Hello and welcome to Lesson 2 of the articy:draft First Steps tutorial series.
Review:
In the first lesson we downloaded, installed, and registered the articy:draft client.
This lesson:
In today’s lesson we are going to set up the Dracula demo project that will serve as a basis for this tutorial series.
How to download and install the demo project:
You can always find the most current version of our demo-projects package on our website. To download the demo project from this blog, click here for articy:draft 3 and here for articy:draft X. Below we will show you where to find it when you’ve just landed on the website.
1. Navigate to Support in the Main menu bar, then select Downloads.
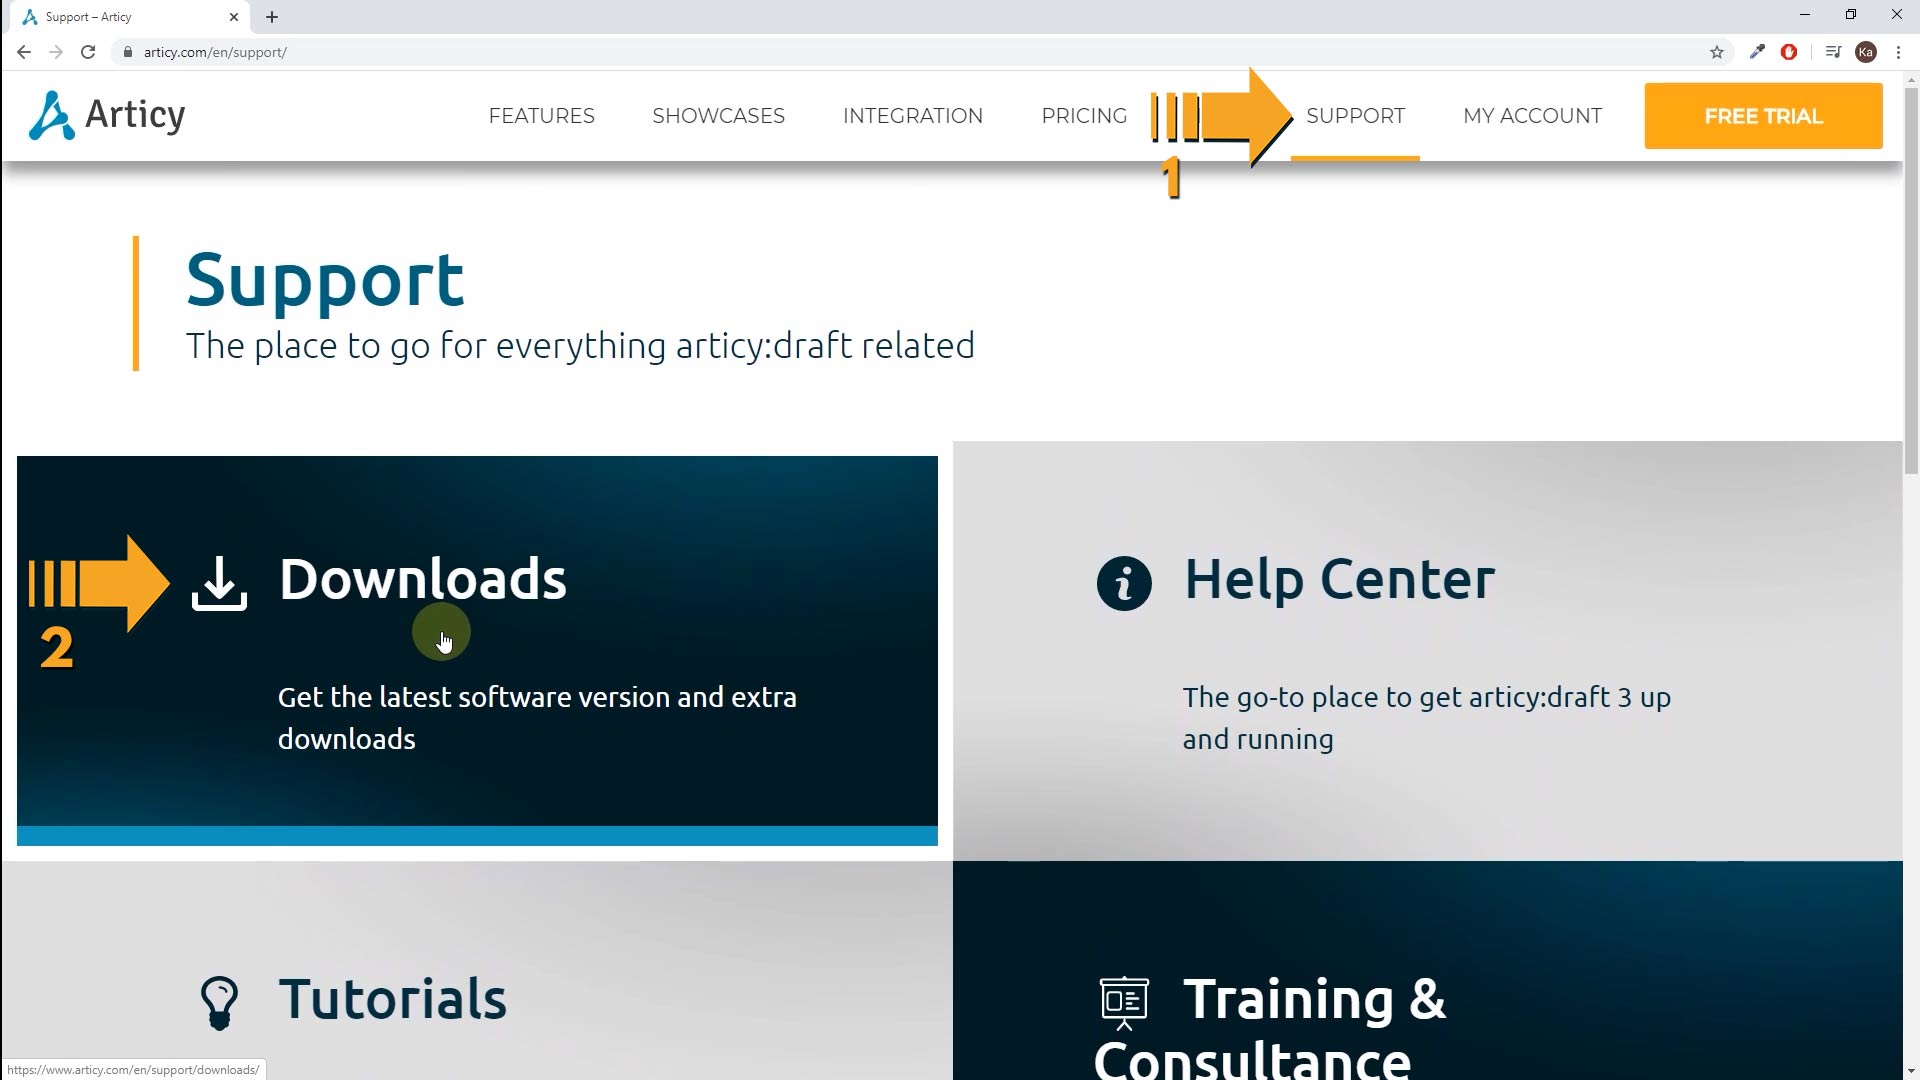
2. Now click the Download demo projects button, right beneath the client download we used in our first lesson. This will download the articy:draft X demo projects, to download articy:draft 3 material, please scroll down on the Downloads page.

3. When the download is finished, start the demo project installation executable.
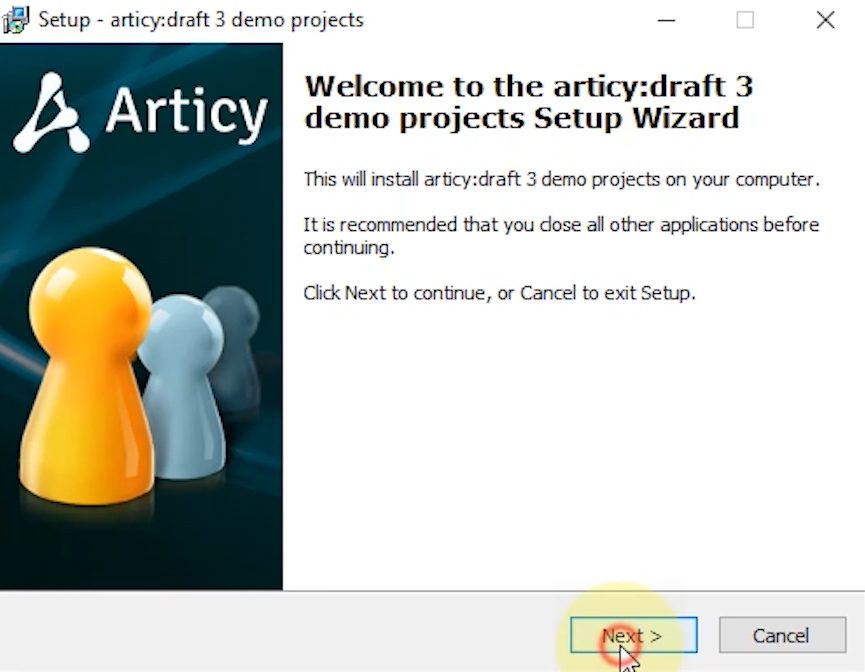
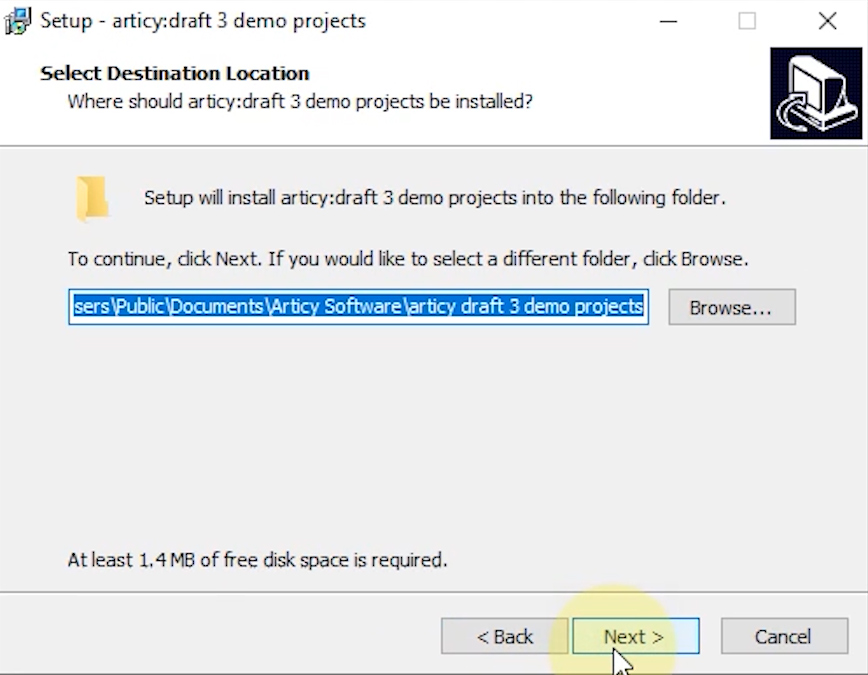
4. Choose where to install the demo projects and click next.
5. Then you can decide if you want to install all projects or just selected ones.
We’re going for the full install here, however during this series we will only be using the Dracula project.

⭐ Our Tip: You should definitely take a look at the other demo projects at some point as well. They might look somewhat overwhelming at the beginning, but as soon as you get more experience they will prove very helpful as they each cover specific areas. For example the Maniac Manfred project shows how you can integrate your articy data into Unity or Unreal.
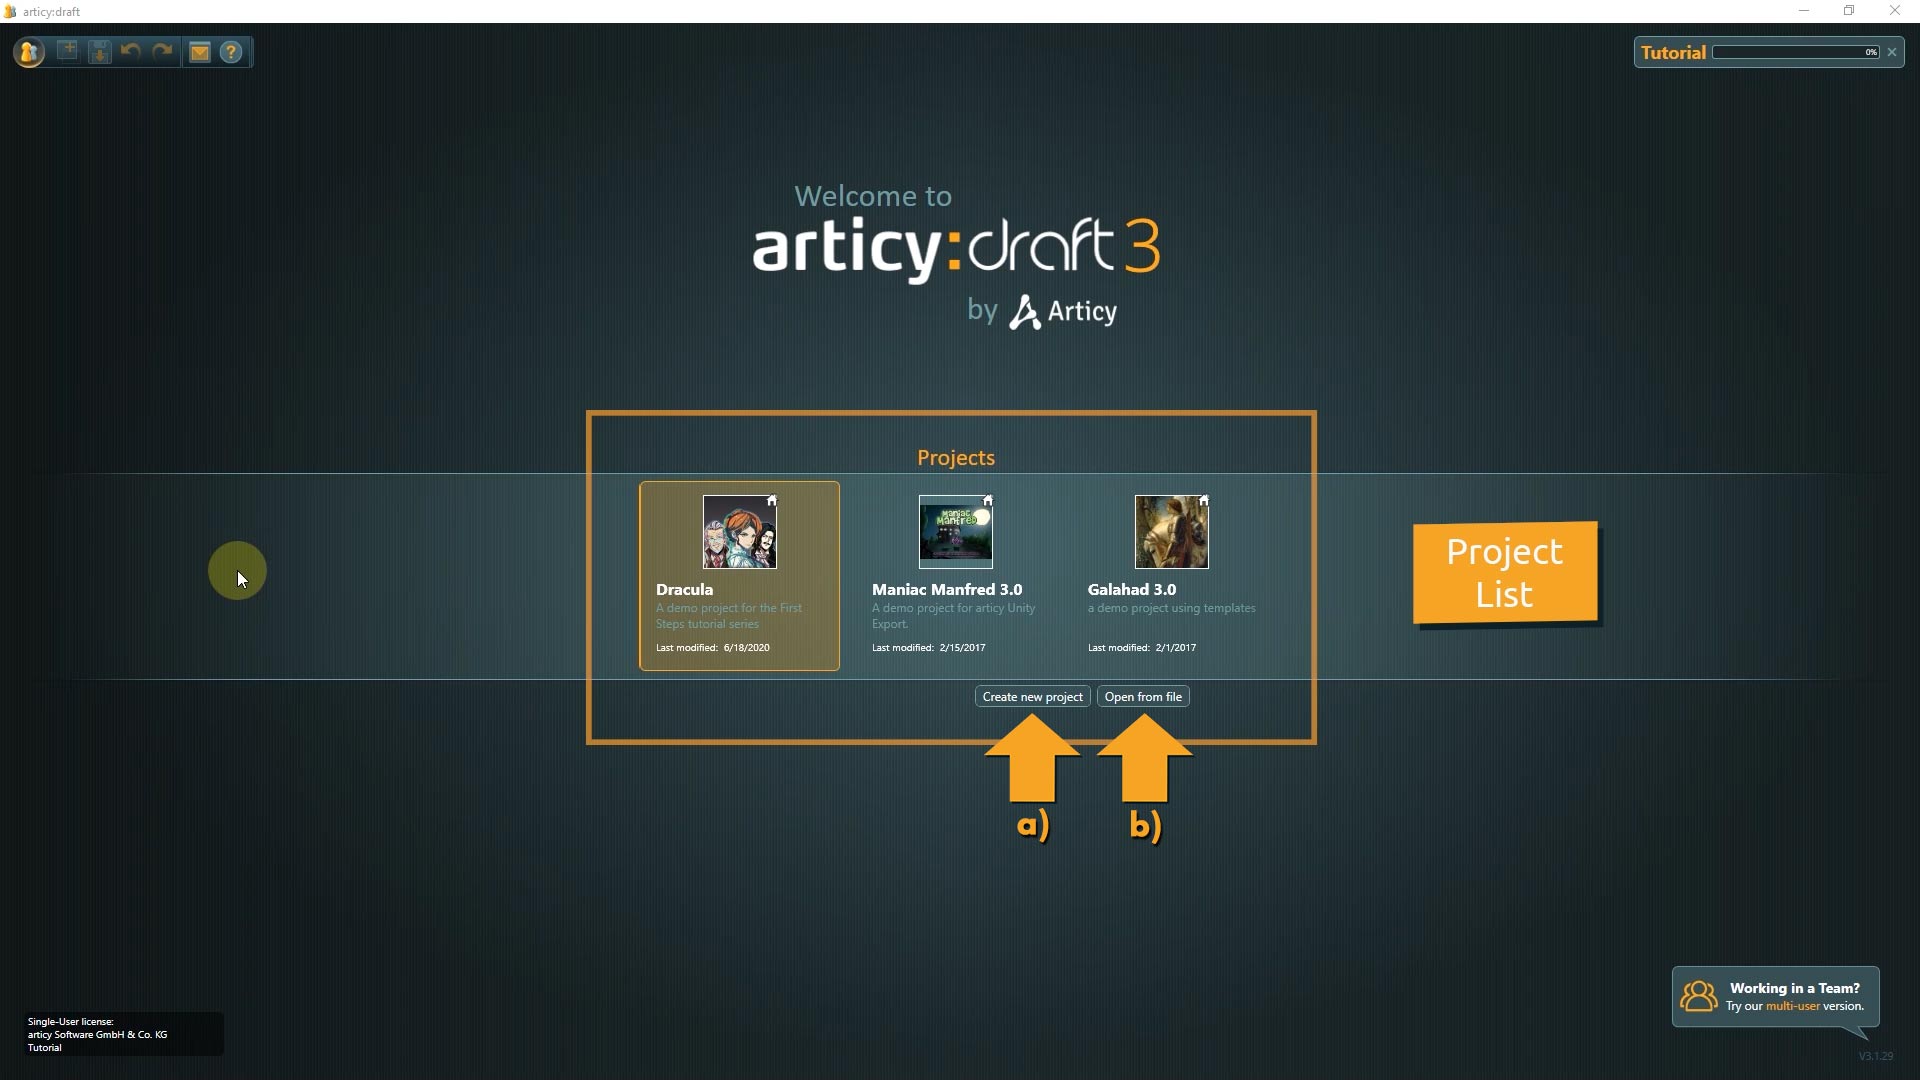
6. The installed demo projects now appear in your project list on the articy welcome screen. The project list shows all the projects you have worked on recently.
Here you can also a) create new projects or b) open existing projects from file.
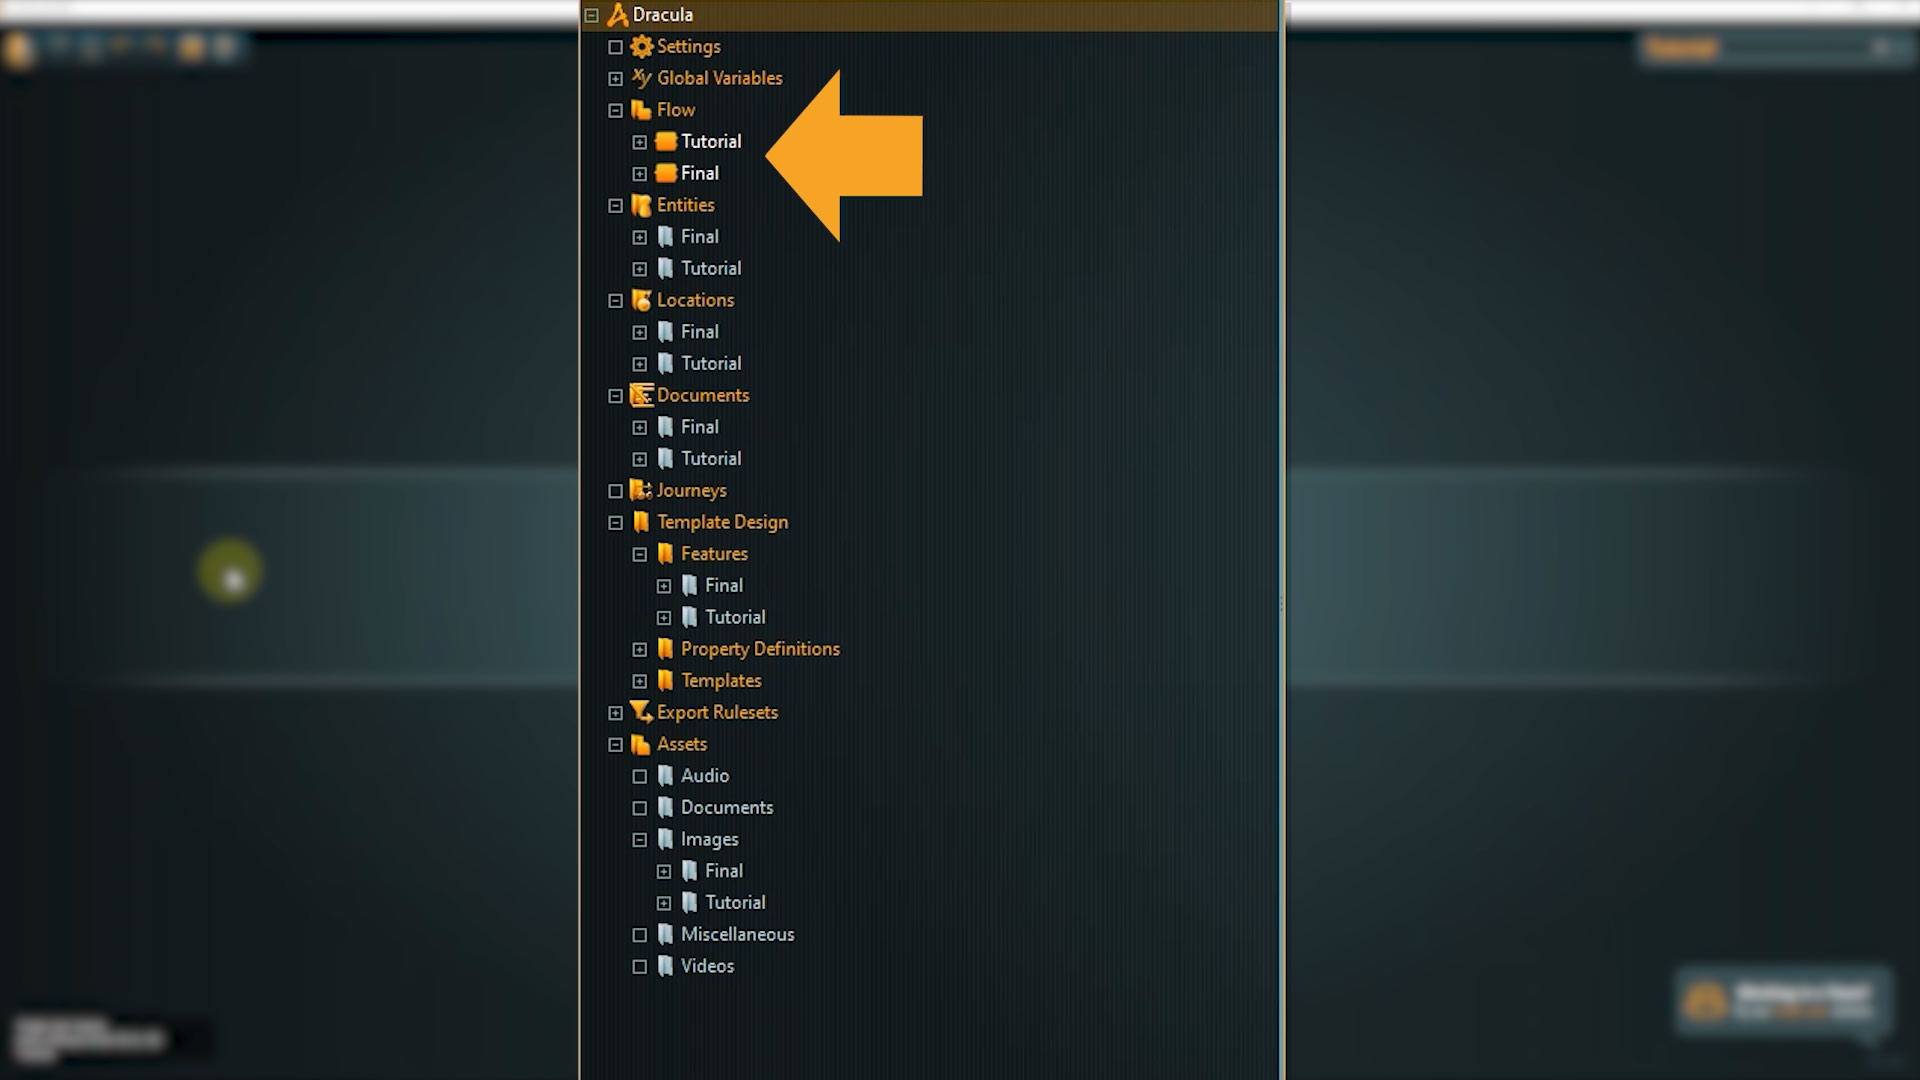
👉 Note: There are some particularities to the Dracula demo project: All content is included twice within this project – once in a Final and once in a Tutorial version. Final is like the name suggests final, it shows the complete project as it will look like at the end of the series. The Tutorial folders mark our active working environment, here we will edit and add content.
This will be all for this short tutorial.
Recap:
We installed the available demo projects, including the Dracula project that will be specifically used in the first steps series.
Up next:
In our next Lesson we will take a first look at the user interface and the workspace layout of articy.
Thank you for joining us, and join us again in our next tutorial.
Useful links:
articy:draft 3 Demo projects download
articy:draft X Demo projects download
Don’t have articy:draft X yet? Get the free version now!
Get articy:draft X FREE
*No Payment information required
Follow us on Twitter, Facebook and LinkedIn to keep yourself up to date and informed. To exchange ideas and interact with other articy:draft users, join our communities on reddit and discord.