Hello and welcome to Lesson 8 of the articy:draft First Steps tutorial series.
Review:
In our previous Lesson we had a look at the presentation mode and used it to play through our dialogue.
This Lesson:
Today, we will take a look at how we can control interactivity by other means than player input. We will learn how to create global variables and how we can use them to make our dialogue between Mina and Dracula more interesting.

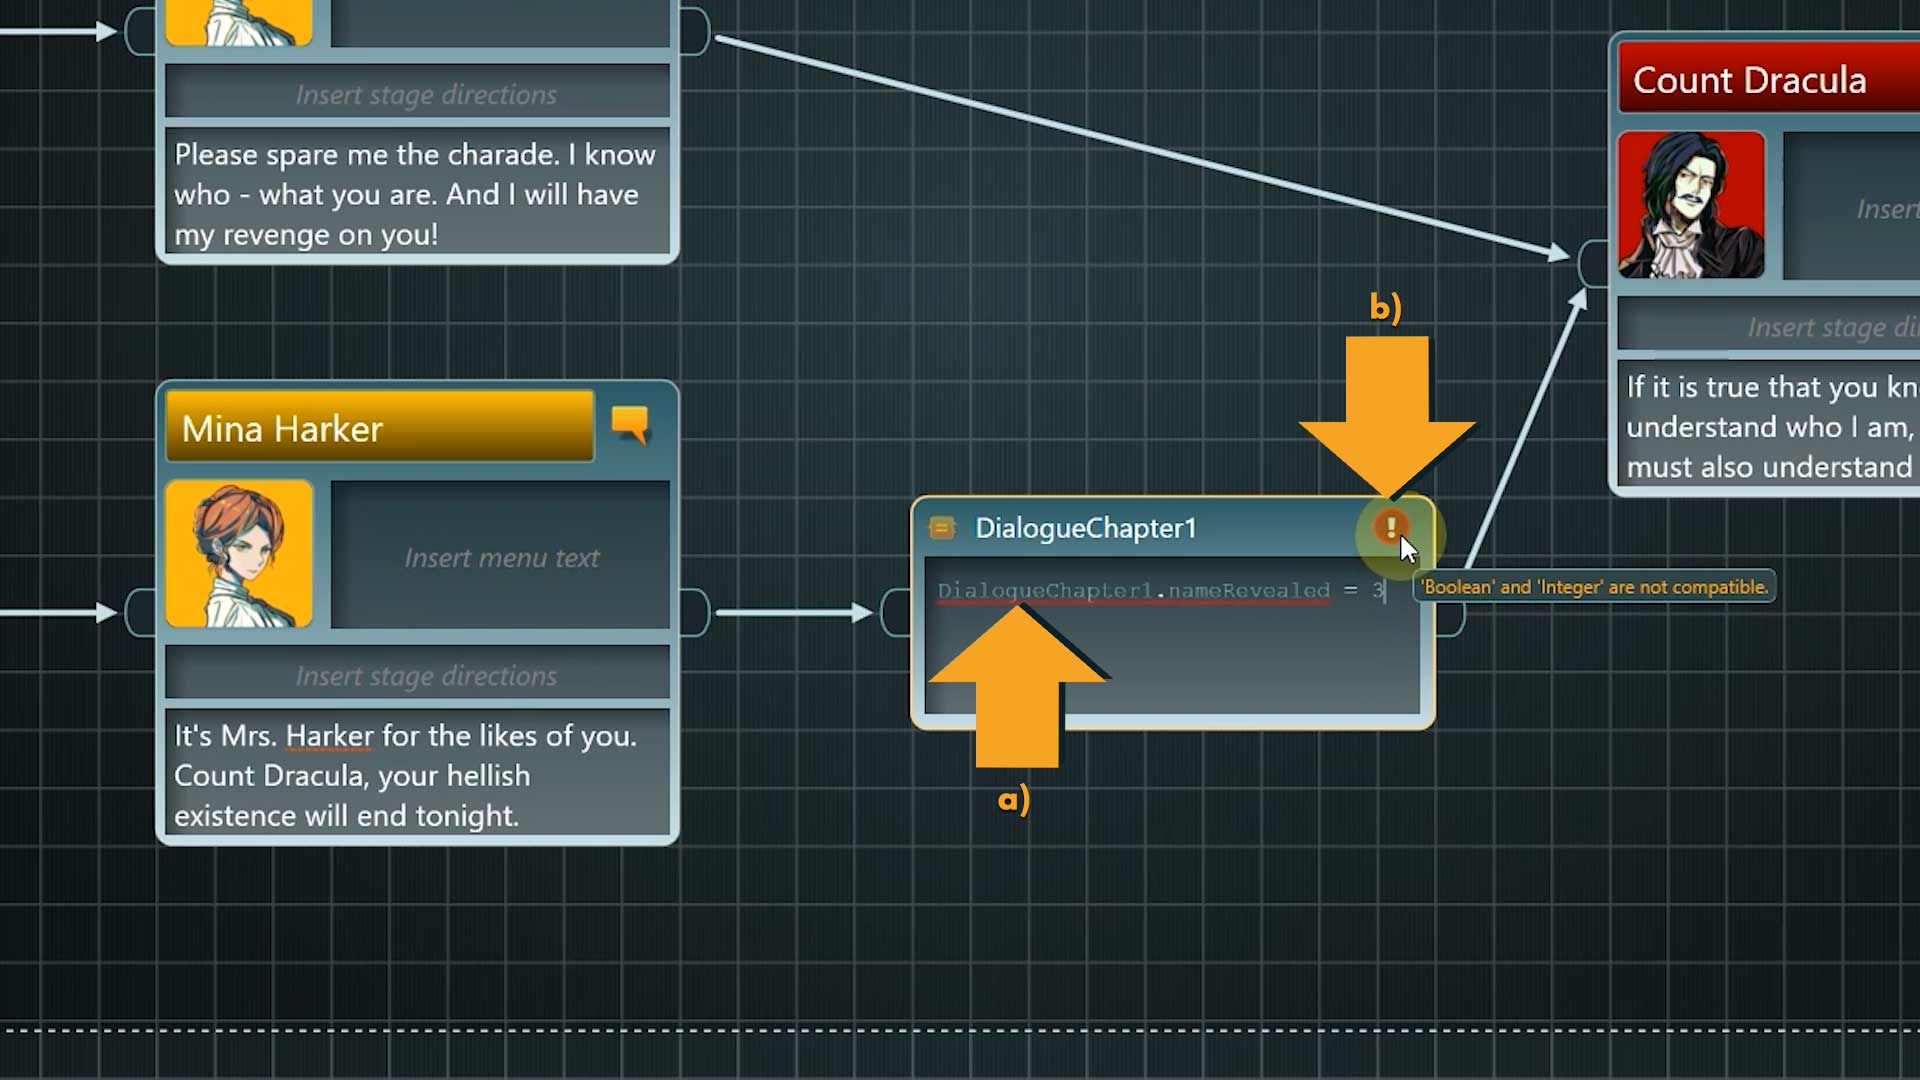
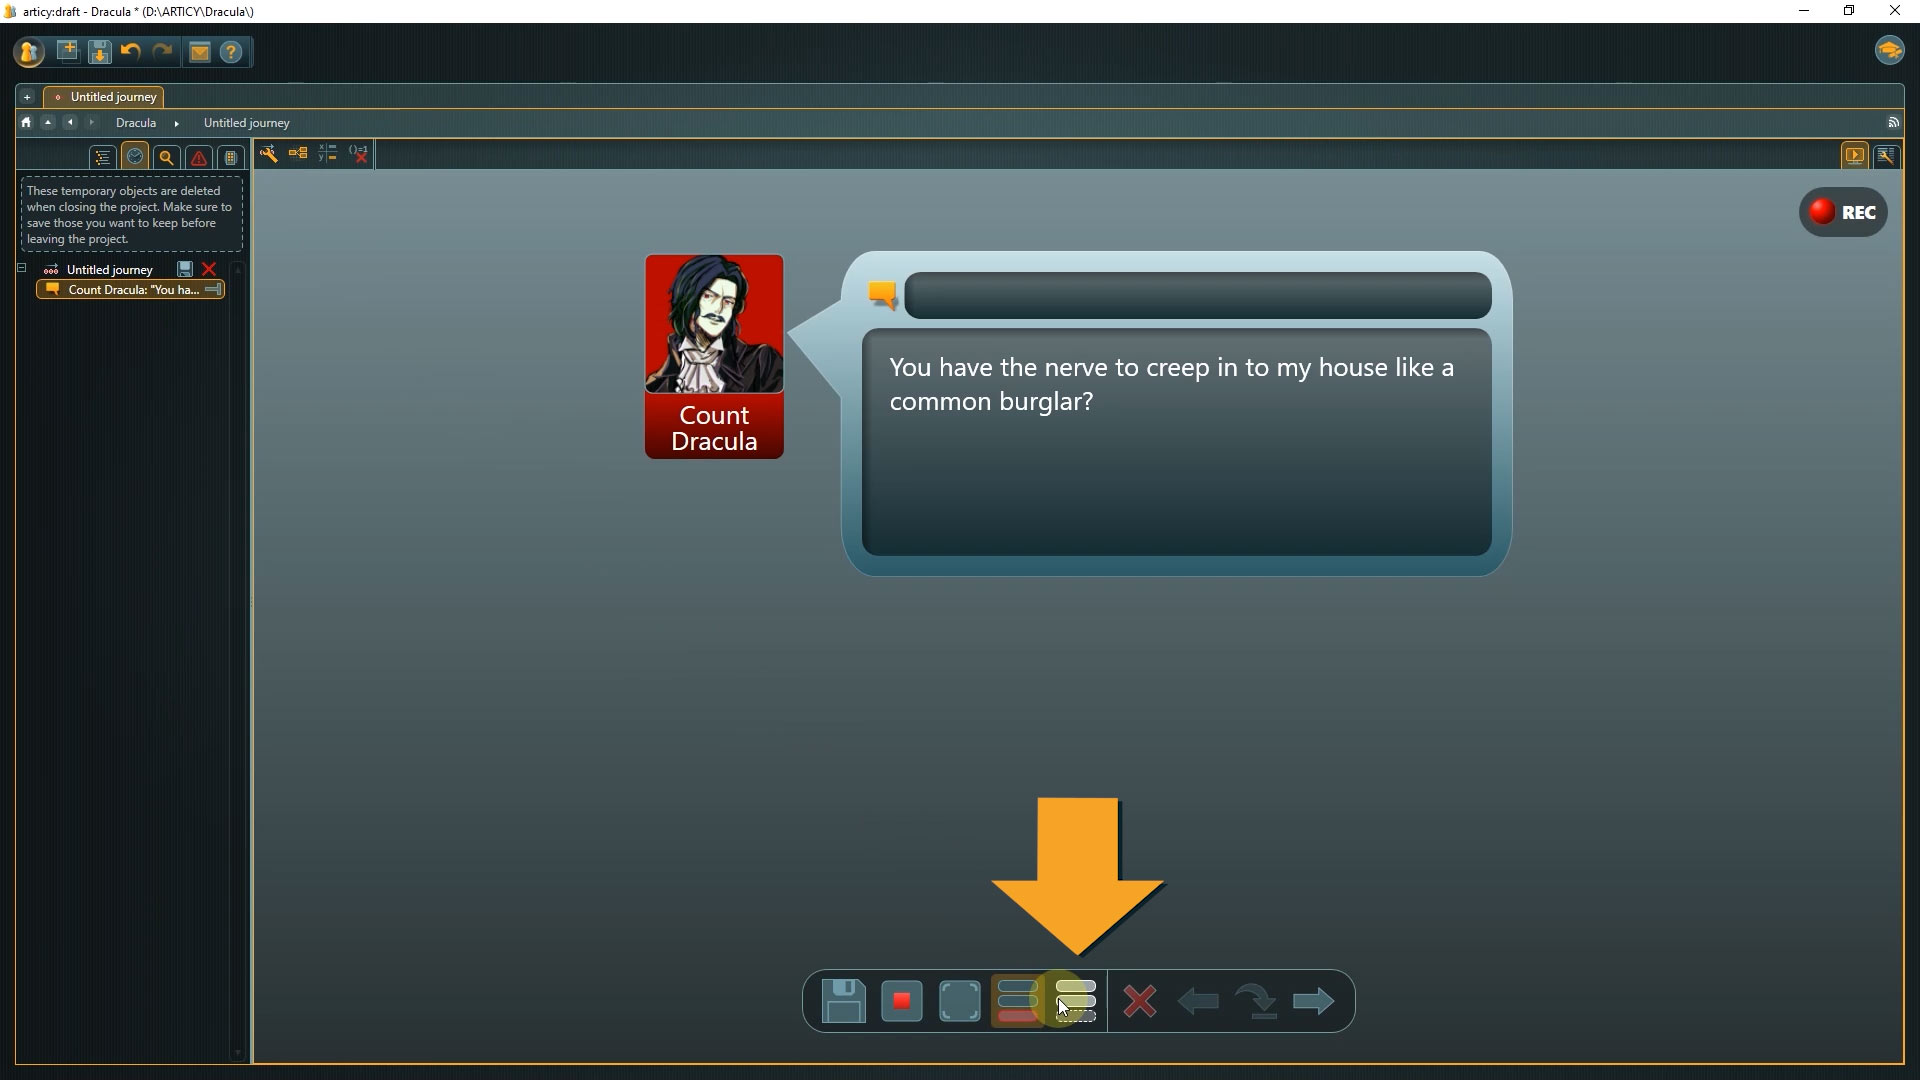
Let us take a quick look at the dialogue again. Going out from the player choice we have two branches, in a) Mina’s name is mentioned in the conversation, and in b) it stays hidden from Dracula.
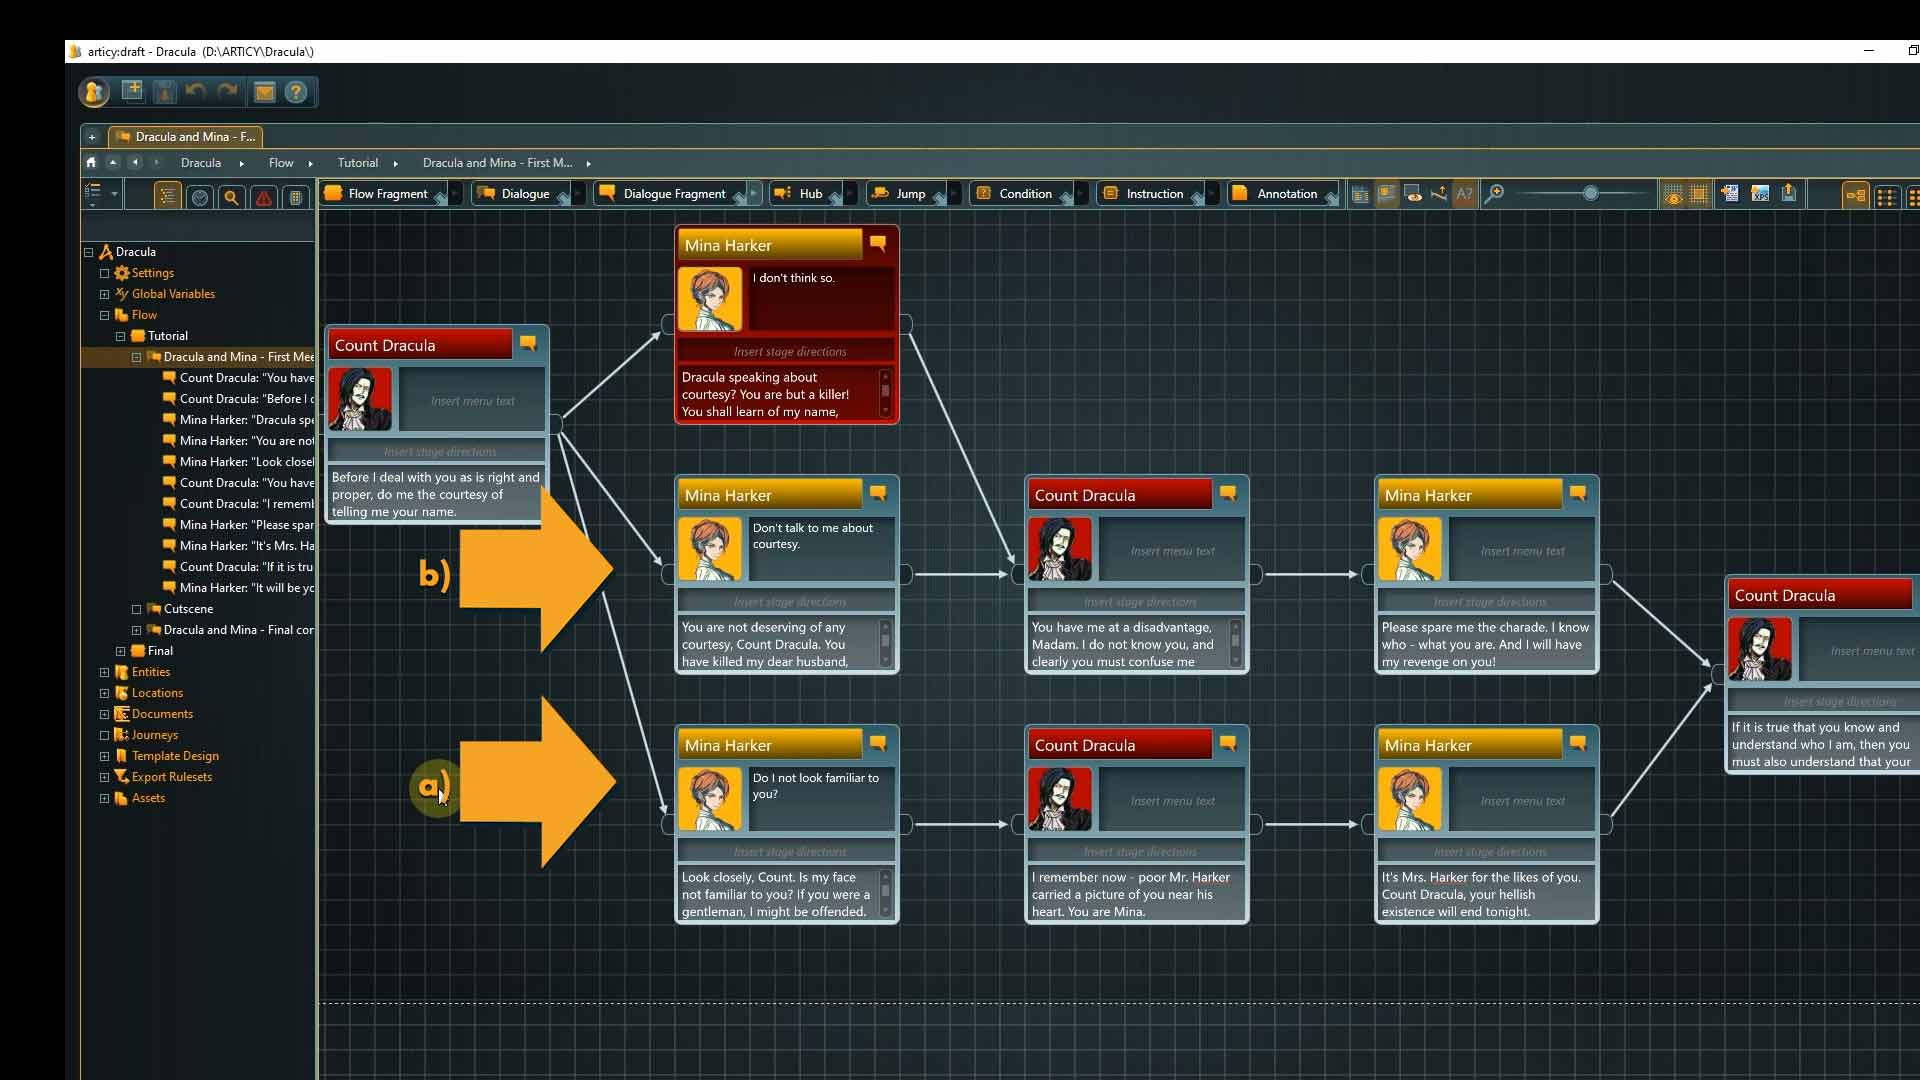
Wouldn’t it be nice if we could pick up this little fact in the dialogue again at a later stage, so that the conversation will be different depending on whether Dracula knows Mina’s name or not?
This is where variables in combination with articy’s scripting language come into play. Don’t worry, you don’t need any programming background to be able to follow along. We will look at a simple use case. Simple, but used in almost all game stories – the yes-no or true-false situation. Did the character already talk to the quest giver, do they have a specific item in their inventory? – things like that.
Global Variables Overview
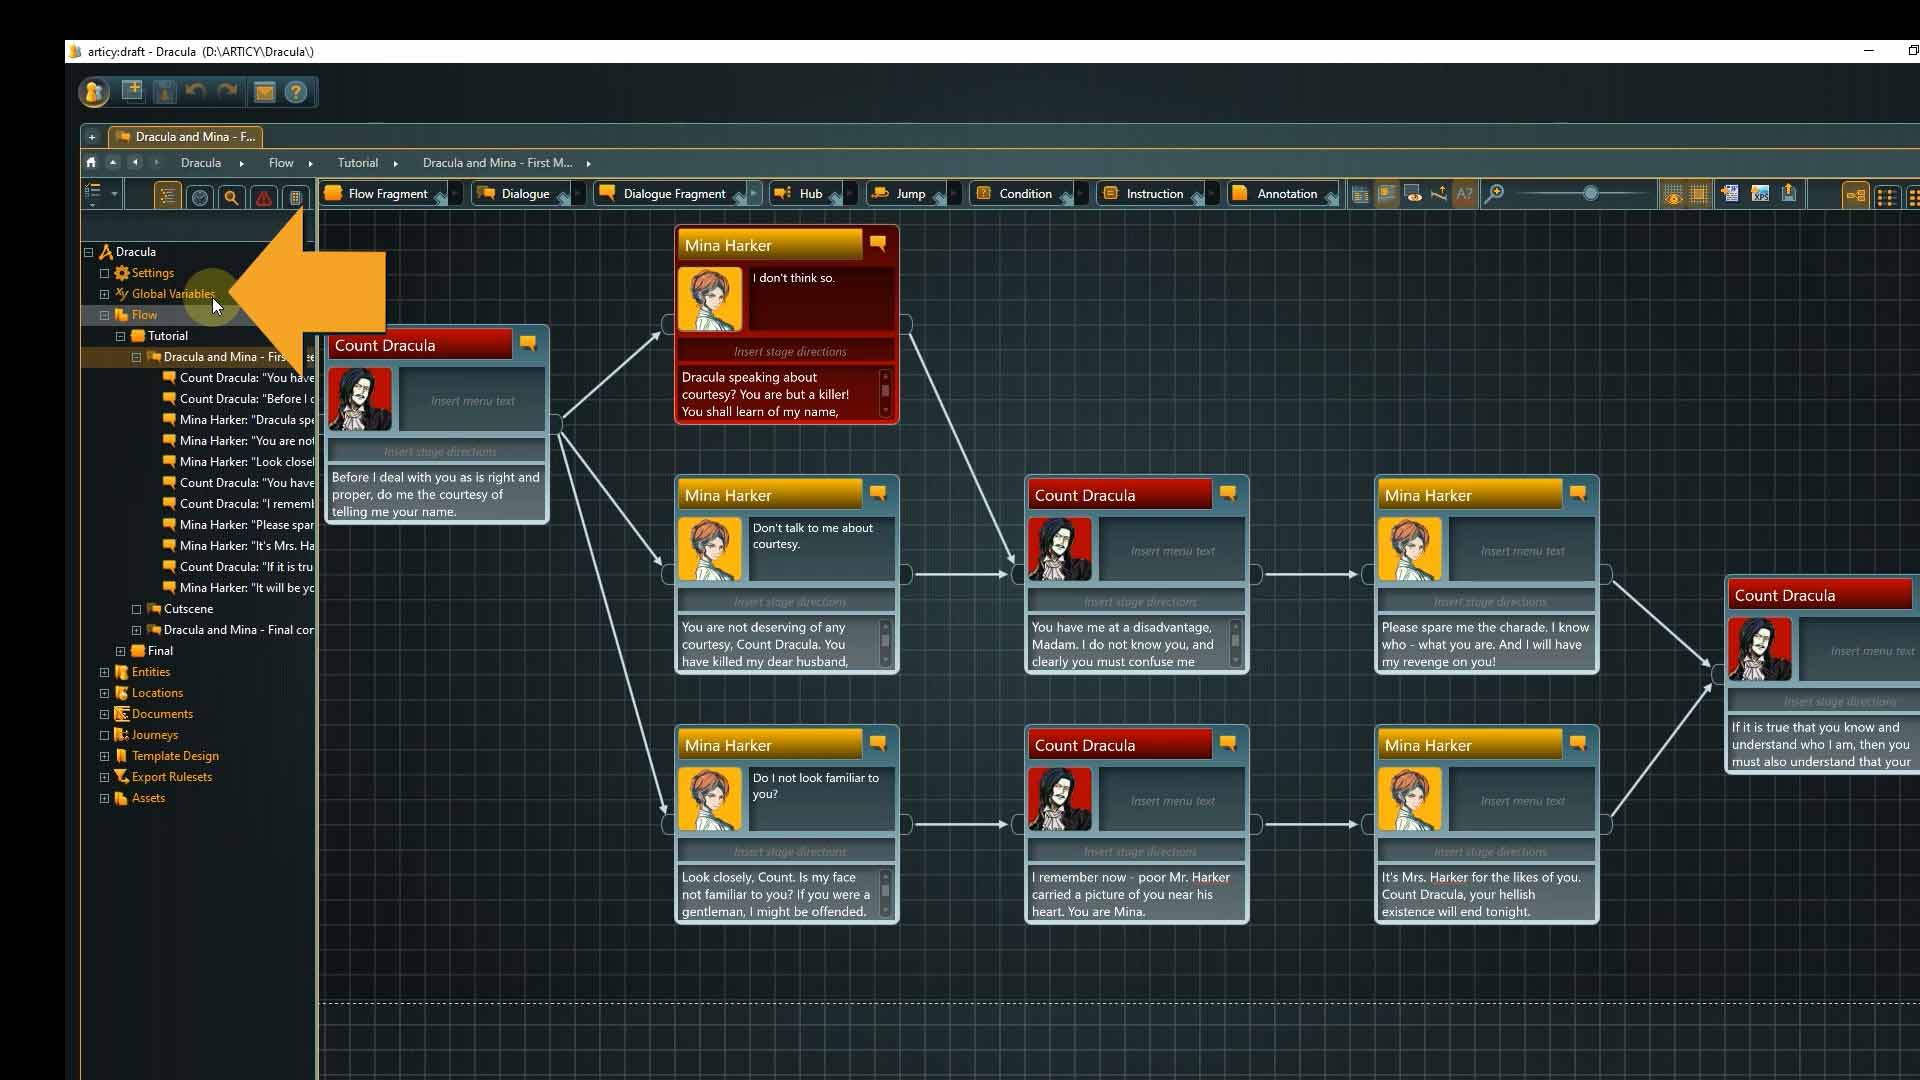
1. To access the variable feature you can go via the jumpstart page or you can click the global variables system folder in the Navigator.
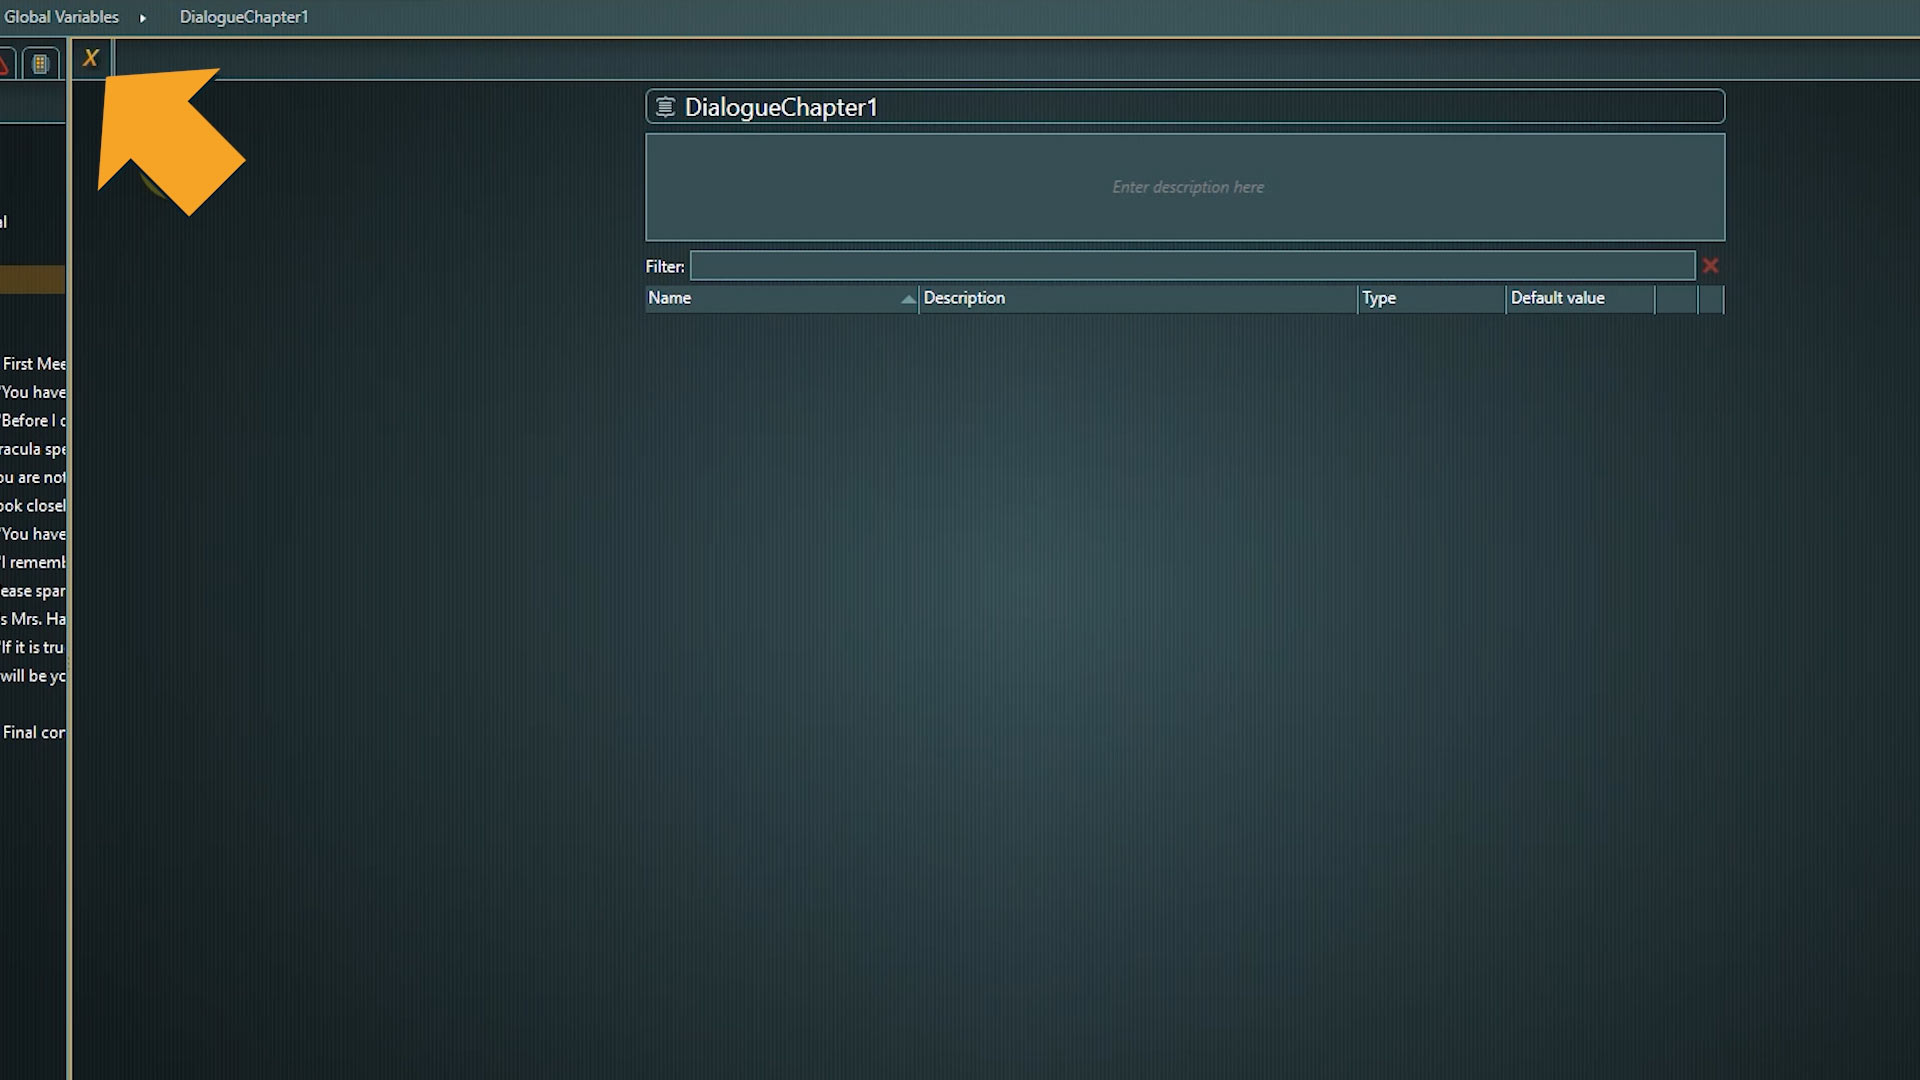
Now we see an overview of the variables we already have in the project. Variables are created into groups called variable sets. A variable set is like a folder for your variables. The sets that are already here belong to the Final project version, so let’s create a new variable set now to work in.
2. Click the Create variable set button, then enter a name.

⭐ Our tip: It is always a good practice to use telling names. Especially if the project grows it gets tedious fast when you are working with set 1, 2 ,3 or similar.
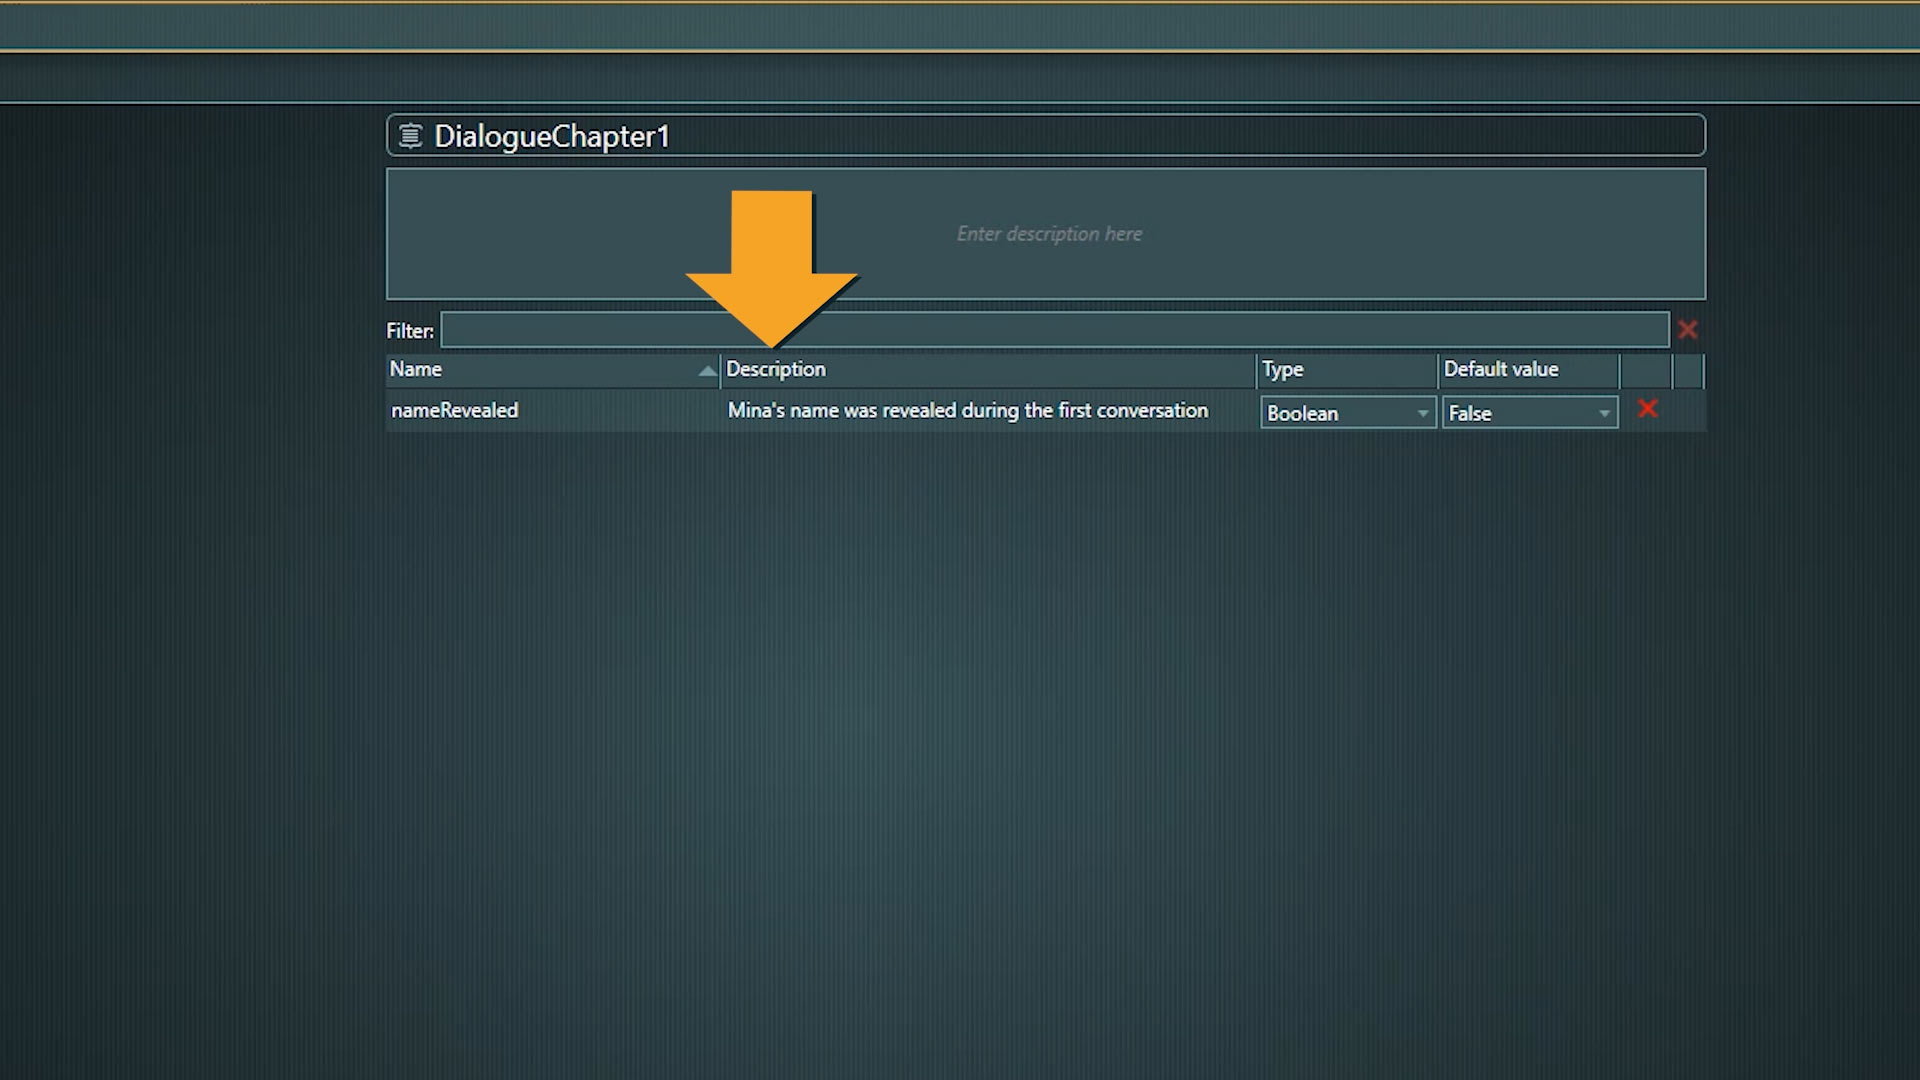
I will call this set “DialogueChapter1”.

3. Now we can create the actual variable, by clicking the create variable button.
👉 You have to be a bit careful when naming your variables. Variable names have to work within code therefore they mustn’t contain spaces or special characters.
As we want to use this variable to monitor if Dracula finds out Mina’s name during their first conversation I will call it “nameRevealed”. I use the so called Camel Case naming convention to write variable names. It means that each word or abbreviation in the middle of a phrase starts with a capital letter. It is a commonly used practice from the coding world, but it is no naming requirement, you don’t have to do it.
4. Next, we can enter a short description, which also helps to keep the overview if the list of variables starts growing.
Next we need to select the type of variable. articy supports different variable types, covering a broad utilization range.
Variable Types
-
– Booleans are used most often in the game writing environment and we will focus on this variable type in the first step series.
– Integers can be used for anything countable, for example experience or morale points.
– String variables are used more seldom, one example would be to store the player character name, if the players can choose it themselves.
5. Select type Boolean for our variable.

The last thing we can adjust is the default value the variable starts out with. A boolean can only be true or false, we will set the default to false here.

That’s it for this stage. Now back to the dialogue.
Scripting basics
To properly employ scripting we will make use of two new node types: Instructions and Conditions: Instructions are used to modify variable values, and Conditions perform checks for these values and control the game flow by that.
The Instruction Node
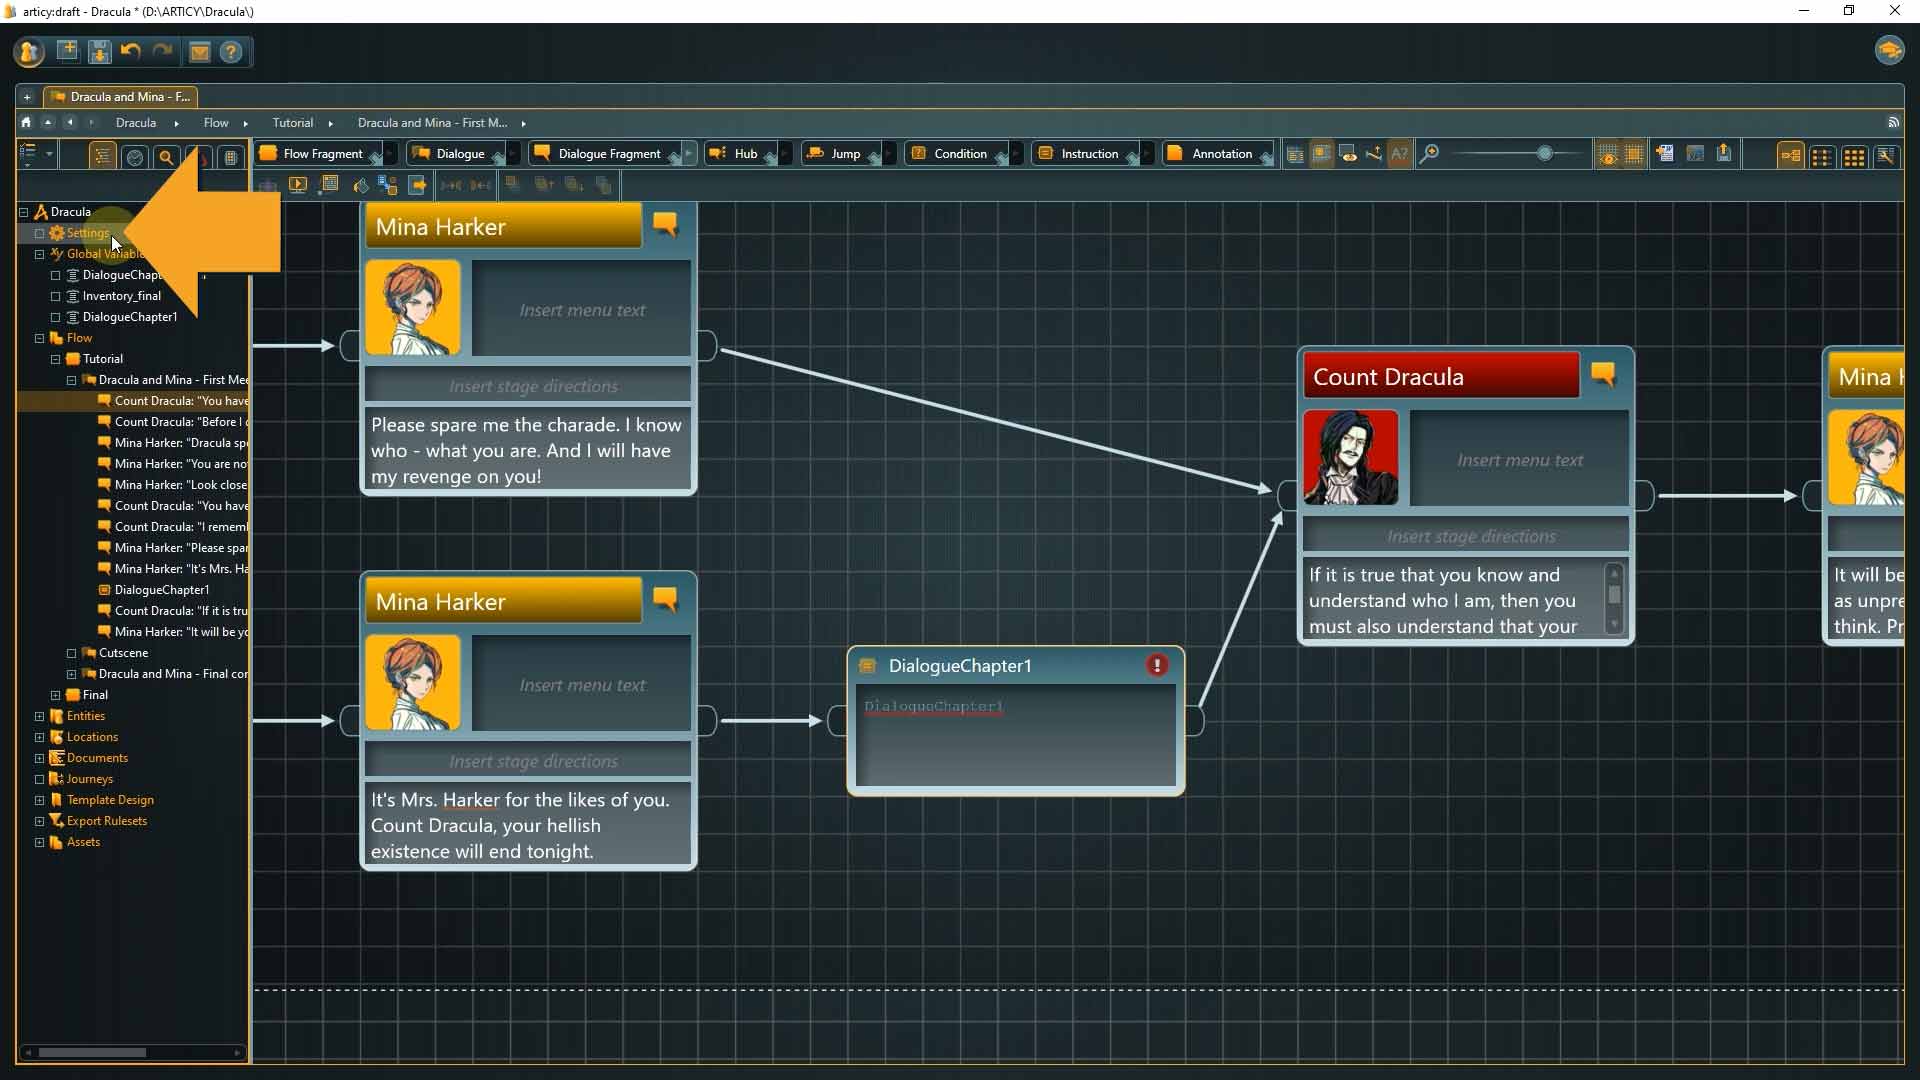
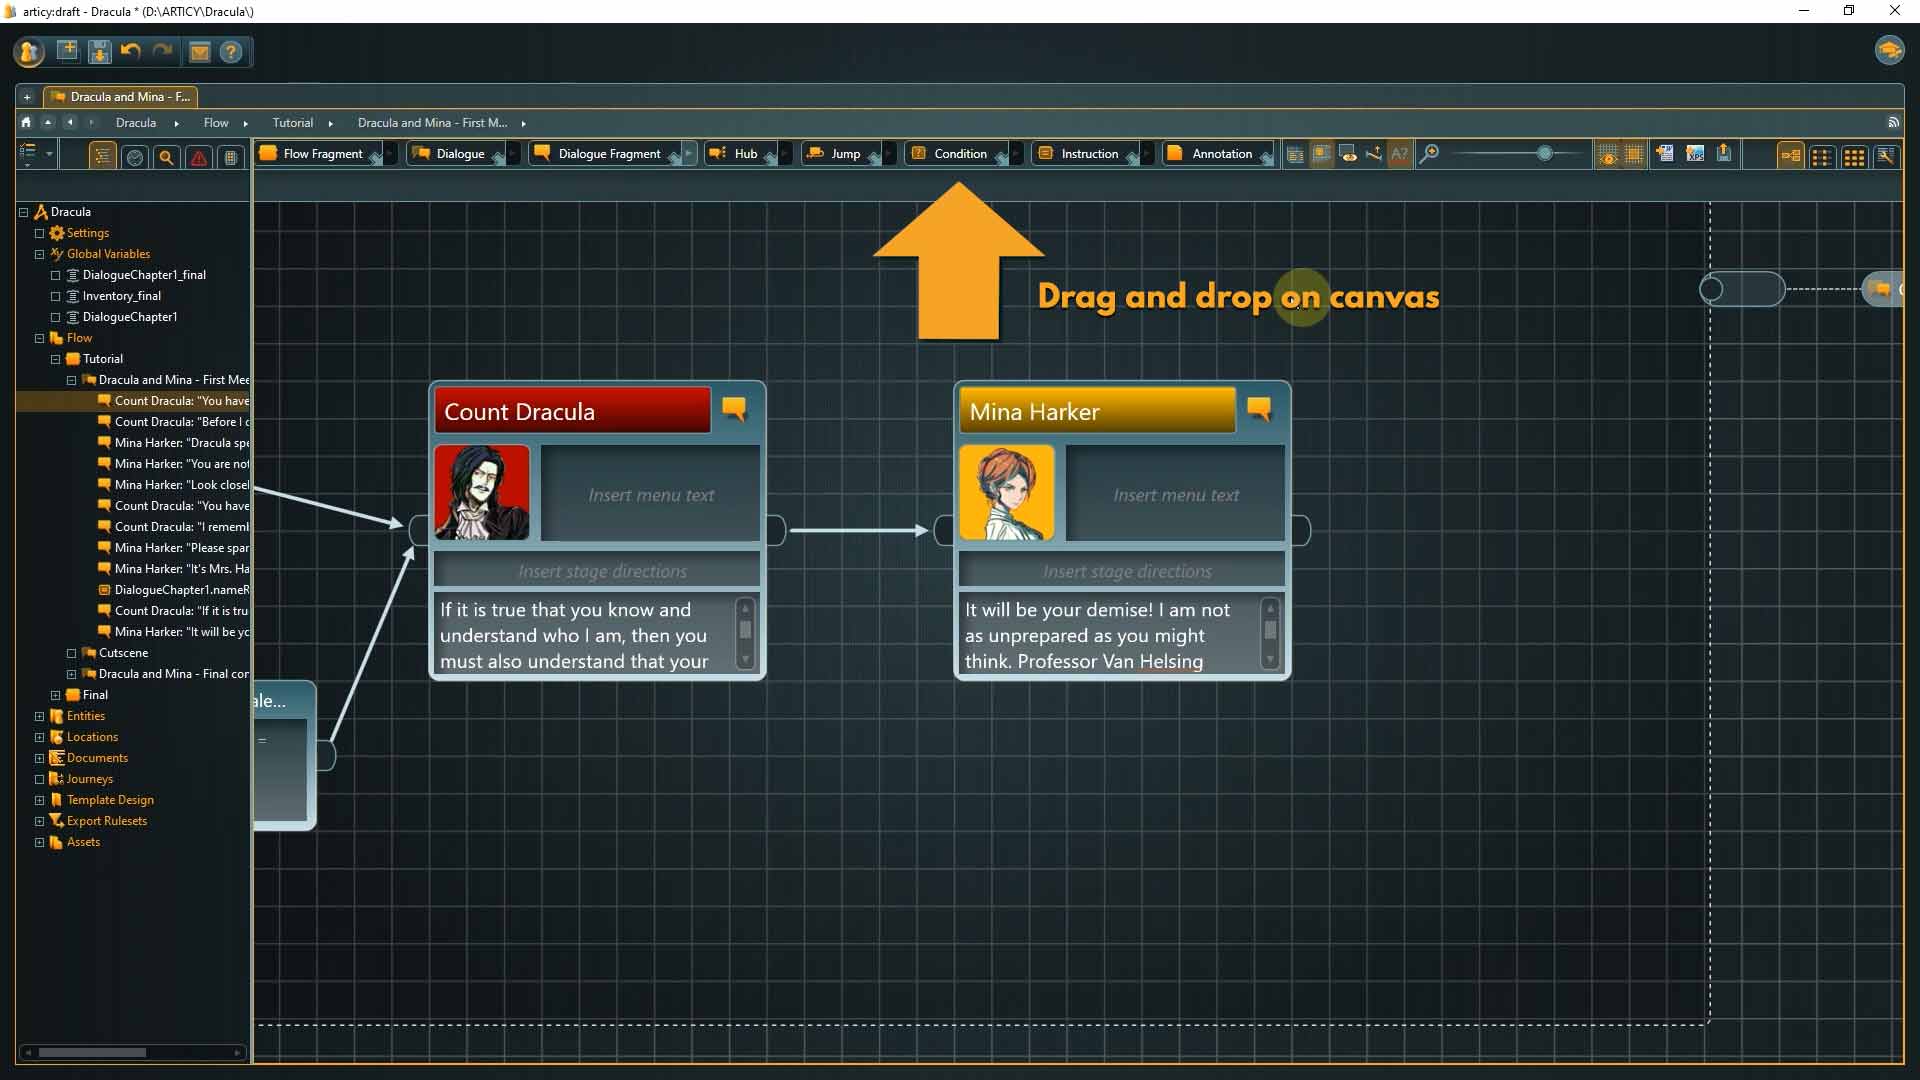
The bottom branch after the player choice has Dracula recalling Mina’s name. To store this information and be able to use it again at some point, we will change the value of the variable we created earlier with an Instruction node.
1. Delete the connection between Mina’s and Dracula’s node.
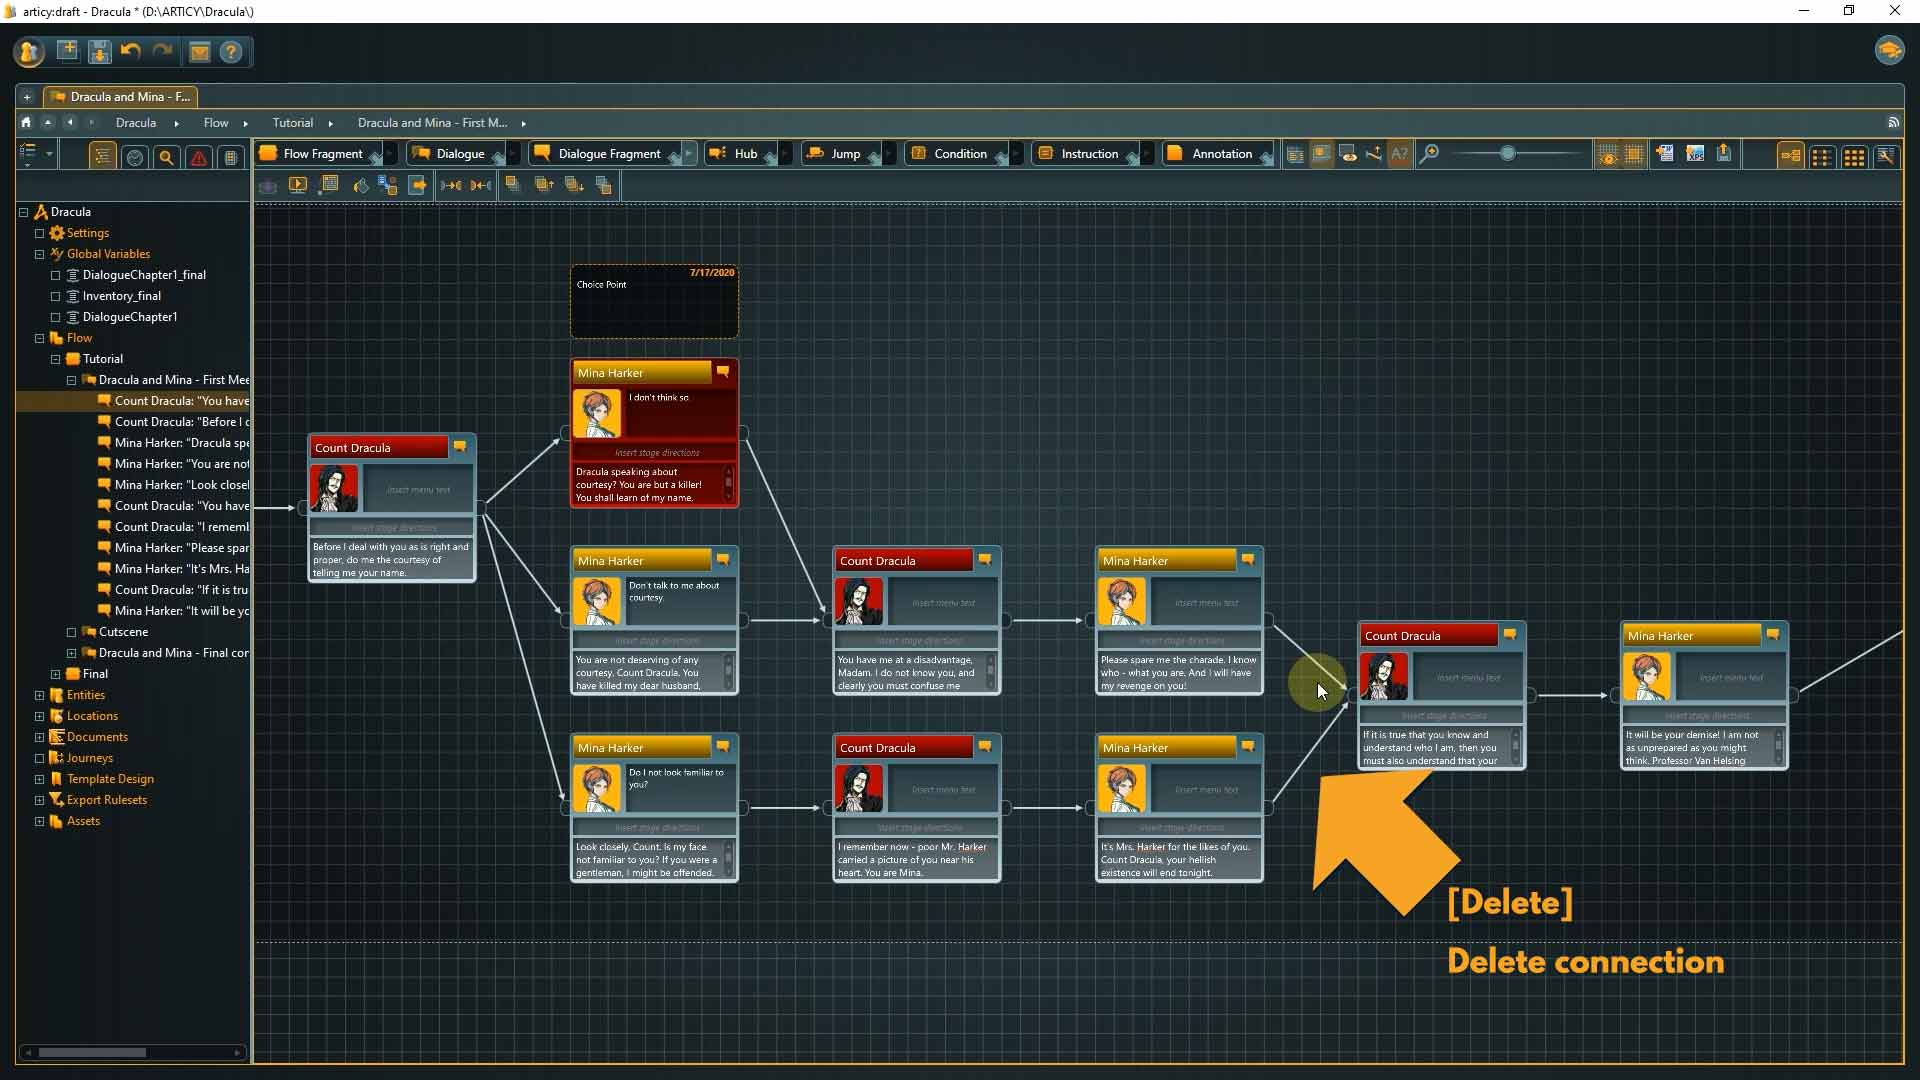
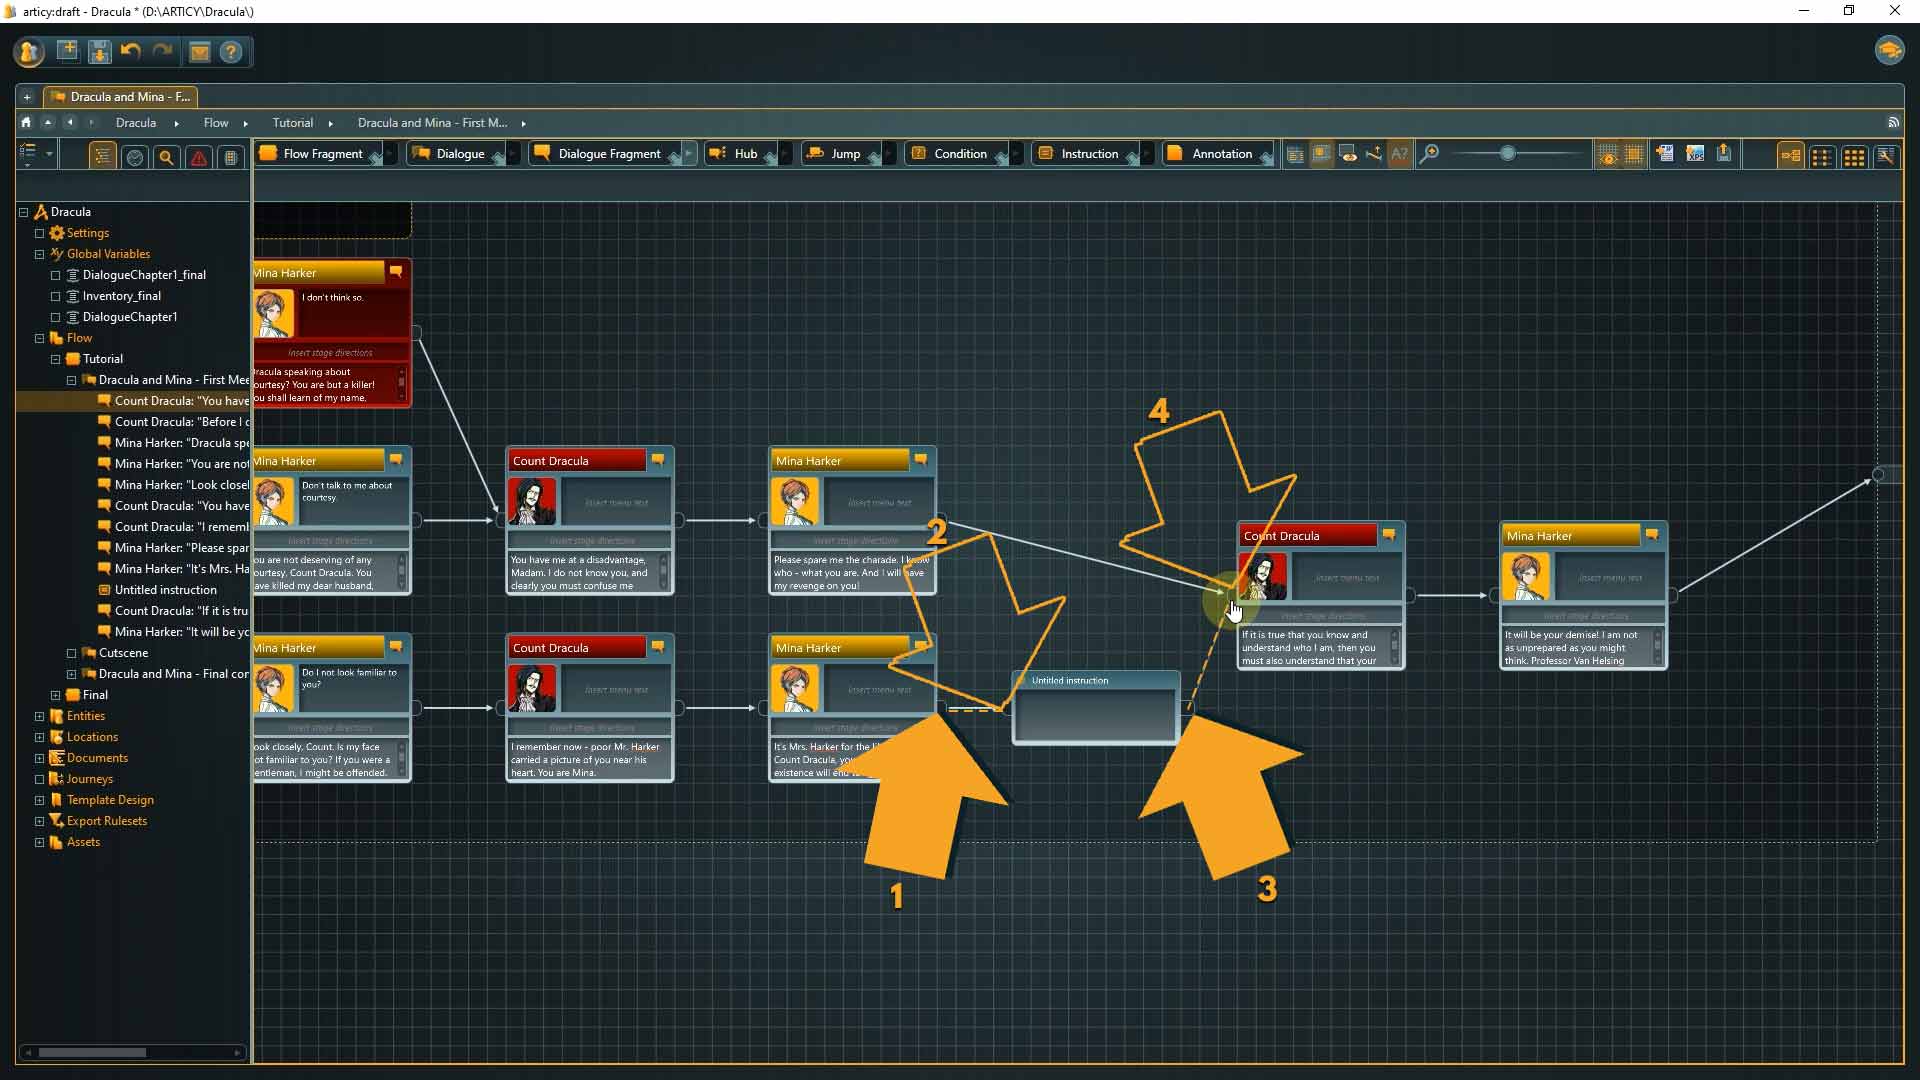
2. Then drag an Instruction node from the toolbar and place it in the middle between these nodes.
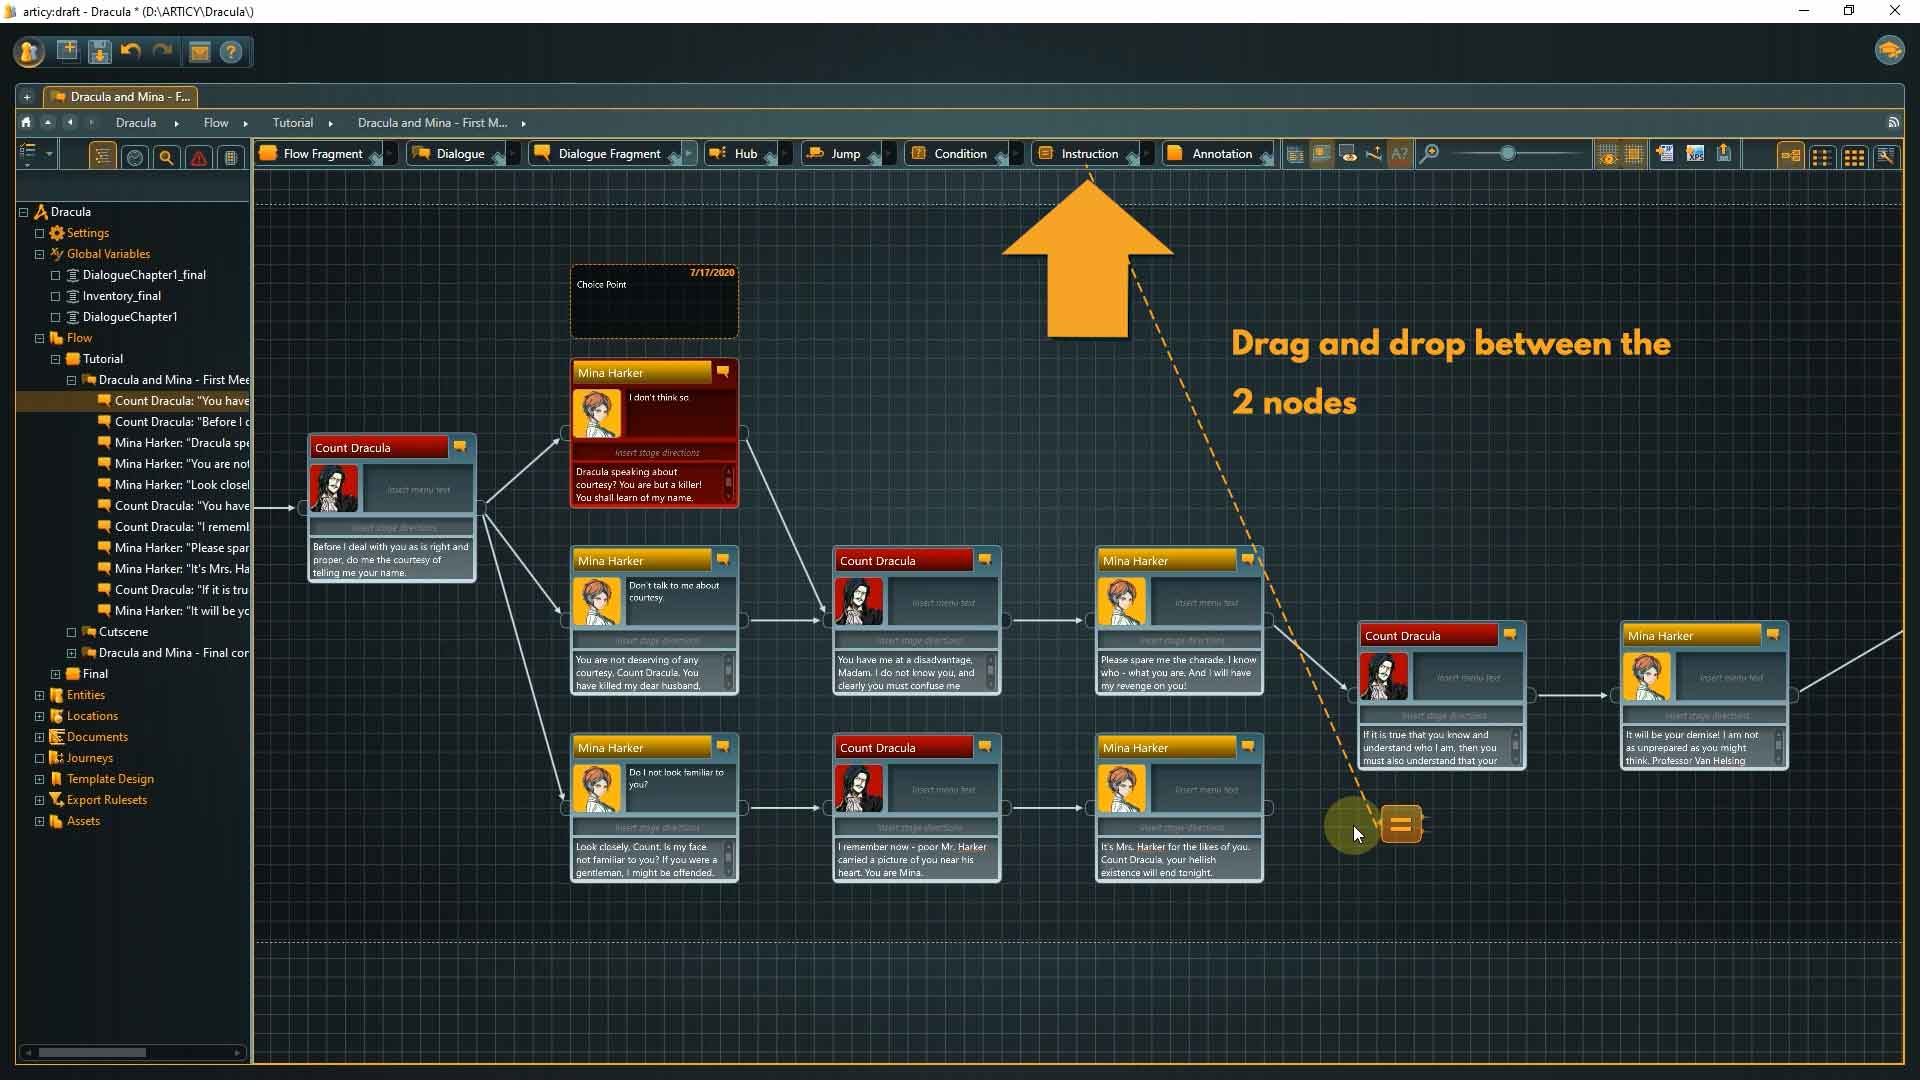
3. Now connect the nodes.
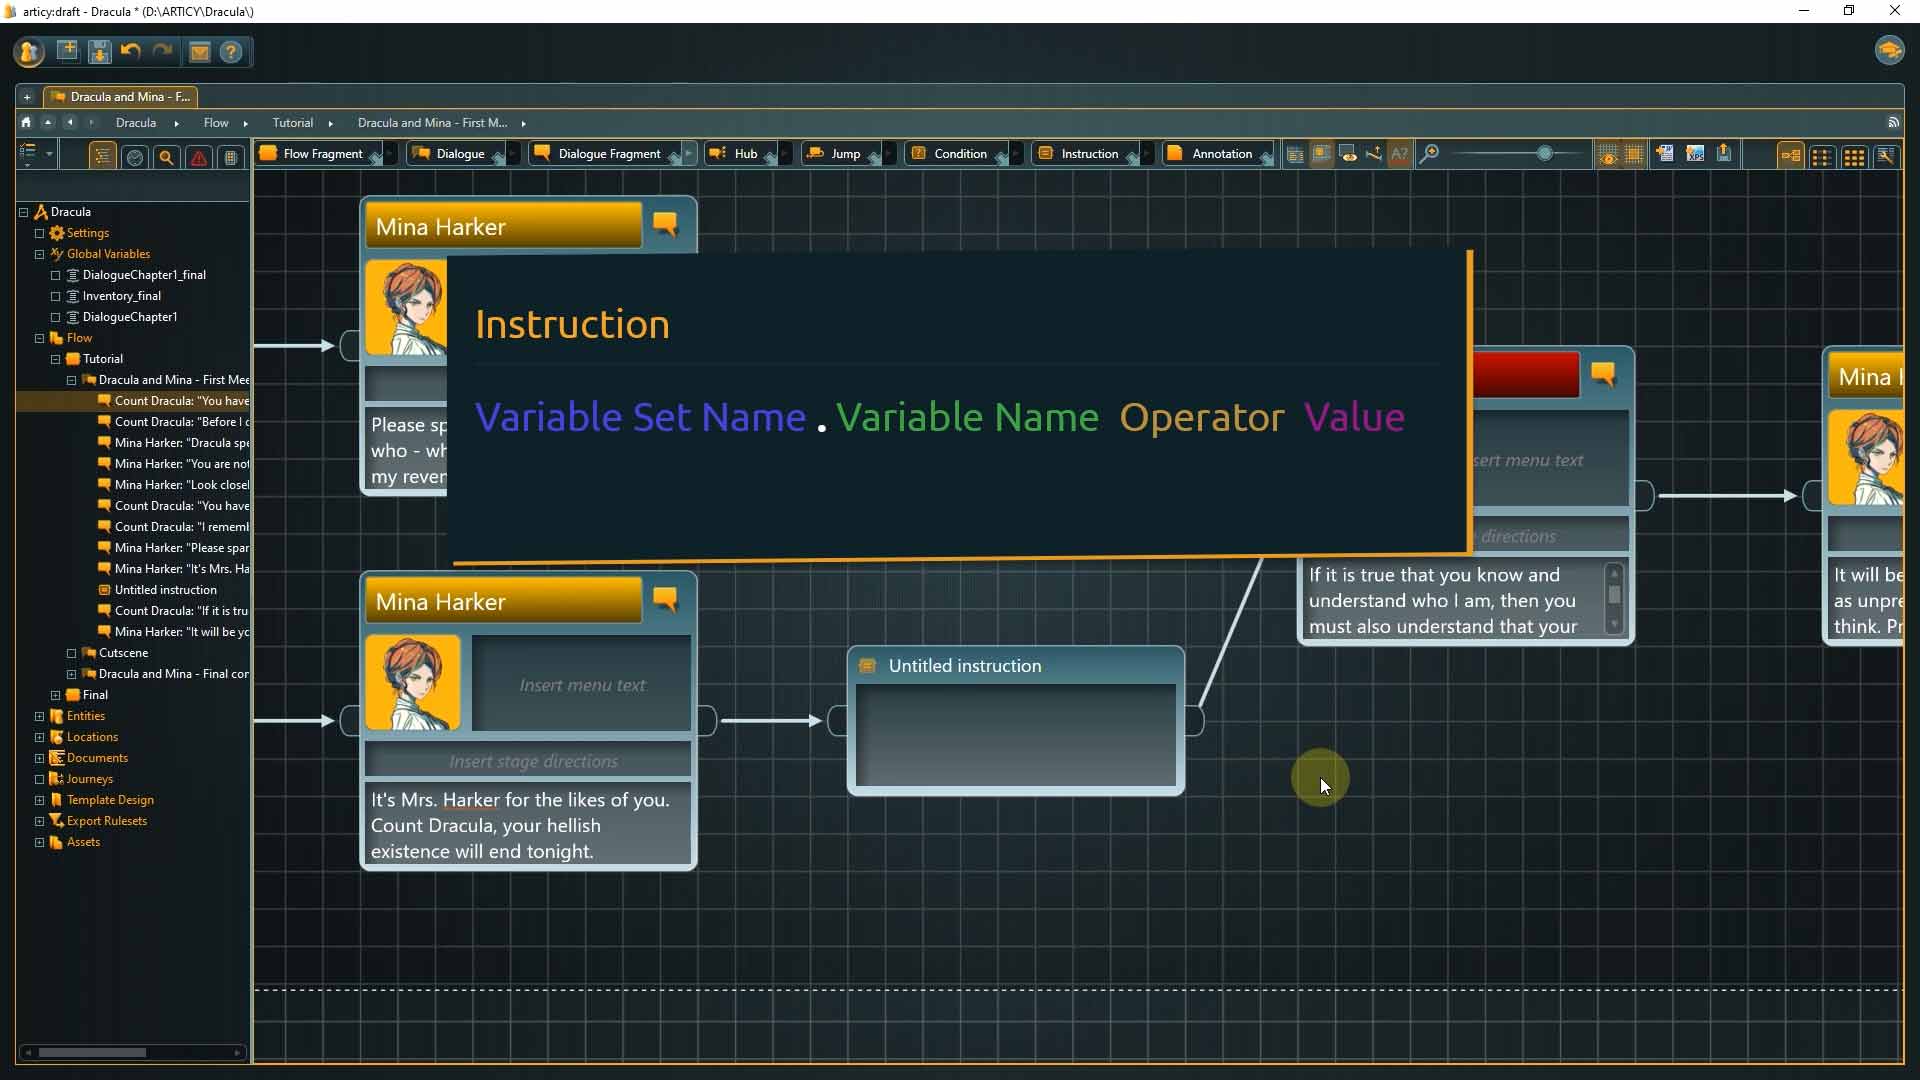
👉 The instruction itself has to be written in form of a command-like expression.
Please bear with me, it might look daunting at first glance, but my promise from the beginning still stands – programming knowledge is not required. If you understand the syntax for setting the value of a boolean variable and how to check for a specific value, you are already able to cover a lot of the bases regarding basic logic for narrative games.
The expression is constructed as follows: Variable set name.variable name Operator Value.
articy actually helps you when writing these expressions with auto completion and syntax highlighting. As soon as you start typing a list will appear where you can choose the correct entry with the cursor keys and confirm with TAB or Enter.
In the rare case that auto completion and syntax highlighting do not work, click the Settings folder in the Navigator
Then go to the Flow tab.

Make sure that “Use built-in scripting support” is checked.

If you add the dot after the variable set name, you are immediately presented a list of variable names belonging to this set – which currently is just the one variable we created.
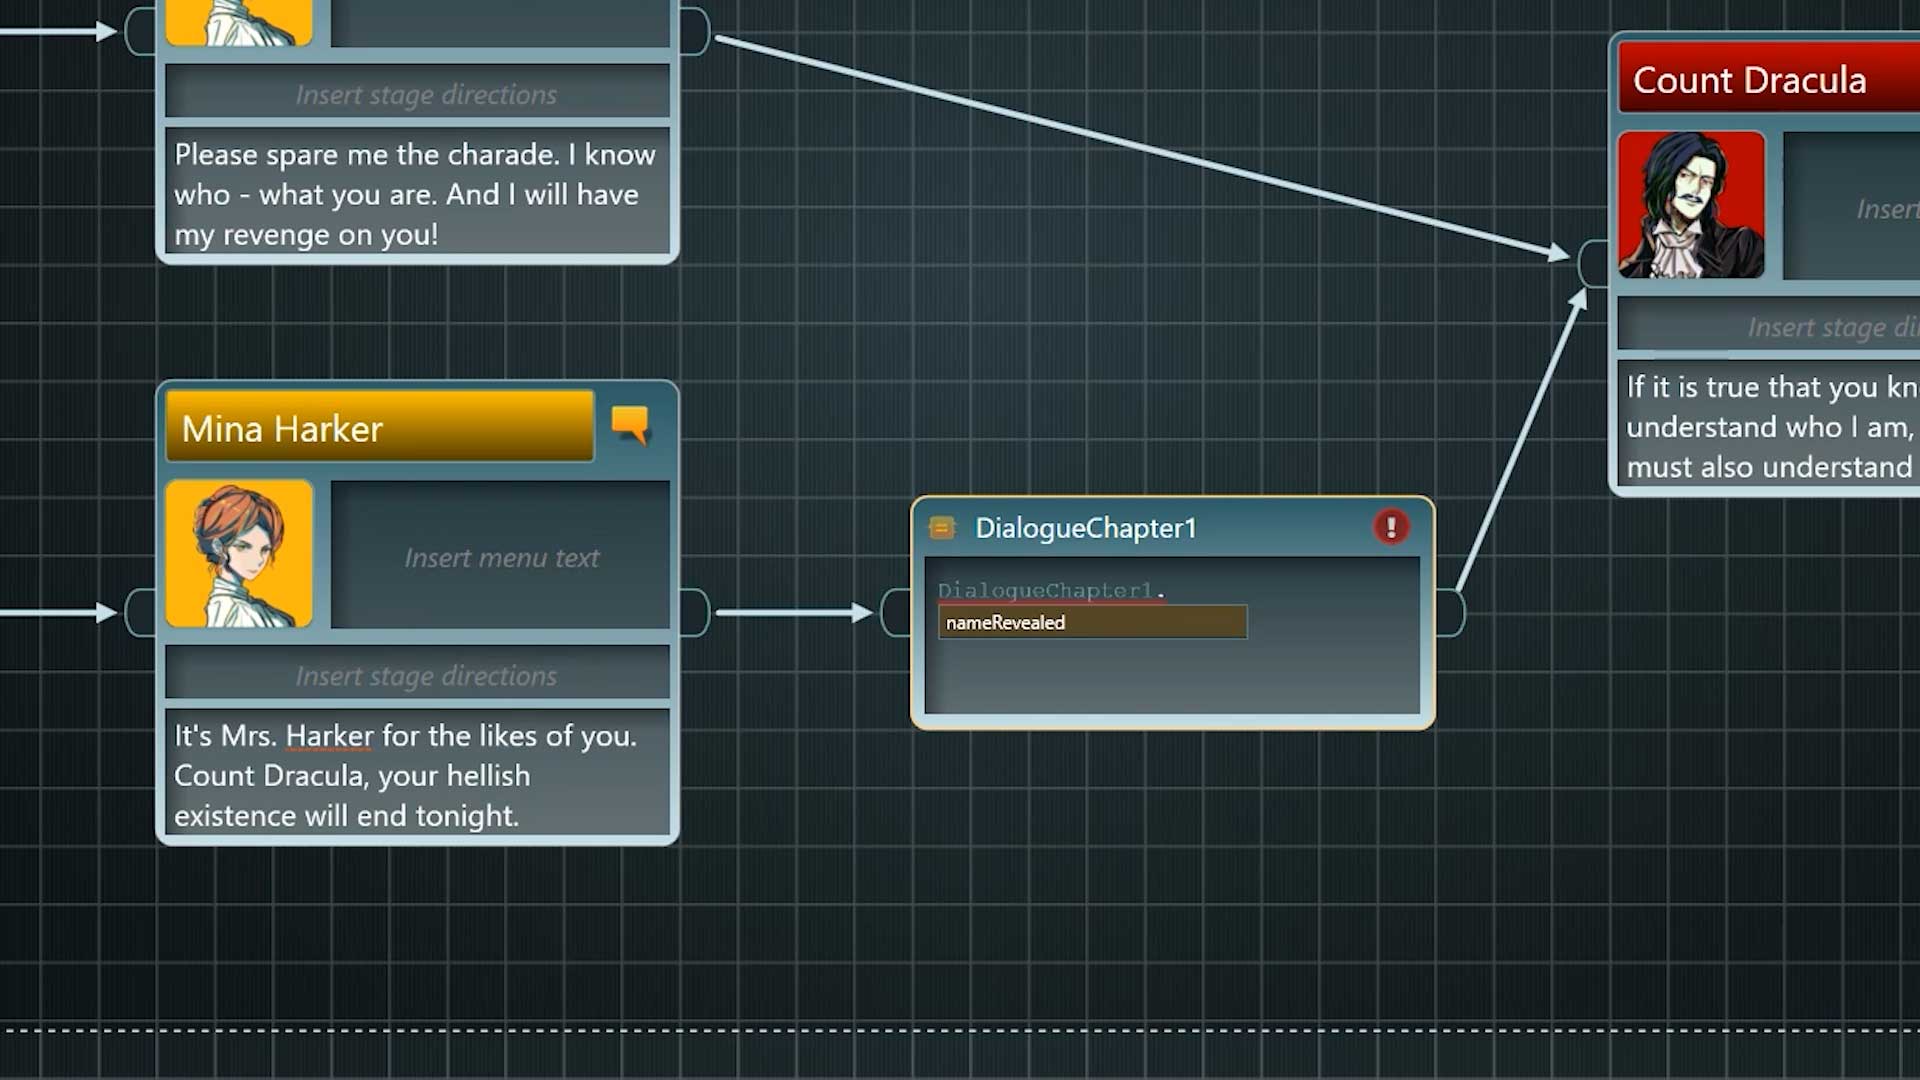
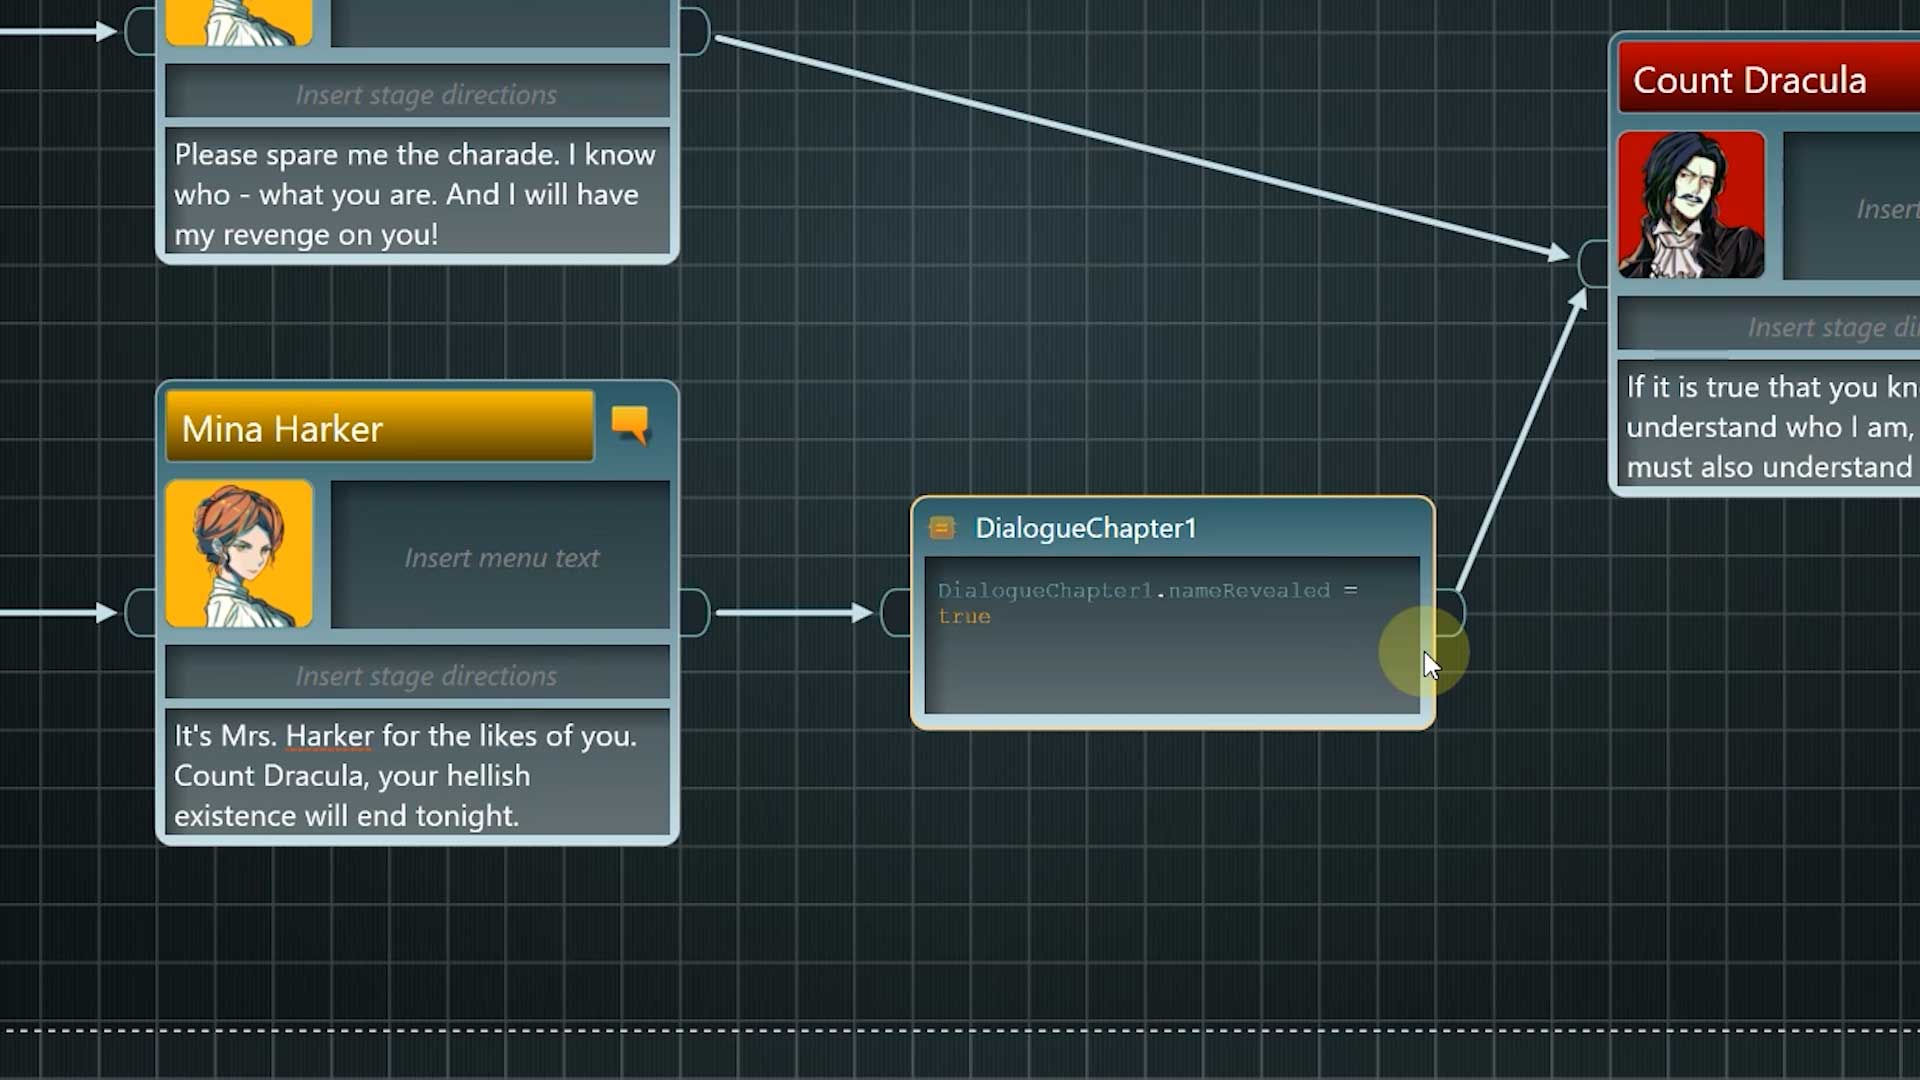
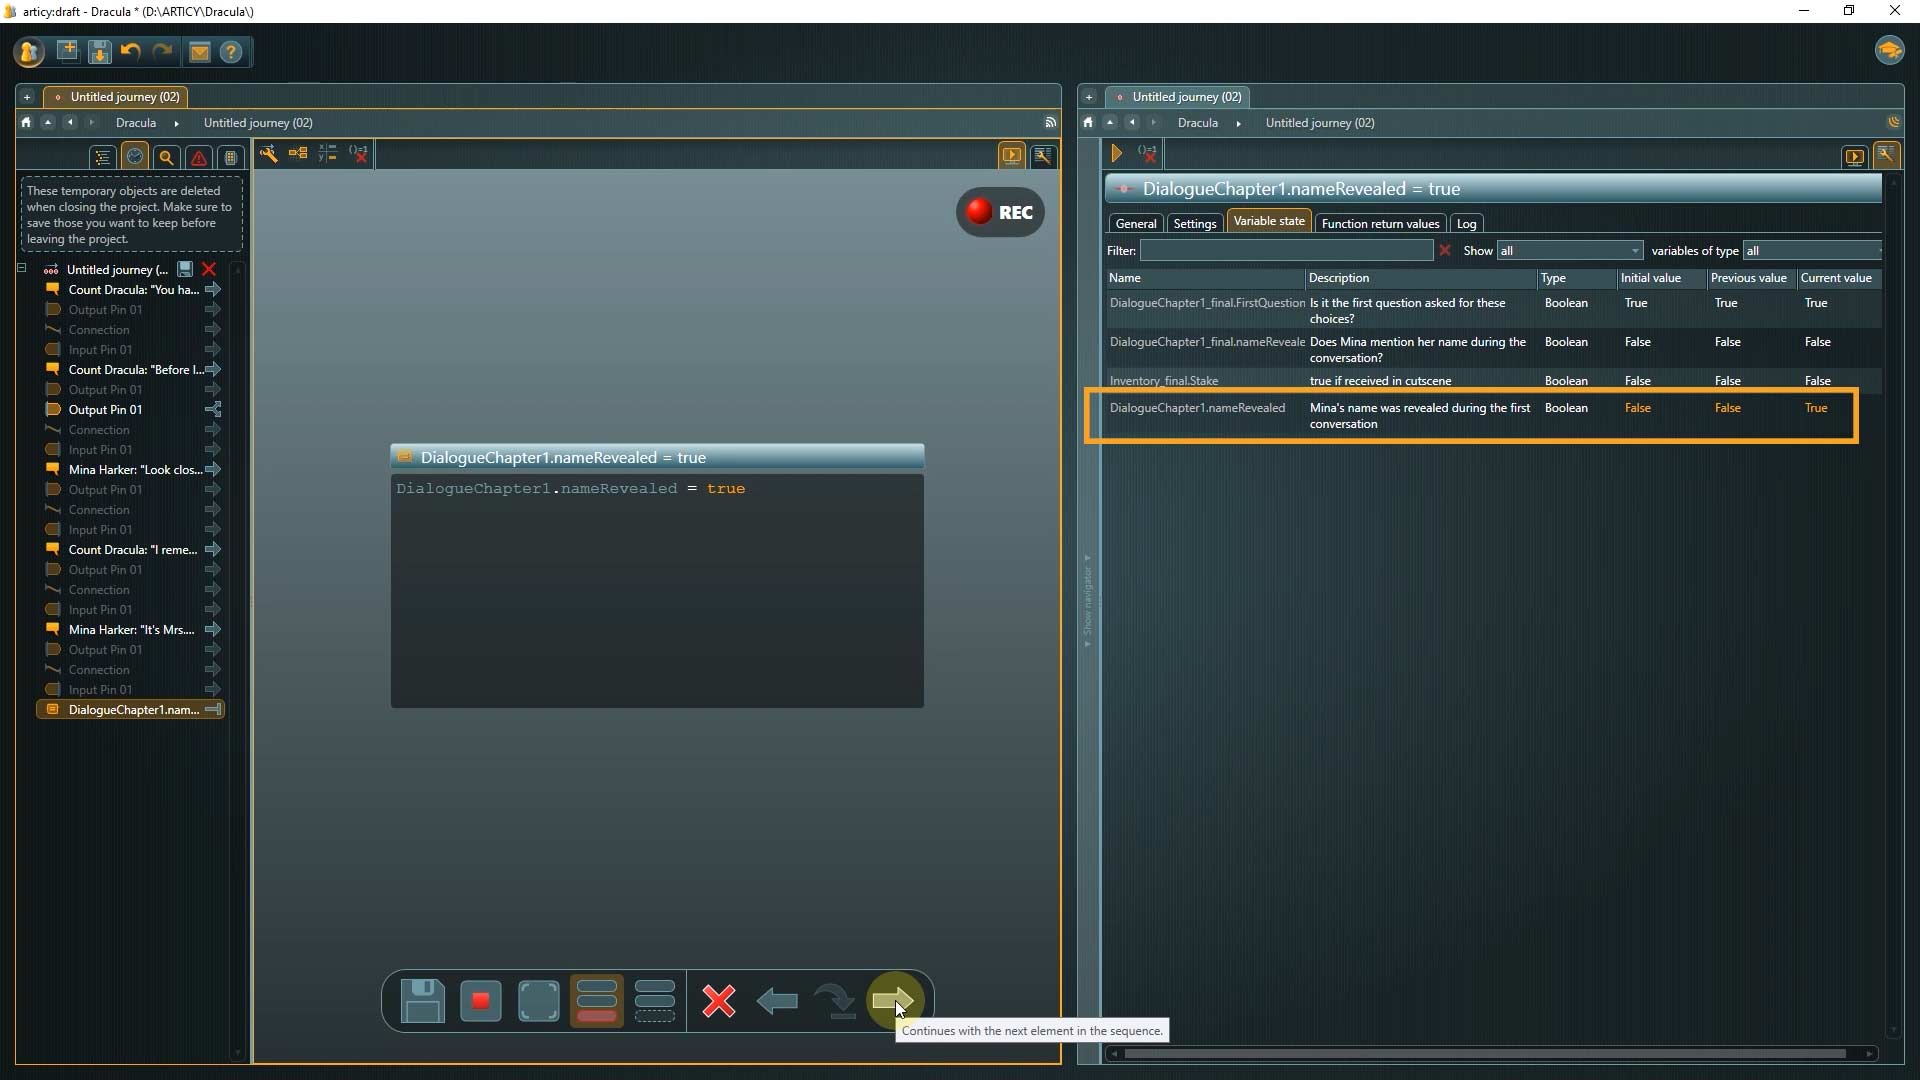
Next comes the operator which in our case is an equal sign. That means the value of the variable will be set to the value that comes after this assignment operator. When creating the “NameRevealed” variable we set the default value to false, so we need to set the value to true now.
If any mistake is made while writing, like a typo or trying to assign values that are not possible for the selected variable type, the faulty part will be a) underlined in red and b) a warning symbol appears at the top of the node. If you hover over this symbol a help text is displayed that indicates the type of error.
With the instruction setup, if the player chooses the first or middle option the variable stays unchanged, if they choose the third option the variable value will be set to true at the end of the branch.
Now we will add a way to use this information. We ended the dialogue with a challenge from Mina to Dracula. Let’s give him a chance to respond to that challenge, but we want his answer to differ based on whether he knows the name of his challenger or not.
The Condition Node
To check for a variable value we need a condition. Drag a Condition node from the toolbar and connect it to the last dialogue fragment.
You will immediately notice that this node is different from the others we have seen so far: it has two colored output pins. We will see the function of those in a minute.
The basic syntax of a Condition is similar to an instruction, the main difference is the kind of operators that are used.
Do you remember the syntax we used in the instruction? Variable set name.variable name operator value
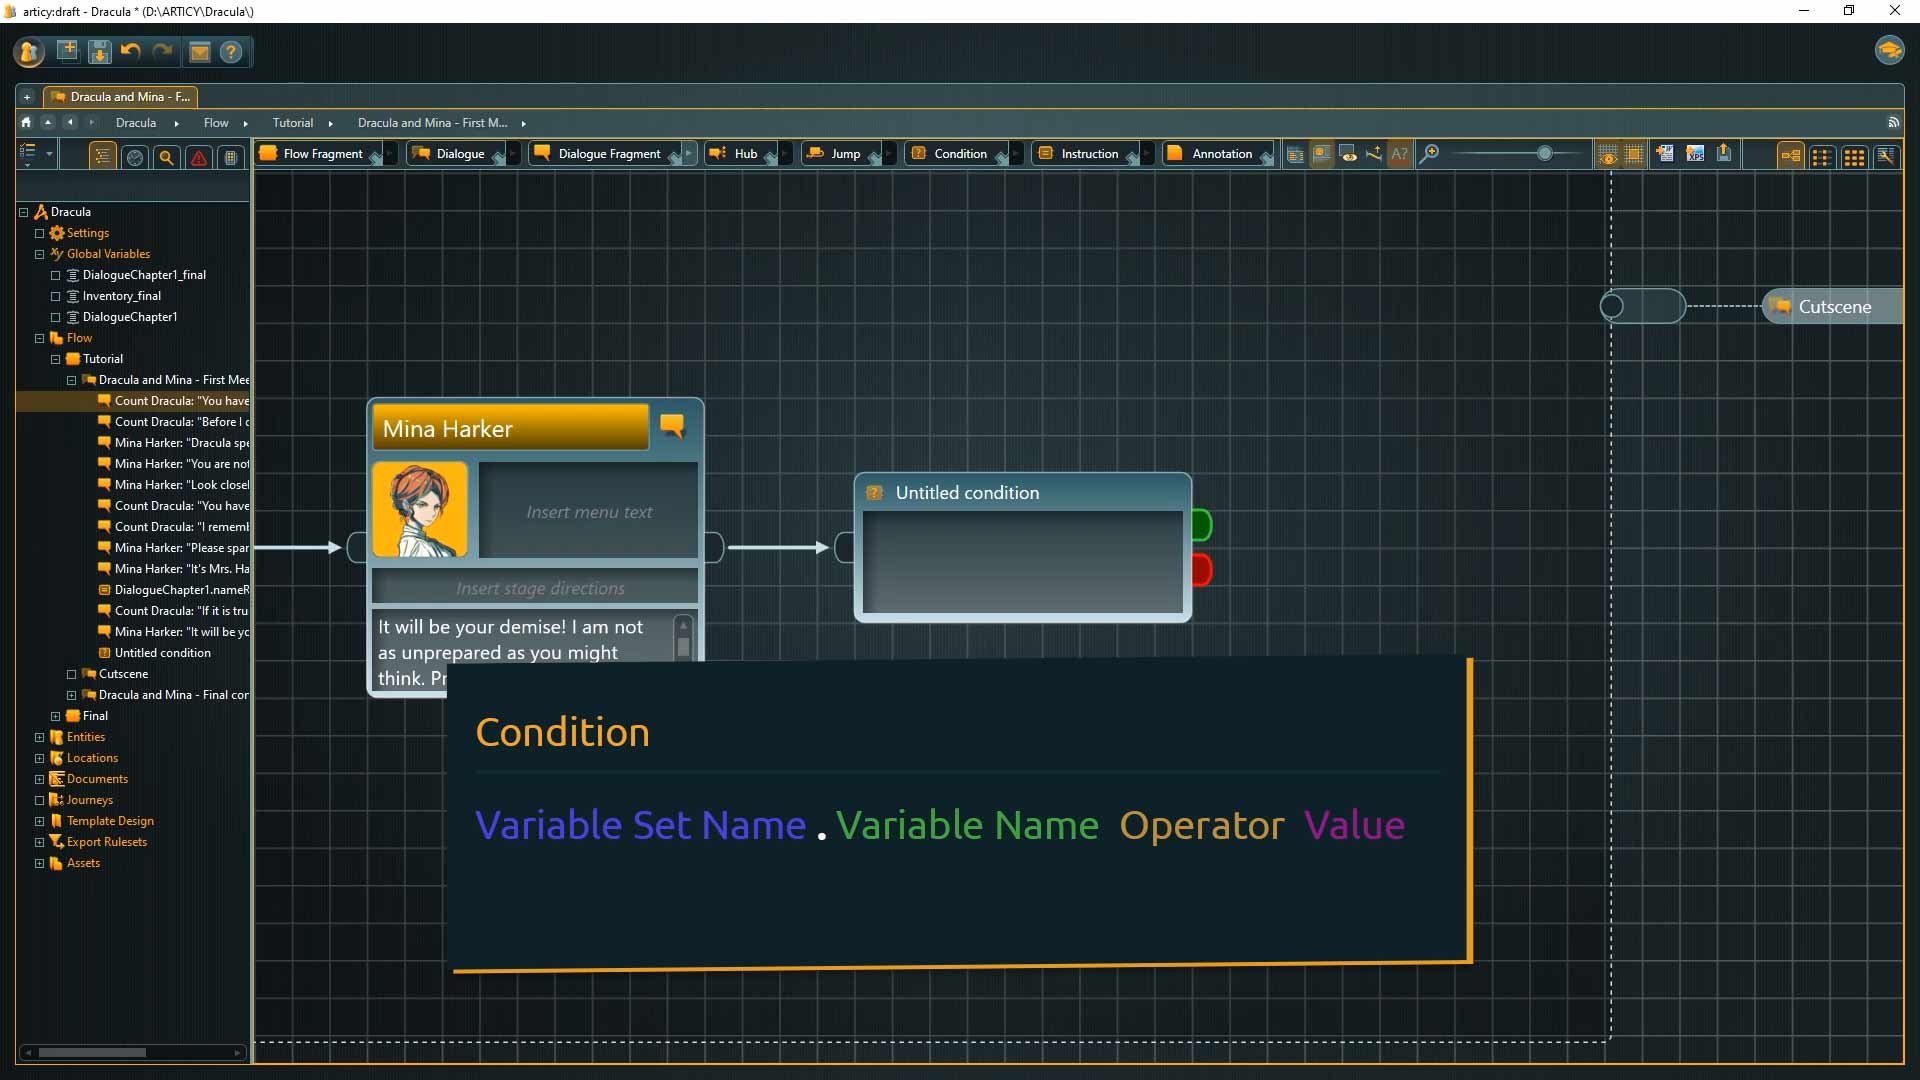
The beginning is the same as before: DialogueChapter1.nameRevealed. To now check for a value we need a so called relational operator. We want to check if the value of the variable is equal to what comes after the operator and for this we use double equal signs. The value we are checking against is true.

If the result of the statement within the condition node is true then the flow will continue through the green output pin, if the result is false it will go through the red pin.
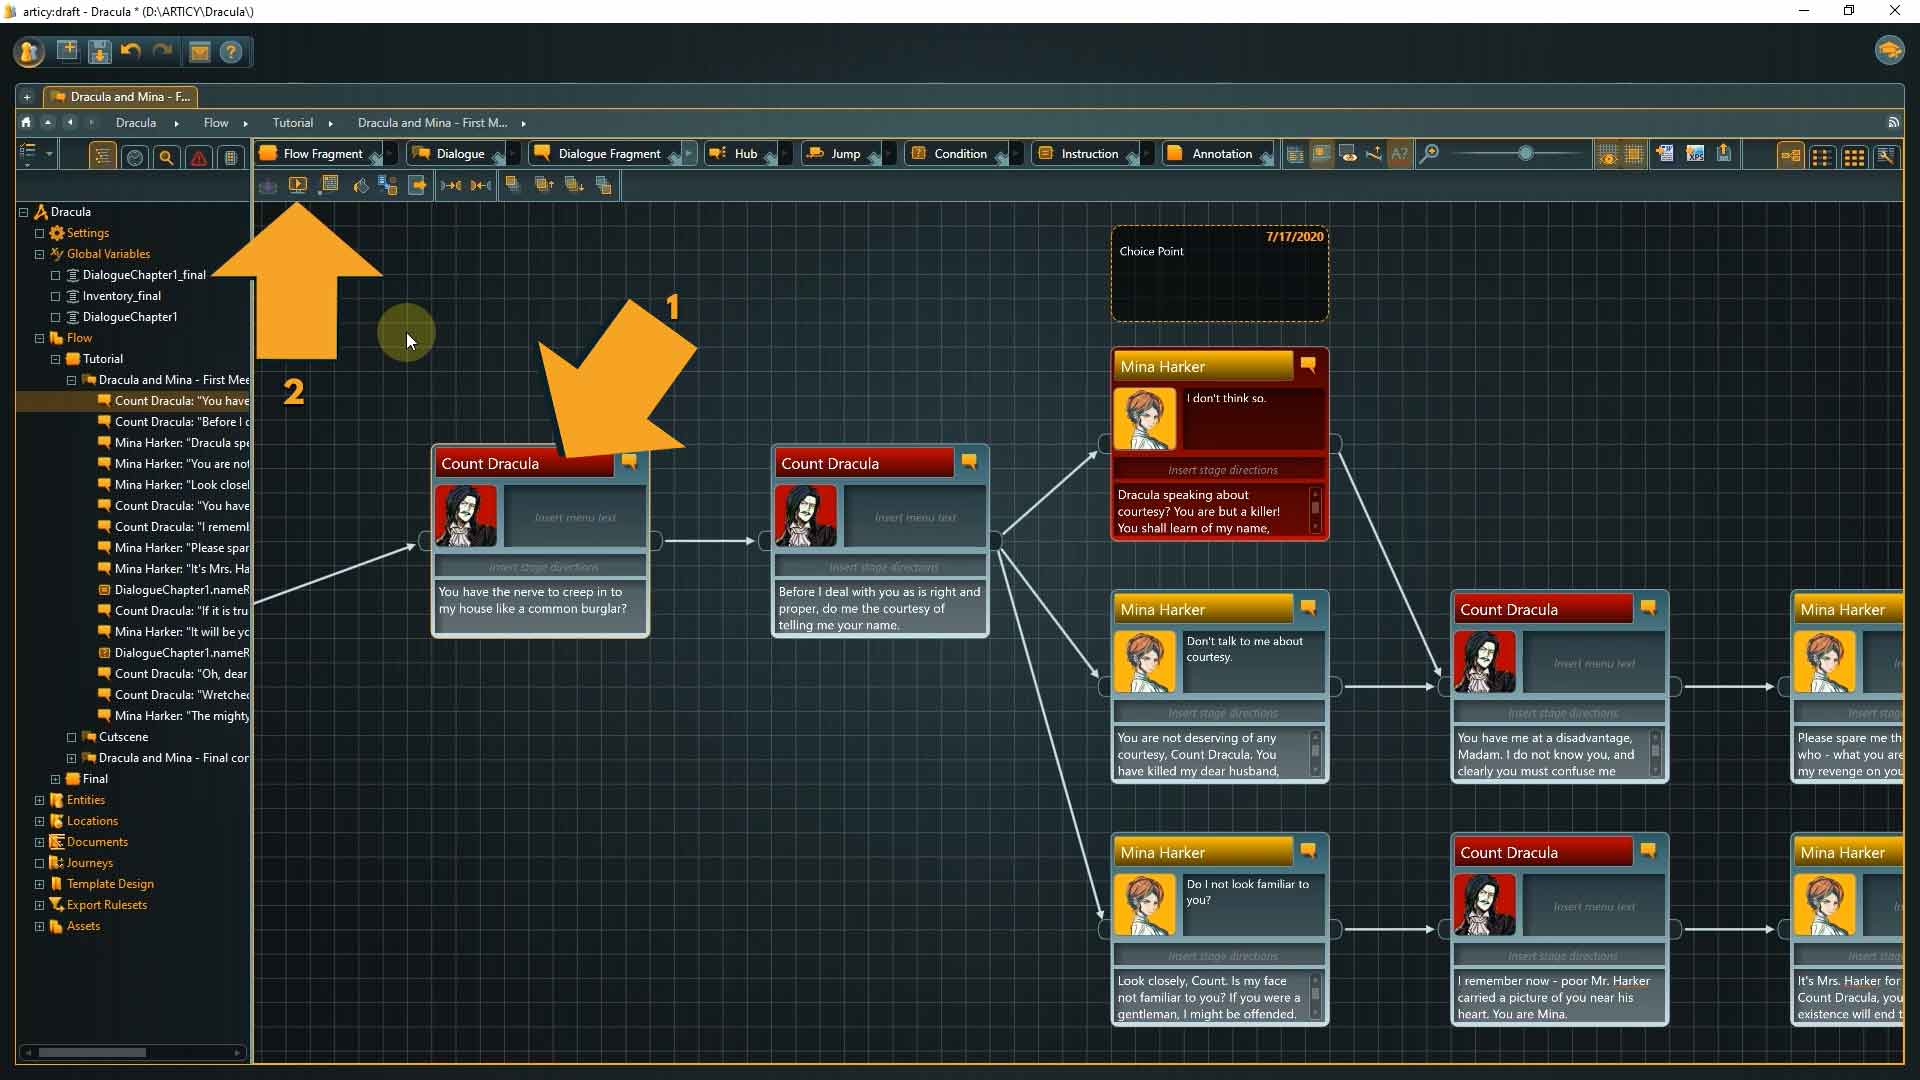
We will take a look at how this plays out in a second, but first I will add a couple of additional dialogue lines after the Condition to complete the conversation between Mina and Dracula.
If we take a look at the dialogue overall now we see that we have two situations where the narrative flow branches. The first instance is a choice point, where the player actively has to make a decision. The second is a reaction point, here the flow is controlled by the current value of the variable. This happens automatically in the background, so the player is not even aware that there are multiple ways to continue at this point.

Choice points are often used when the player character is involved, reaction points can be valid for players and NPCs alike, but in the end it is up to the developer and how they interpret these points during implementation.
If you want to delve deeper into the capabilities of articy’s scripting language you can find a the documentation here
Playthrough
Now let’s take a look at how our dialogue behaves in another play-through.
1. Start the presentation with the first dialogue fragment selected.
2. Before continuing make sure to select Player Mode.
When playing through, we only get to see what the player would see in the game. The variable handling happens in the background, and we don’t even notice the reaction point, we just see a nice flowing dialogue.
3. Return to the first element in the flow and start the presentation again. Now make sure Analysis mode is selected.
4. To not only follow the presentation, but monitor the variables at the same time, create a second view-pane by dragging it in from the side. Select the entry Property Inspector in the second pane.
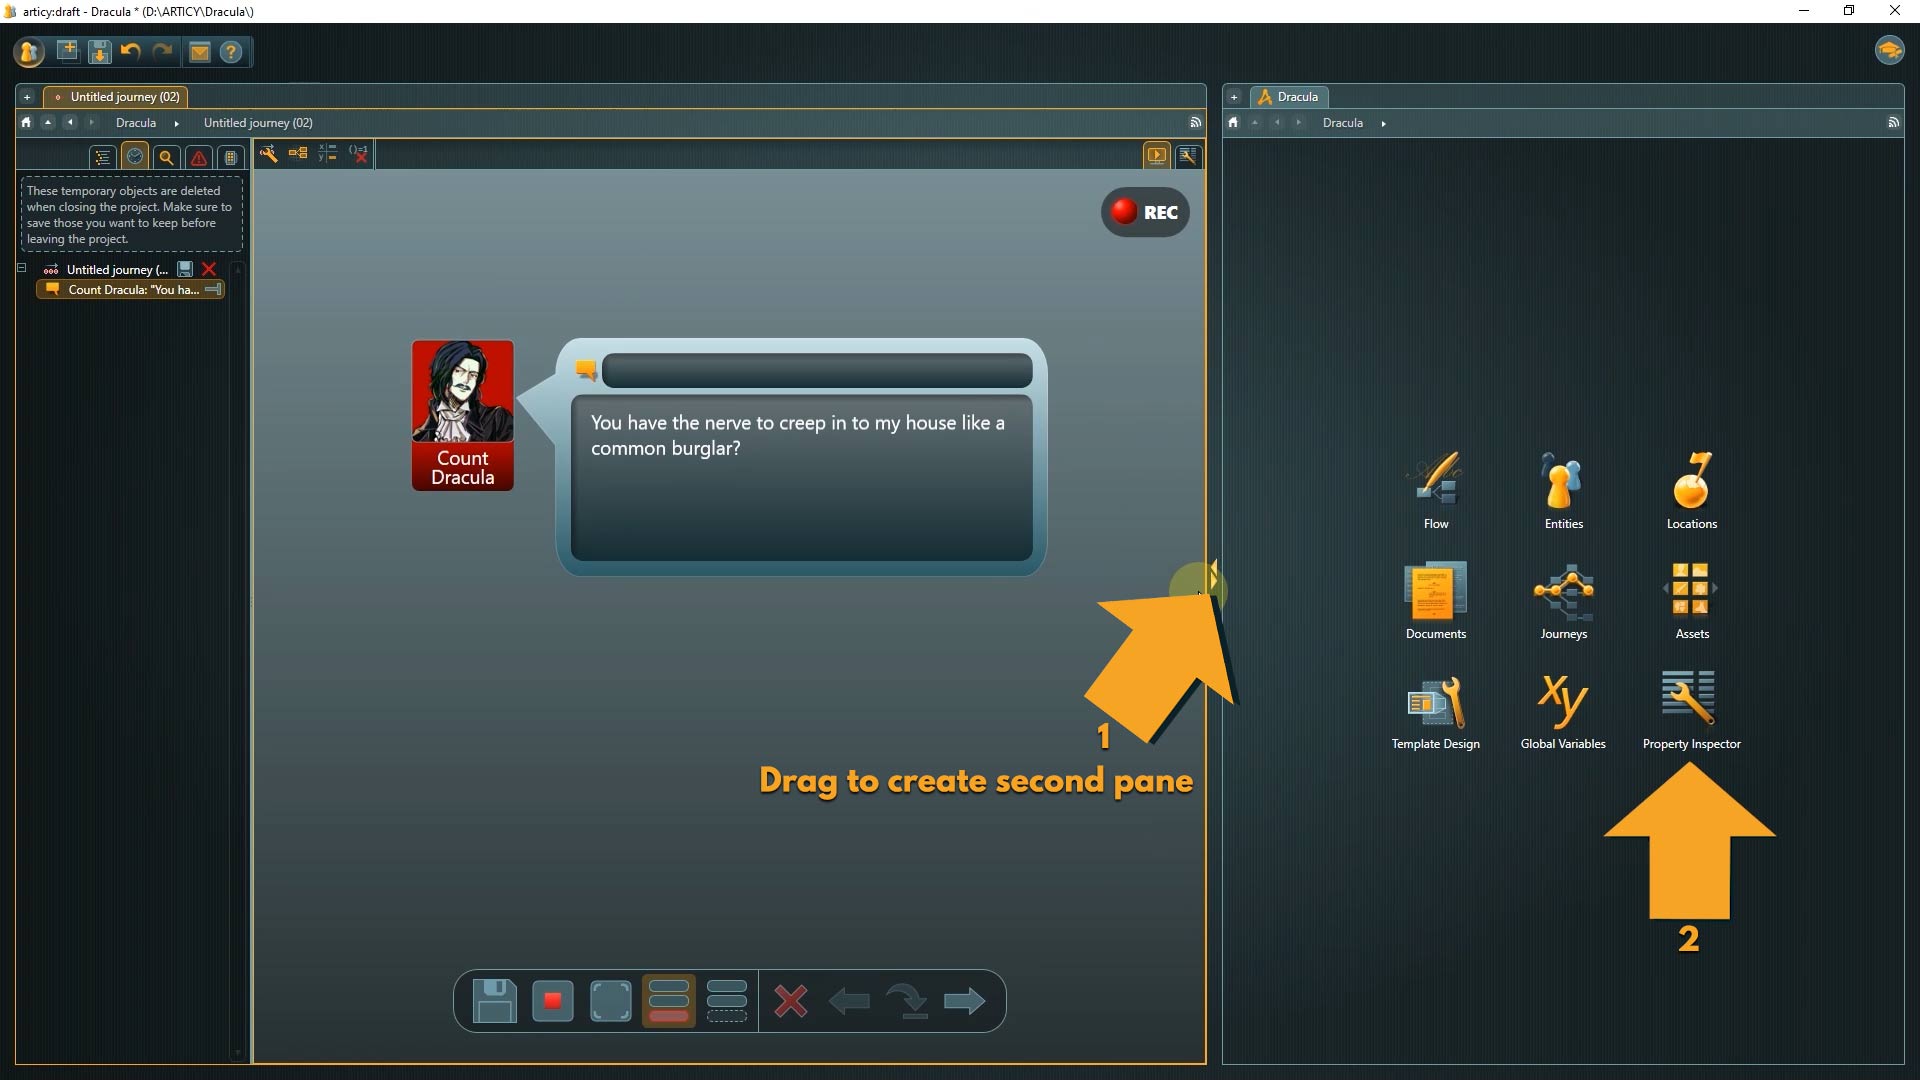
The Property Inspector synchronizes this pane to objects selected in other panes and allows us to get different views on one object. Today we will use the Property Inspector to get a live view on our variables.
5. Click the tab “Variable state” in the second pane to open the list and go through the dialogue.
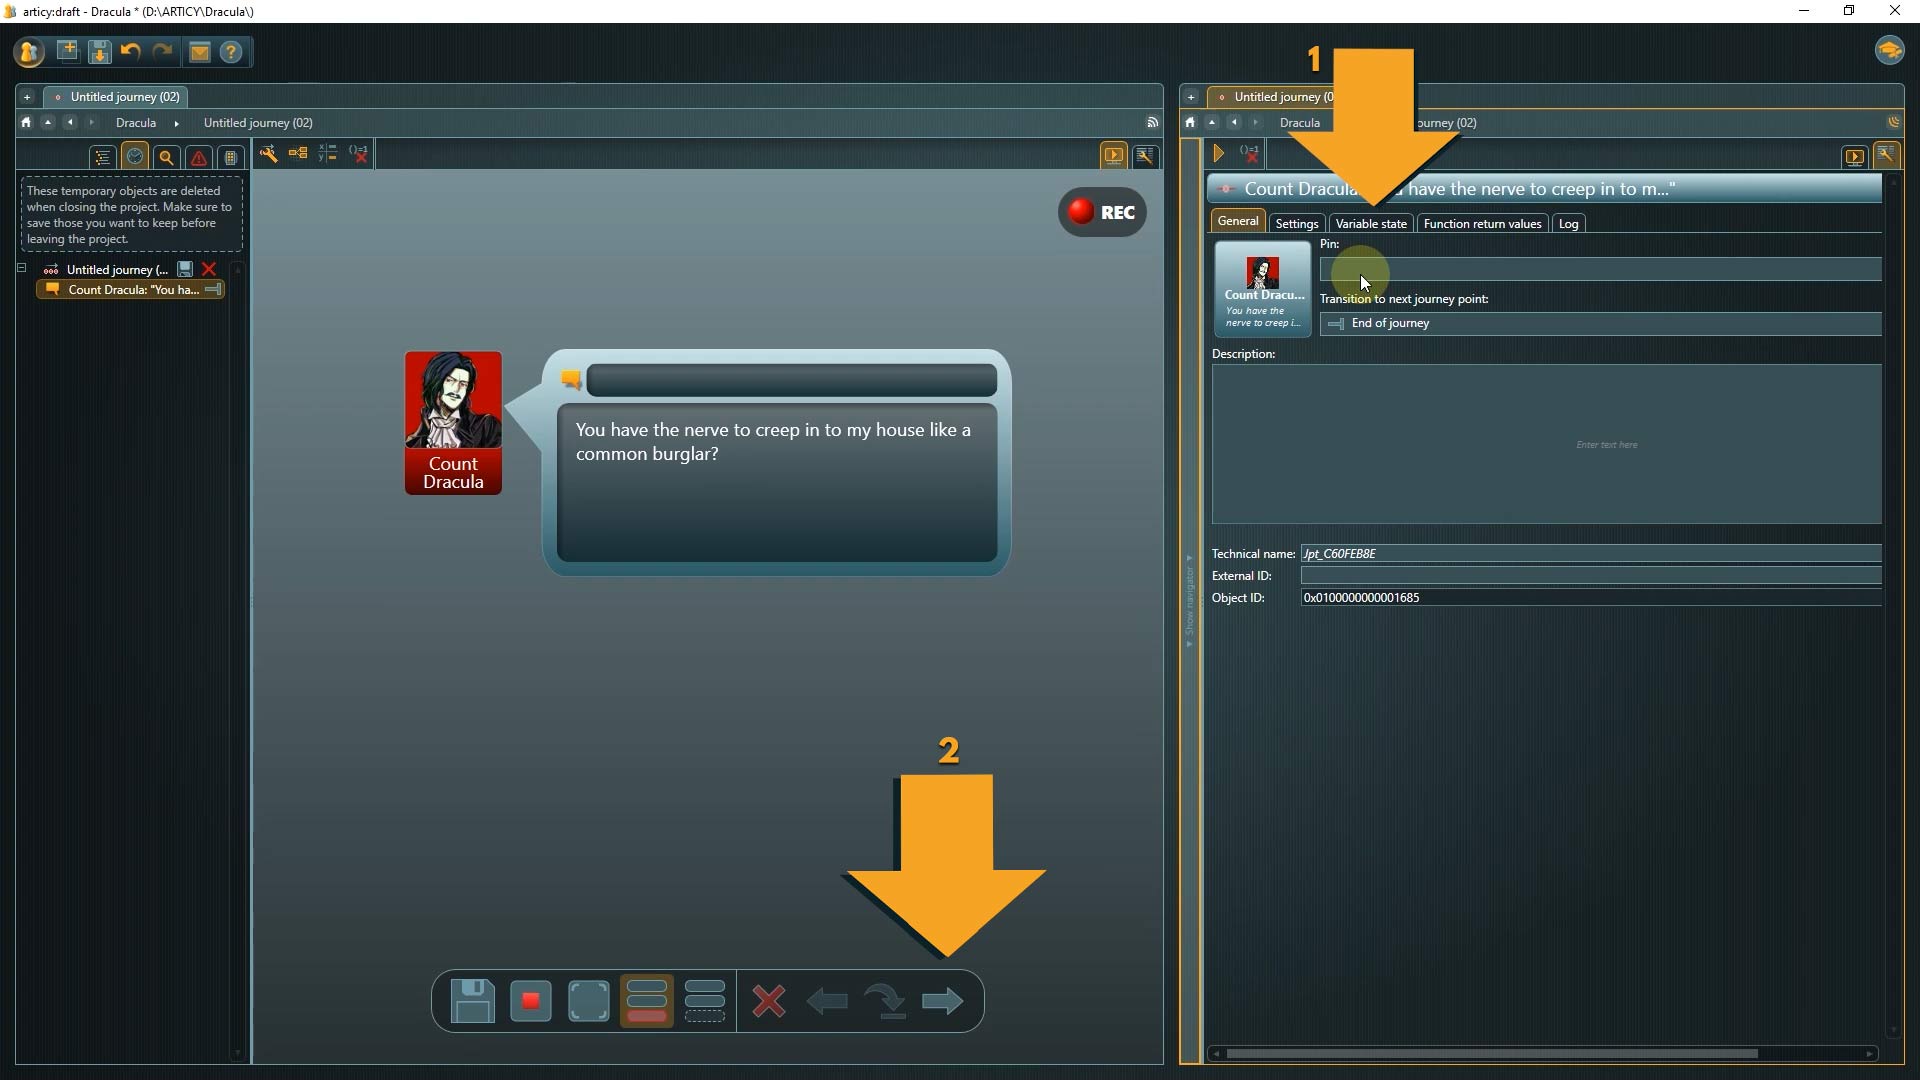
You will notice that in Analysis mode the instruction is displayed in the presentation and that the variable state gets updated as soon as we arrive at this point.
In this mode the reaction point is visualized as well.
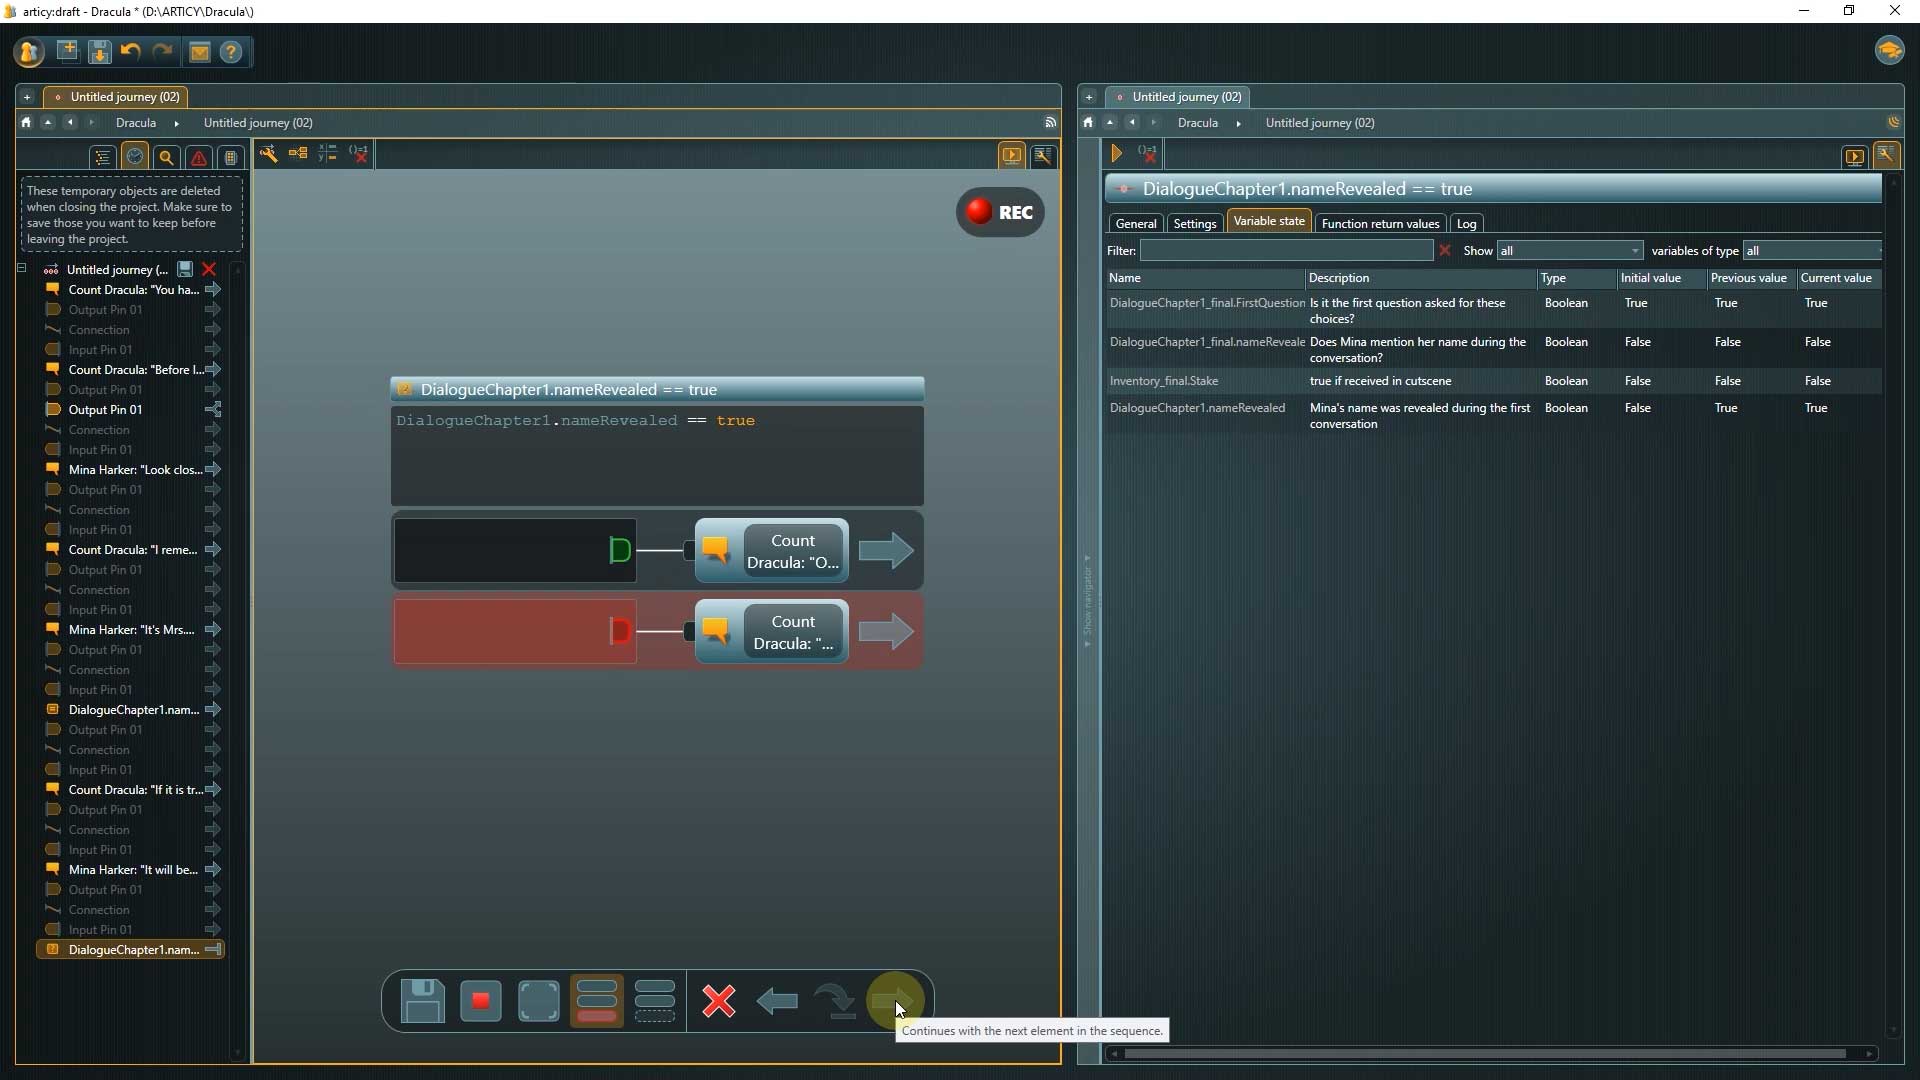
Options marked red are invalid. The regular flow would continue through the top branch, but the Analysis mode allows us to follow all routes, even invalid ones.
Recap:
This marks the end of this Lesson. We learned about global variables and simple scripting and applied this knowledge by fleshing out our dialogue with a reaction point.
Up Next:
In the next lesson we will dive deeper into the topic of Templates. We will talk about why we should use templates and how to work with them.

Thank you for joining us, and join us again in our next tutorial.
Useful Links:
Don’t have articy:draft X yet? Get the free version now!
Get articy:draft X FREE
*No Payment information required
Follow us on Twitter, Facebook and LinkedIn to keep yourself up to date and informed. To exchange ideas and interact with other articy:draft users, join our communities on reddit and discord.