Hello and welcome to Lesson 14 of the articy:draft First Steps tutorial series.
Review:
In the last lesson we visited the “Document View”. We saw how documents are structured in articy and wrote a linear cutscene for our project that we then converted to connected nodes in the Flow.

This Lesson:
In this lesson we will revisit the Flow view and go through the “Final confrontation” dialogue step by step. We create reaction points and choice points by adding scripting logic, and learn about another way to use conditions and instructions.

Reaction and choice points:
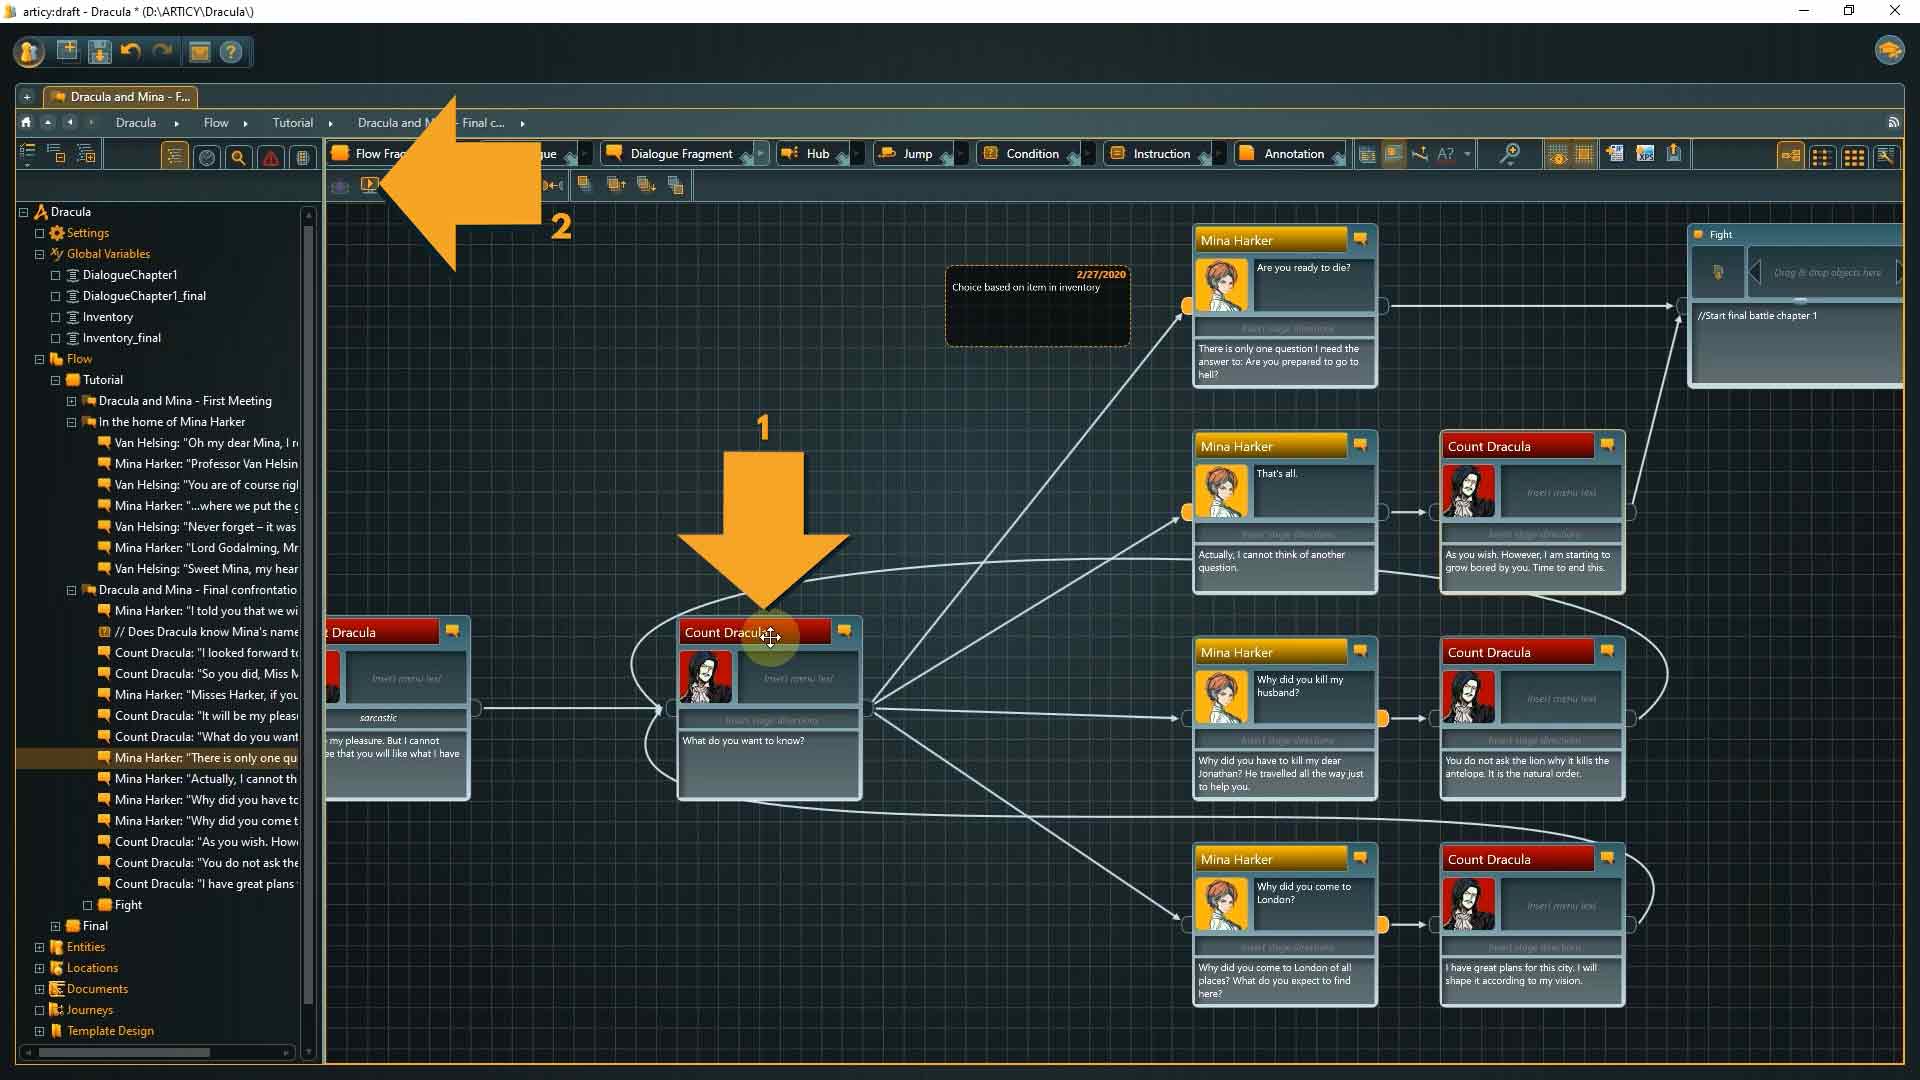
1. Start by submerging into the “Final confrontation” dialogue node in the Tutorial folder of the Flow.
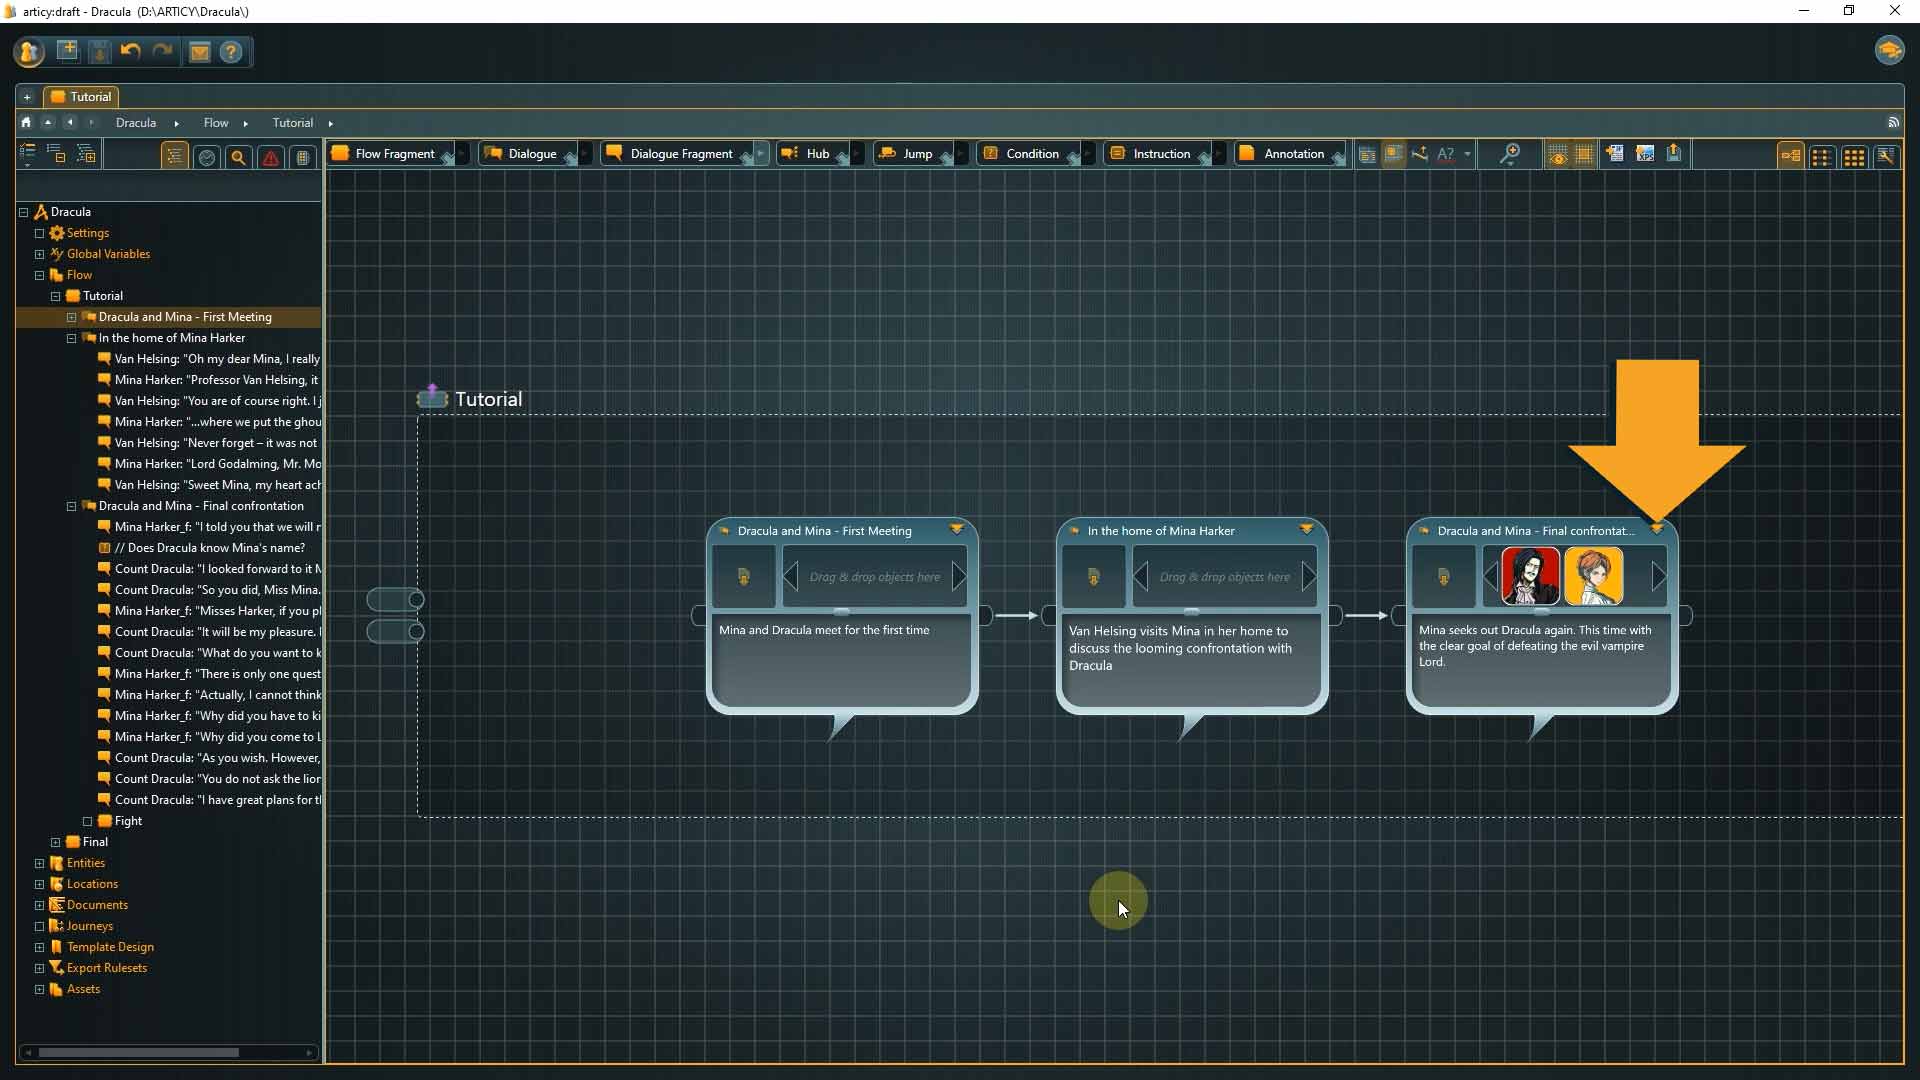
First thing you will notice from the “_f” addition to the name, is that the Mina entity is from the final version.

This is because this dialogue existed before we even created the Mina entity in the tutorial folder.
2. To preserve the project’s continuity we should update the entity, so that we use the same entity for the entire Tutorial part of the project. We can do this by double clicking the speaker name to highlight it and then starting to type the name. The selection drop-down opens and we can choose the proper entity.

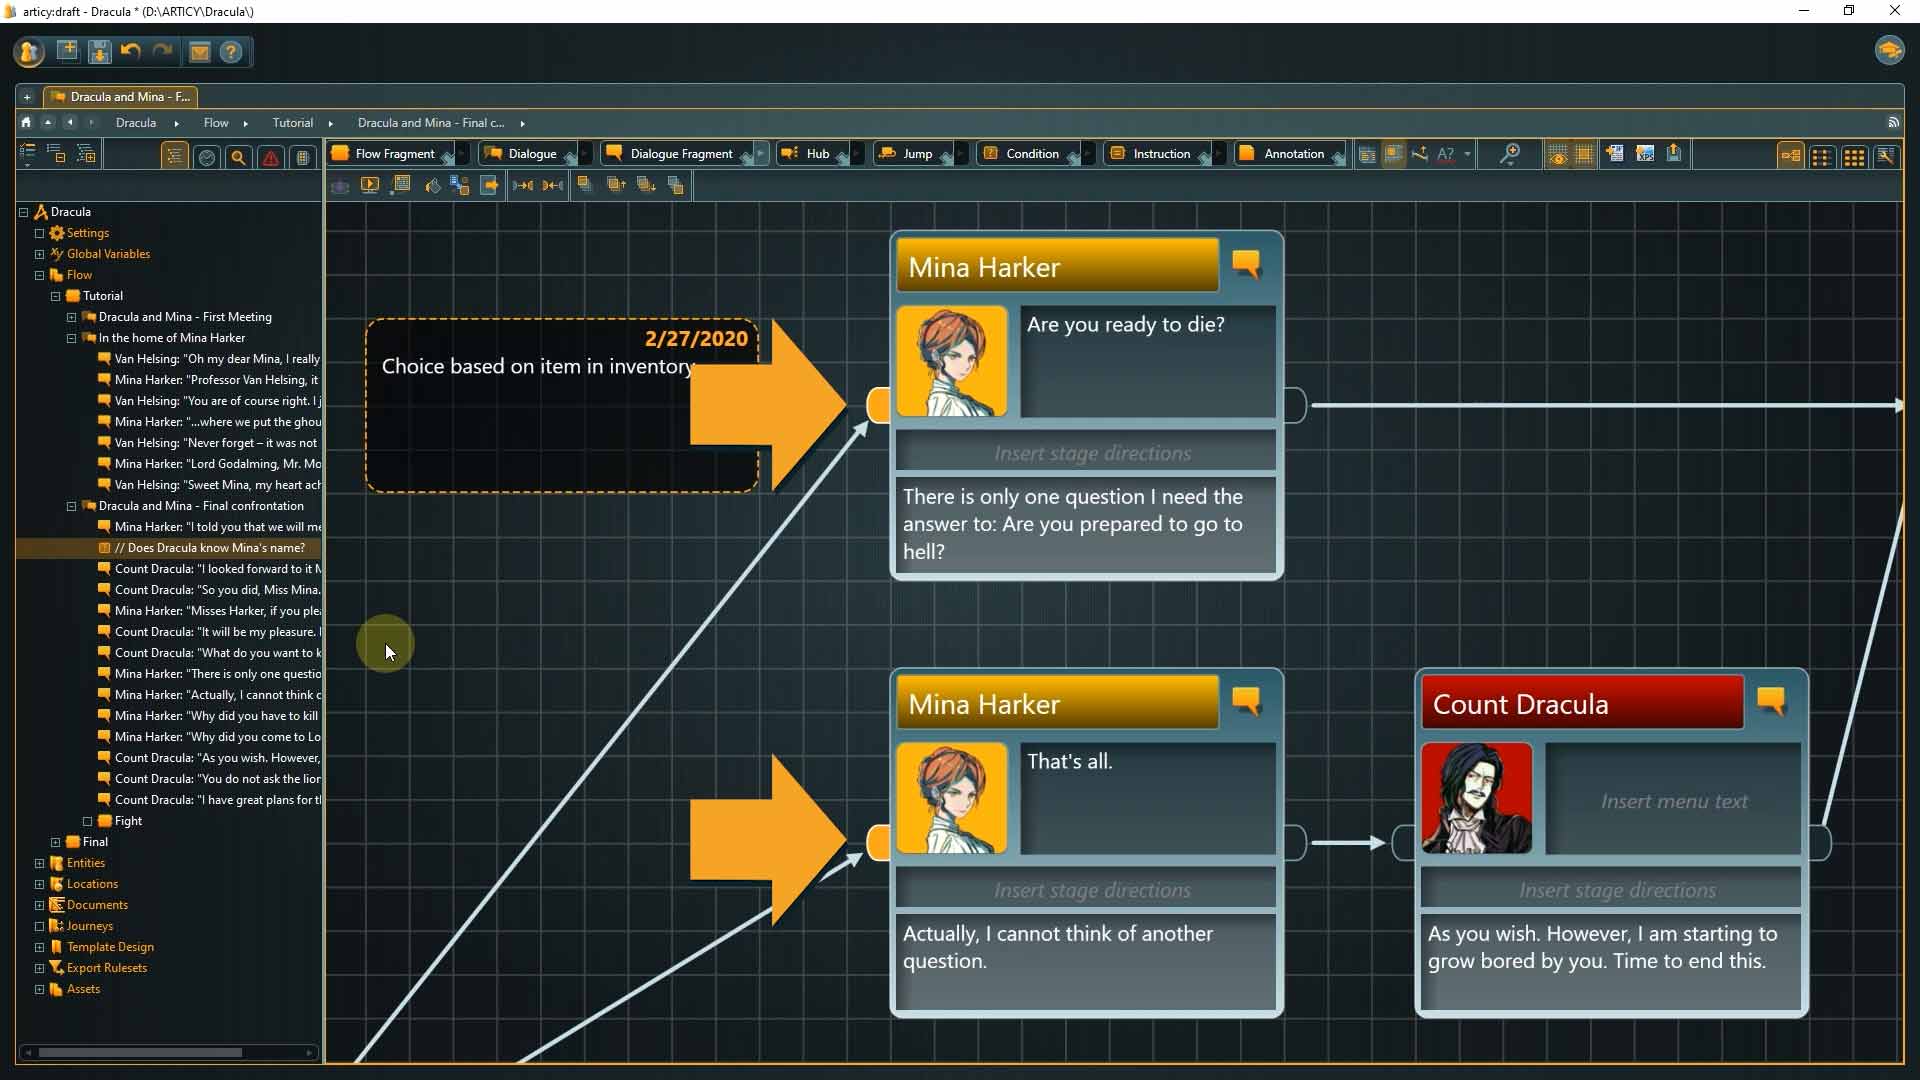
With that out of the way, let’s take a closer look at the dialogue in detail.
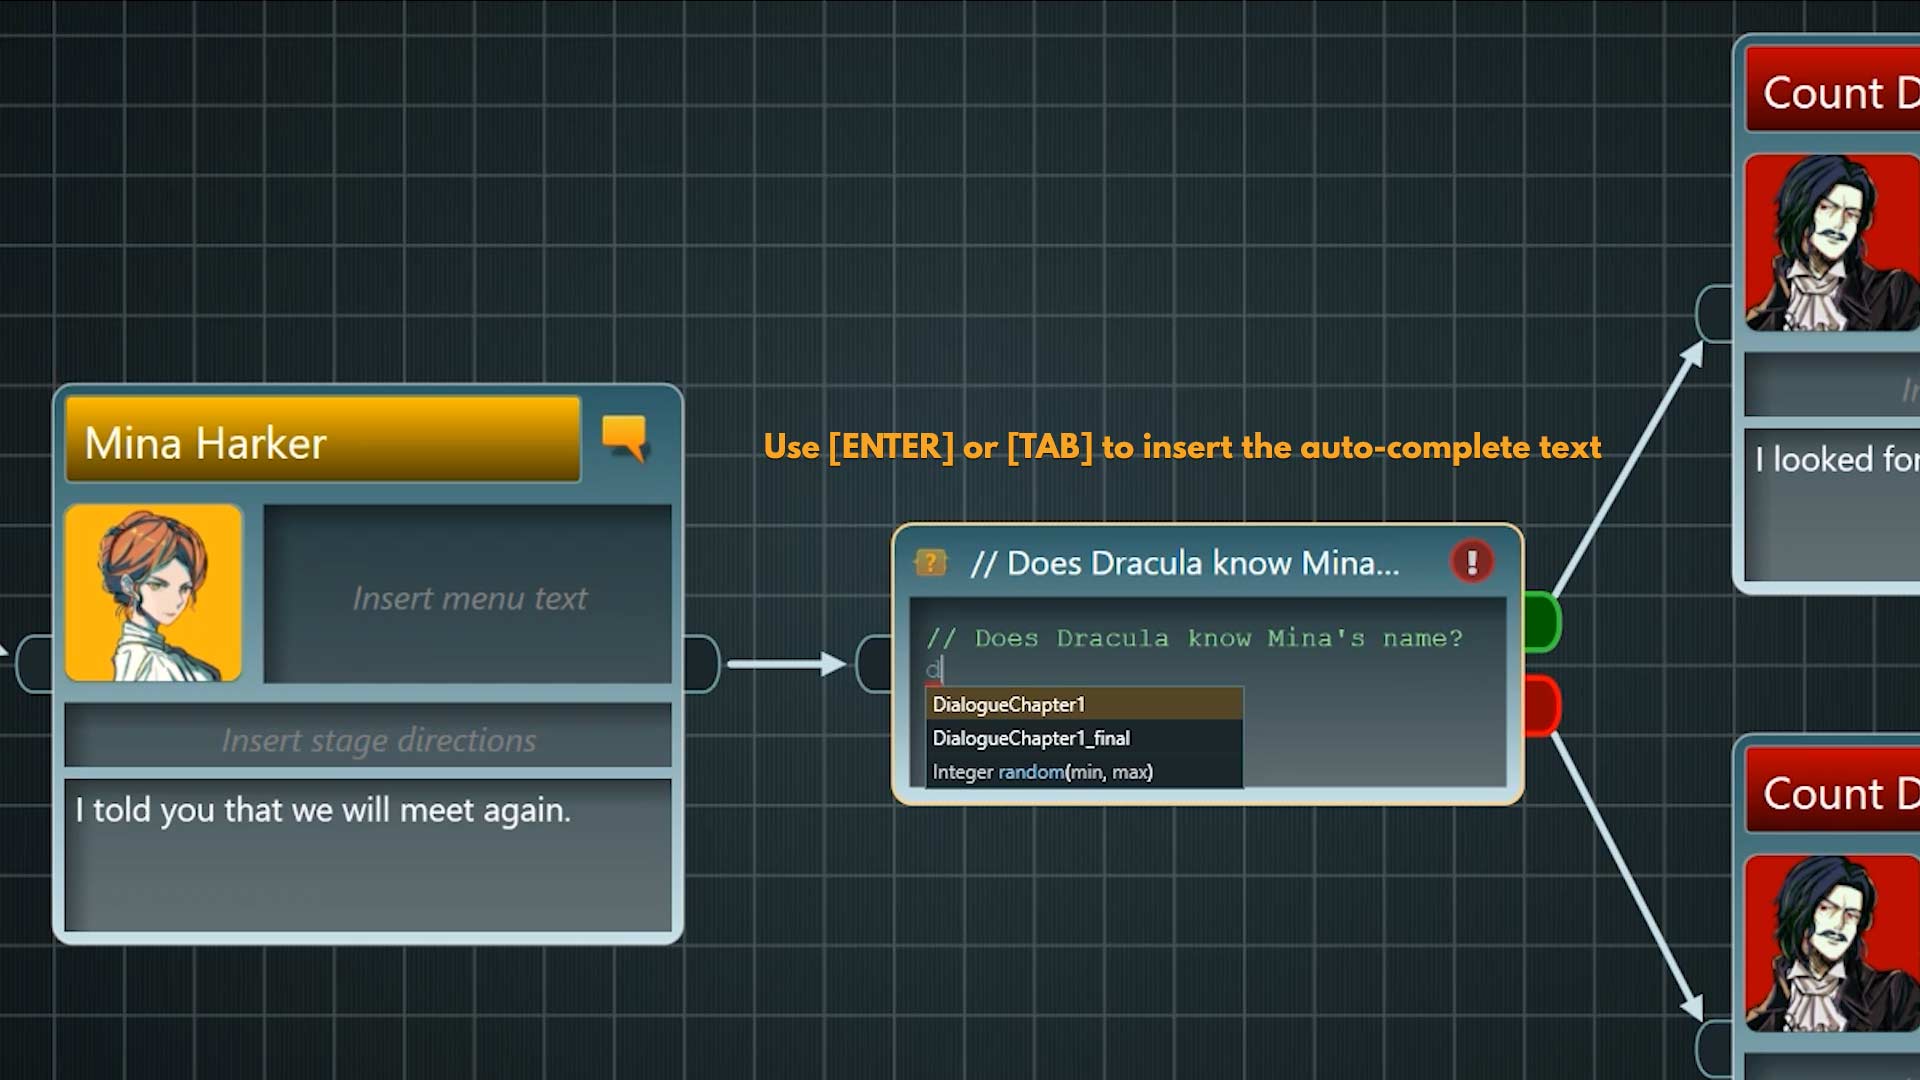
Right at the beginning we want to have a reaction point. If we zoom in closer on the Condition node, we see some text in there stating that we want to pick up again on whether Dracula knows Mina’s name or not. If we want to use text within a condition or instruction, for example to use it as a placeholder for the scripting expression, it needs to be in the form of a comment.
3. To create a single line comment just start the sentence with double forward slashes. If you don’t do this articy tries to interpret it as an expression which will result in an error.
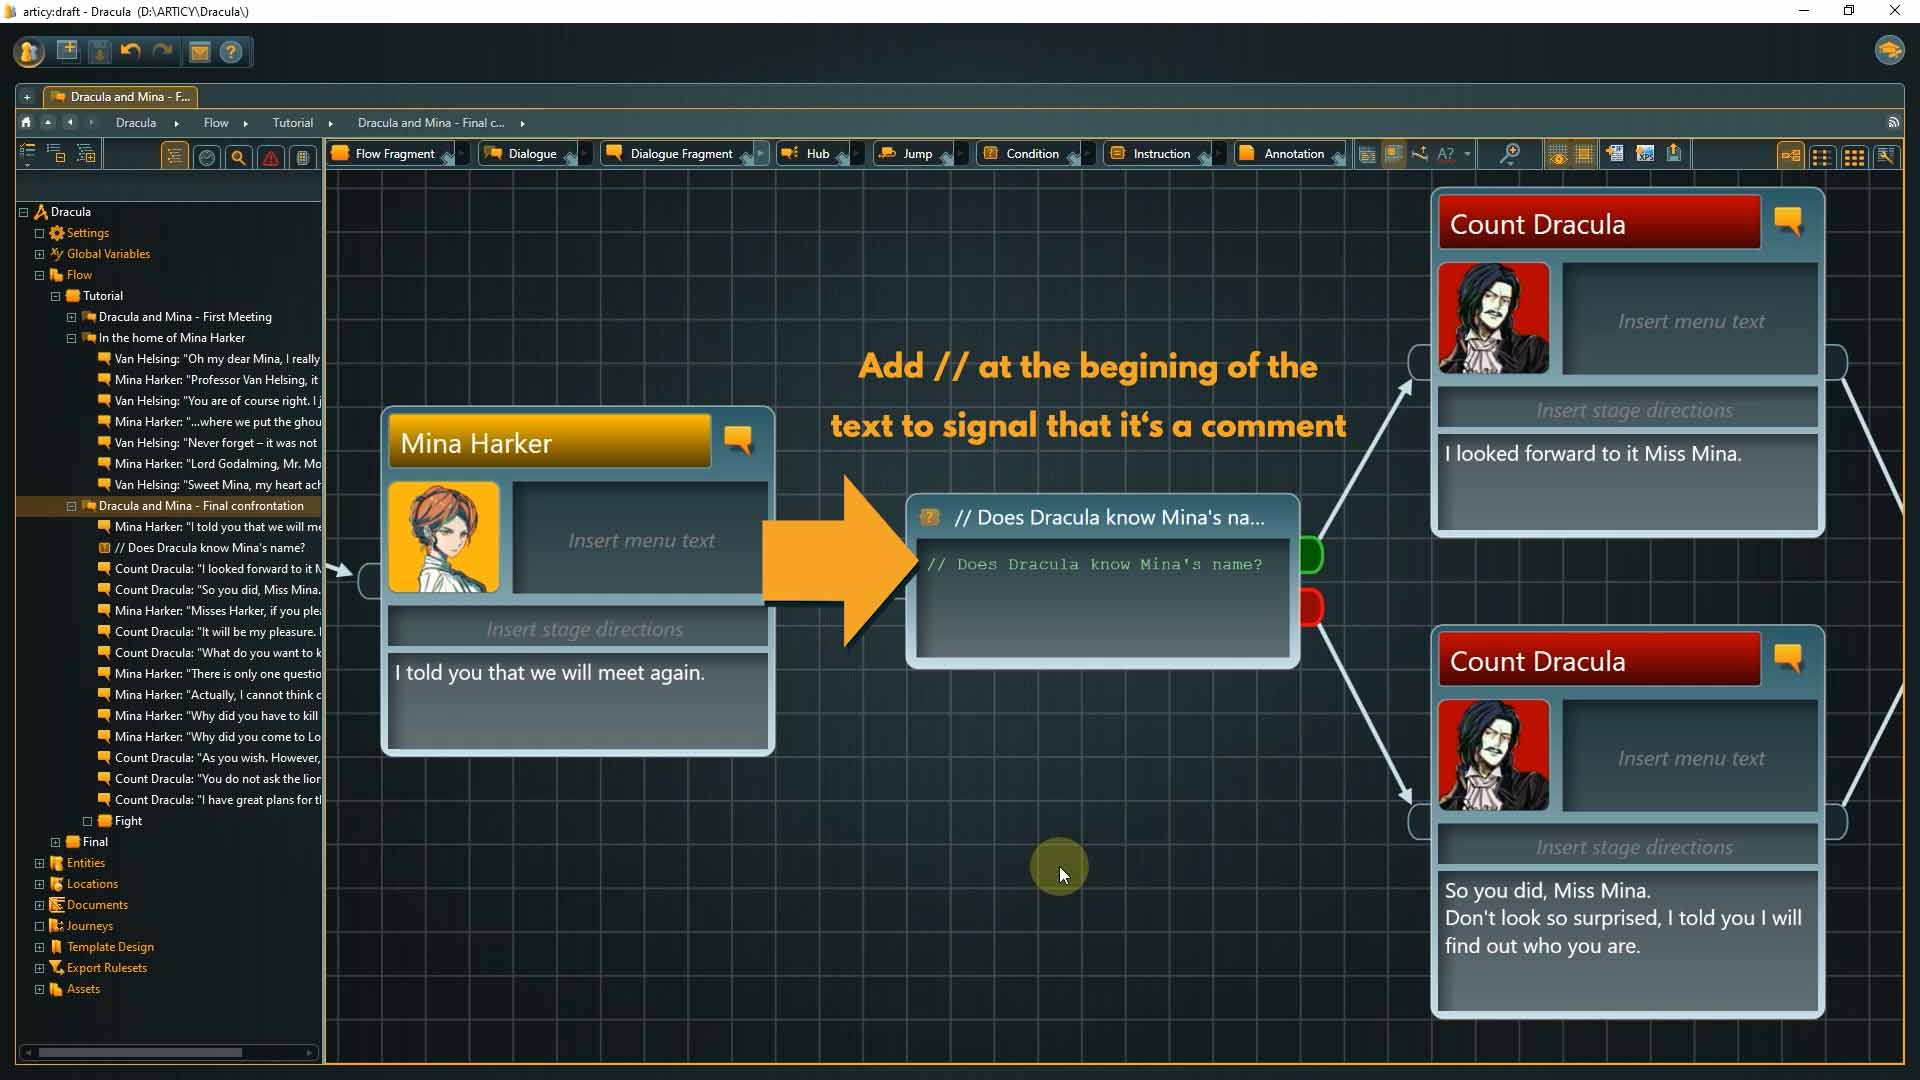
In this Condition we need to check the state of the “nameRevealed” variable. The variable value might have changed in the first dialogue, depending on which choice the player made.
👉 Global variables cannot just be used within one layer of the flow, but throughout the entire project.
Do you still remember what the structure of a condition looks like? If you want to test yourself write it down and then click the button below to see if you’ve got it right.
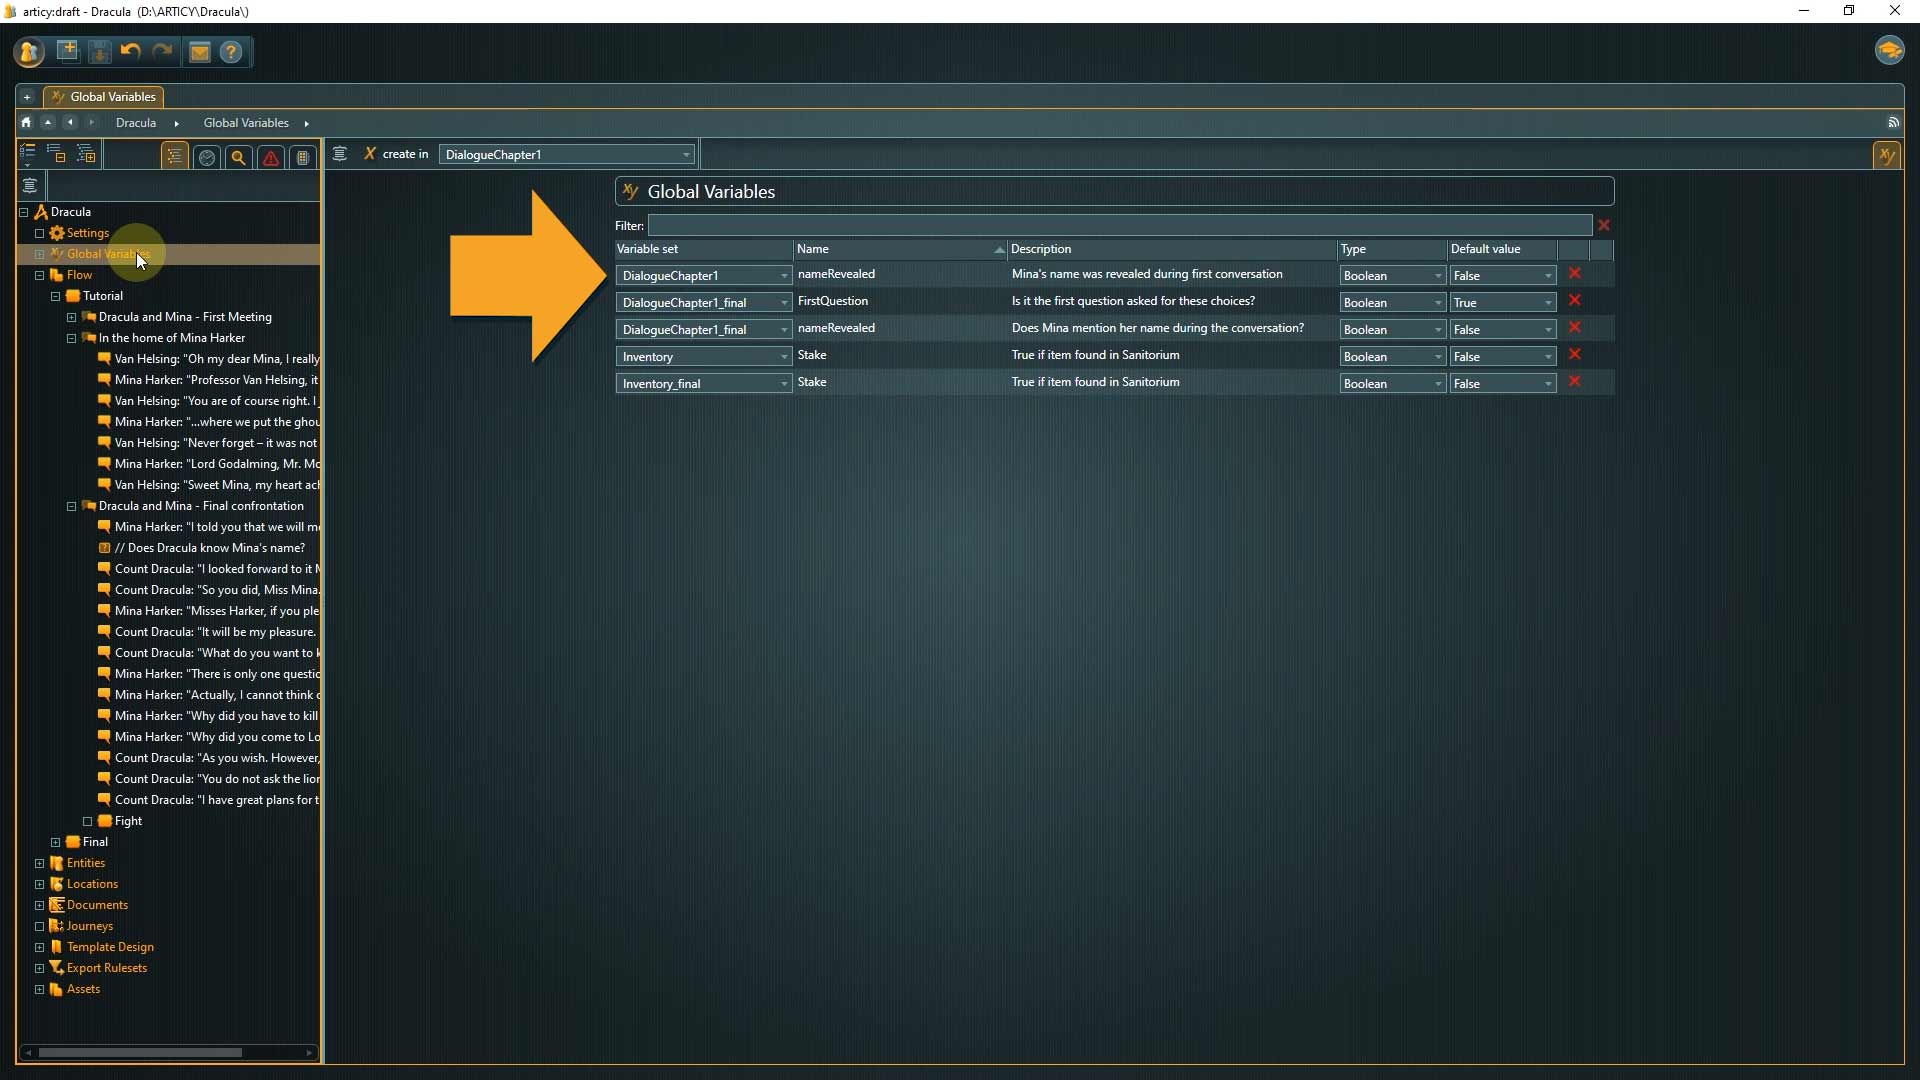
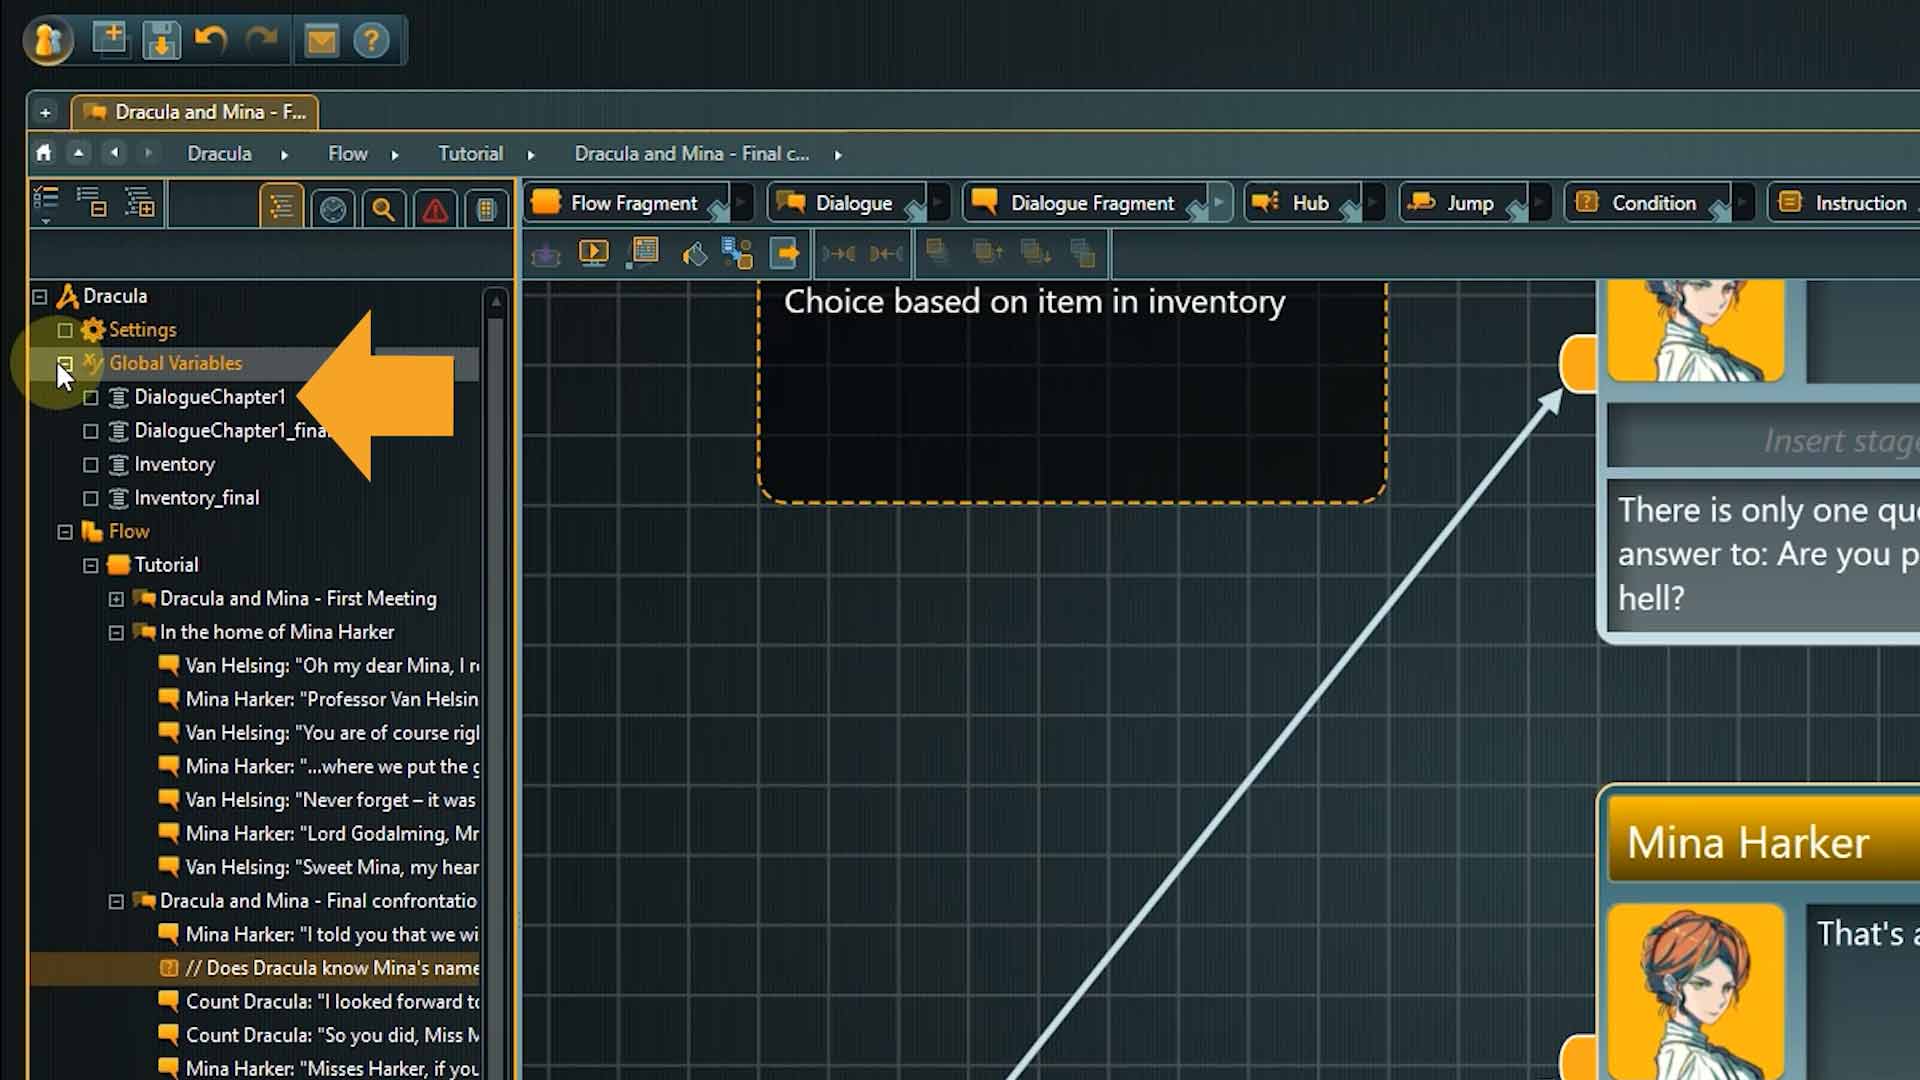
4. If you are unsure about a name or want to check to which set a variable belongs, just click the “Global variables” system folder in the Navigator.
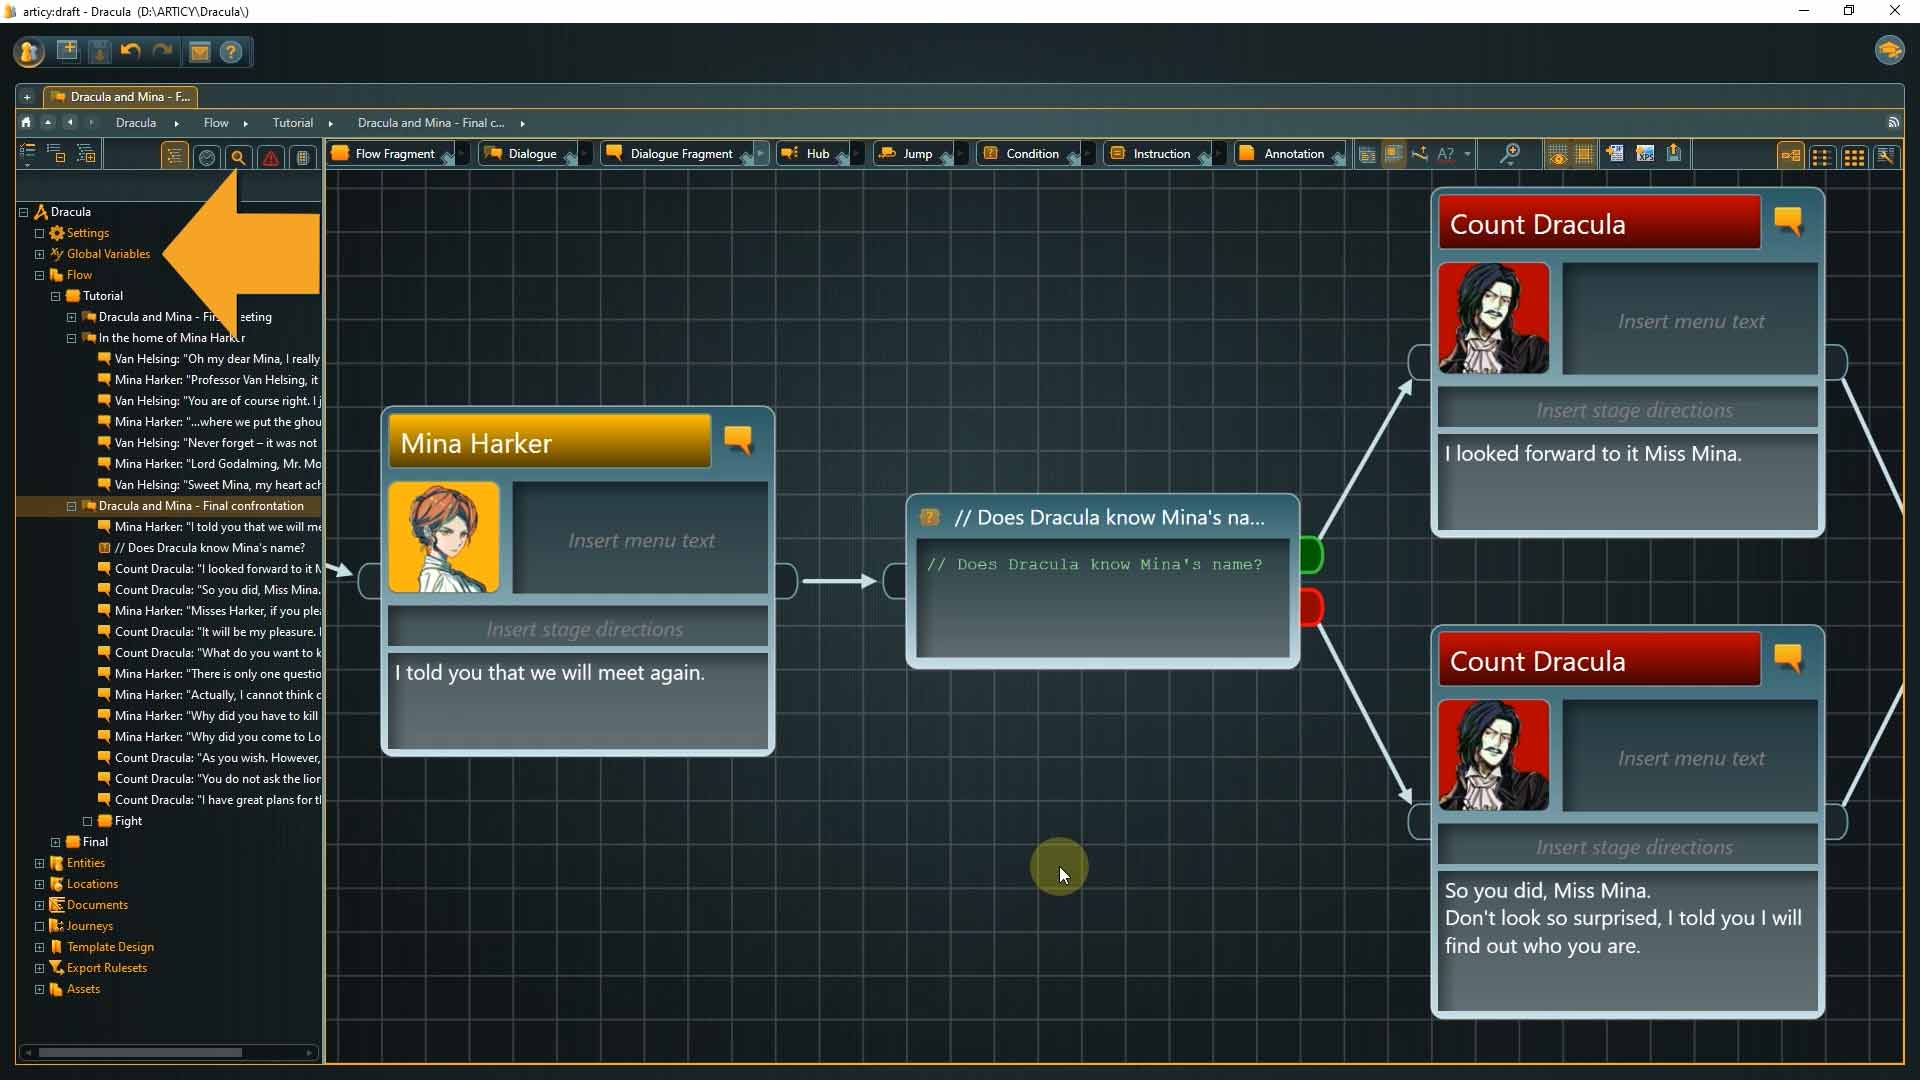
Here we can see all the information. We need the “nameRevealed” variable from the “DialogueChapter1” variable set.
5. As soon as you start typing the set name inside the condition node, auto-complete kicks in and you can use Enter or TAB to complete.
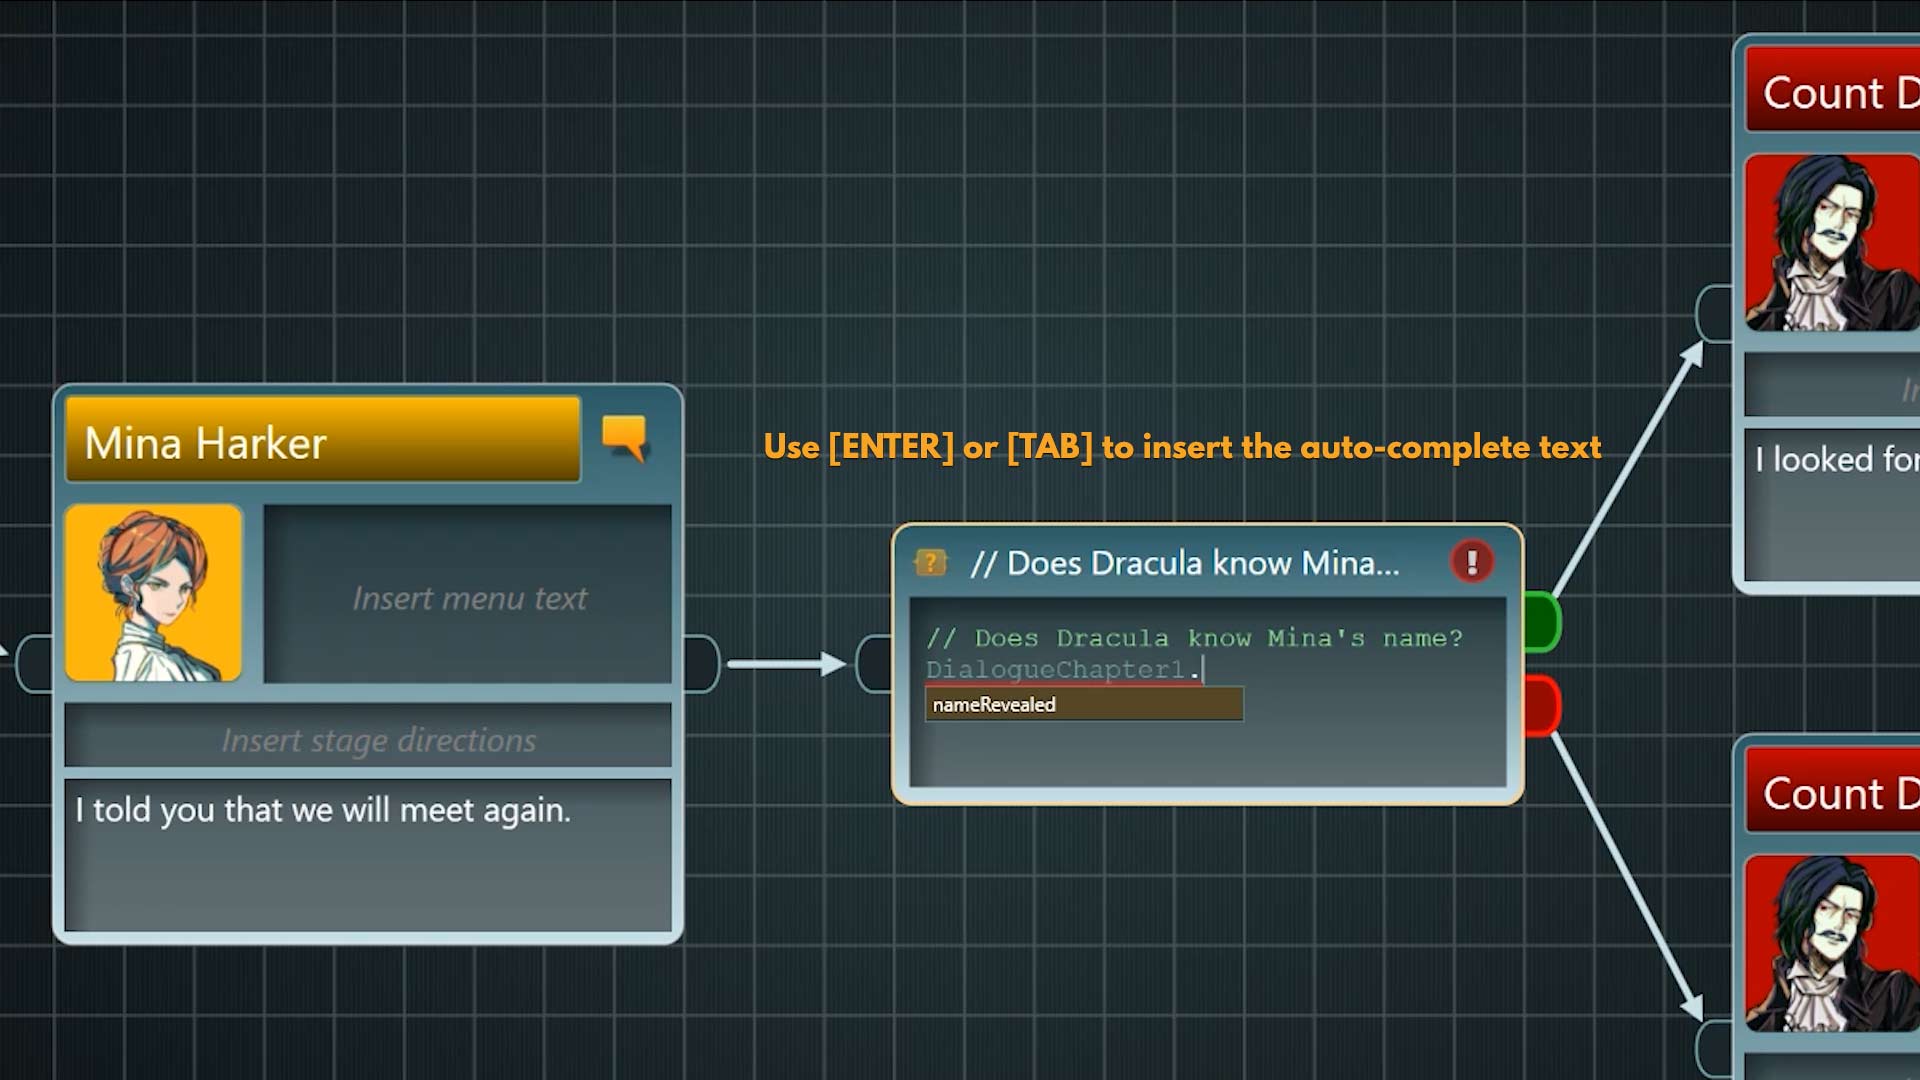
Next comes the variable name, separated by a dot. As we only have one variable in this set so far, the name is displayed in the selection drop down right after typing the dot. Again complete by pressing Enter or TAB.
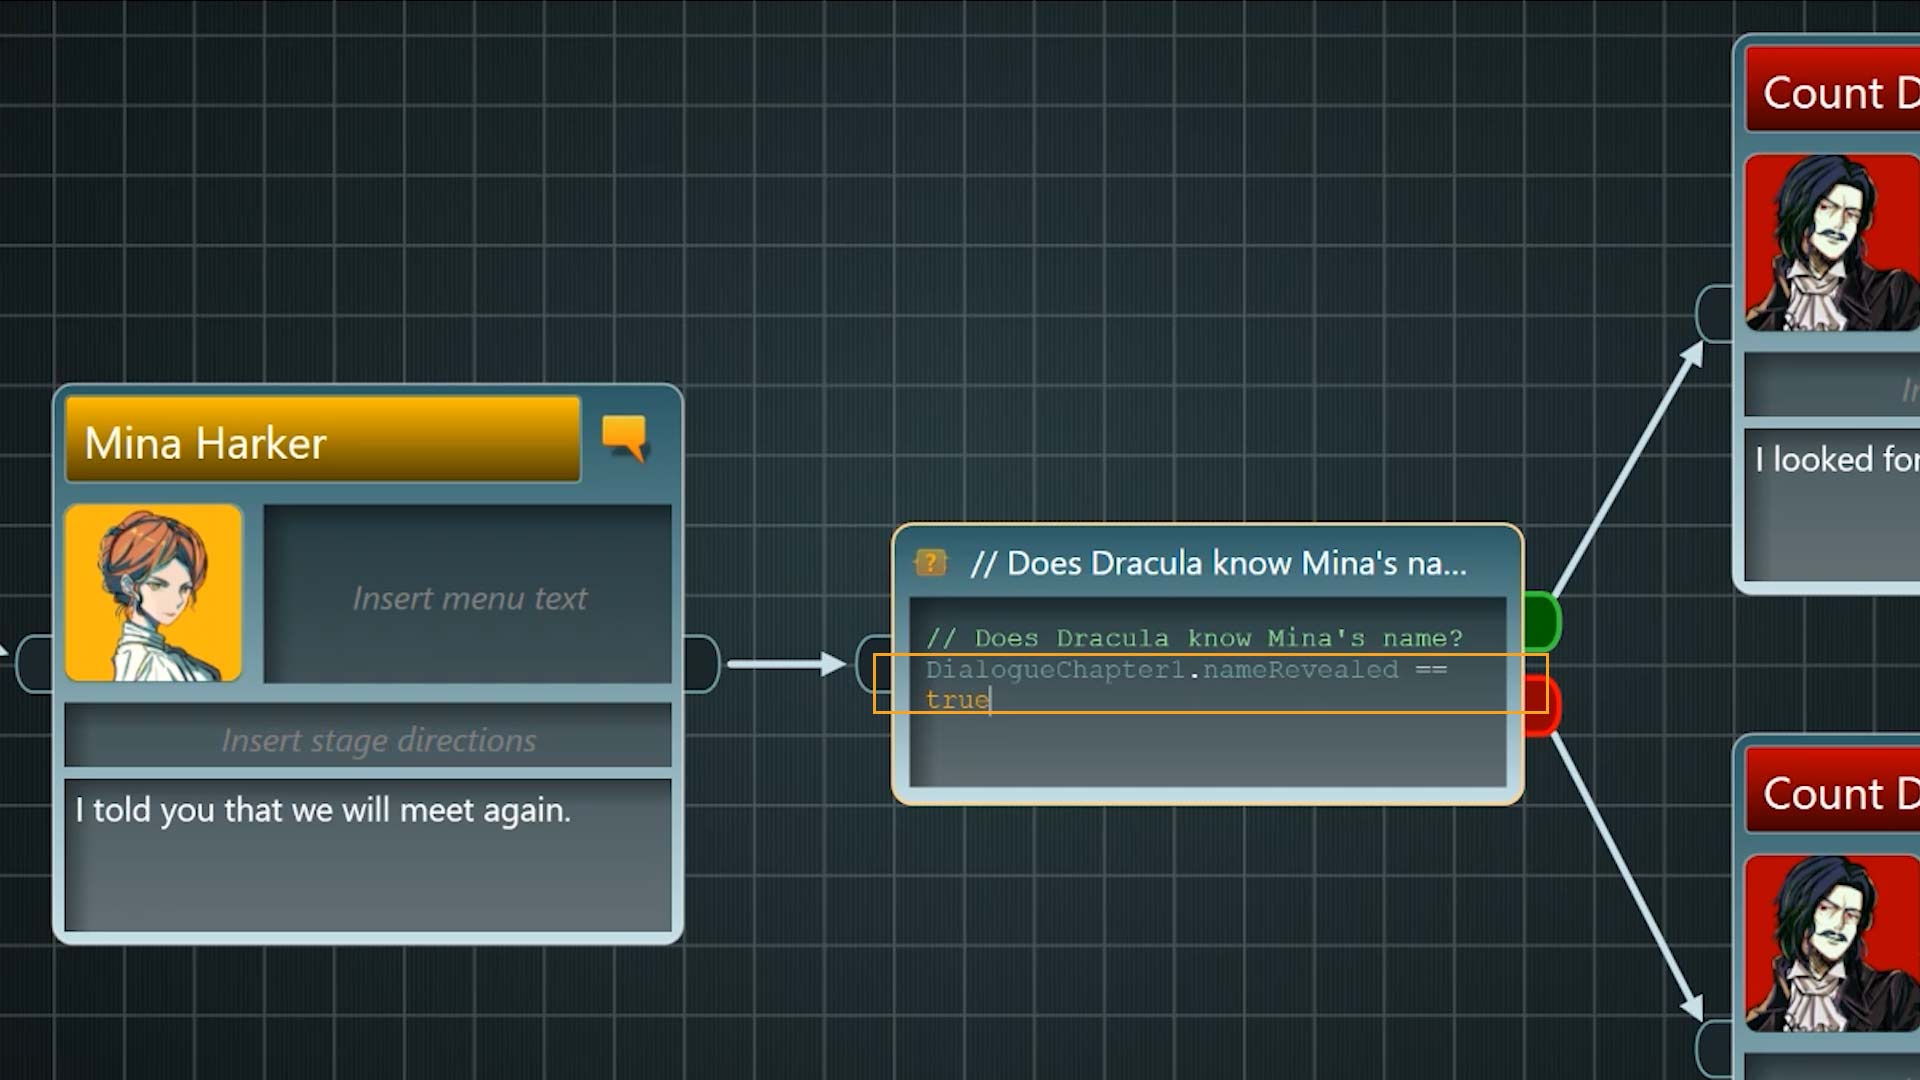
Next is the operator. We want to check for a specific value therefore we use the relational operator “==”. The variable was created with a default value of false. It gets set to true within the first dialogue, if Dracula finds out Mina’s name. We will check for the true state. So our complete expression will read: “DialogueChapter1.nameRevealed == true”.
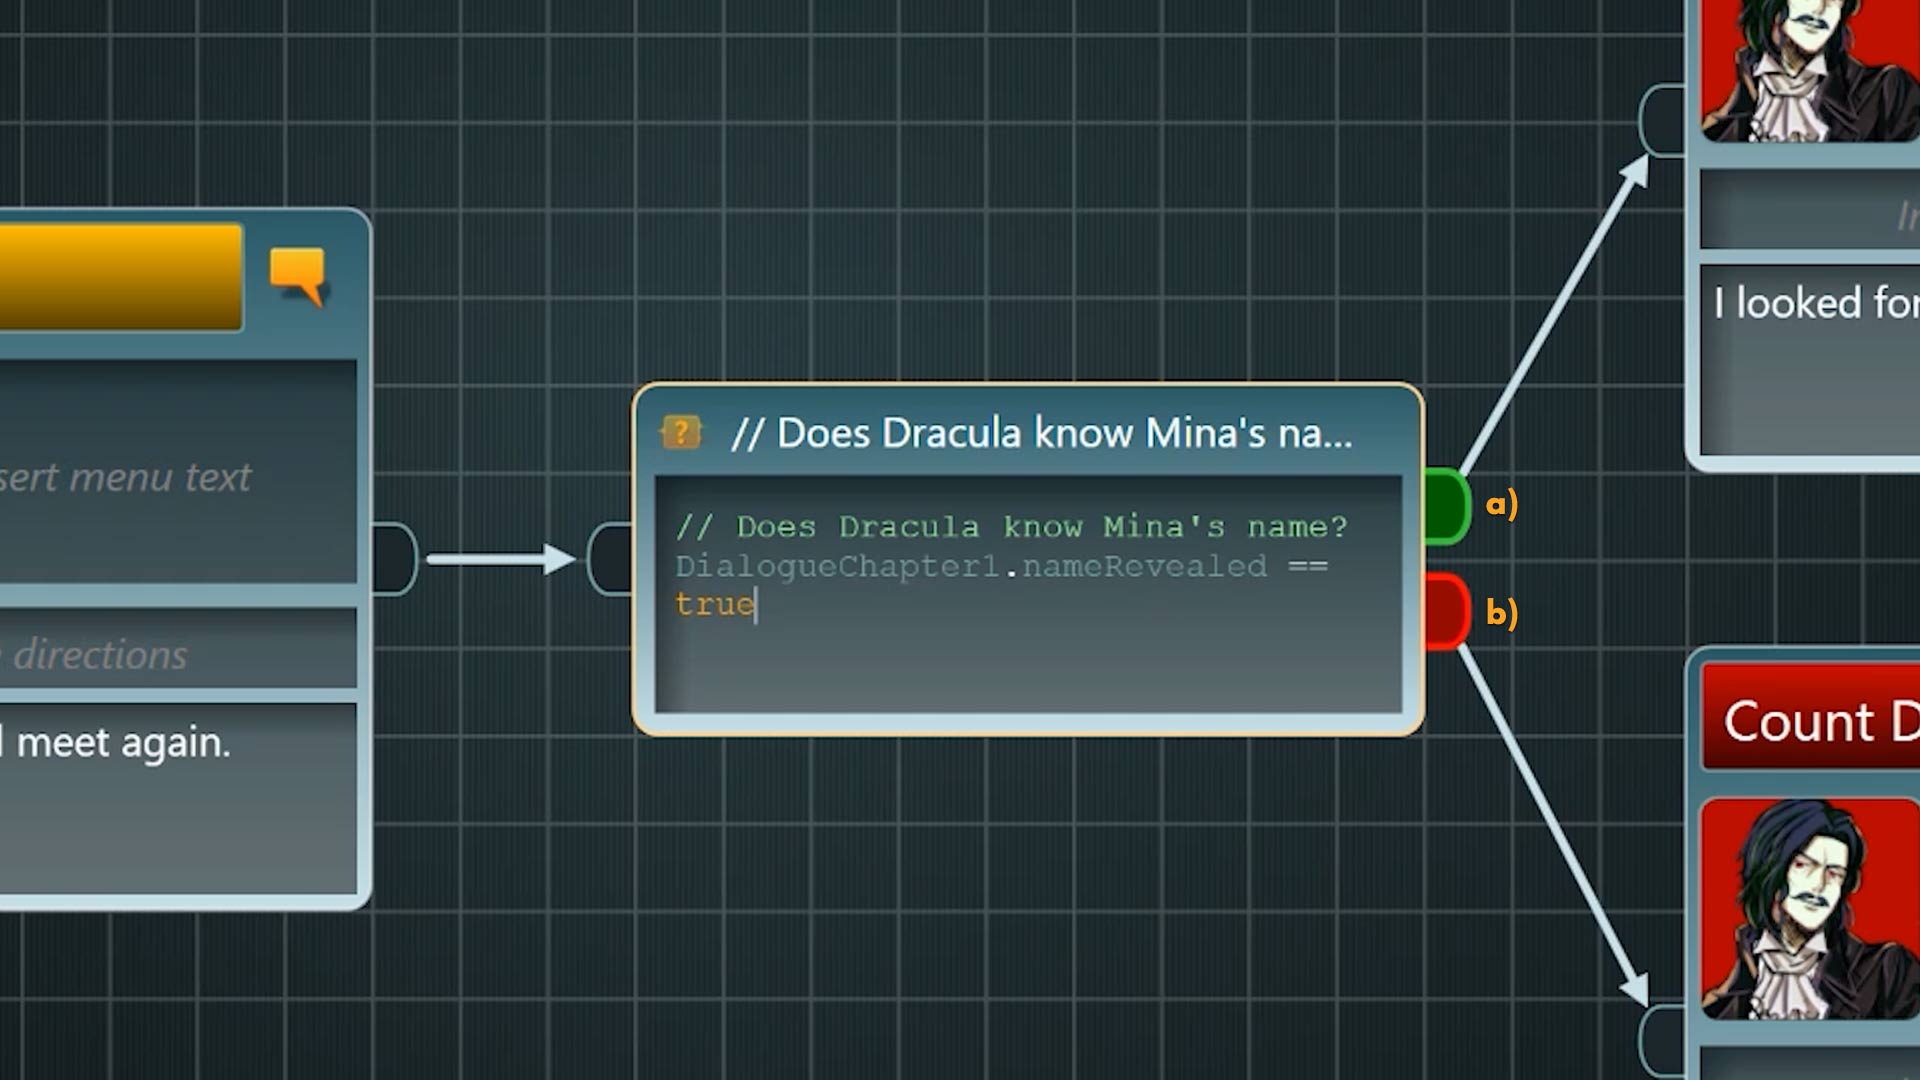
If the entire expression is true, which happens if the variable value is true, the conversation will continue through a) the green output pin. If Dracula did not find out Mina’s name back in the first dialogue, the flow will continue through b) the red pin.
After the reaction point the dialogue merges down to one branch again. Shortly after, we arrive at a point that looks a bit busier – we have four outgoing connections from this node and two connections that point to the input pin from positions further down the Flow.
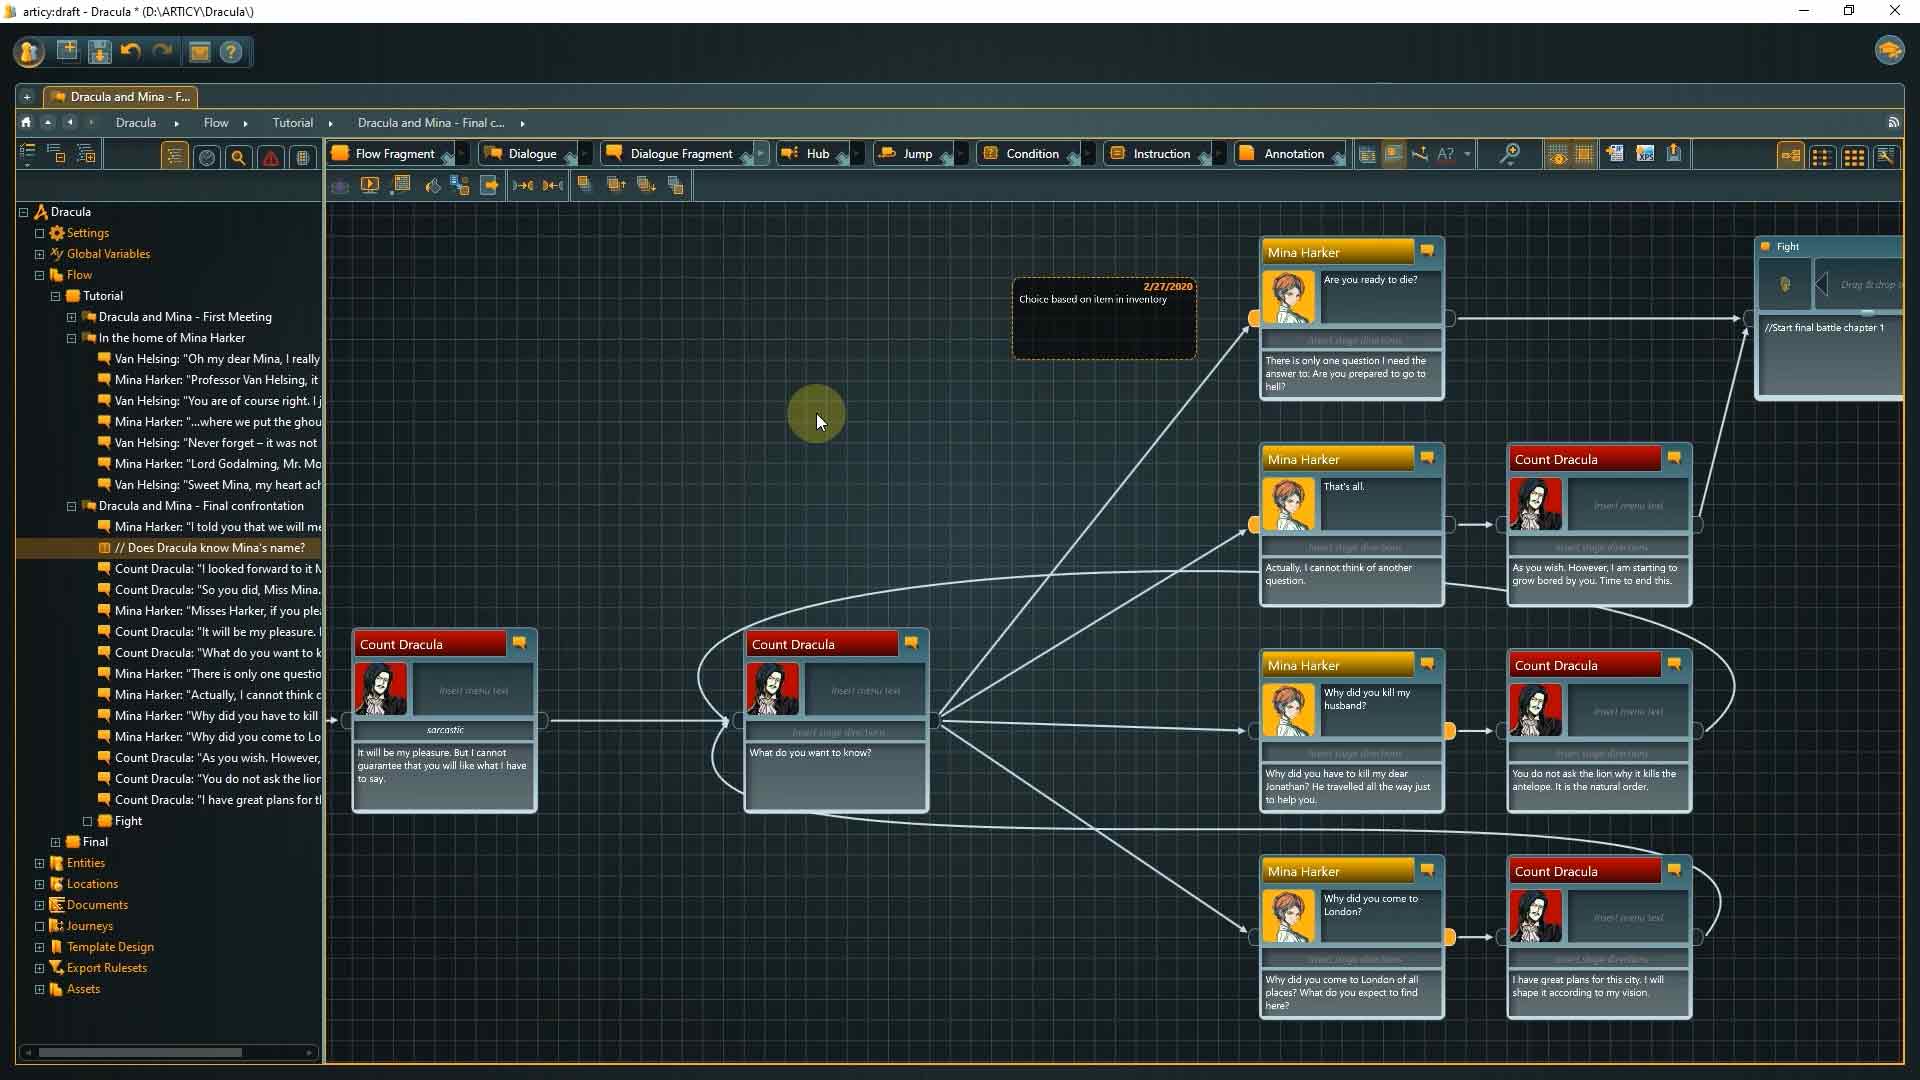
The outgoing connections mark another choice point for the player. There is a difference to the choice point in the first dialogue however – not all choice options are always available.
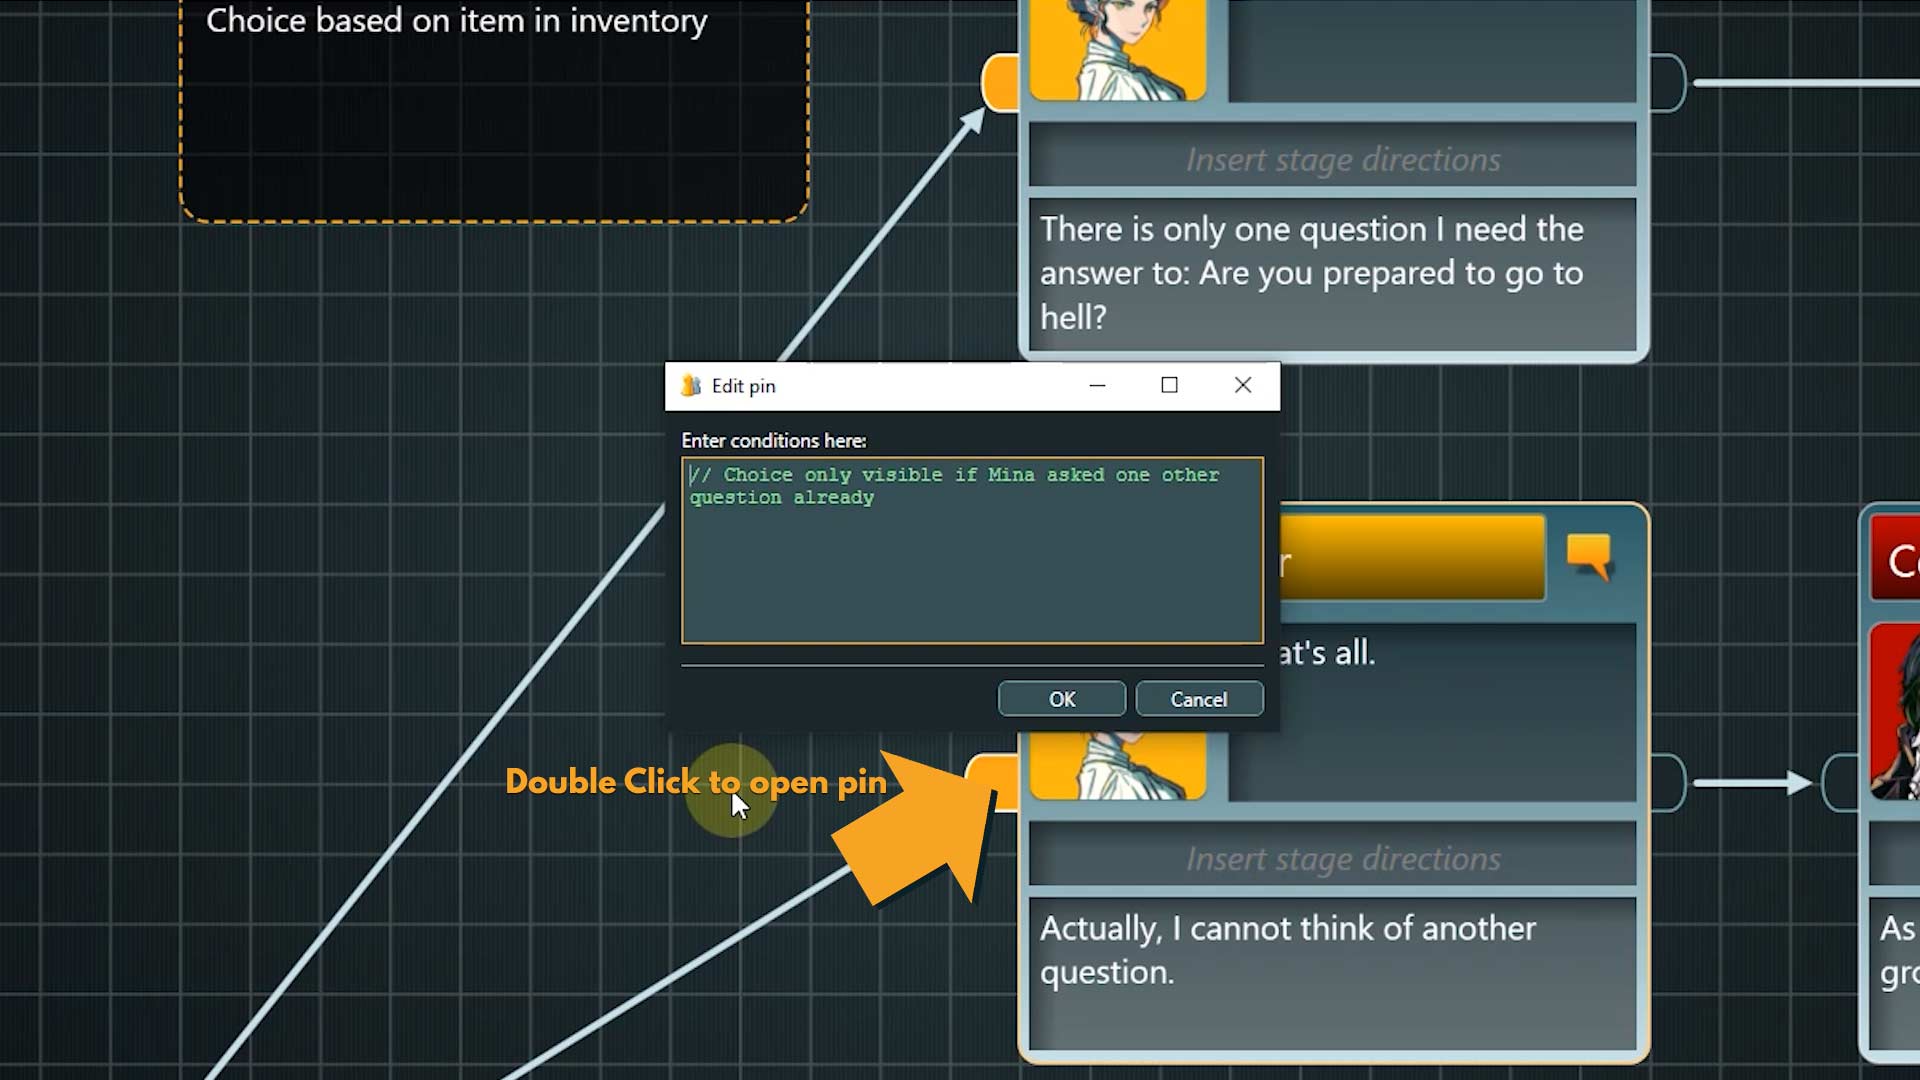
If you look closer at the input pins of the choices, you can see that the first two are highlighted in orange. That means that these pins hold additional information – in this case Conditions.
Sometimes it is not possible to use a Condition node, for example in a case like this, where more than two options are available. To be able to have some of the choices only appear when certain circumstances are met, we can put Conditions into input pins. If you hover over a pin its content is displayed in a small pop-up.
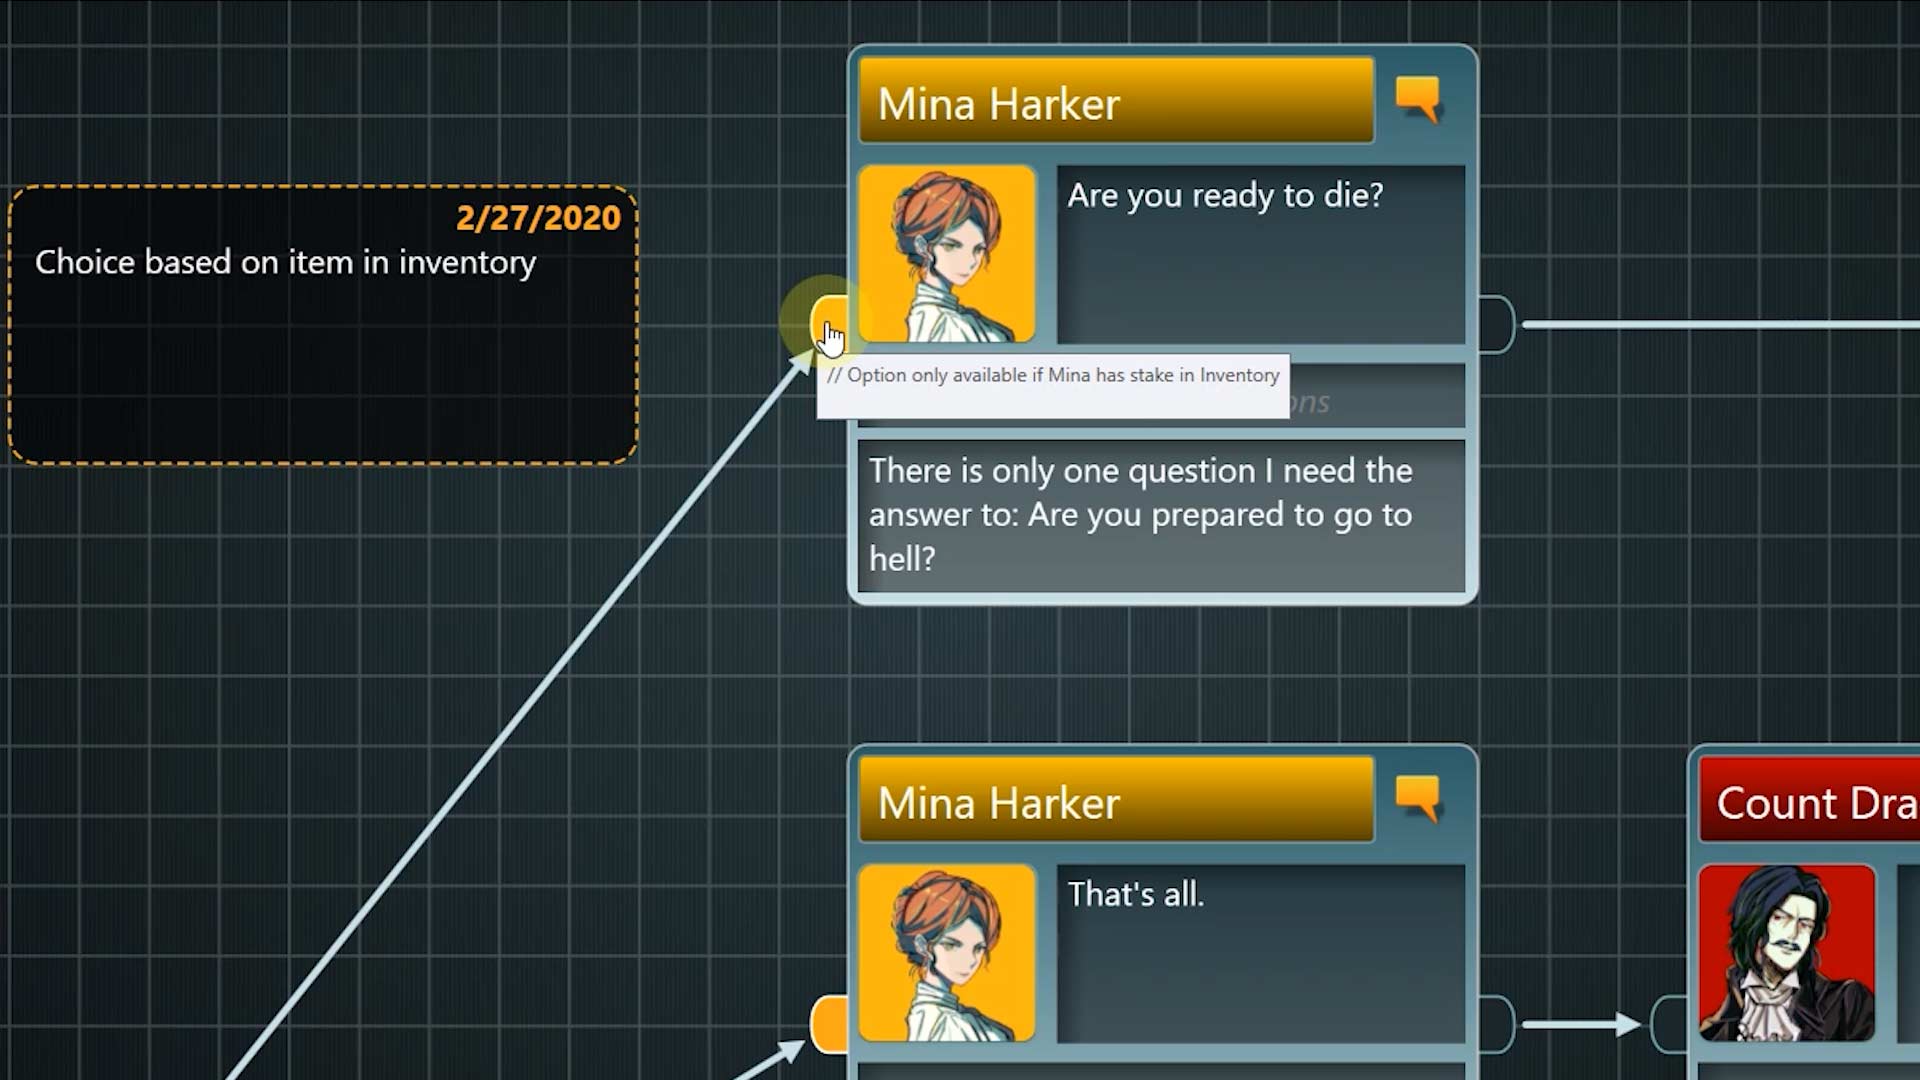
6. Double click the input pin to open its Edit window. We have another comment telling us what we are supposed to do here: This dialogue option should only be visible to the player if Mina has the Stake item in her inventory.

In Lesson 11 we created the Stake item and also a new variable set, representing Mina’s inventory. Can you guess what the Condition needs to look like? It is very similar to the one before – we check for the value of a variable. Only this time we are dealing with a different variable set. “Inventory.Stake == true” – that is our expression here.
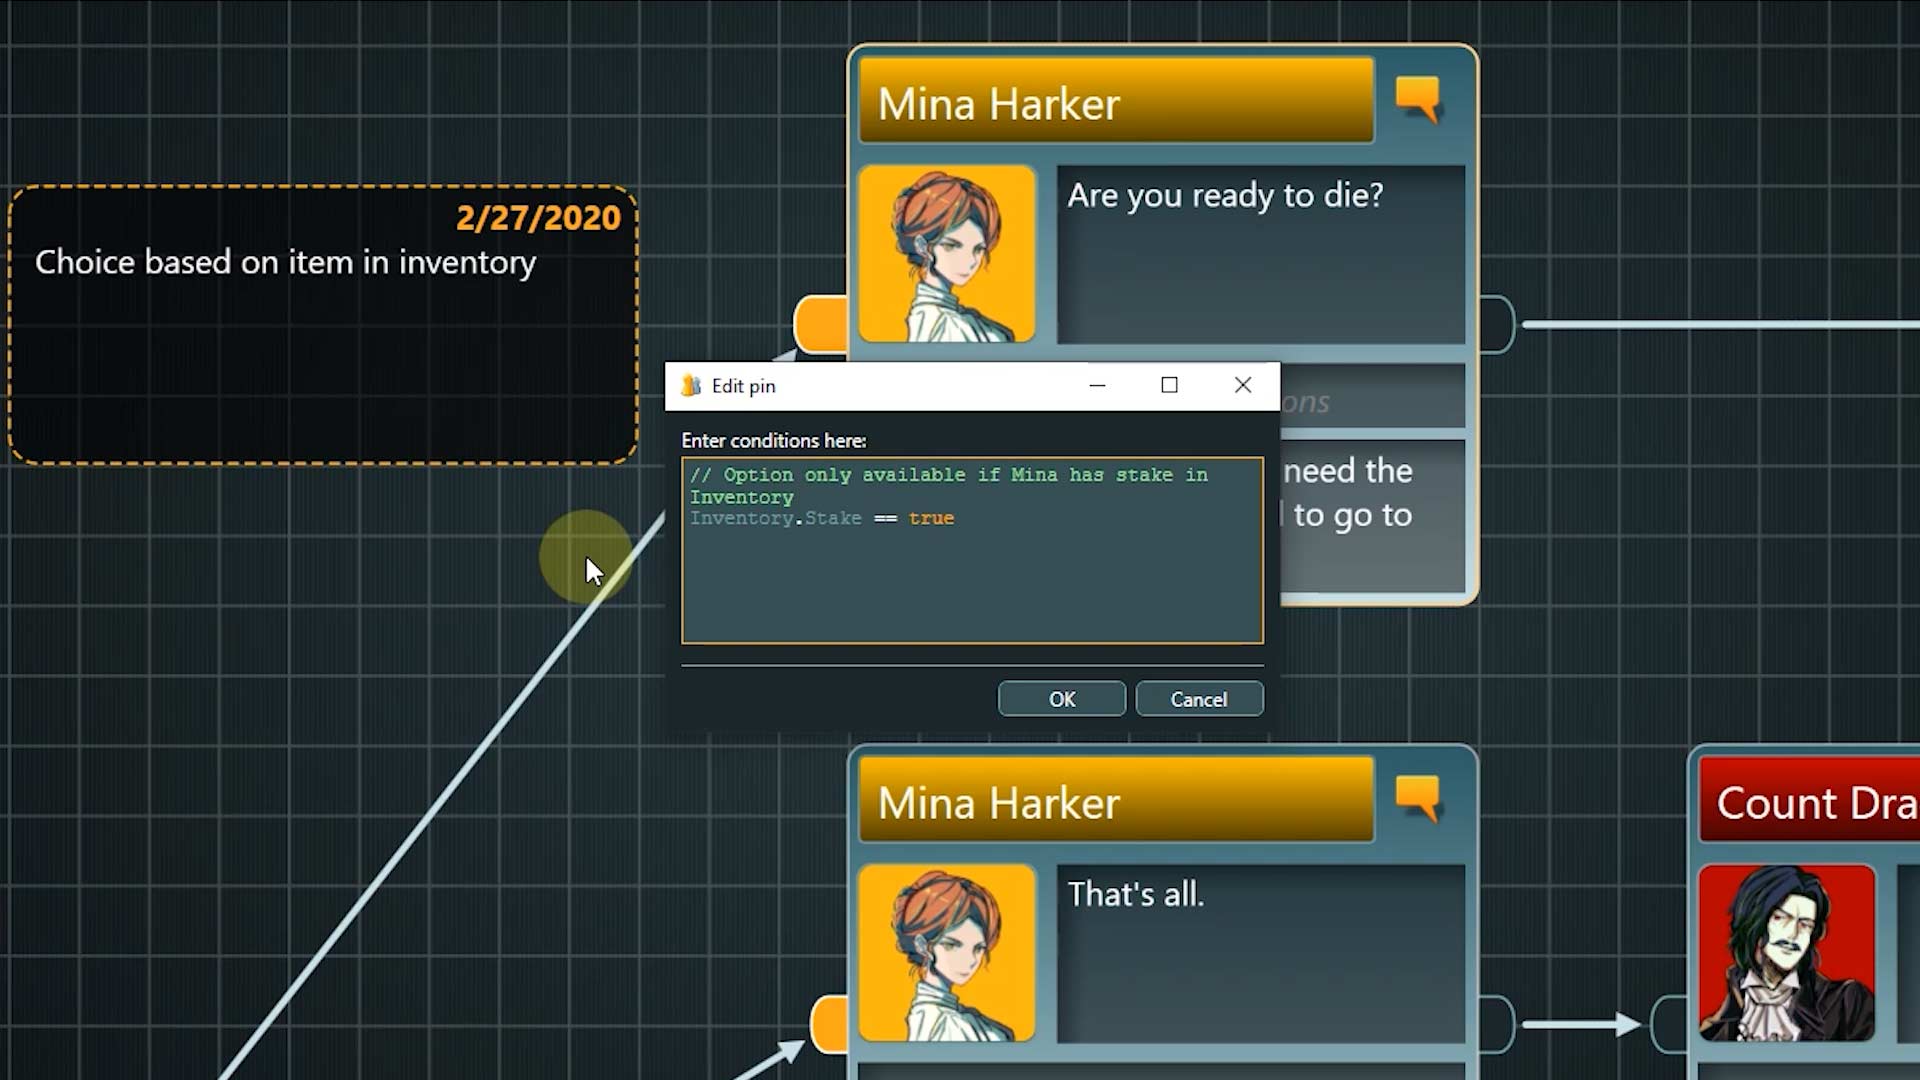
If Mina did at any point of the story pick up the Stake then the variable value will be true, which means the entire expression returns true as well. That means the dialogue option is available for the player. If Mina did not receive the item yet – which is currently the case in our project, the expression will be false and this dialogue option will be hidden from the player.
If this option is available to the player and gets chosen, the dialogue ends immediately and a fight between Mina and Dracula starts that concludes this first chapter of the story. It is symbolized by a placeholder node in articy, as the actual combat mechanics would be realized in the game engine.

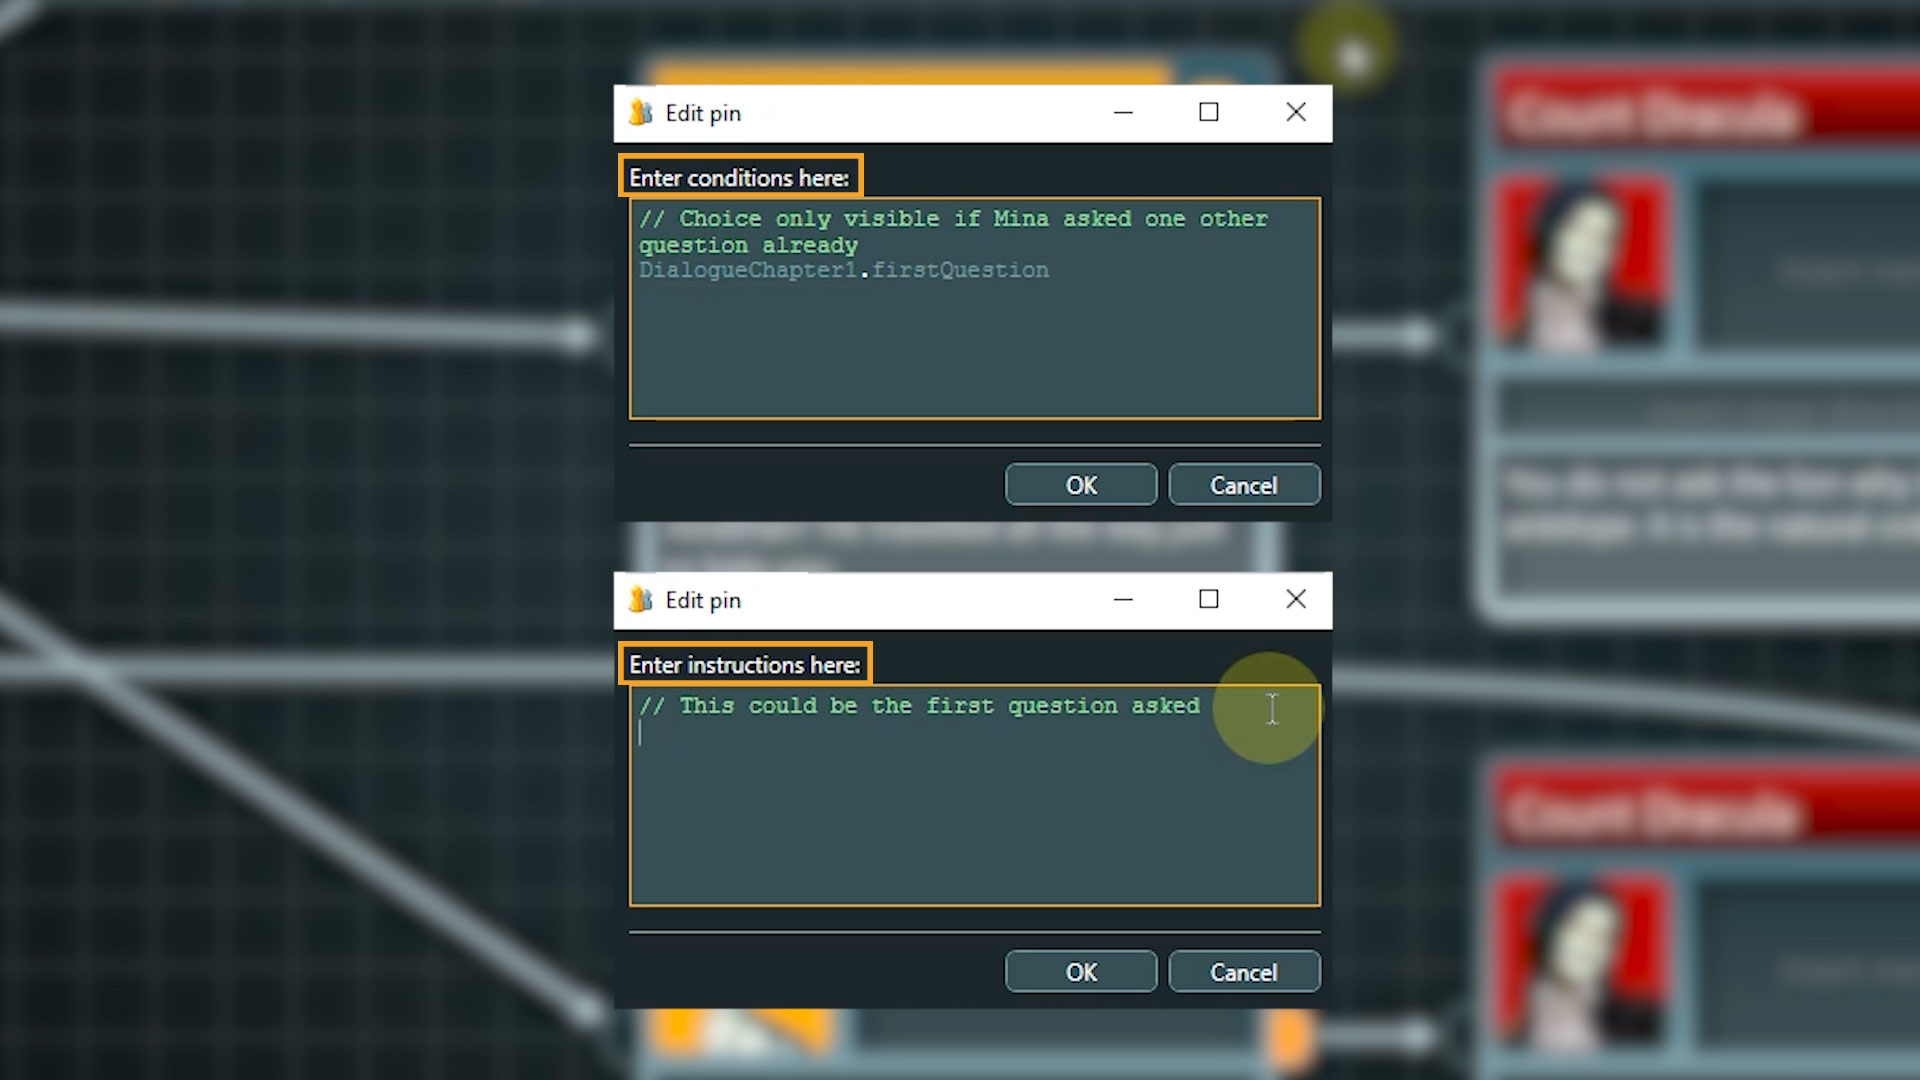
Open the input pin of the second choice now and look at the comment. Here we are supposed to add another Condition, so that this dialogue option is also only visible if the Condition is met. This option is only supposed to appear after the player asked at least one other question.
Okay, how can we realize this? Any ideas? There is no new functionality involved, we can do it with the tools we have seen so far.
Let’s look at it step by step: From the Conditions we worked with earlier today we learned that if a Condition inside an input pin returns false for the overall expression, the flow does not continue through this node, in case of our choice point it means that this particular option is not displayed to the player. That means we want to phrase the Condition in a way that the first time the player arrives at this choice point the expression returns a false value for this option.
But before we can check for anything, we need to create a variable for this situation.
7. Click the entry “DialogueChapter1” beneath “Global Variables” in the Navigator to go directly to this variable set.
8. Now create a new variable by clicking the “Create variable” button in the toolbar.

I’ll call it “firstQuestion” and enter a short description. Boolean as a default type is correct, but I will change the default value to True.
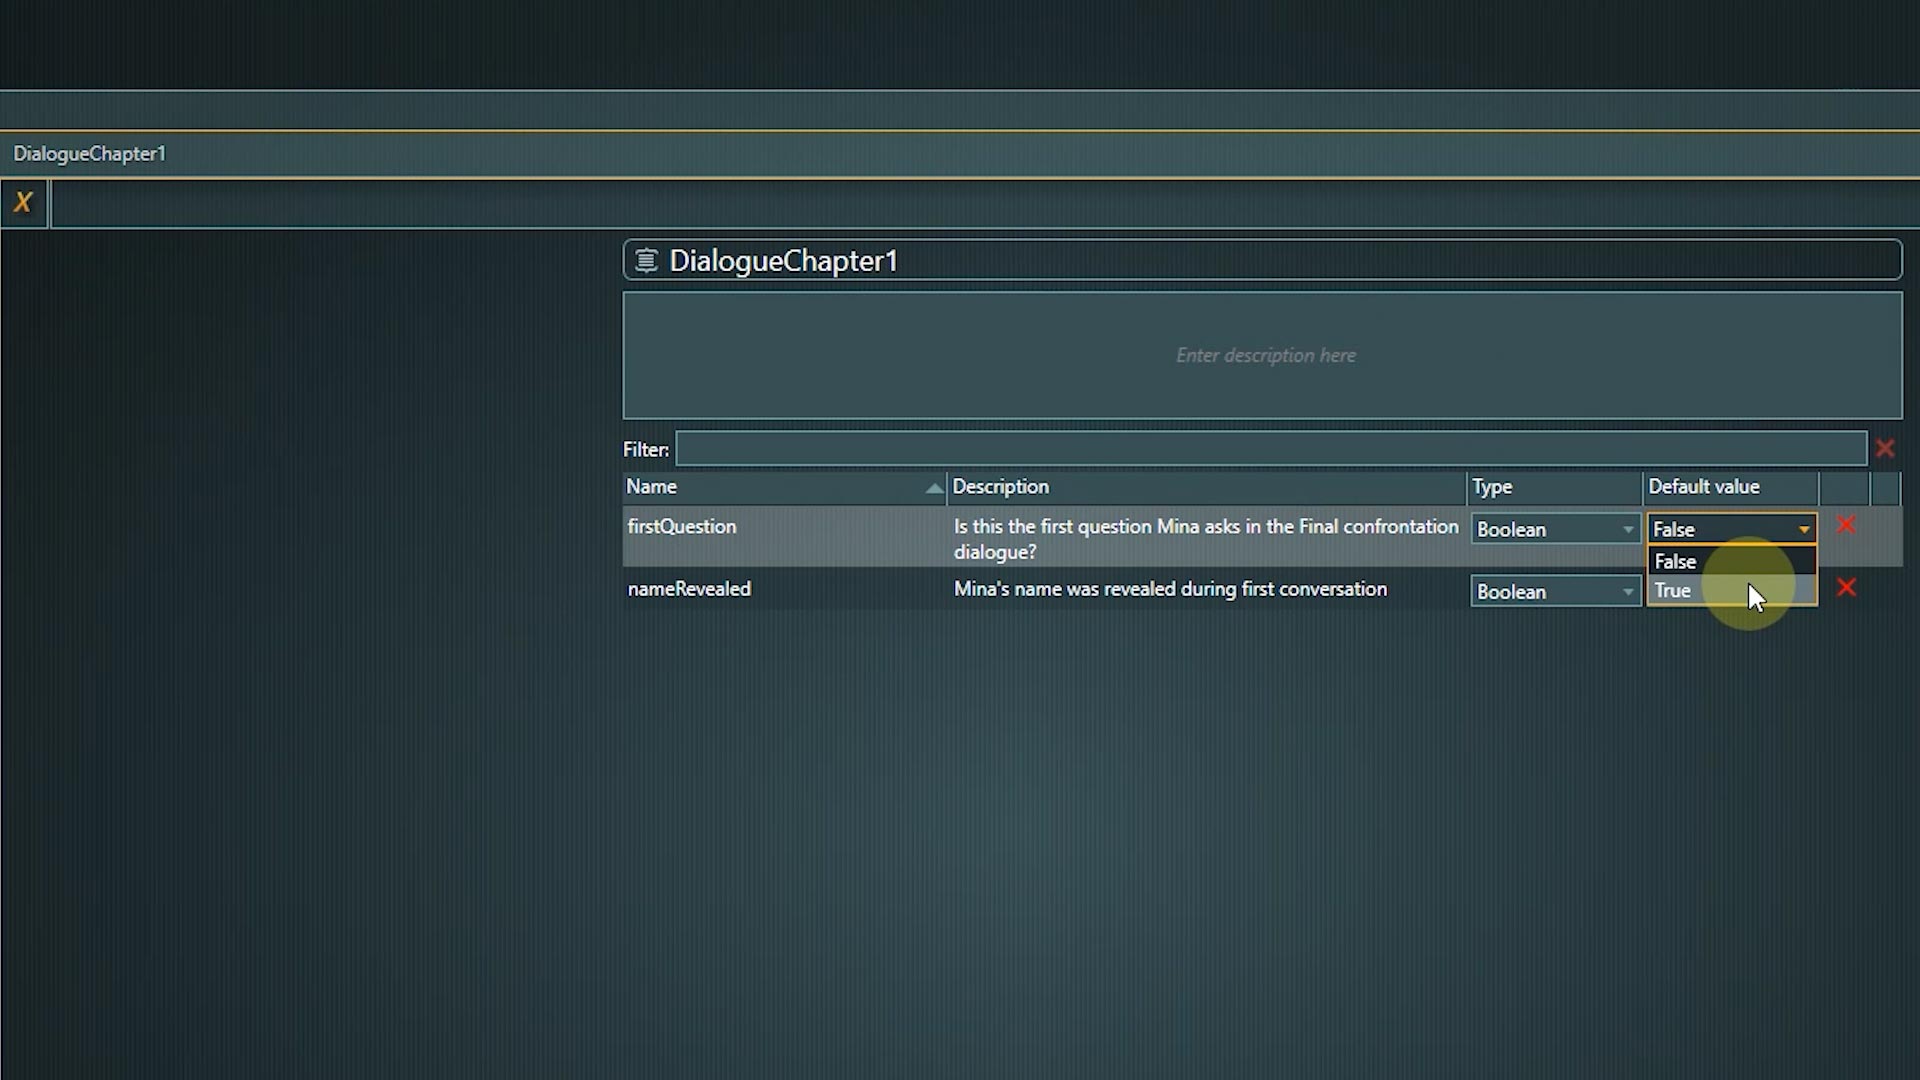
I tend to choose the starting value in a way that phrasing scripting expressions make the most logical sense for me. You will be able to see my train of thought in a minute, when we get to write the scripting expressions.
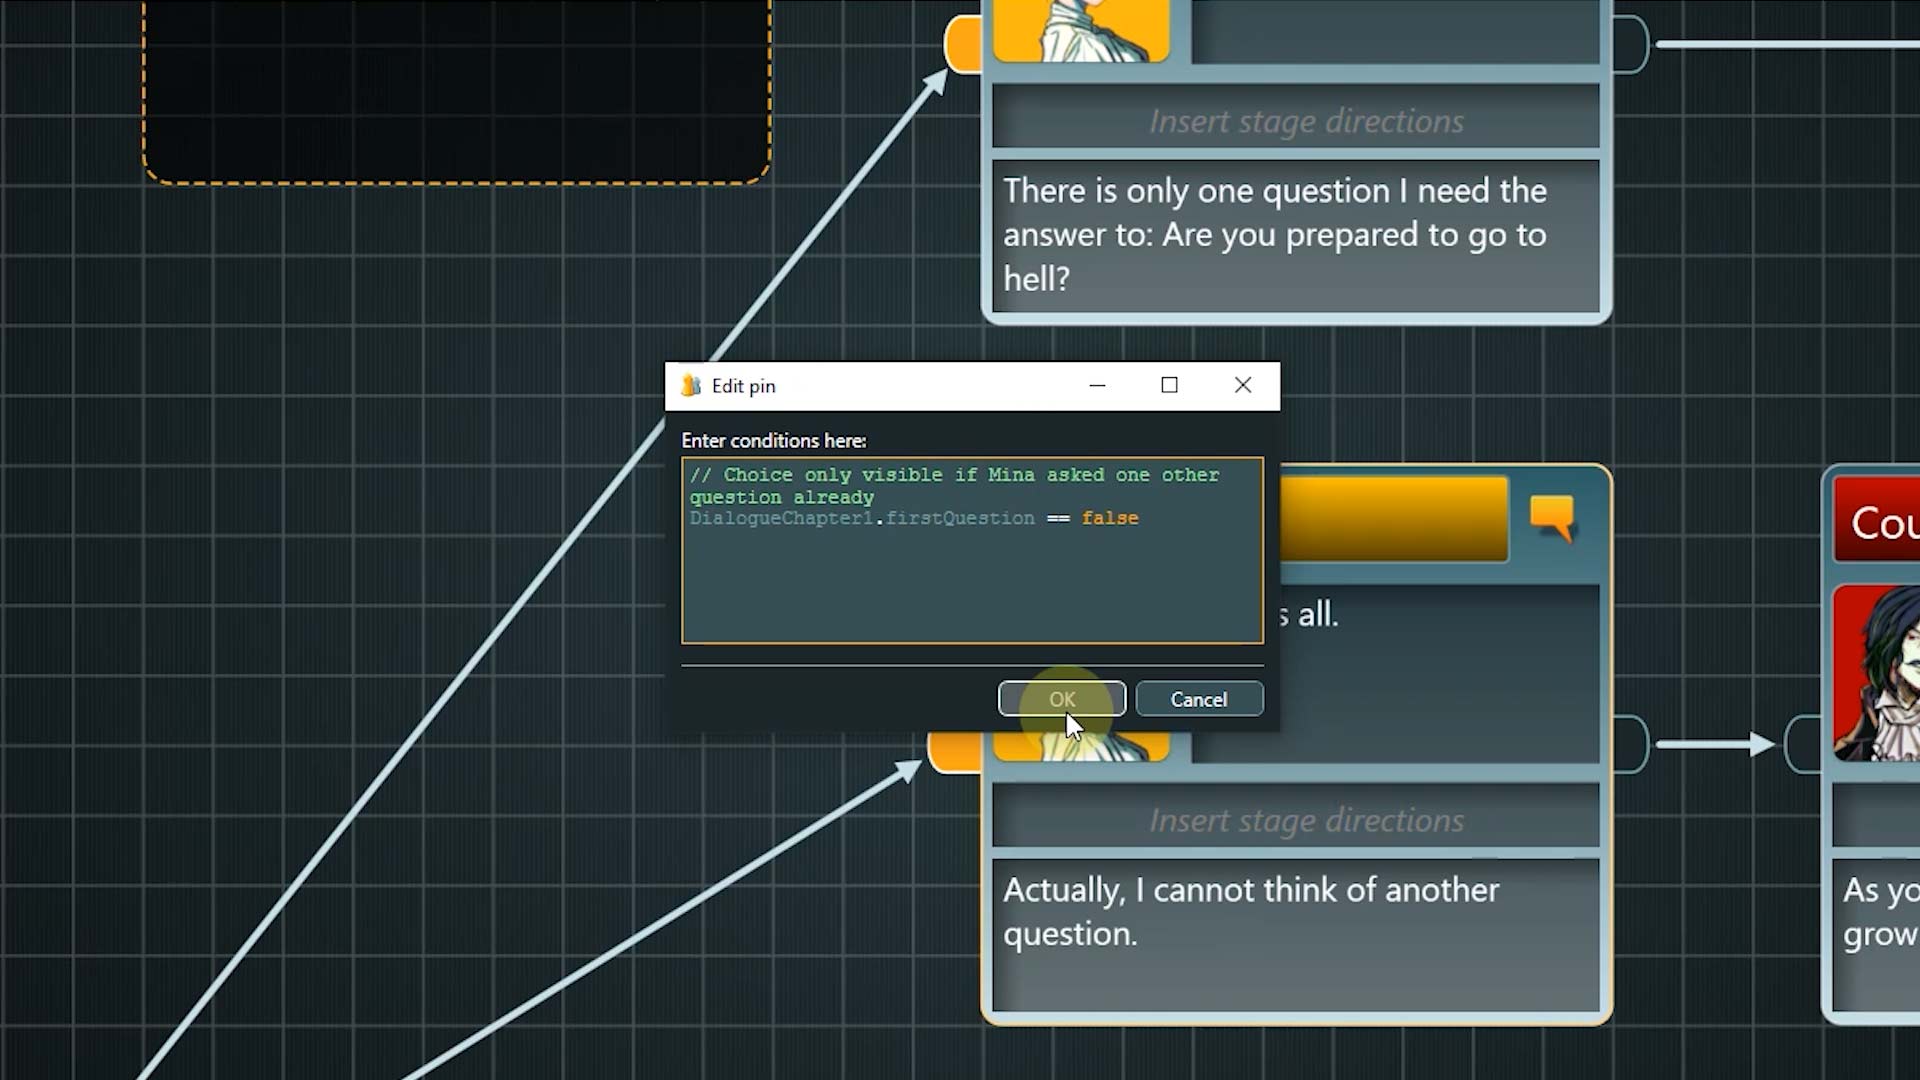
9. This is the only variable we need, so we can go back to the dialogue now. Open the Edit window again by double clicking the node’s input pin.

The first part of the expression should be pretty easy: “Variable set name.variable name relational operator” – “DialogueChapter1.firstQuestion ==”.
But what do we check for now? Remember, the starting value for the variable is true. Is this the first question? Yes. But we only want this option to appear if the player asked another question first, so we need to check for a false value here.
Great. First step taken. Now we only need a way to change the value of the variable. This we will be doing with the last two choices. There you can see that the output pins are highlighted in orange. That means that now we are dealing with Instructions.

👉 Conditions always go into the input pin, as something is checked to determine if the node will even be accessible. Instructions are placed in the output pin to change some value or state after going through this node. You will also see what kind of content is expected as a prompt inside the pin’s edit window.
The last two dialogue options are always available to the player. So this is where we will put in our instructions. The first option could be visible if Mina has the Stake, but as this option ends the dialogue right away, we don’t need to add an instruction here.
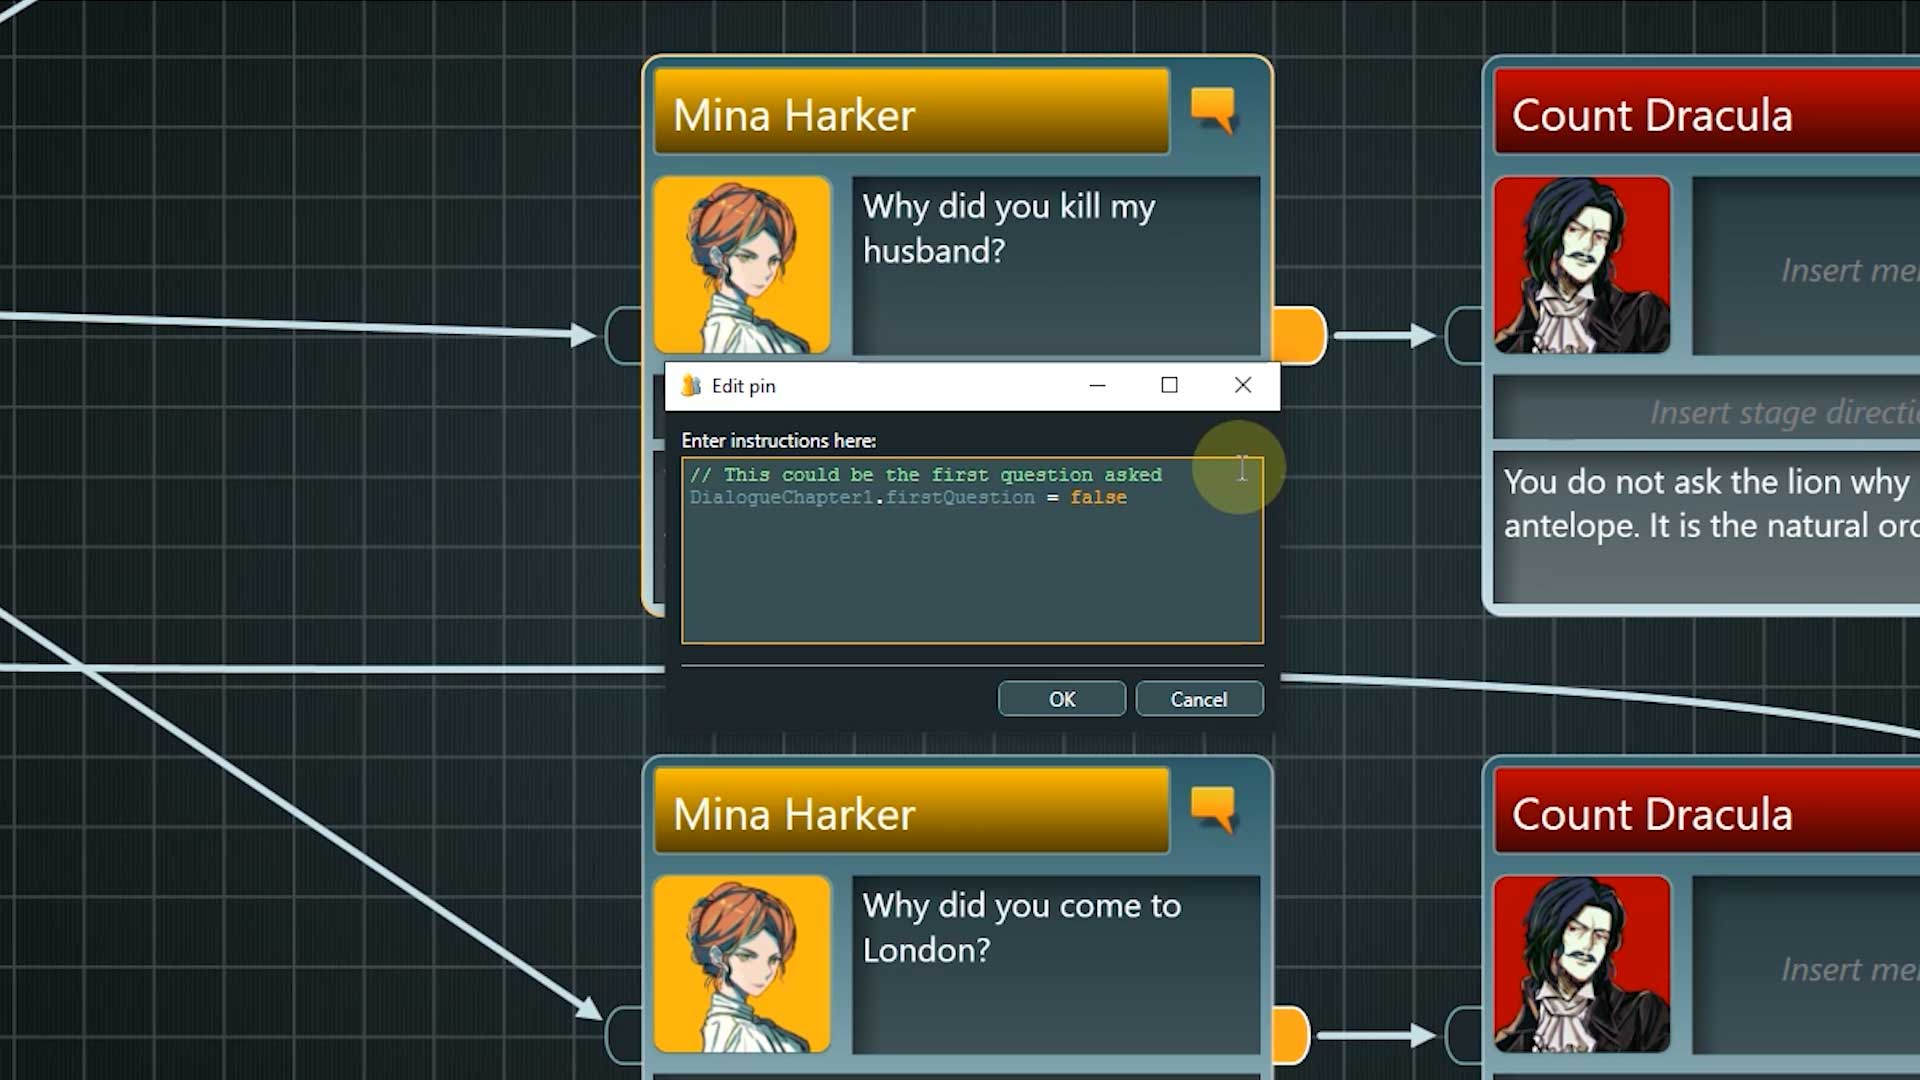
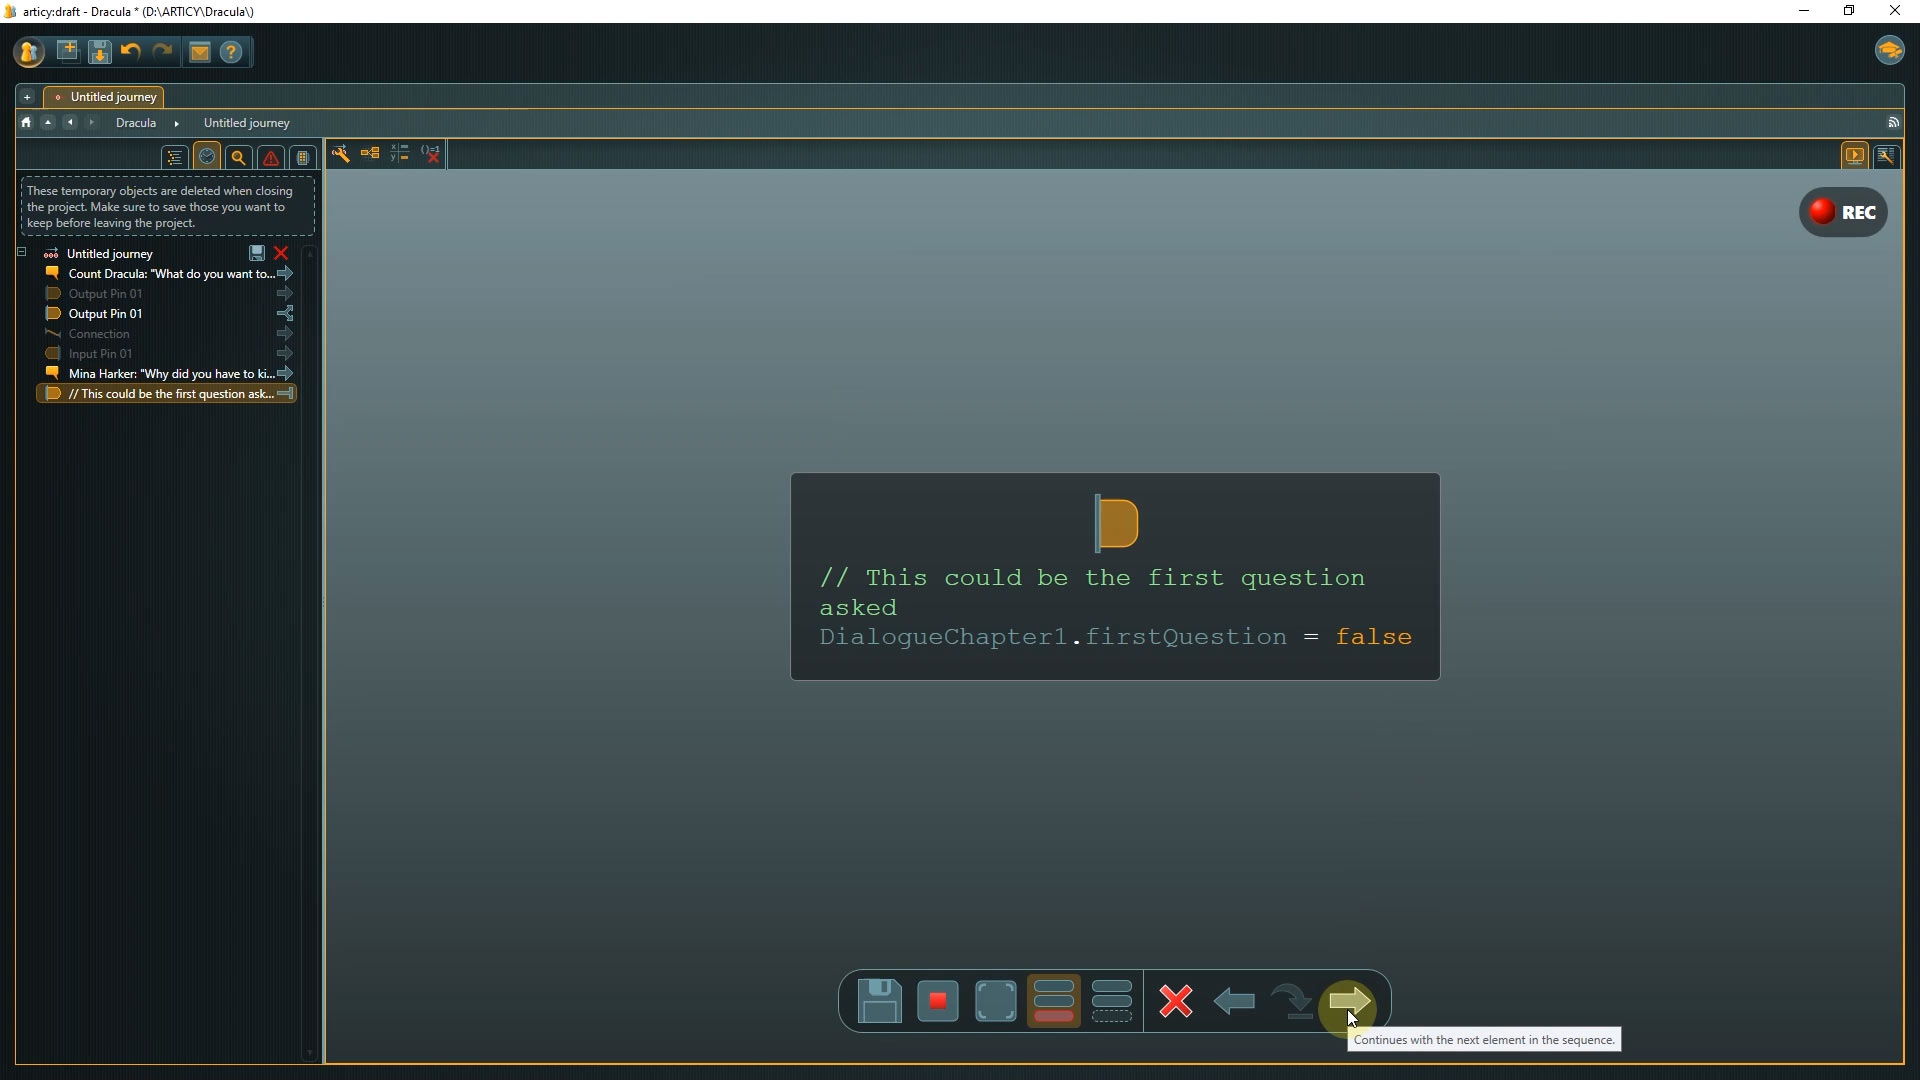
10. Open the output pin by double clicking. We now need to change the variable value. After going through the node we are no longer at the point of the first question, as we have just asked it, so we need to change the variable value to False.
“DialogueChapter1.firstQuestion = false”.
We can now copy this expression to the remaining node.
If the player chooses either of the last two options they get a response from Dracula and then the flow goes back to the line where Dracula asks what we want to know.
Let’s take a quick look at how this plays out.
Double check the scripting in presentation mode
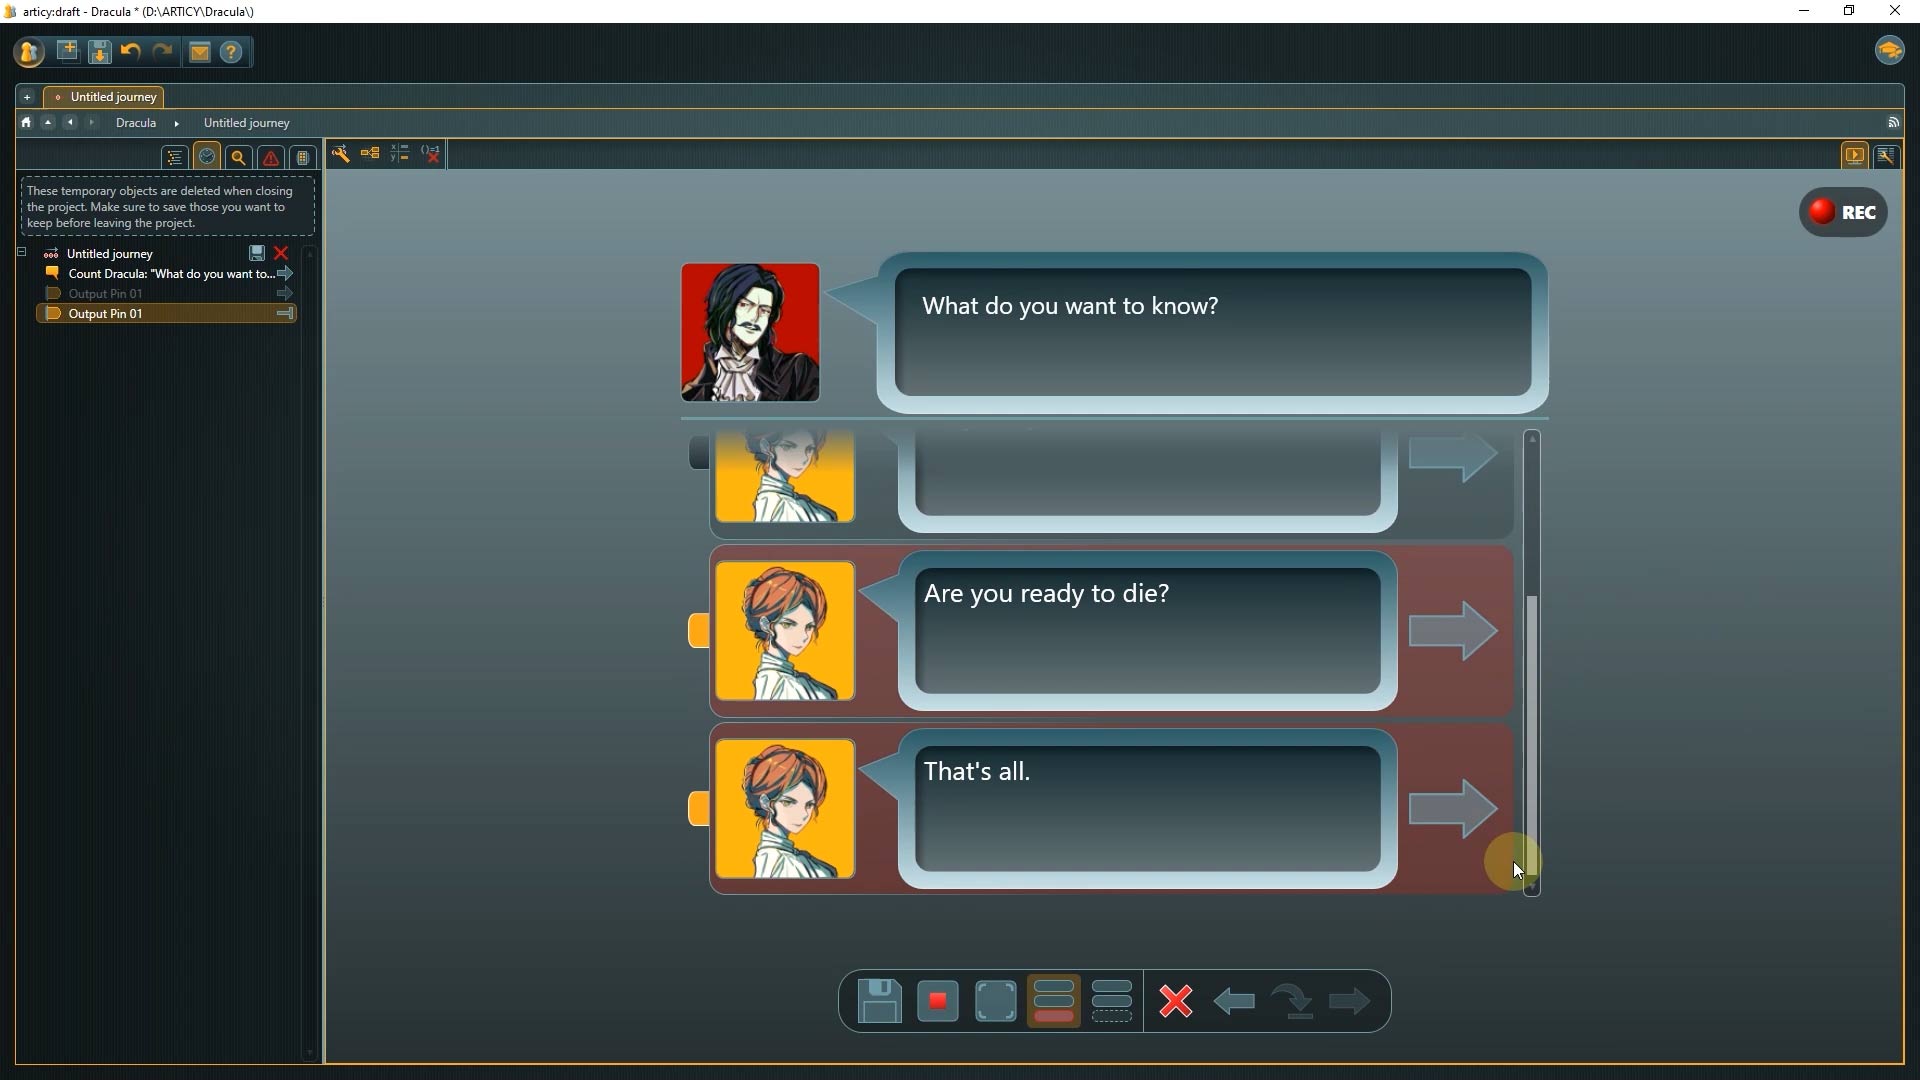
1. Select the Dracula node before the choice point and start a presentation.
2. Check that Analysis Mode is active.
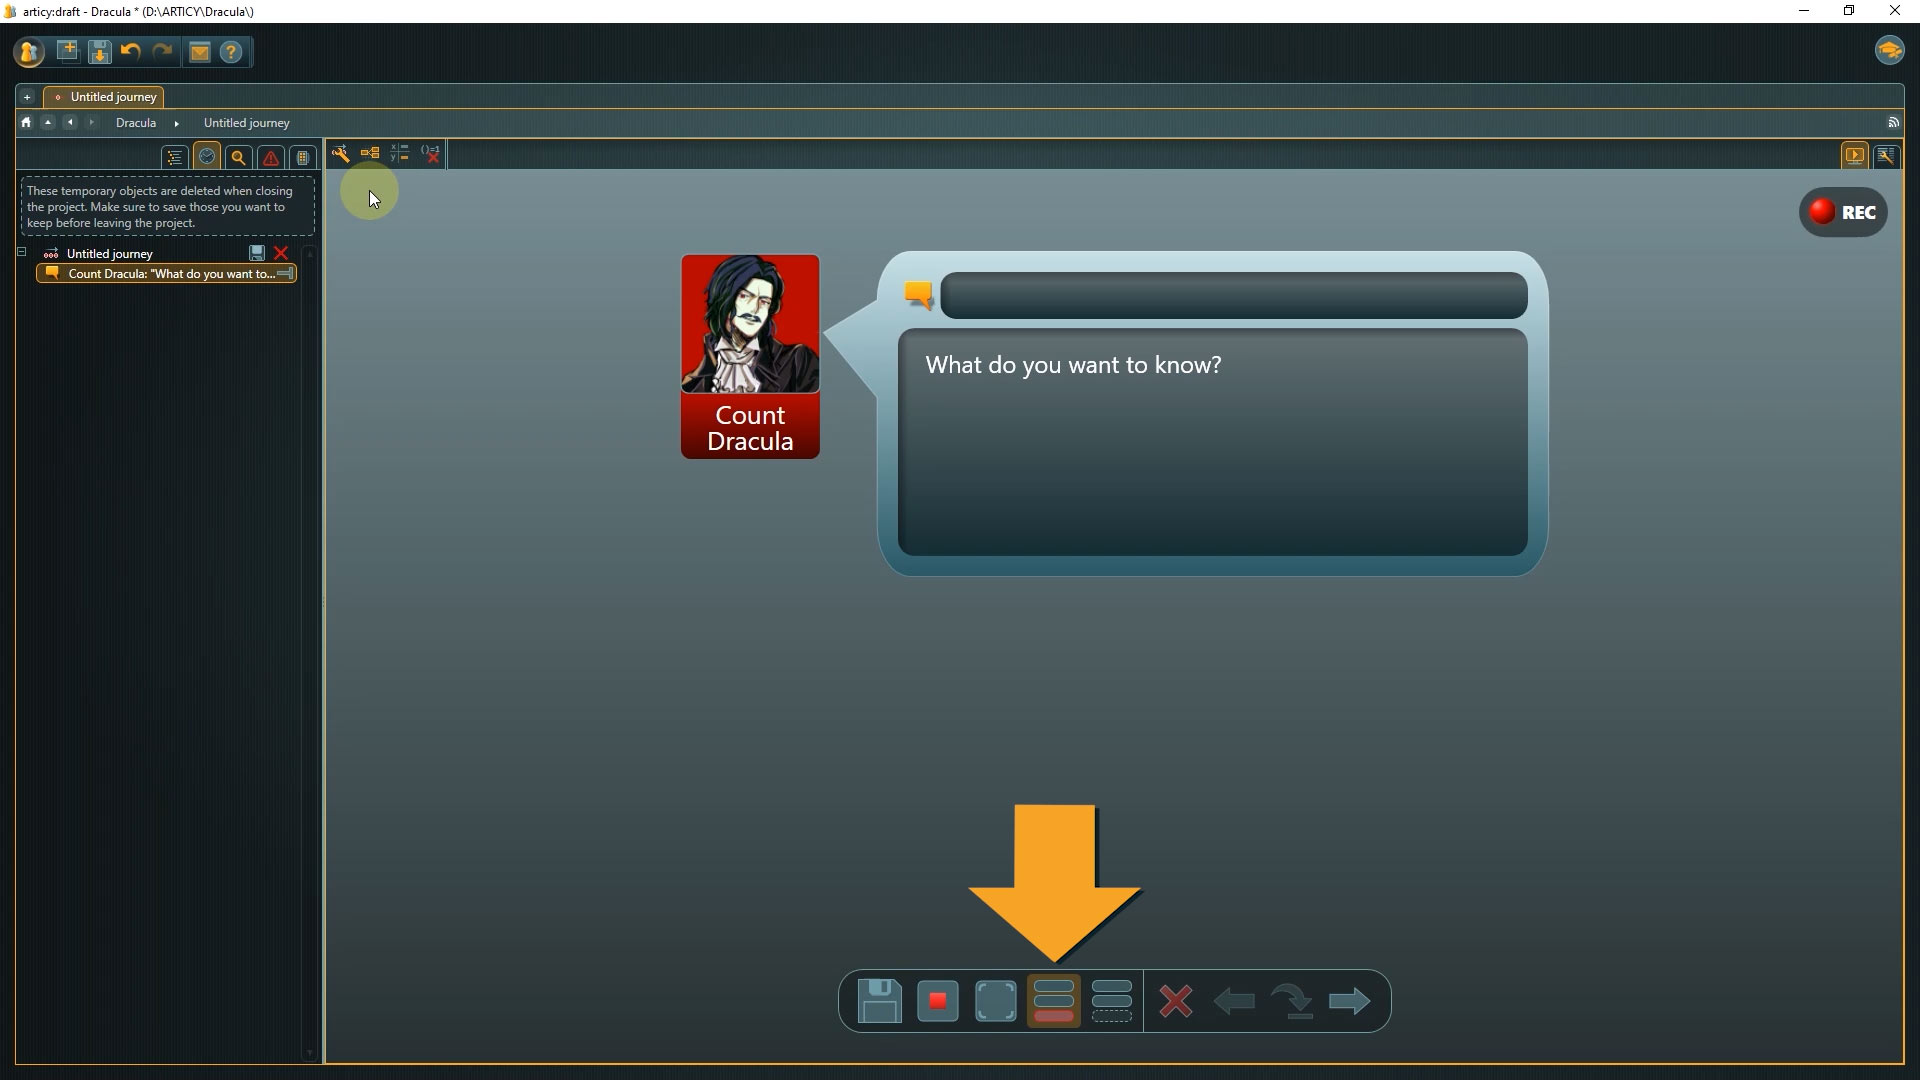
Here we see that only two of the options are valid responses the conditions for the other two are not met, this is why they are highlighted in red. They would not be shown to the player.
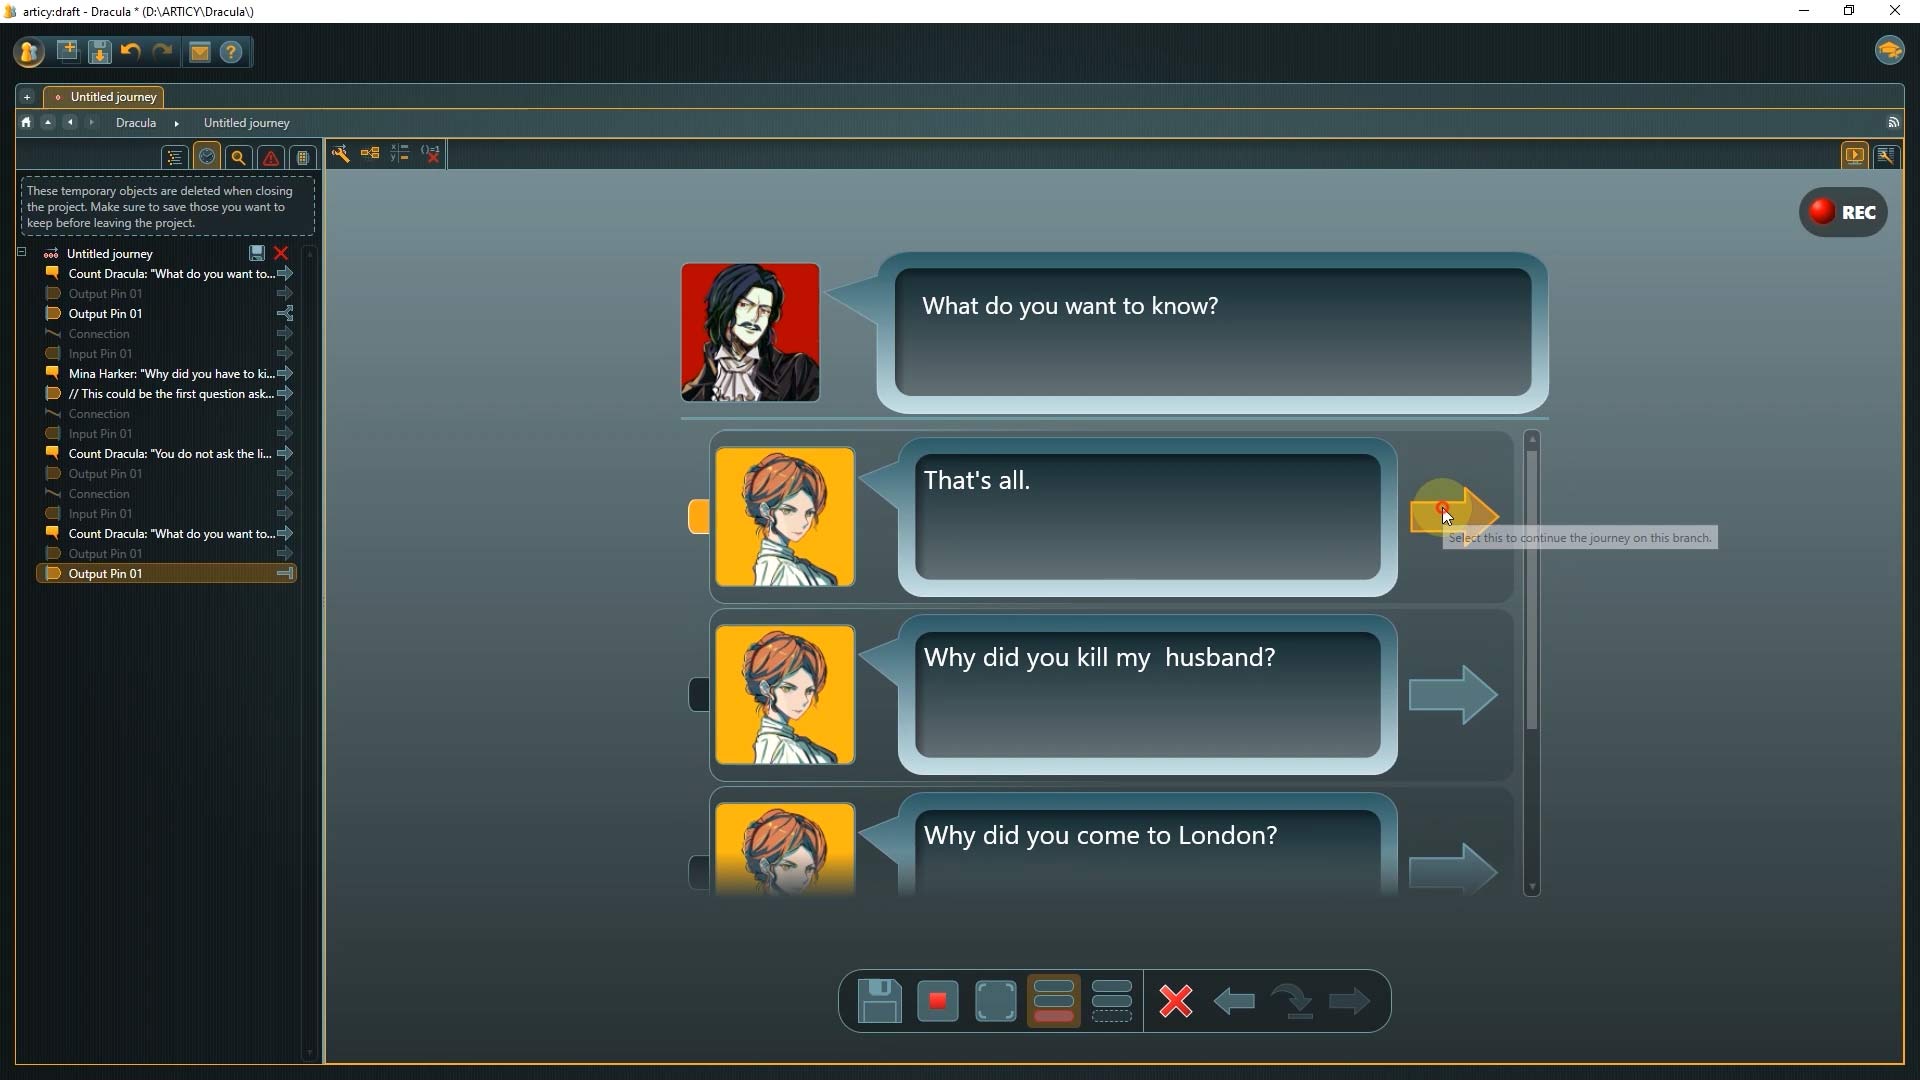
If we continue the conversation, the value for the “firstQuestion” variable gets changed, which results in another option being available when we get to the choice point again.
We can now choose the response that takes us out of the question loop and continues with the final battle.
Very nice.
Recap:
In today’s lesson we have learned that instructions and conditions can be put into node pins, and we improved the dialogue by adding some interactivity through scripting.
Up Next:
In our next lesson we will continue working with this dialogue and update its structure with Hub and Jump Flow elements.

Thank you for joining us, and join us again in our next tutorial.
Useful links:
Don’t have articy:draft X yet? Get the free version now!
Get articy:draft X FREE
*No Payment information required
Follow us on Twitter, Facebook and LinkedIn to keep yourself up to date and informed. To exchange ideas and interact with other articy:draft users, join our communities on reddit and discord.