Hello and welcome to lesson 2 of the articy:draft Importer for Unreal tutorial series.
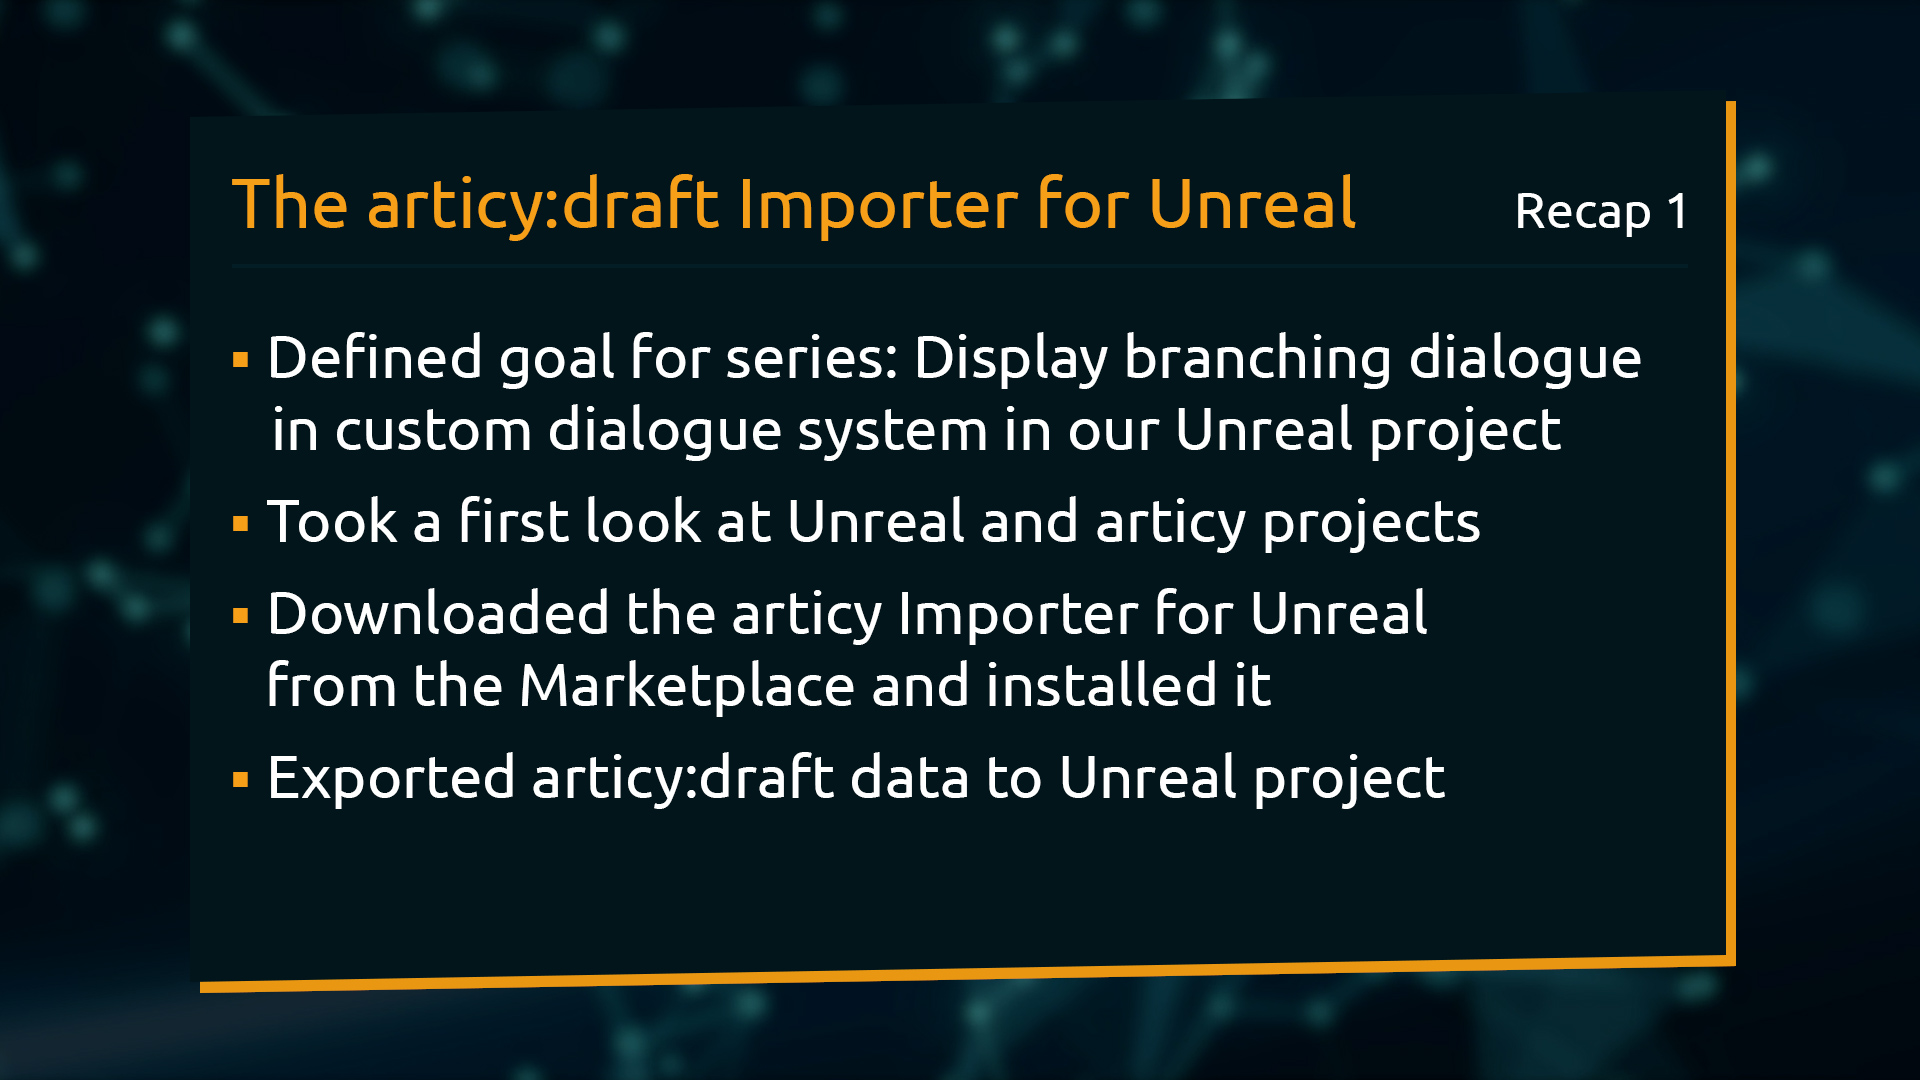
Recap lesson 1
In the first lesson we defined our goal for this tutorial series, which is to display branching dialogue imported from articy with a custom dialogue system in our Unreal project. We took a first look at both Unreal and articy projects, installed the articy Importer from the marketplace, and exported articy data to Unreal.
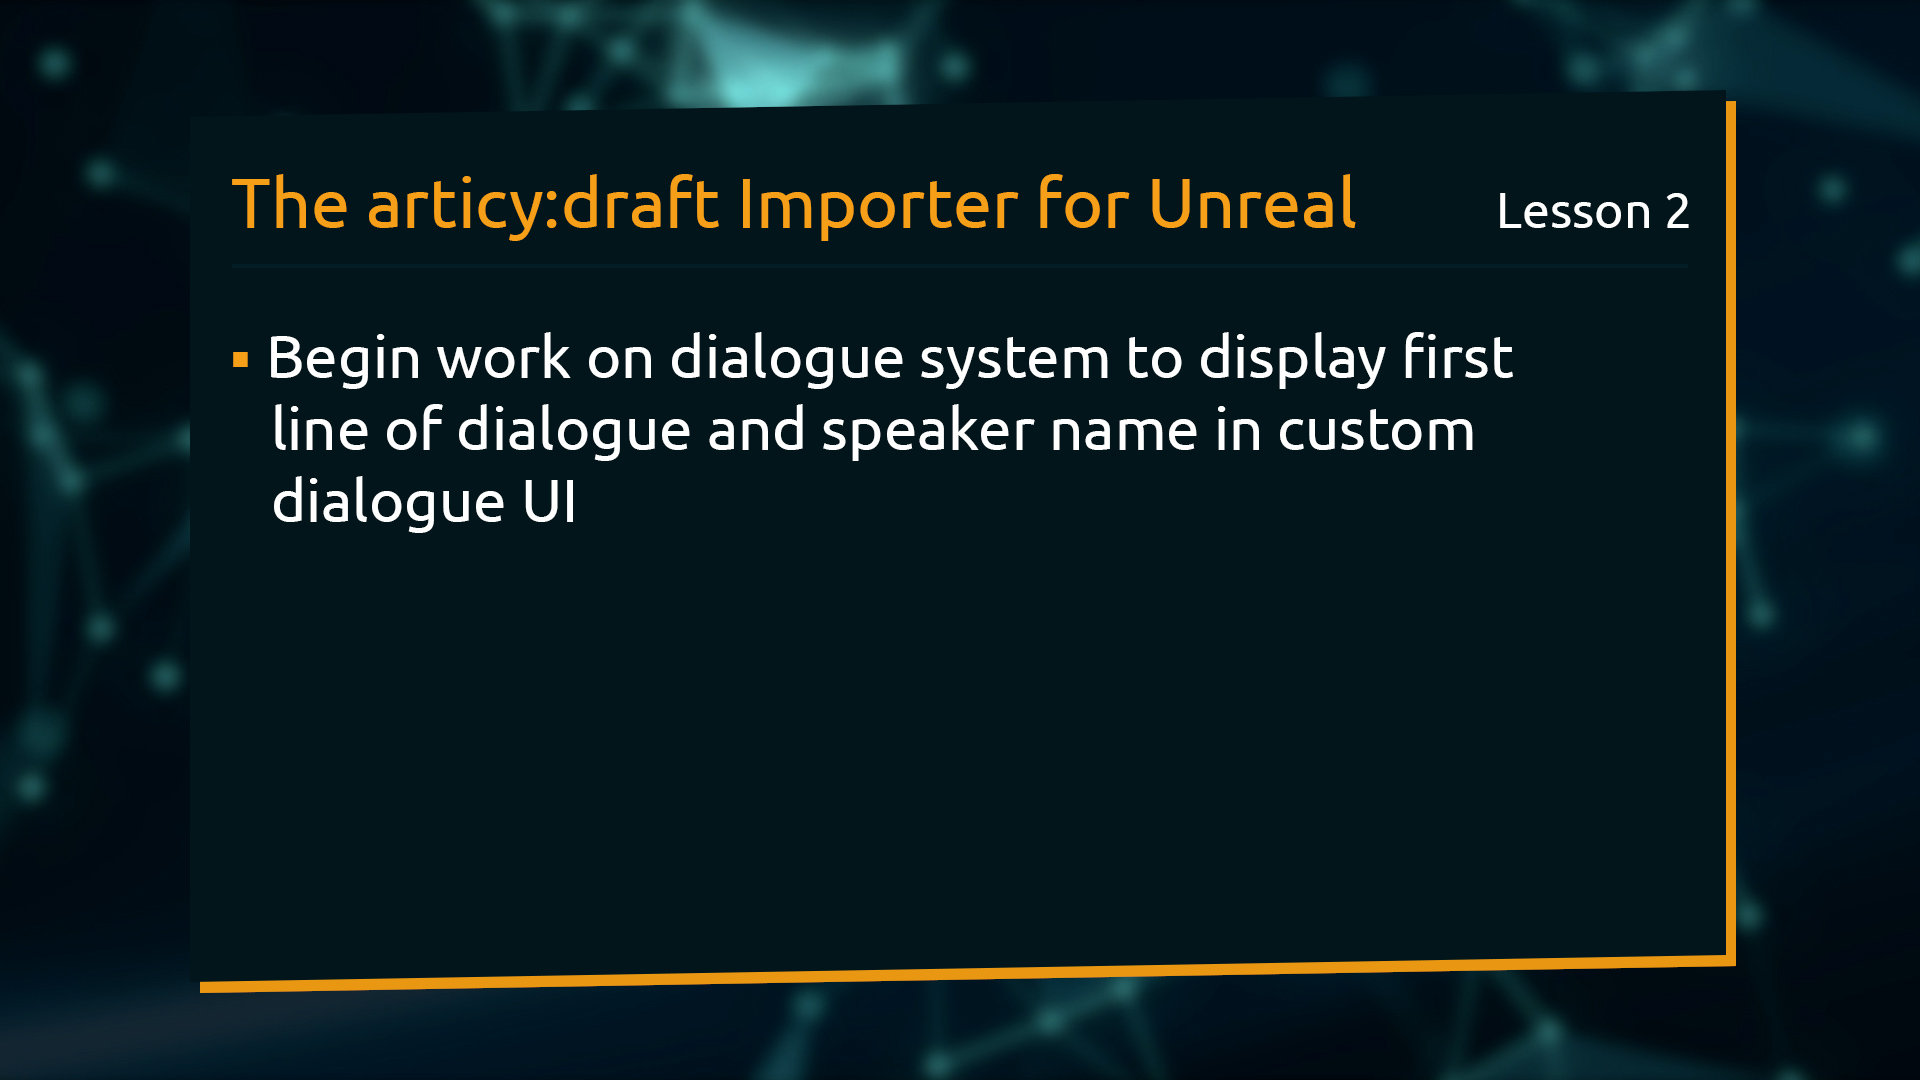
This lesson
In this lesson we will begin working on the dialogue system to display a first dialogue line with speaker name in the custom dialogue UI.
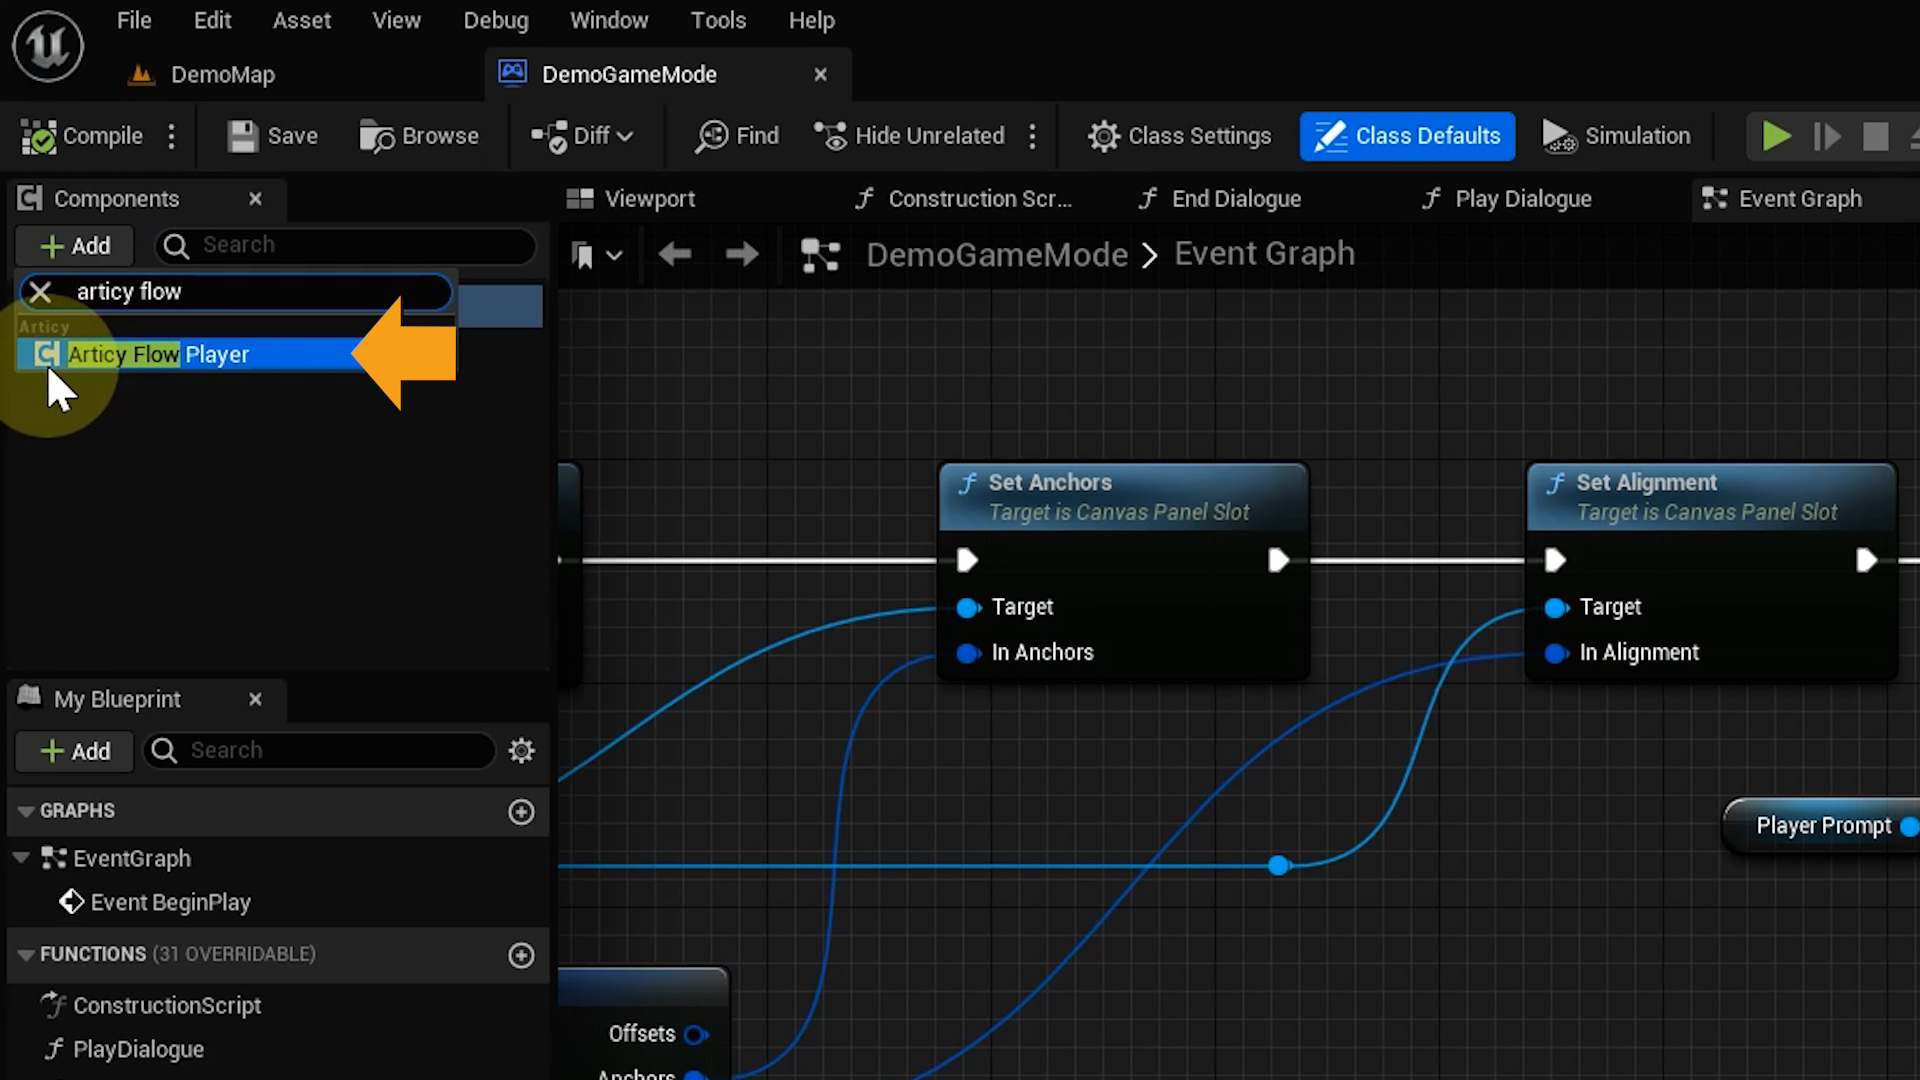
Flow Player Component
First thing is to add a Flow Player component to the Demo Game Mode blueprint. I briefly mentioned it in the first video, this will make the magic happen. It traverses through the flow, handles branching, evaluates conditions, executes instructions, and will make callbacks to our game code.
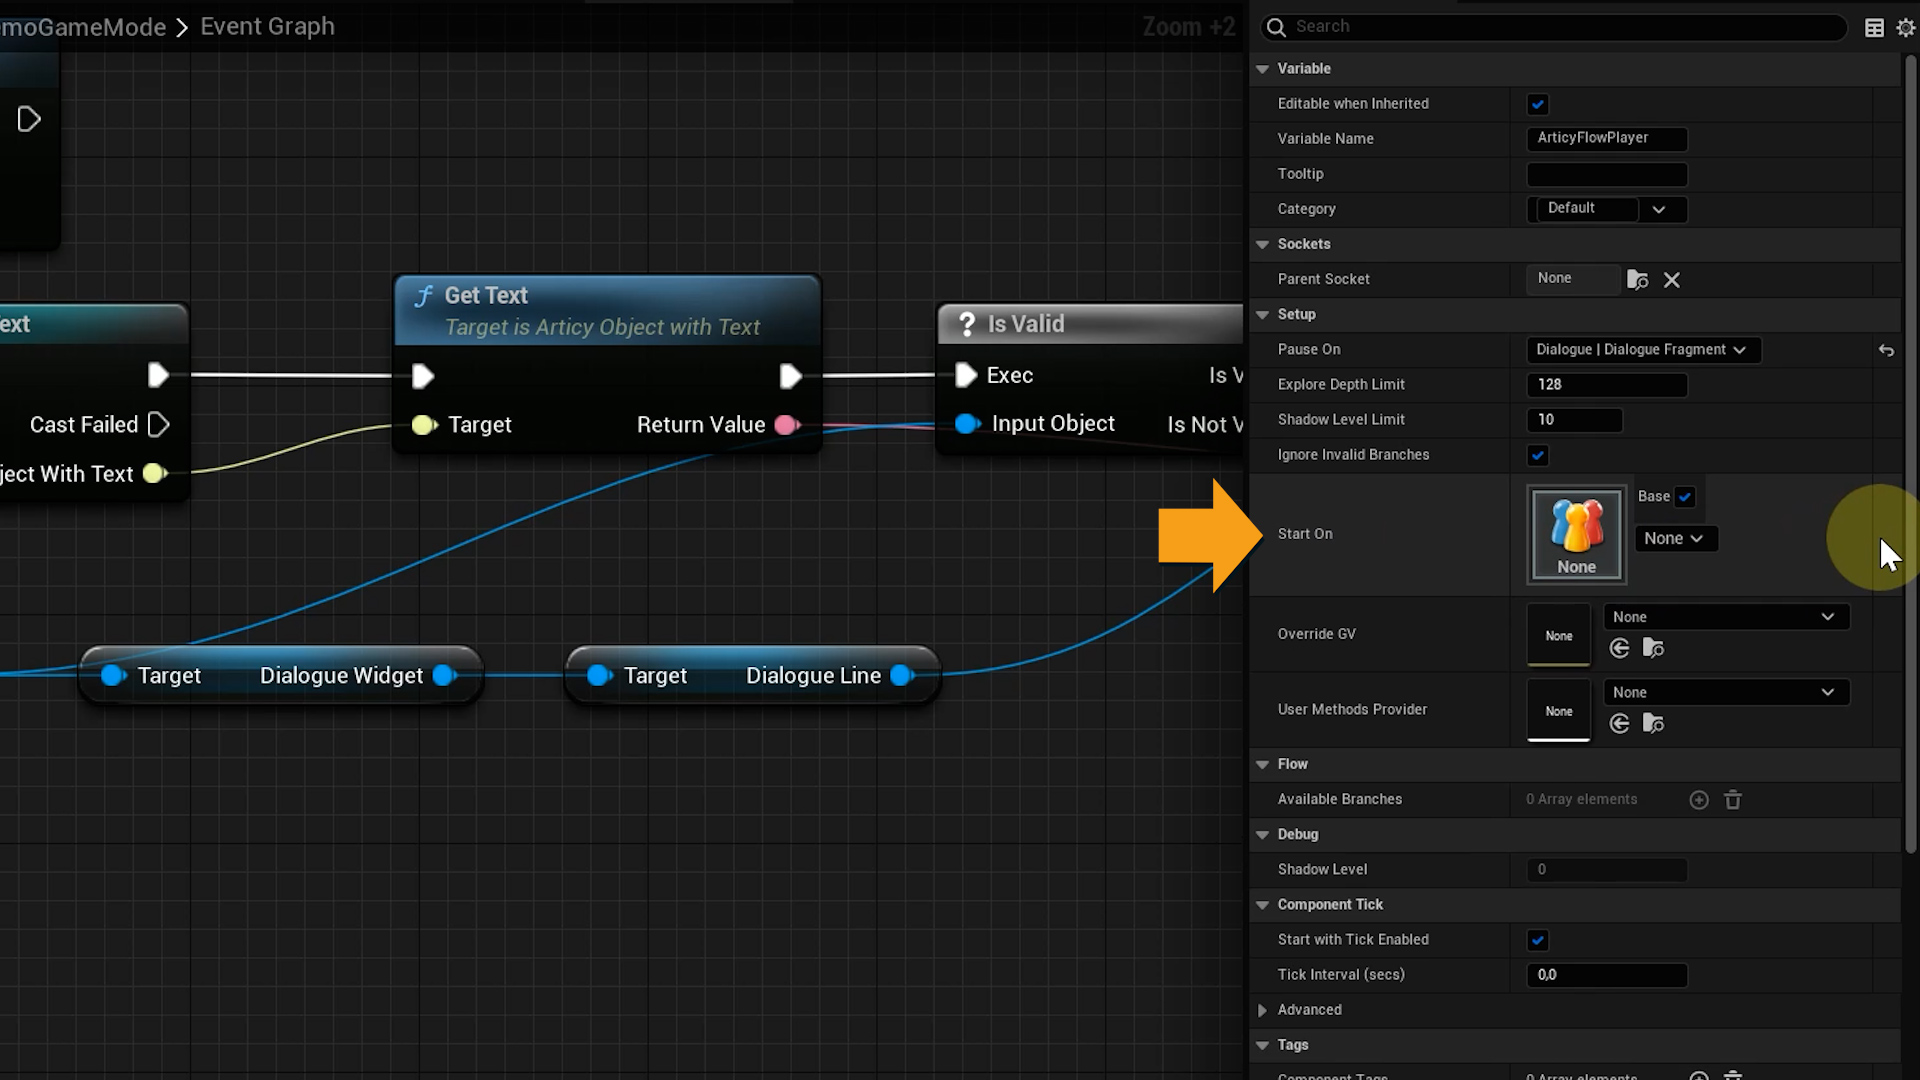
There is a lot going on in the details tab, but at the moment the only entries of relevance for us are Pause On, and Start On.
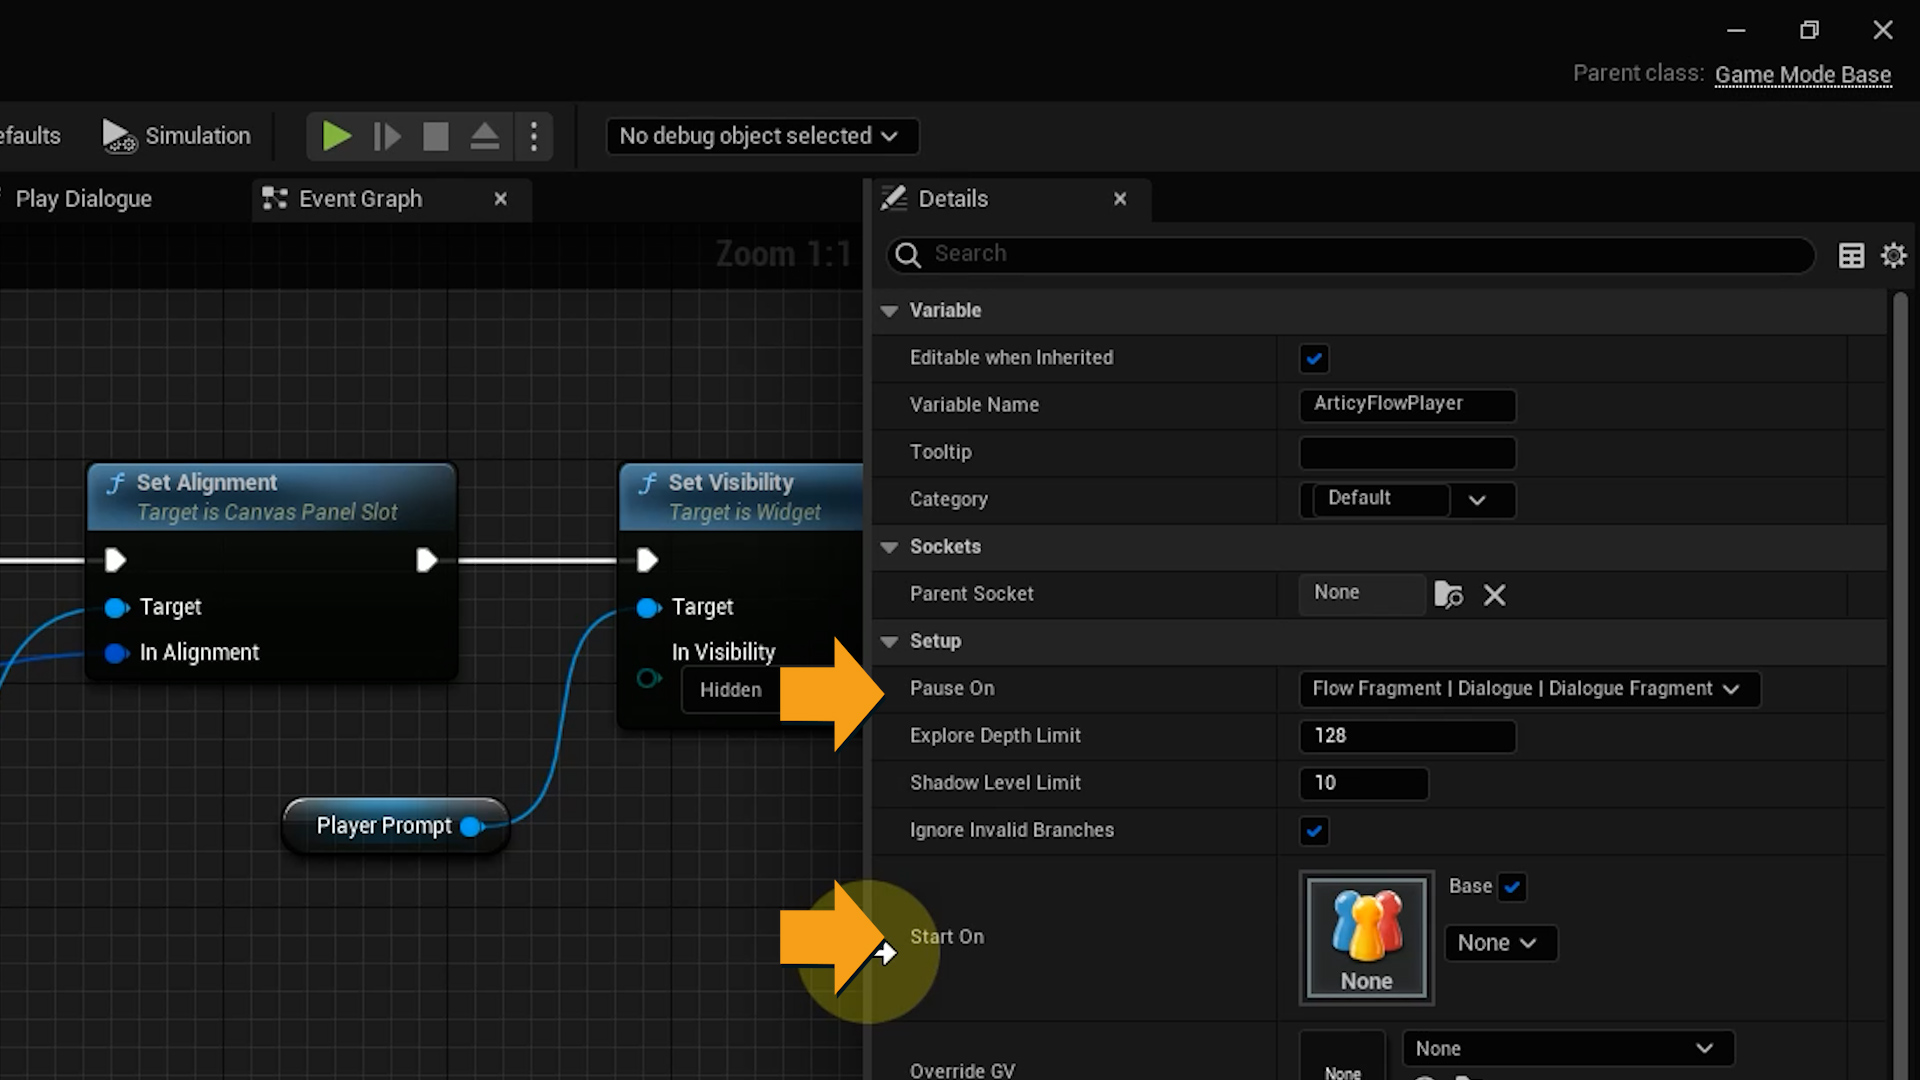
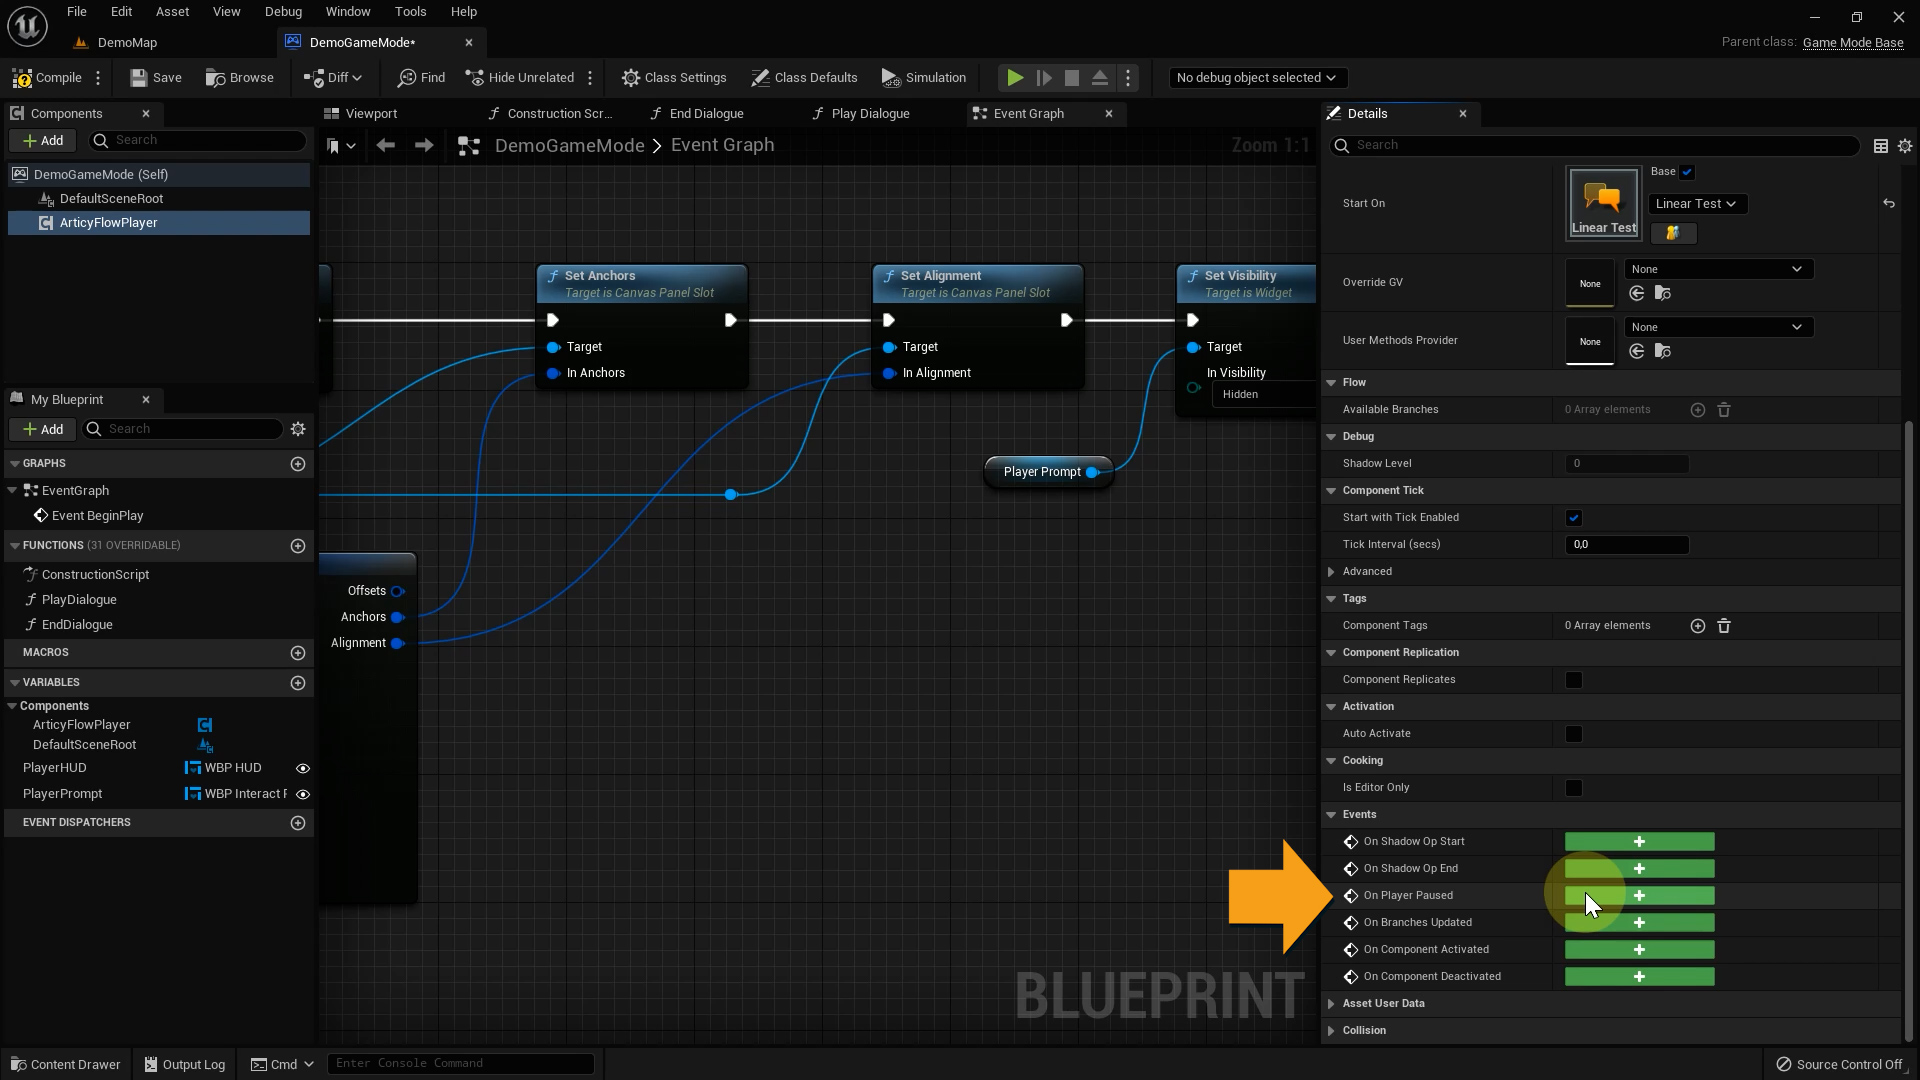
Later Start On will be set dynamically, for this first test let’s select Linear Test as the start node.
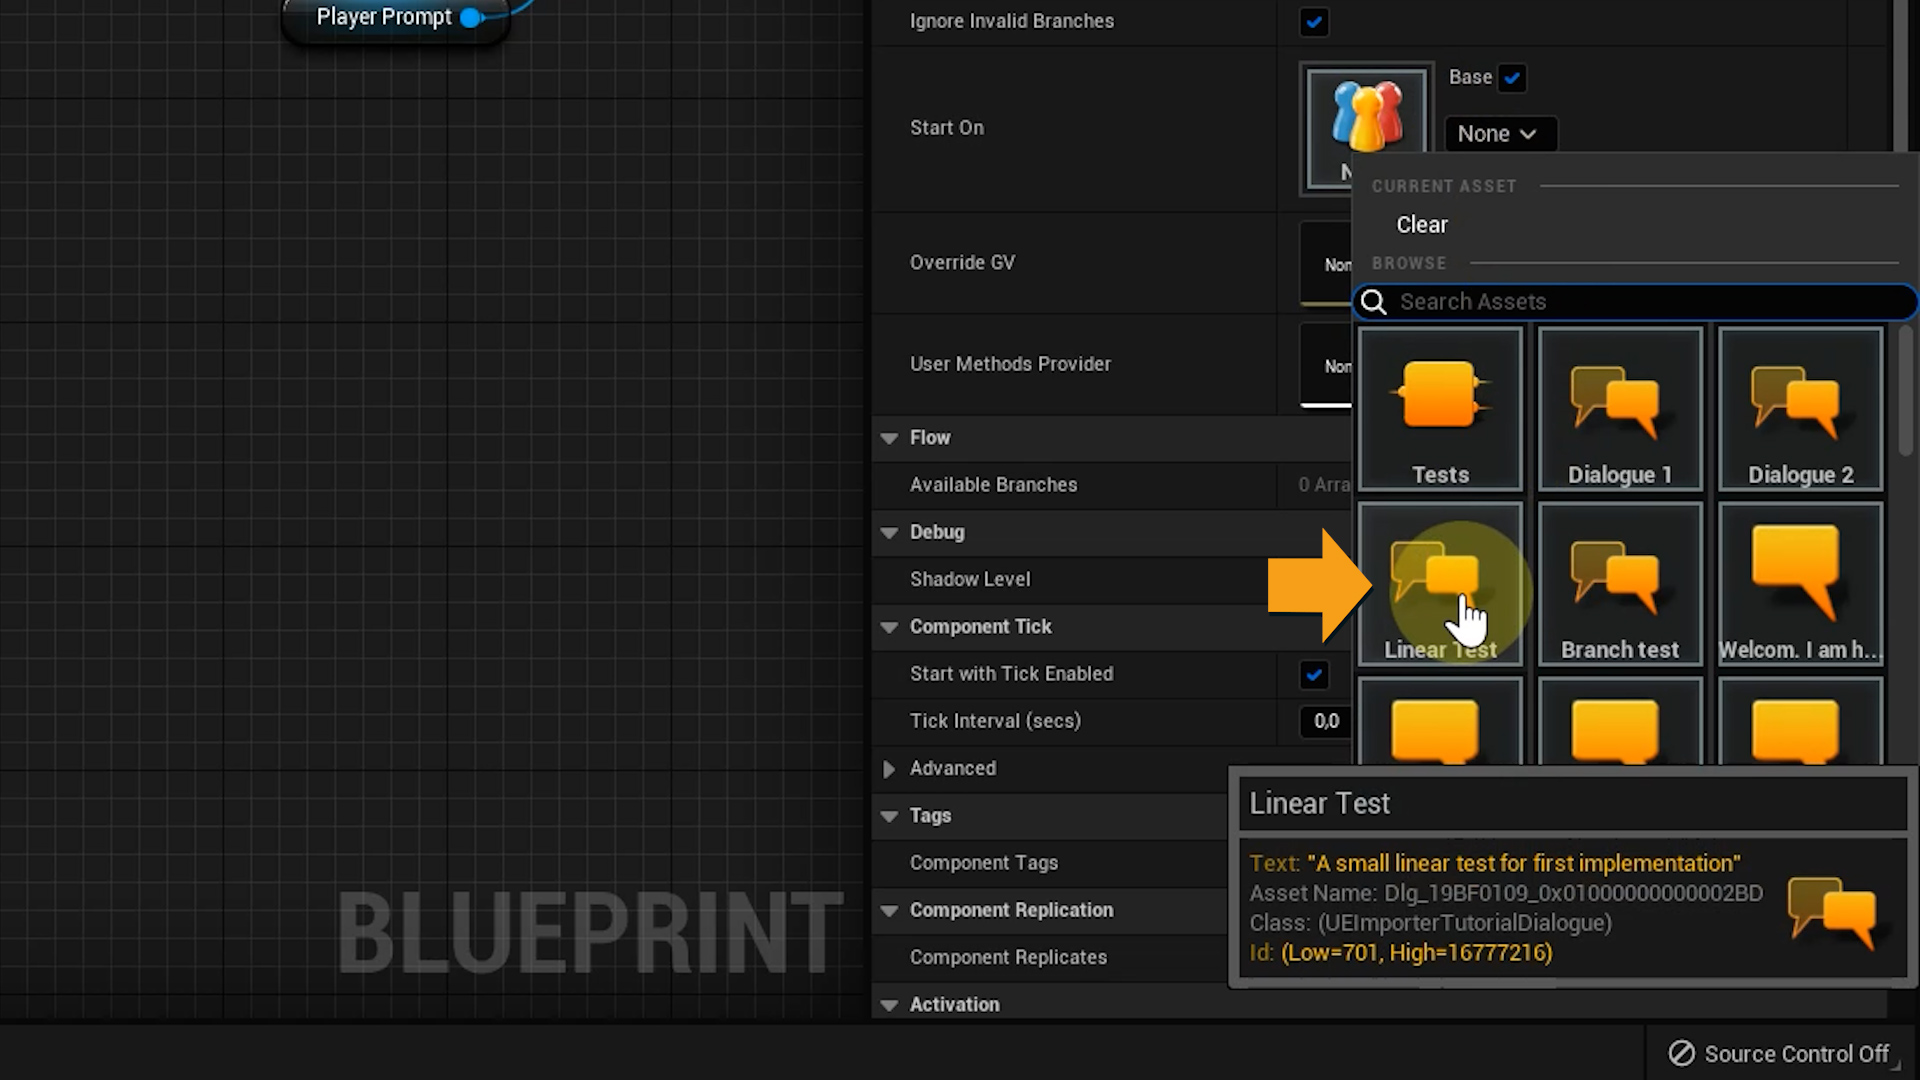
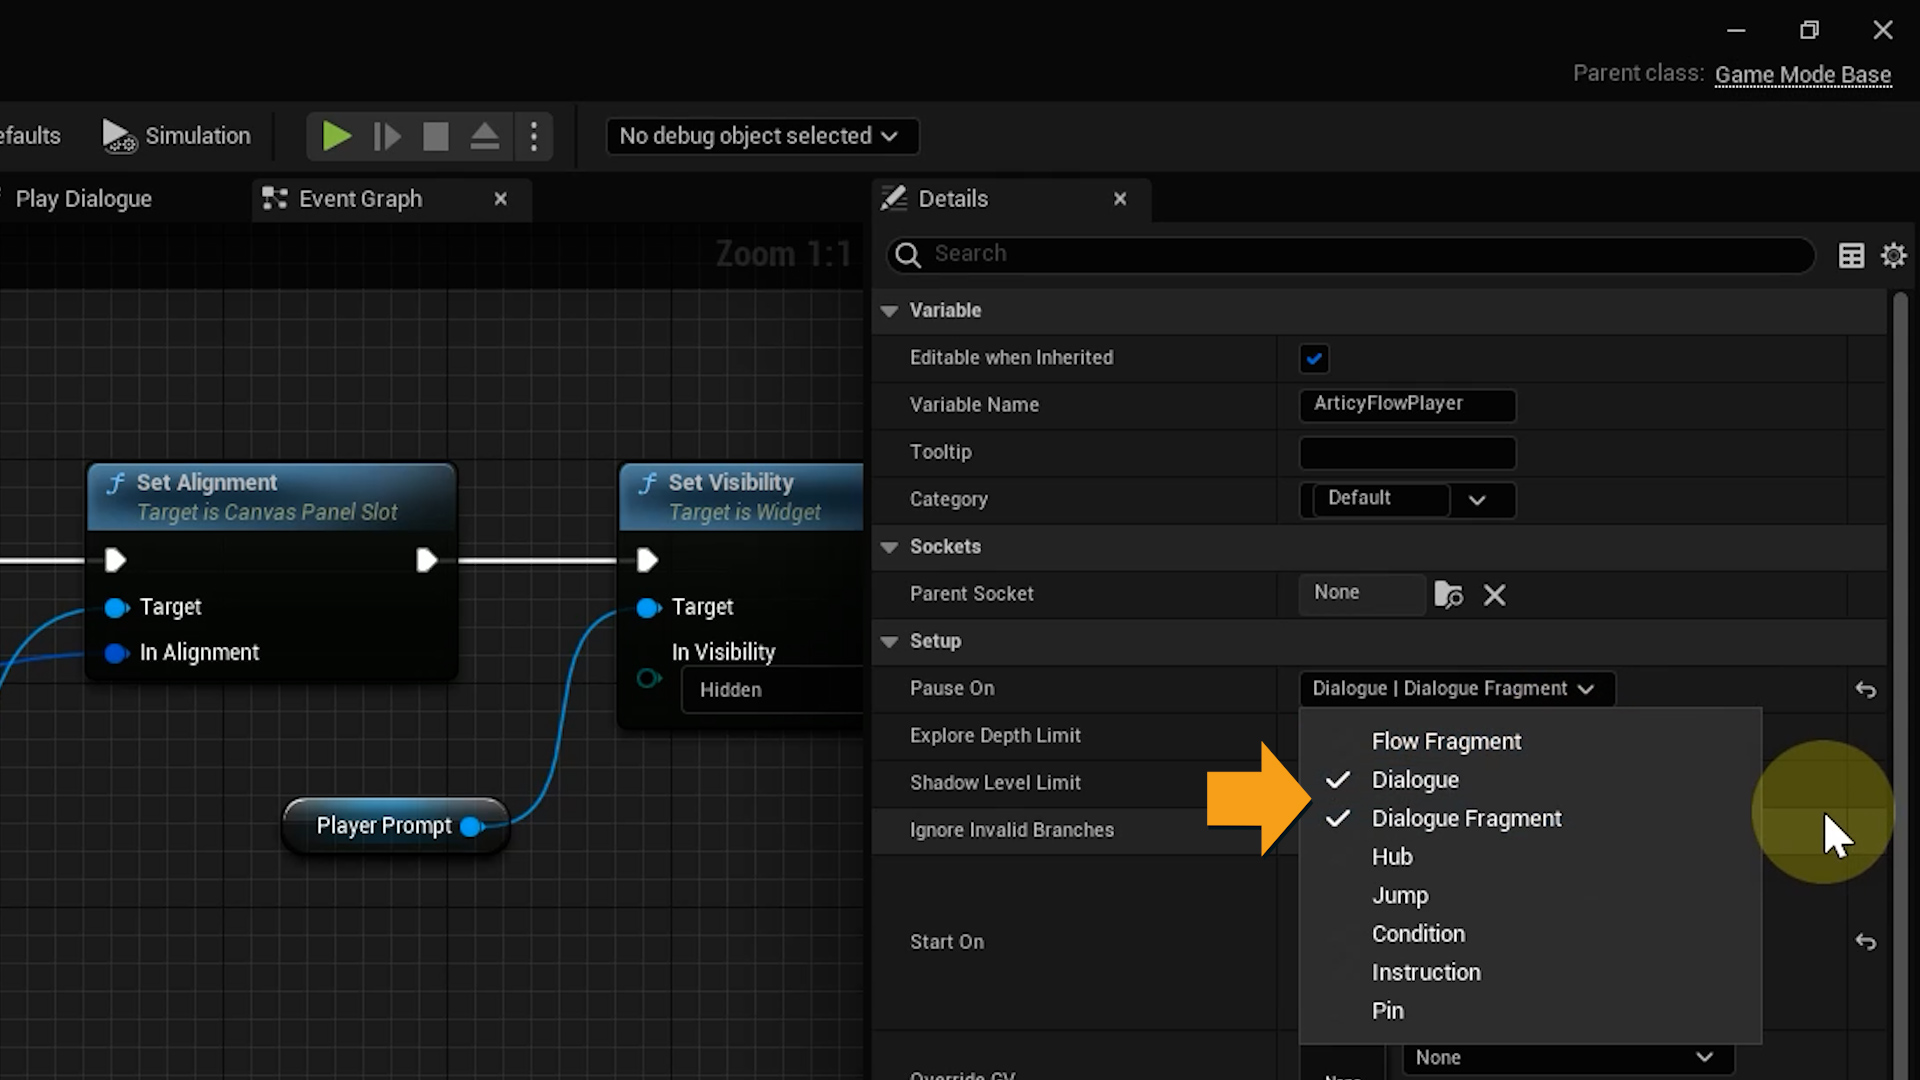
Pause On defines where the Flow Player will stop during flow traversal. There is no one correct answer what to select here, it depends on how your project is set up. Generally speaking, it makes sense to have the Flow Player stop only on elements that have data you need to fetch, or that you want to display. For this project I set Pause On to Dialogues and Dialogue Fragments.
Accessing articy data
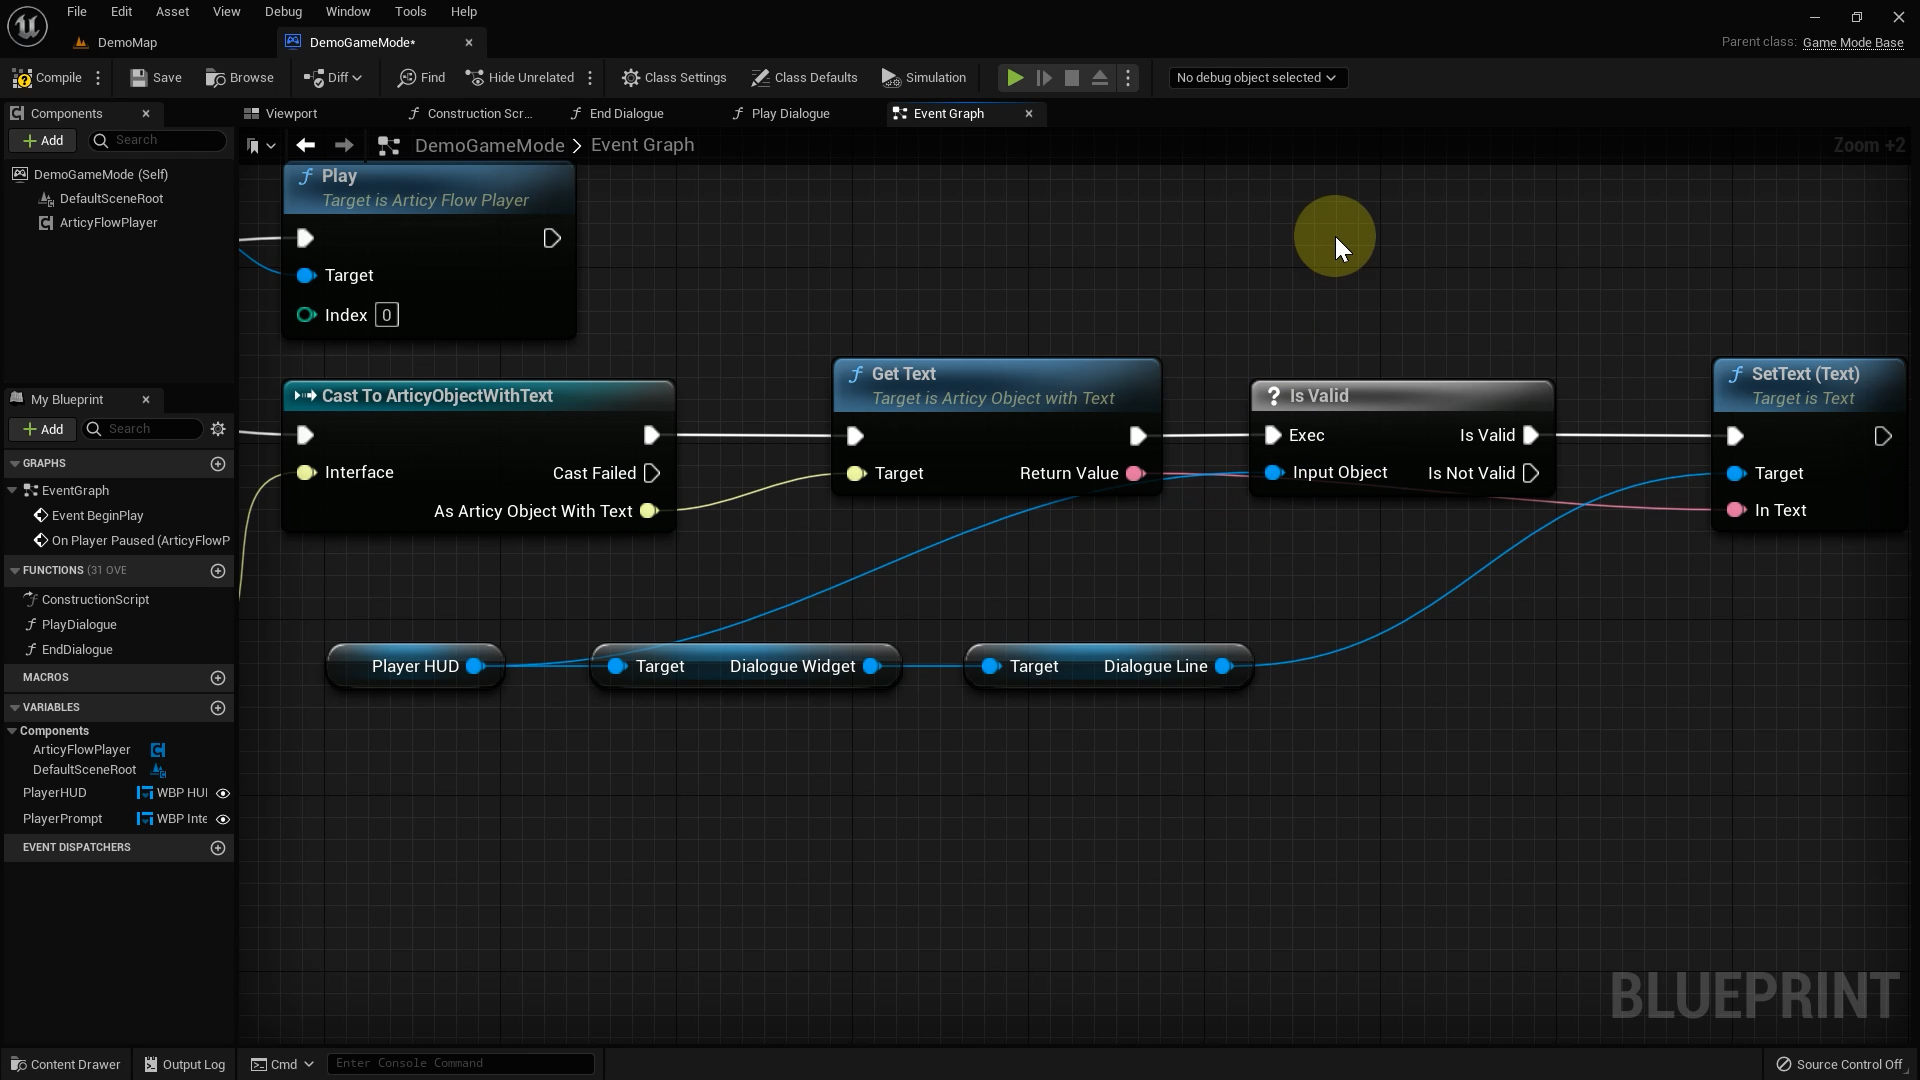
Now let’s see if we can access any articy data. To actually display any text we need to add an On Player Paused event in the Demo Game Mode event graph and add functionality to it.
We can create the event by either using the right-click create menu or by selecting the articy Flow Player component and adding the event from the details tab.
First we cast the object we paused on to an Articy node, as we don’t have any more specific information about the possible node type at this point. Then we get its type and from there make a switch for the pausable types with Switch on EArticyPausableType. If we expand this node, we can see that it contains all the options that we encountered in the Pause On drop down of the articy Flow Player component earlier.
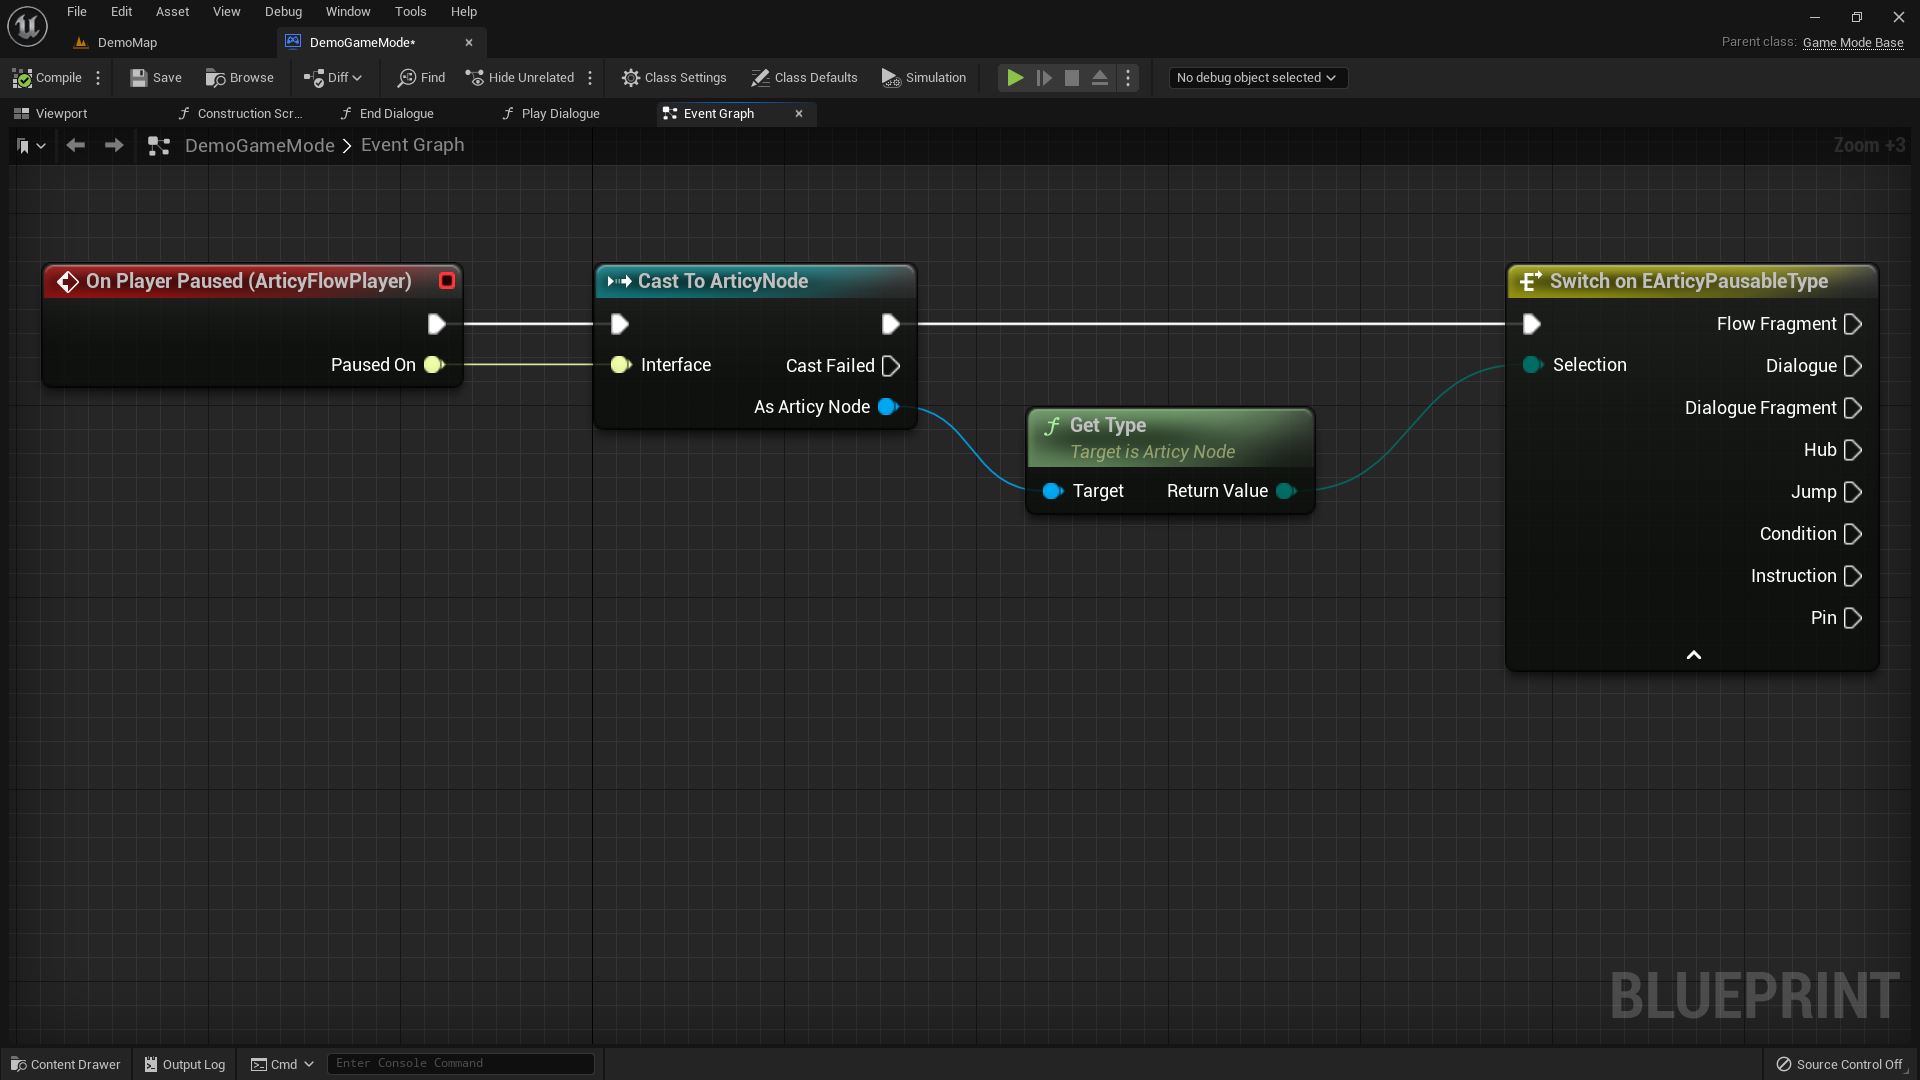
As our dialogue is composed out of Dialogue Fragments in articy:draft we continue from the Dialogue Fragment pin. Now we have to do another cast to be able to access the text of the node. As often in programming we have different options, it solely depends on what you are trying to achieve and how the code is set up. We will go with one way to access the text of the current node, which should work in the majority of cases. We will do a cast to Articy Object With Text, which basically is the lowest common denominator when it comes to node types that can have text content. The interface for the cast comes from the event node itself. Then we Get Text and print it to the output log and the screen for now.
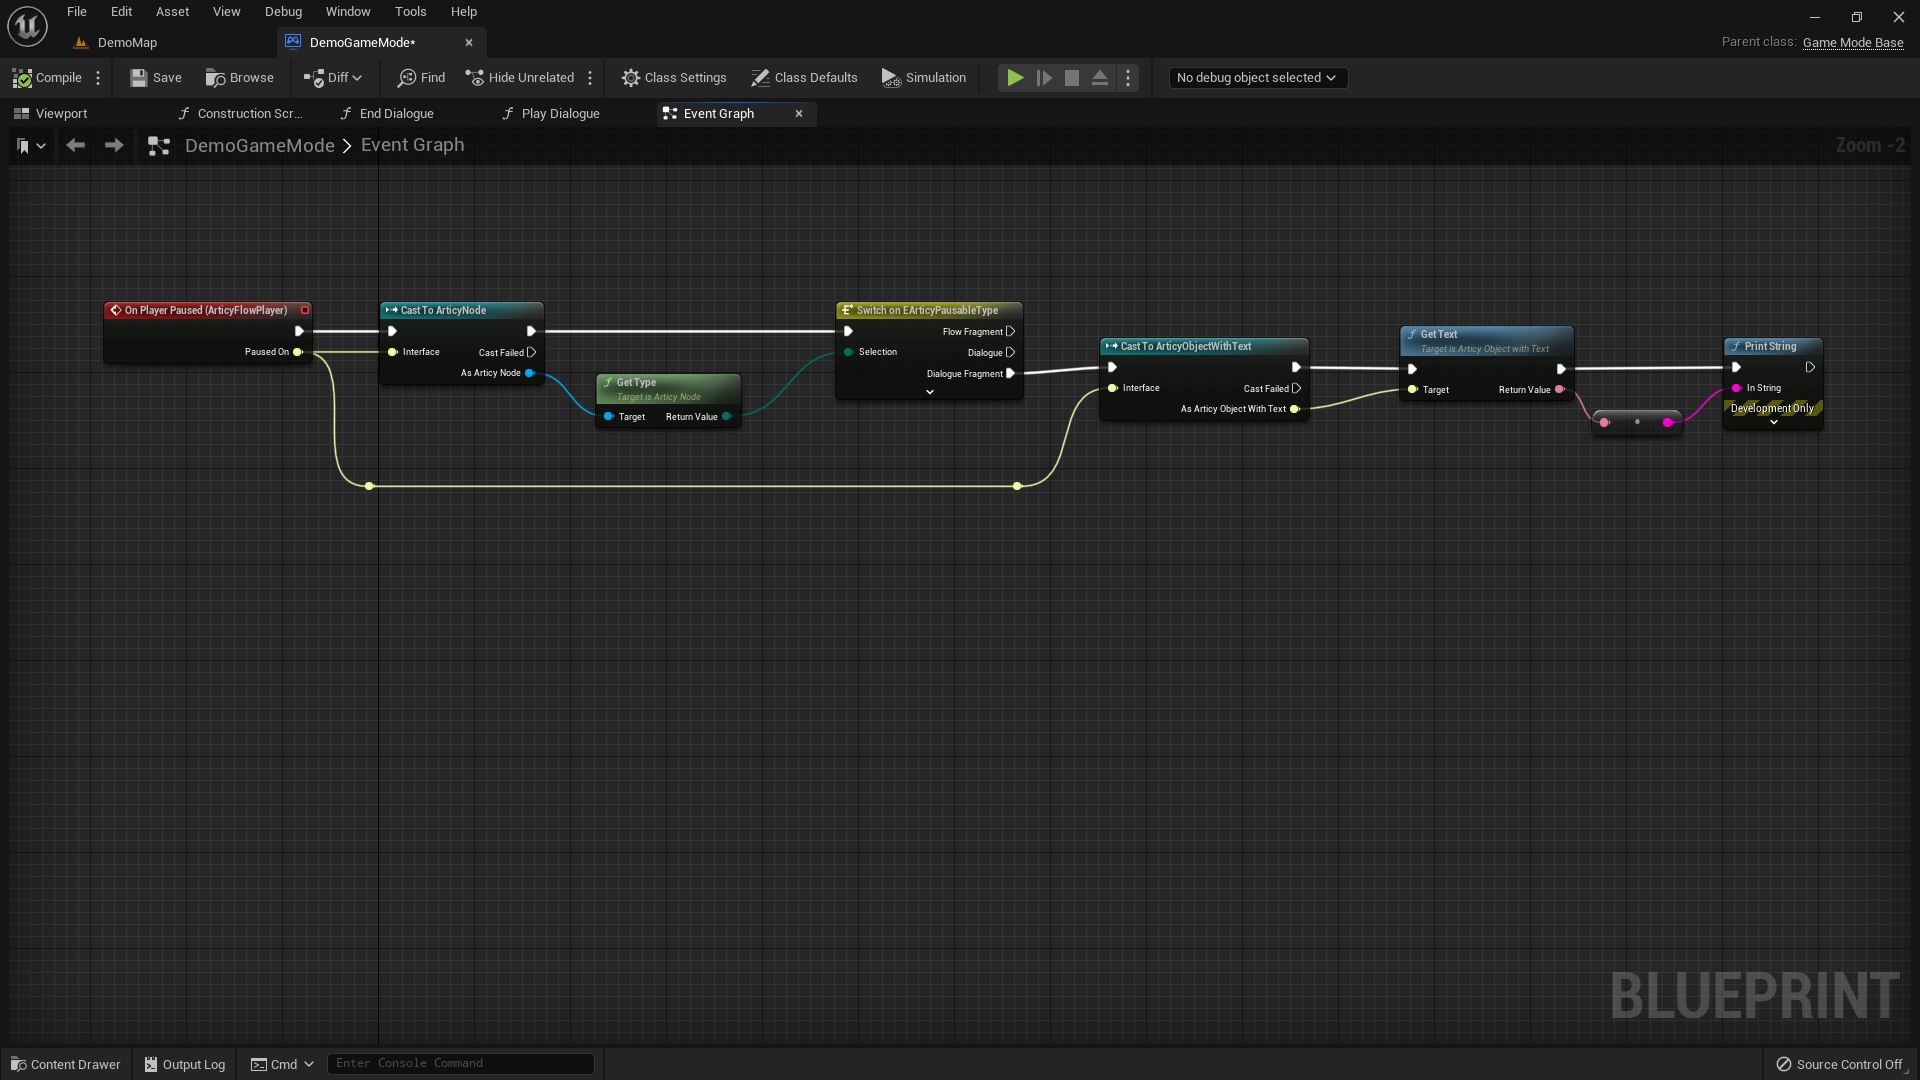
But when we hit Play, nothing happens. Why is that? If we look back at our On Pause settings for the Articy Flow Player component we can see that we selected Dialogue Fragments and Dialogues. Our starting object is Linear Test which is a Dialogue node. That means the Flow Player starts and immediately pauses.
Going back to our On Player Paused event in the blueprint, you will notice that nothing is set for a pause on a Dialogue, so we are basically stuck. Solutions would be to either remove Dialogues from Pause On, or add an instruction in the blueprint to define what is supposed to happen when the Flow Player encounters a dialogue node. Usually I would lean towards only pausing on node types that include any logic that need to be processed, but to show how this situation can be handled, I will add a statement to the Dialogue pin of the switch.
As a general rule you should make sure that you create a path on the switch for all node types you selected in Pause On. Otherwise you might run into issues if the Flow Player pauses on a specific node type, but does not have any instructions for it, as we have seen earlier when we tried to play our level.
What we do is adding a command to the Flow Player to immediately continue playing when pausing on a Dialogue node.
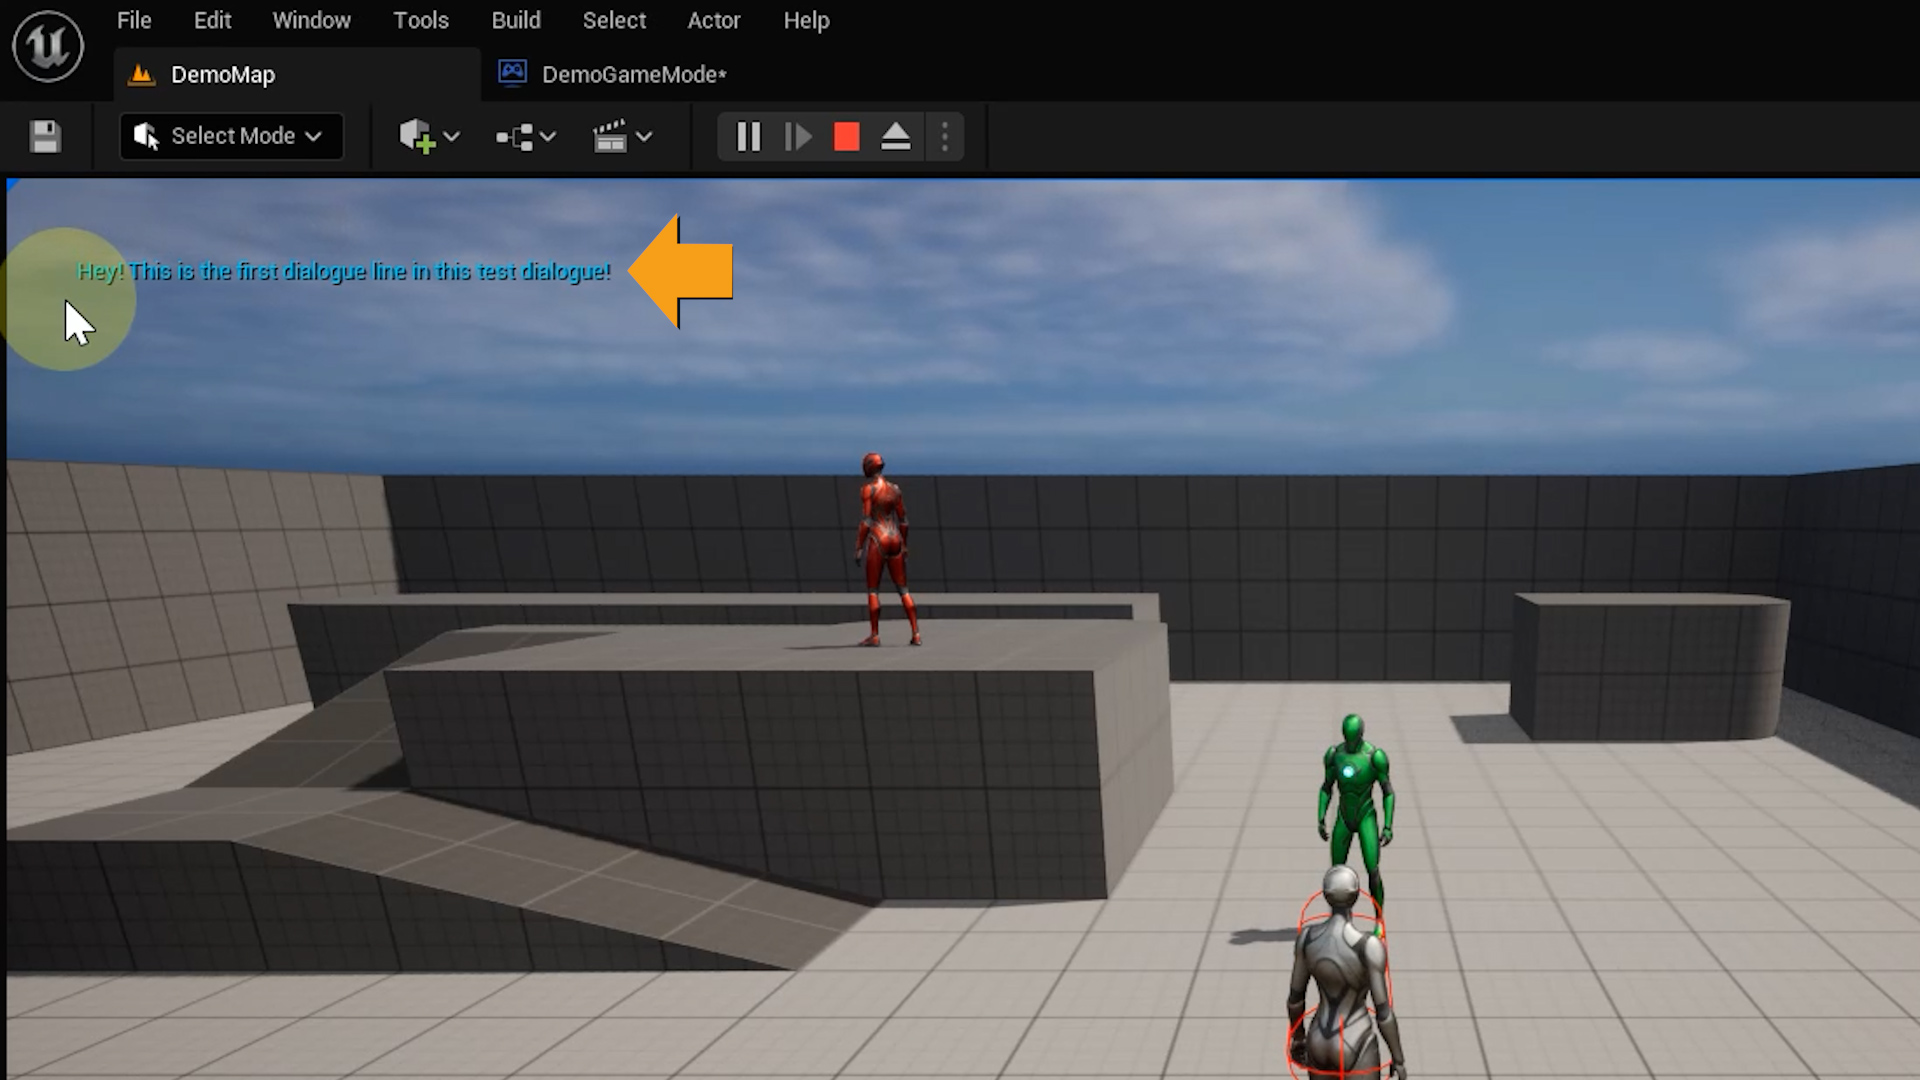
When we now hit Play the first line of the linear test dialogue is displayed on screen. We are able to access and display data we imported from articy. Nice!
Displaying dialogue within dialogue UI
The next step will be an exciting one: we are going to start the dialogue when interacting with an NPC and we will display the text properly within our dialogue UI.
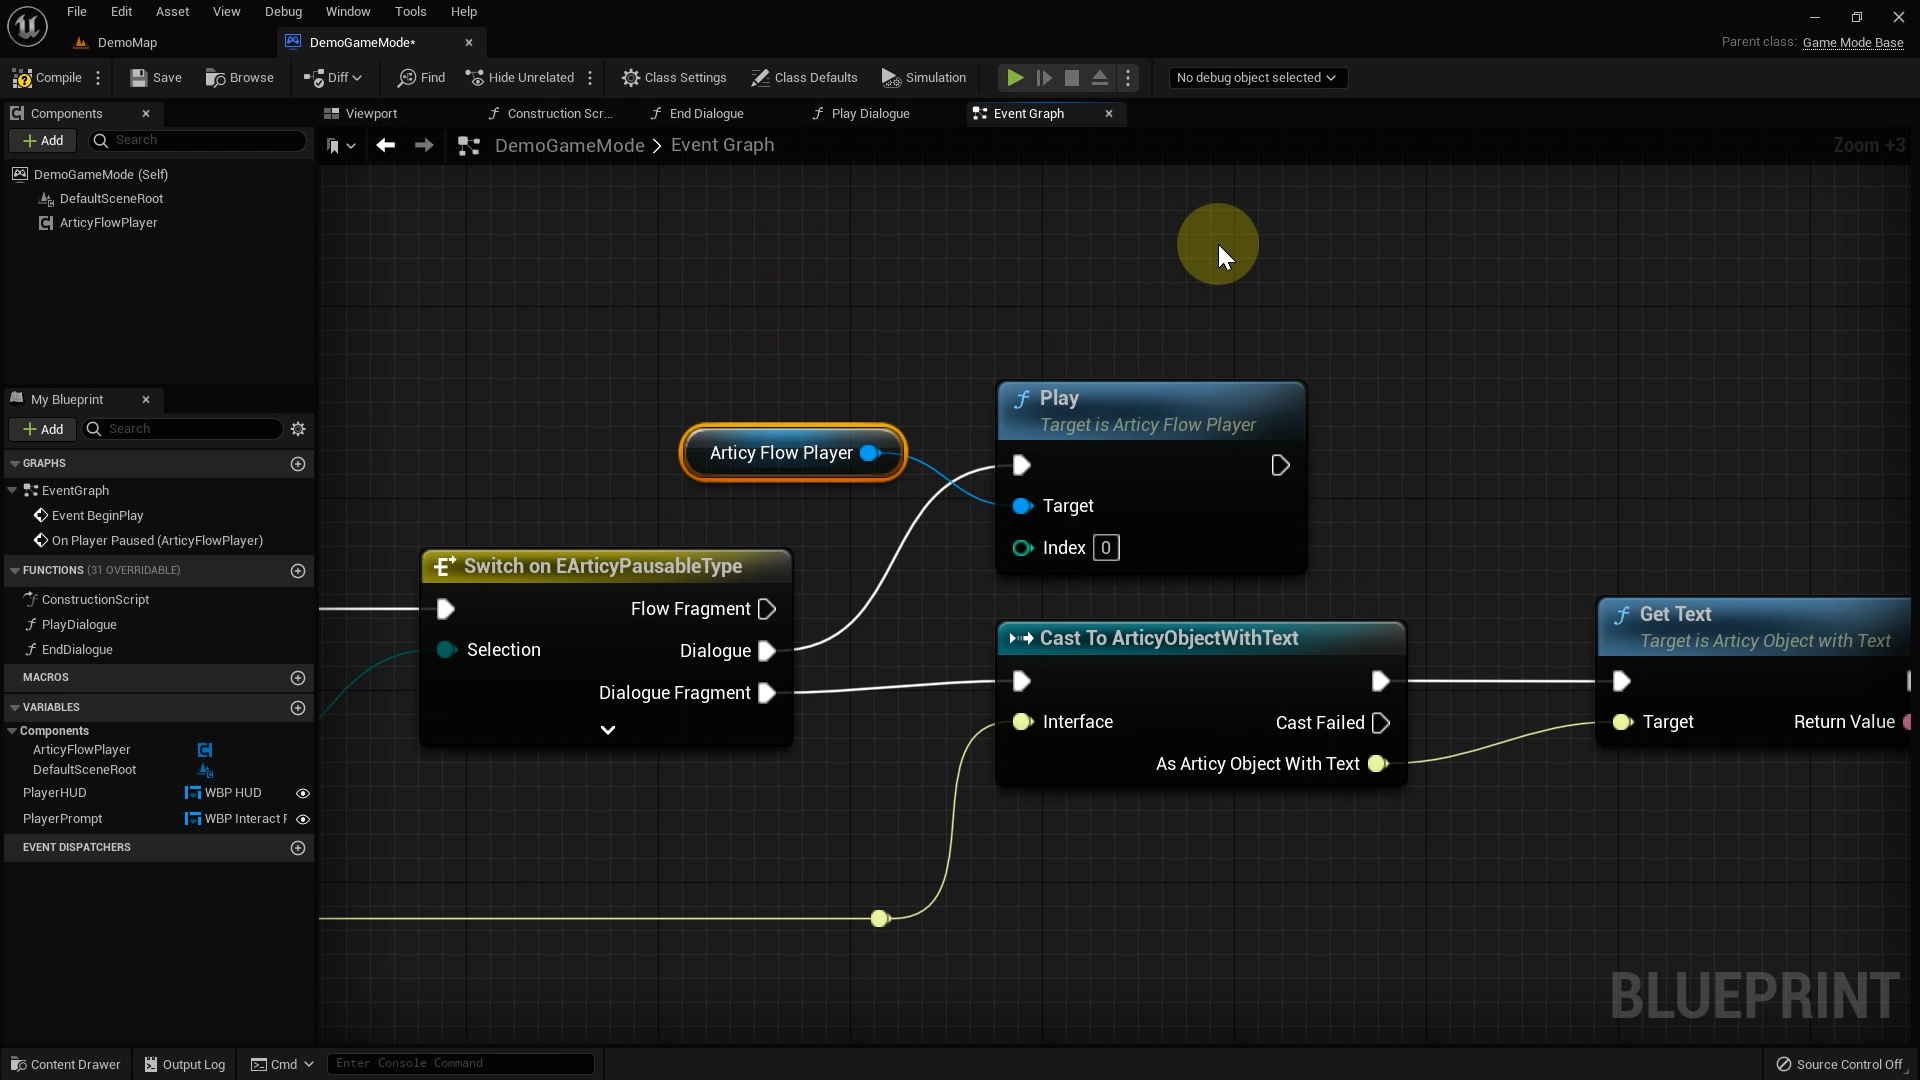
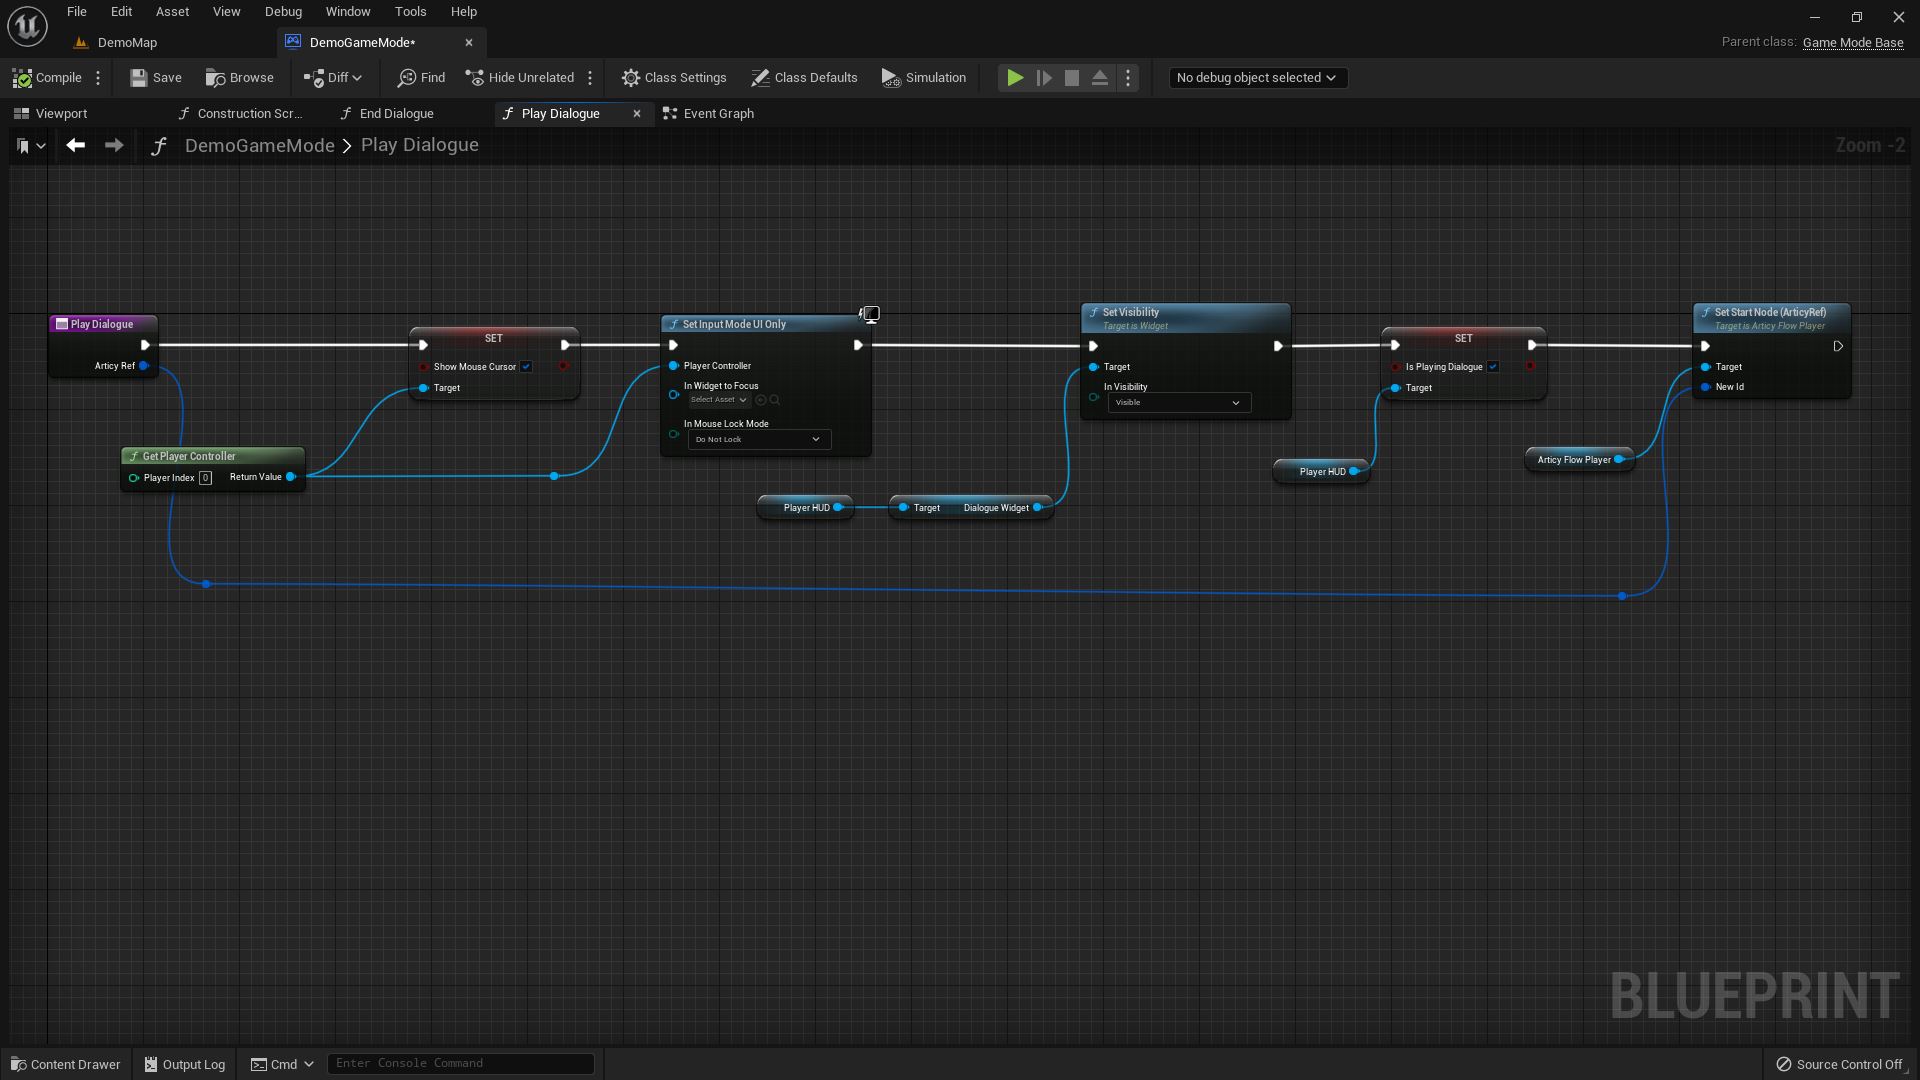
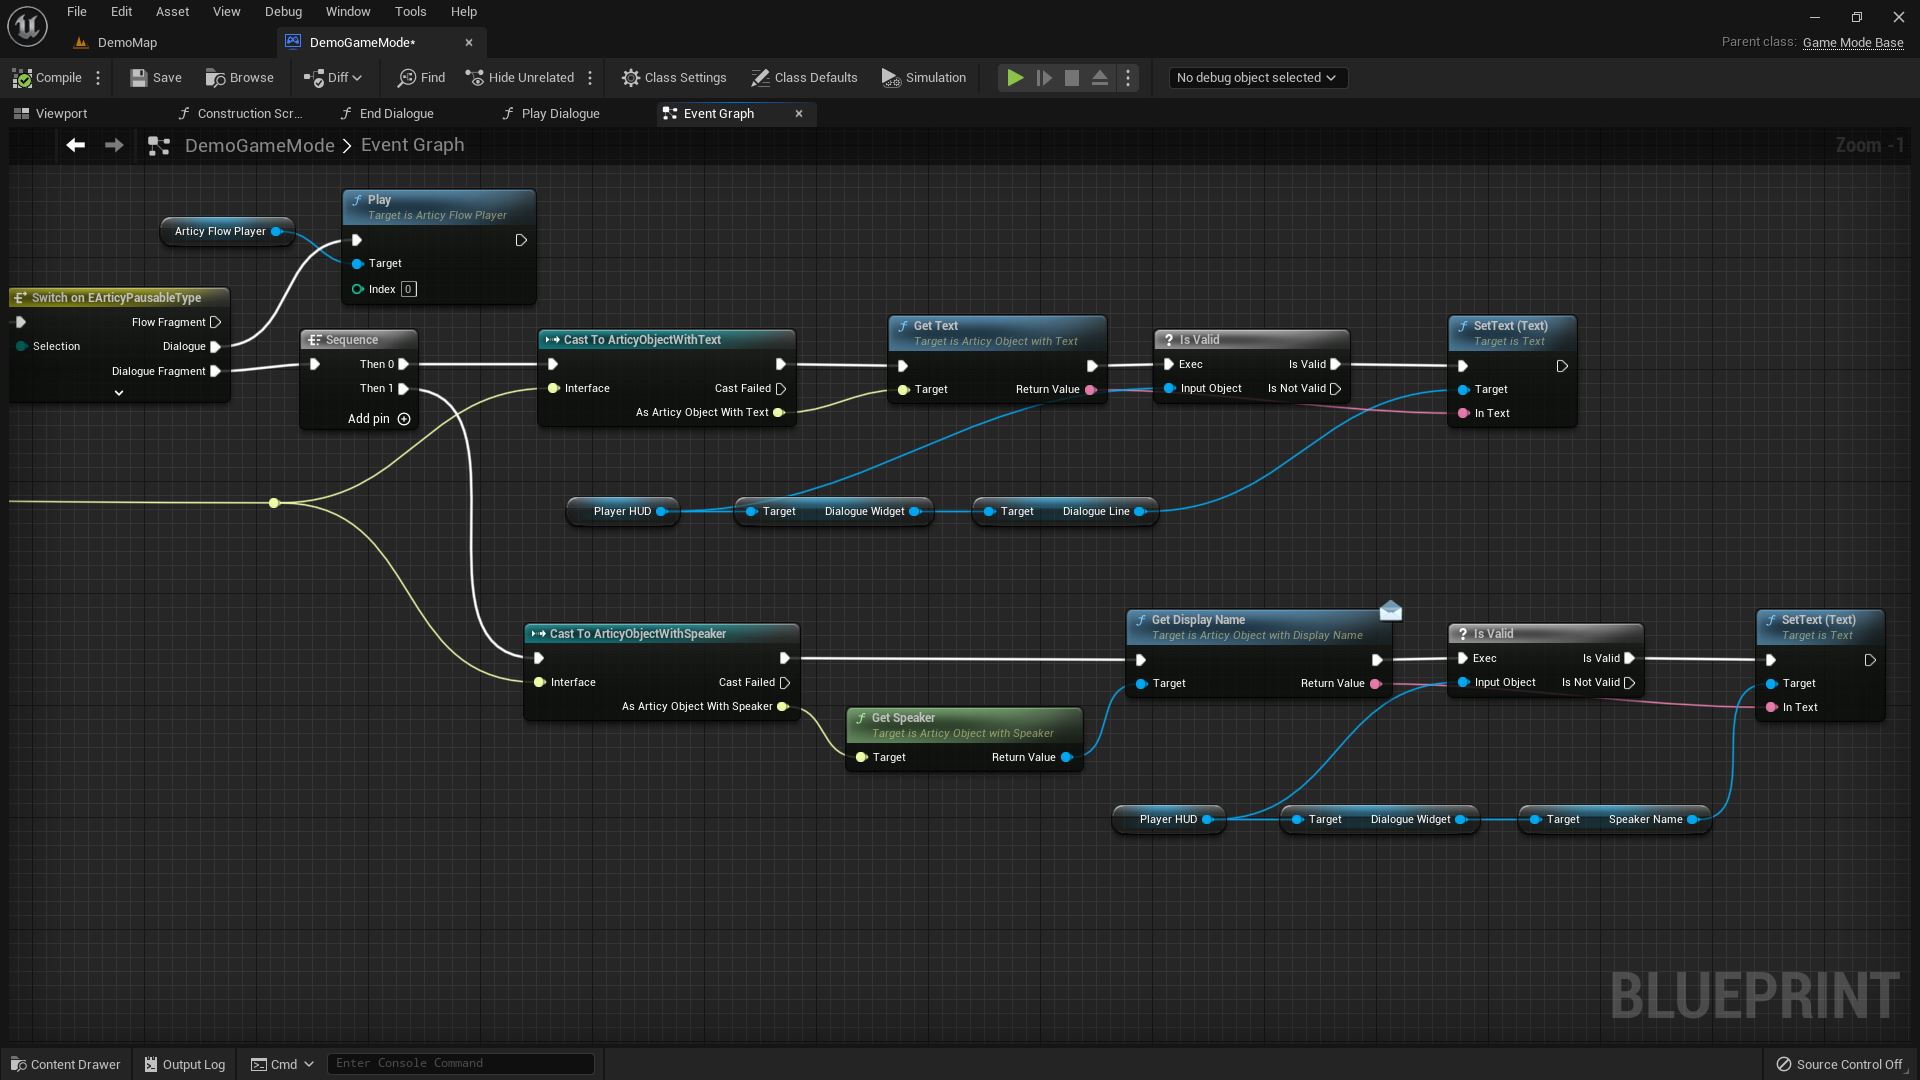
To display the text in the dialogue UI instead of printing it to the console, we need to update the last part of the Demo Game Mode event graph. We remove the Print String node and use Set Text (Text) to display the text of the Dialogue Fragment we pause on currently. The target for Set Text we get from Player HUD, a variable saved when creating the HUD widget in the Begin Play Event. From Player HUD we get the Dialogue Widget and from there we get the Dialogue Line.
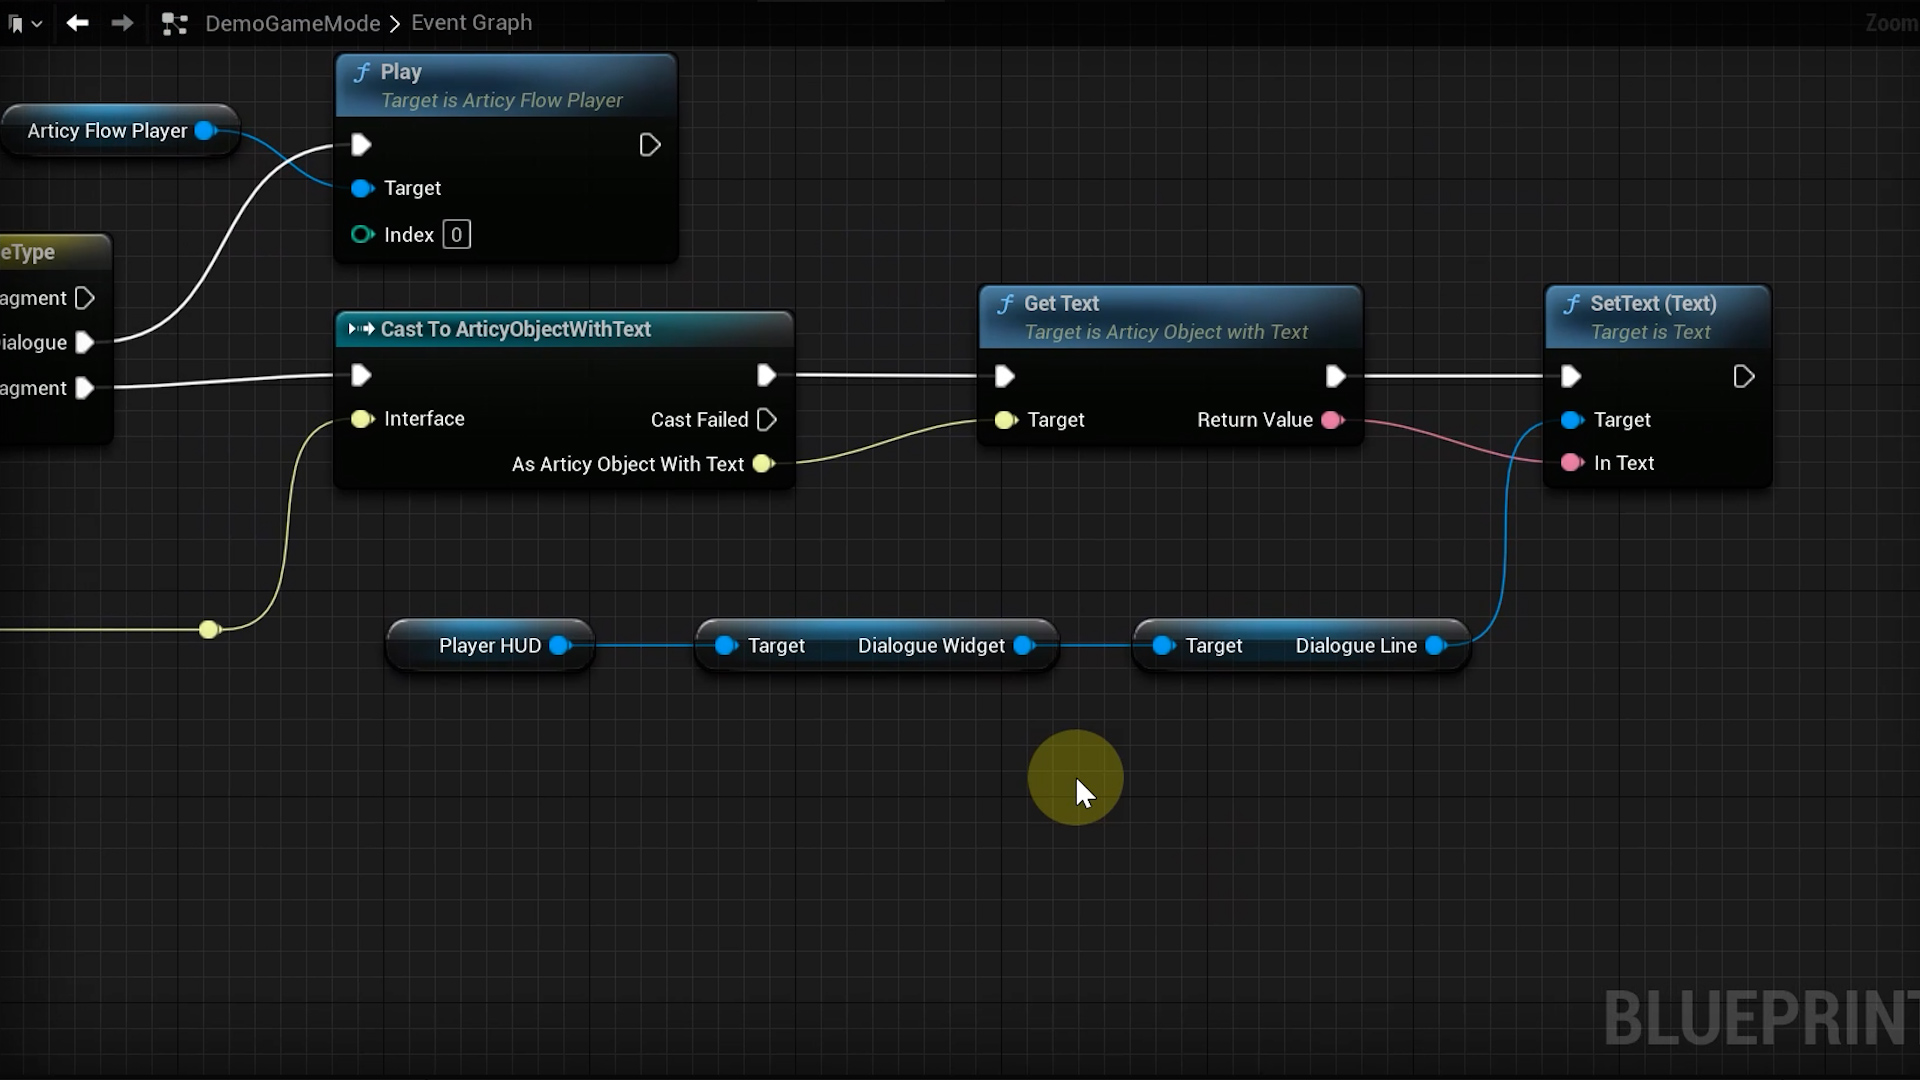
If we play at this moment, you will notice that we get a couple of runtime errors. This is because thanks to the Start On property the Flow Player starts running right away and Set Text is trying to access the Player HUD which at this point might not even be instantiated. This won’t be an issue much longer because of the way our dialogue system is going to be set up, once we remove the Start On property from the Flow Player component. But to be absolutely sure and prevent this kind of error, we can add a simple Is Valid function between Get Text and Set Text and use Player HUD as the input object.
If your dialogue UI is set up differently, you just have to make sure that certain elements are exposed as variables, so we can access and change values. Like for example the Dialogue Line text object. If you downloaded the course material you can take a closer look how the widgets are constructed.
Now we want to give the NPC a reference to a specific dialogue instead of having one preset dialogue that starts automatically. We remove the Start On value from Flow Player component.
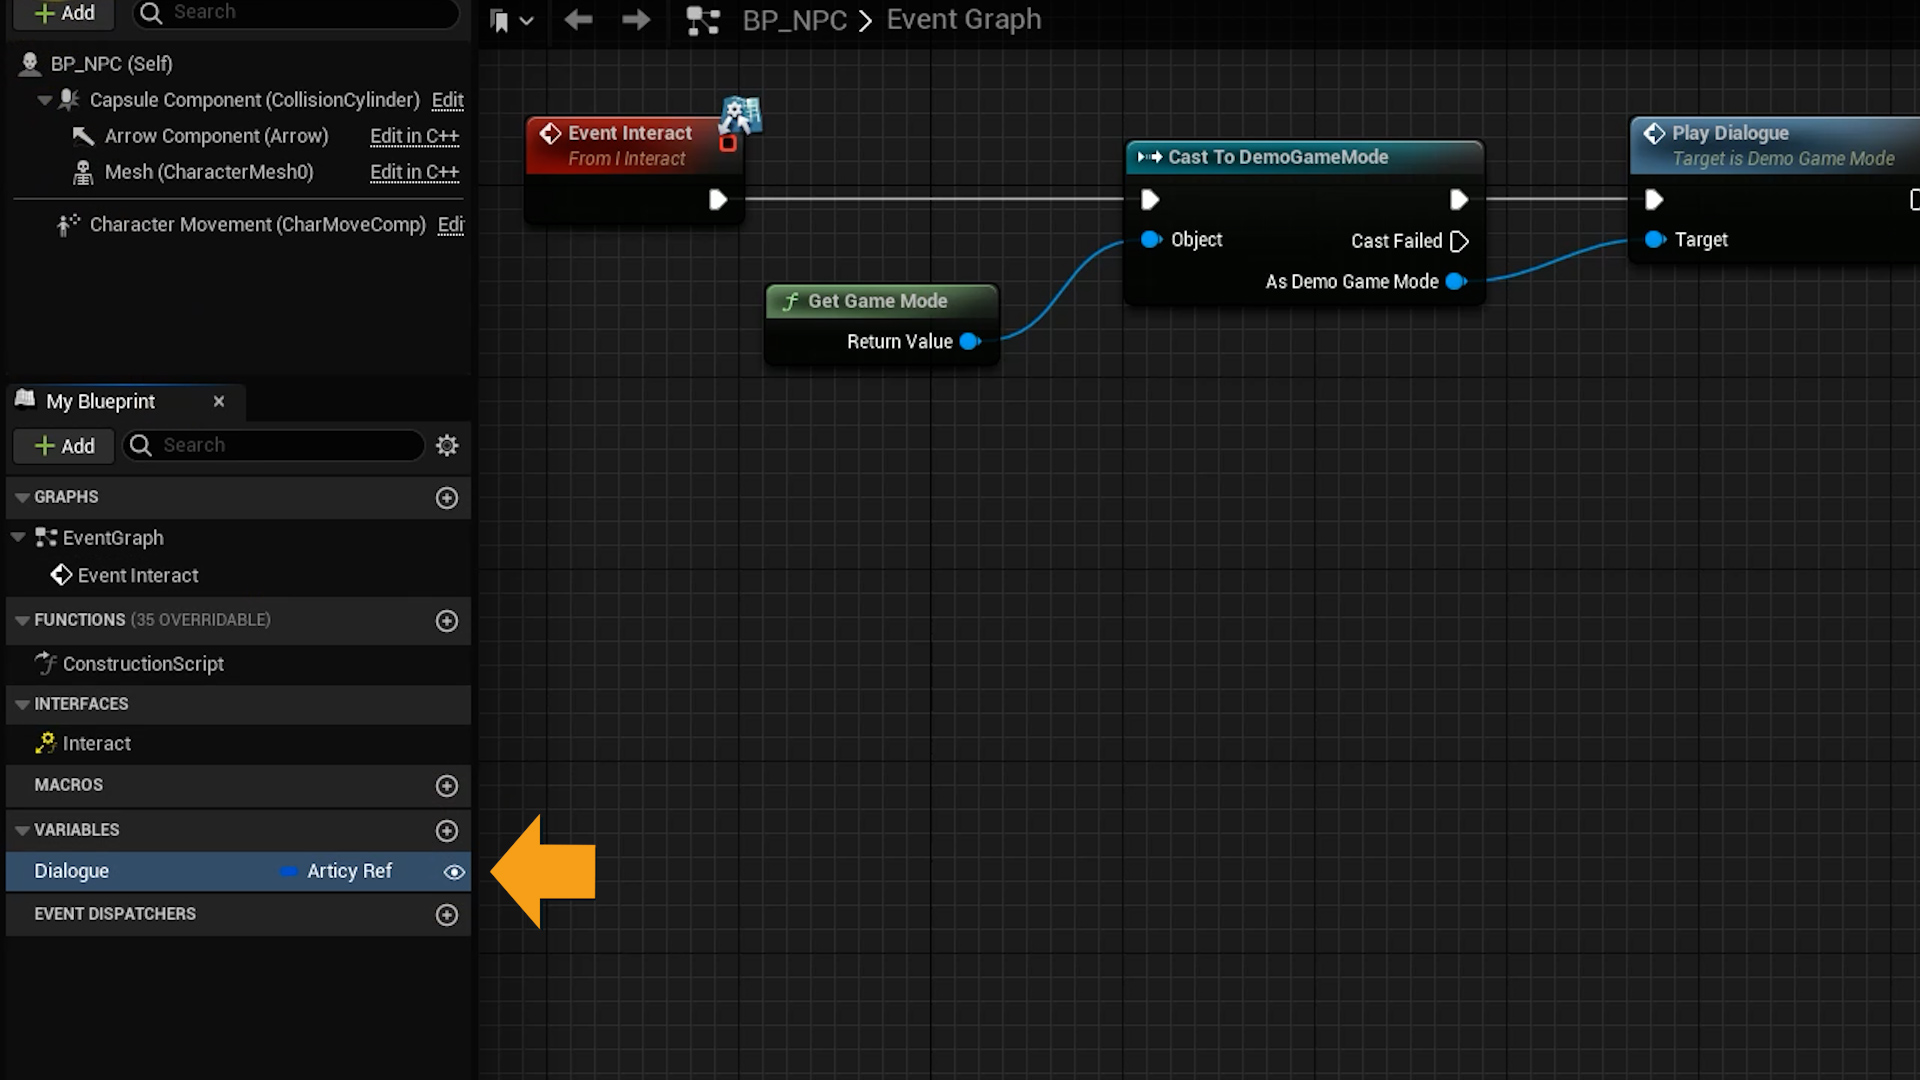
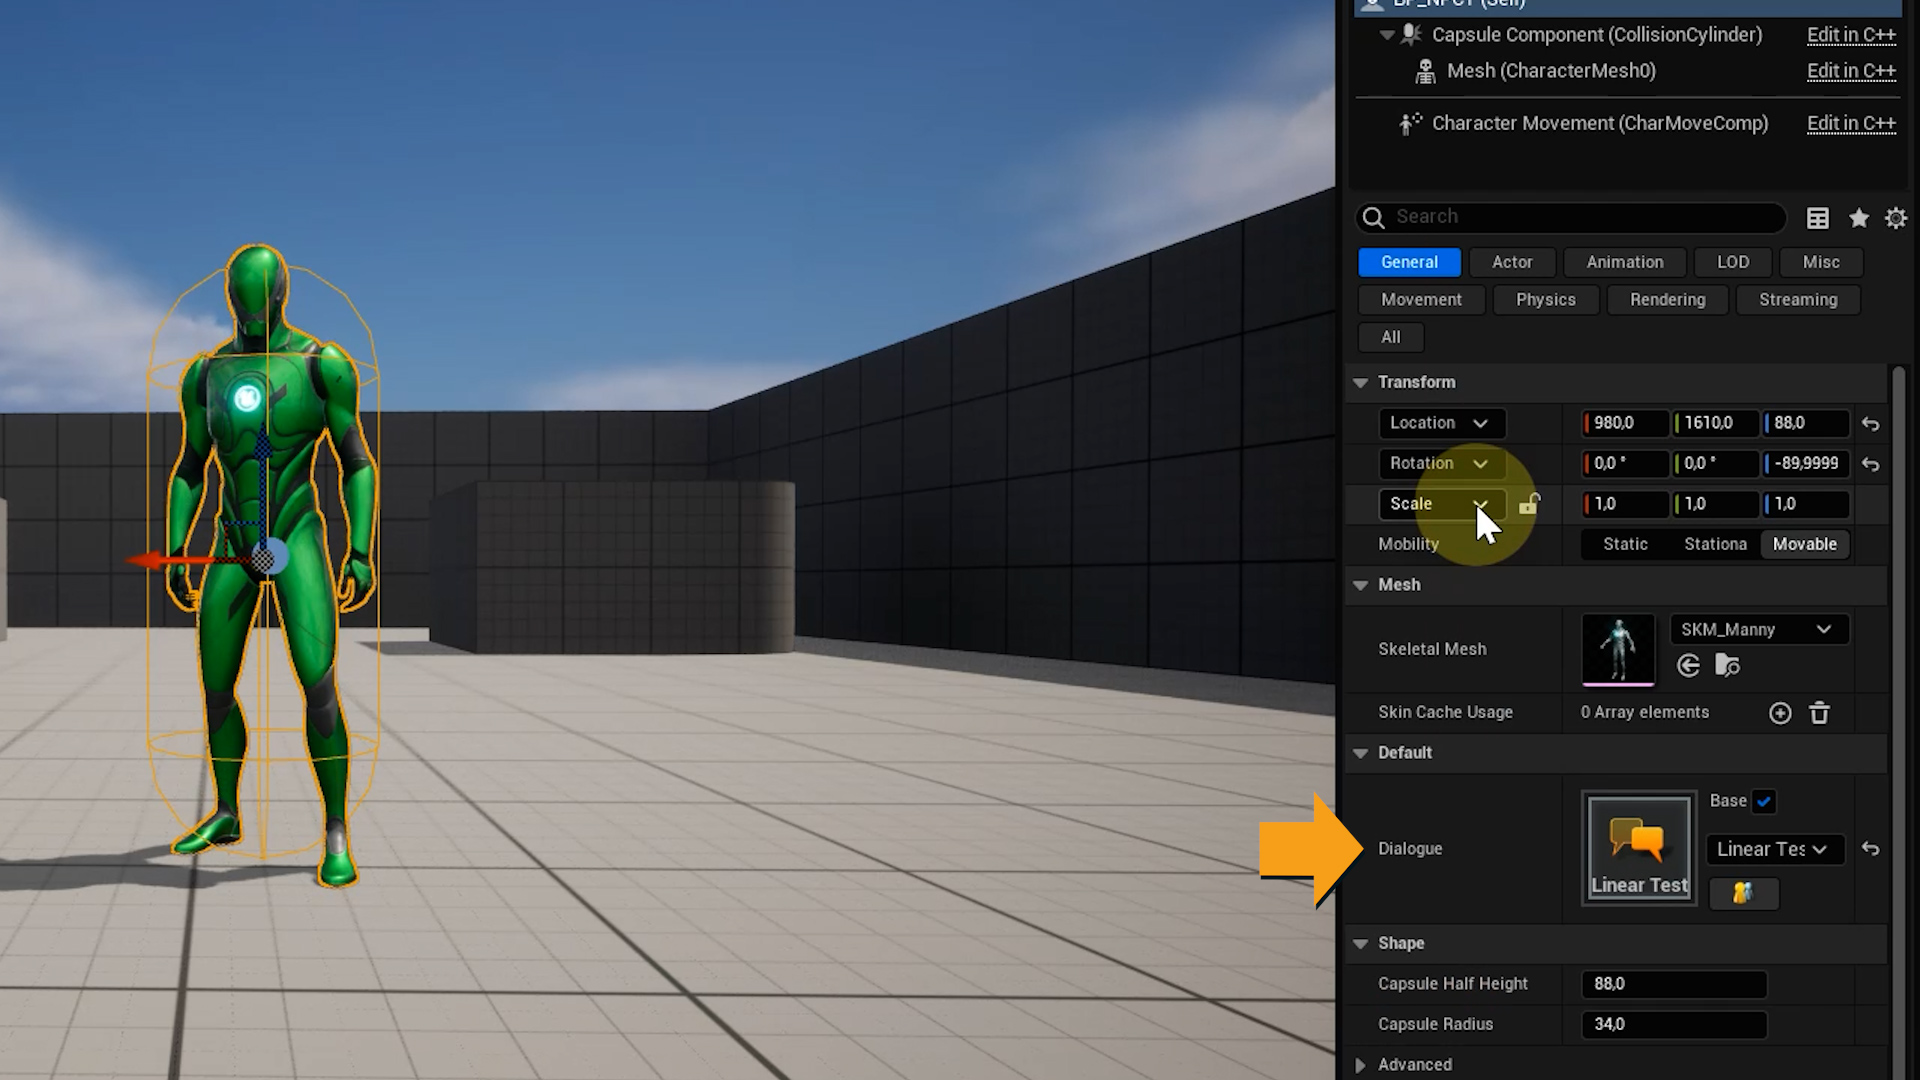
Then we go over to the NPC blueprint and add a variable Dialogue of type Articy Ref and make it public.
Now we can go to our level and select NPC1. Choose Linear Test Dialogue as the value for the Dialogue variable.
After doing this we switch back to the Demo Game Mode blueprint. Here we add an Articy Ref type input into the Play Dialogue function.
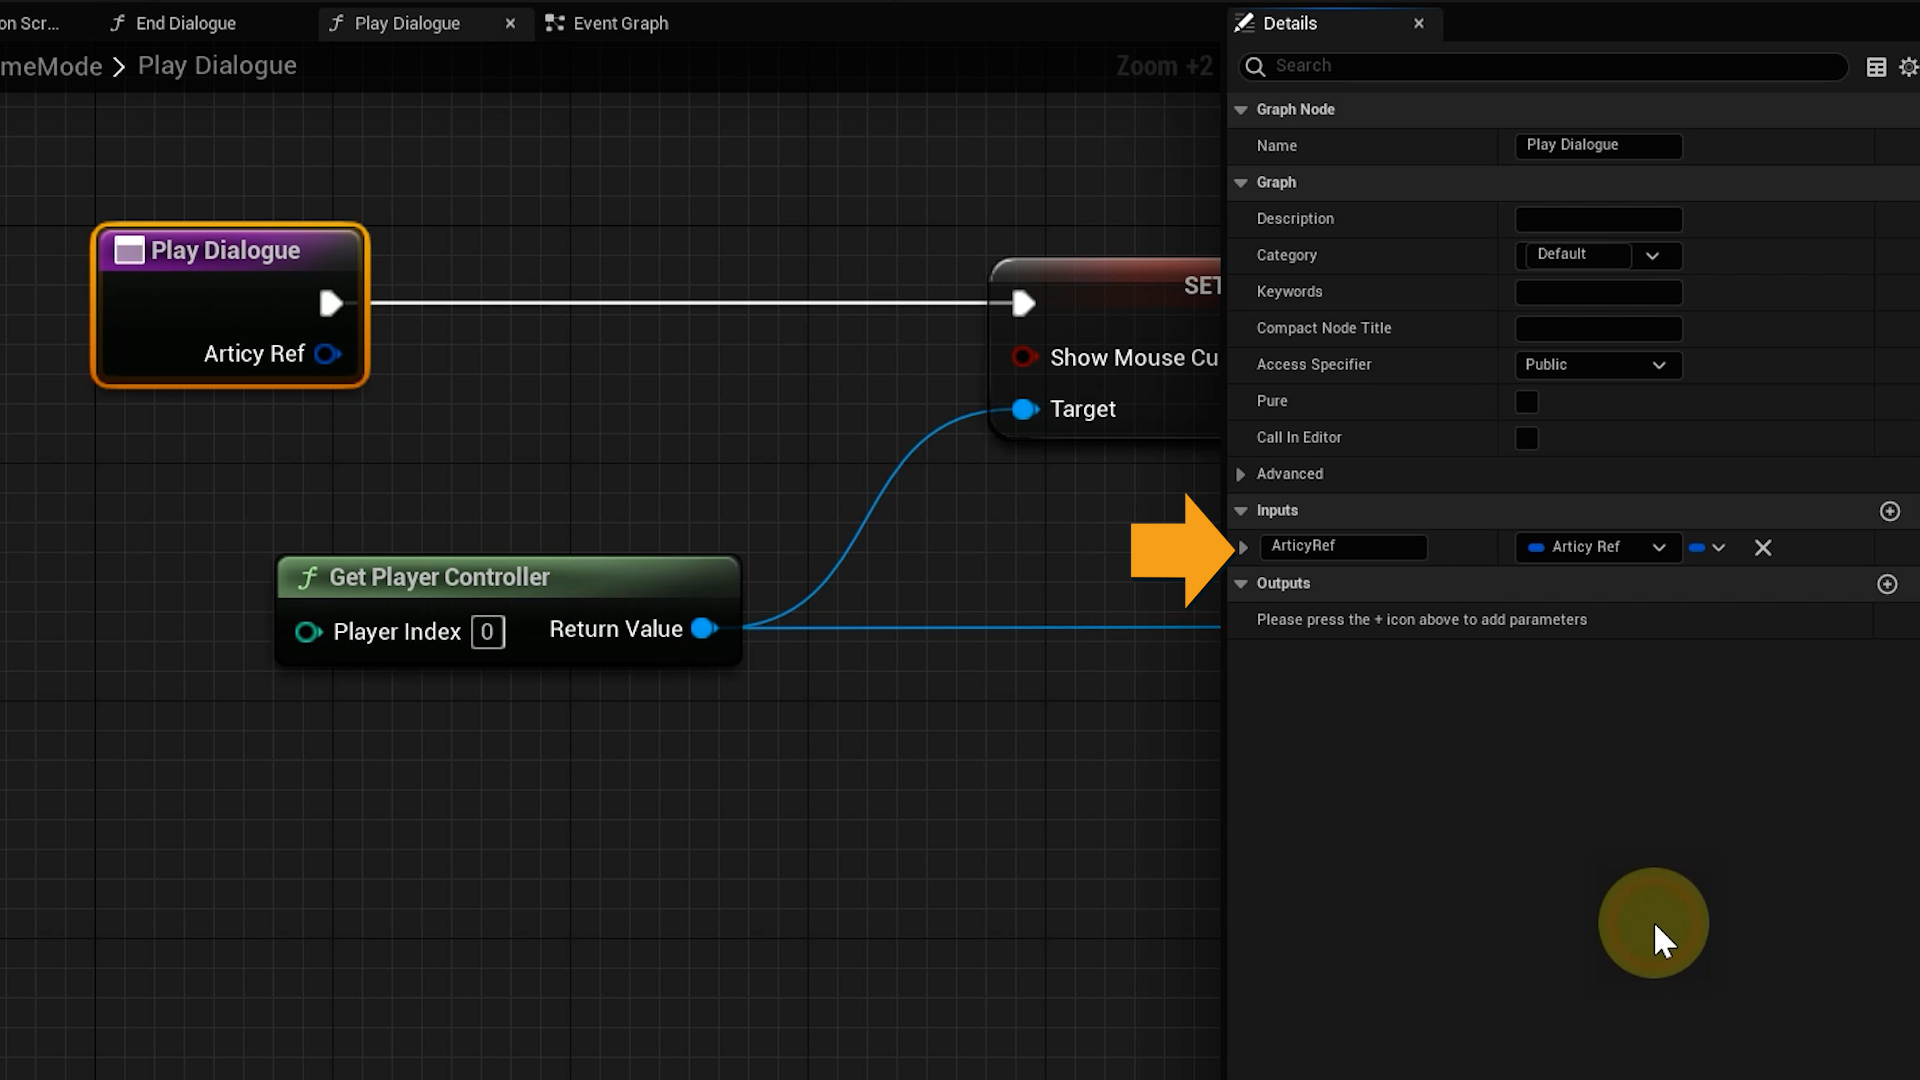
At the very end of the function, we add Set Start Node (Articy Ref), where we pass in the Articy Ref we received as a parameter. Target is the Flow Player.
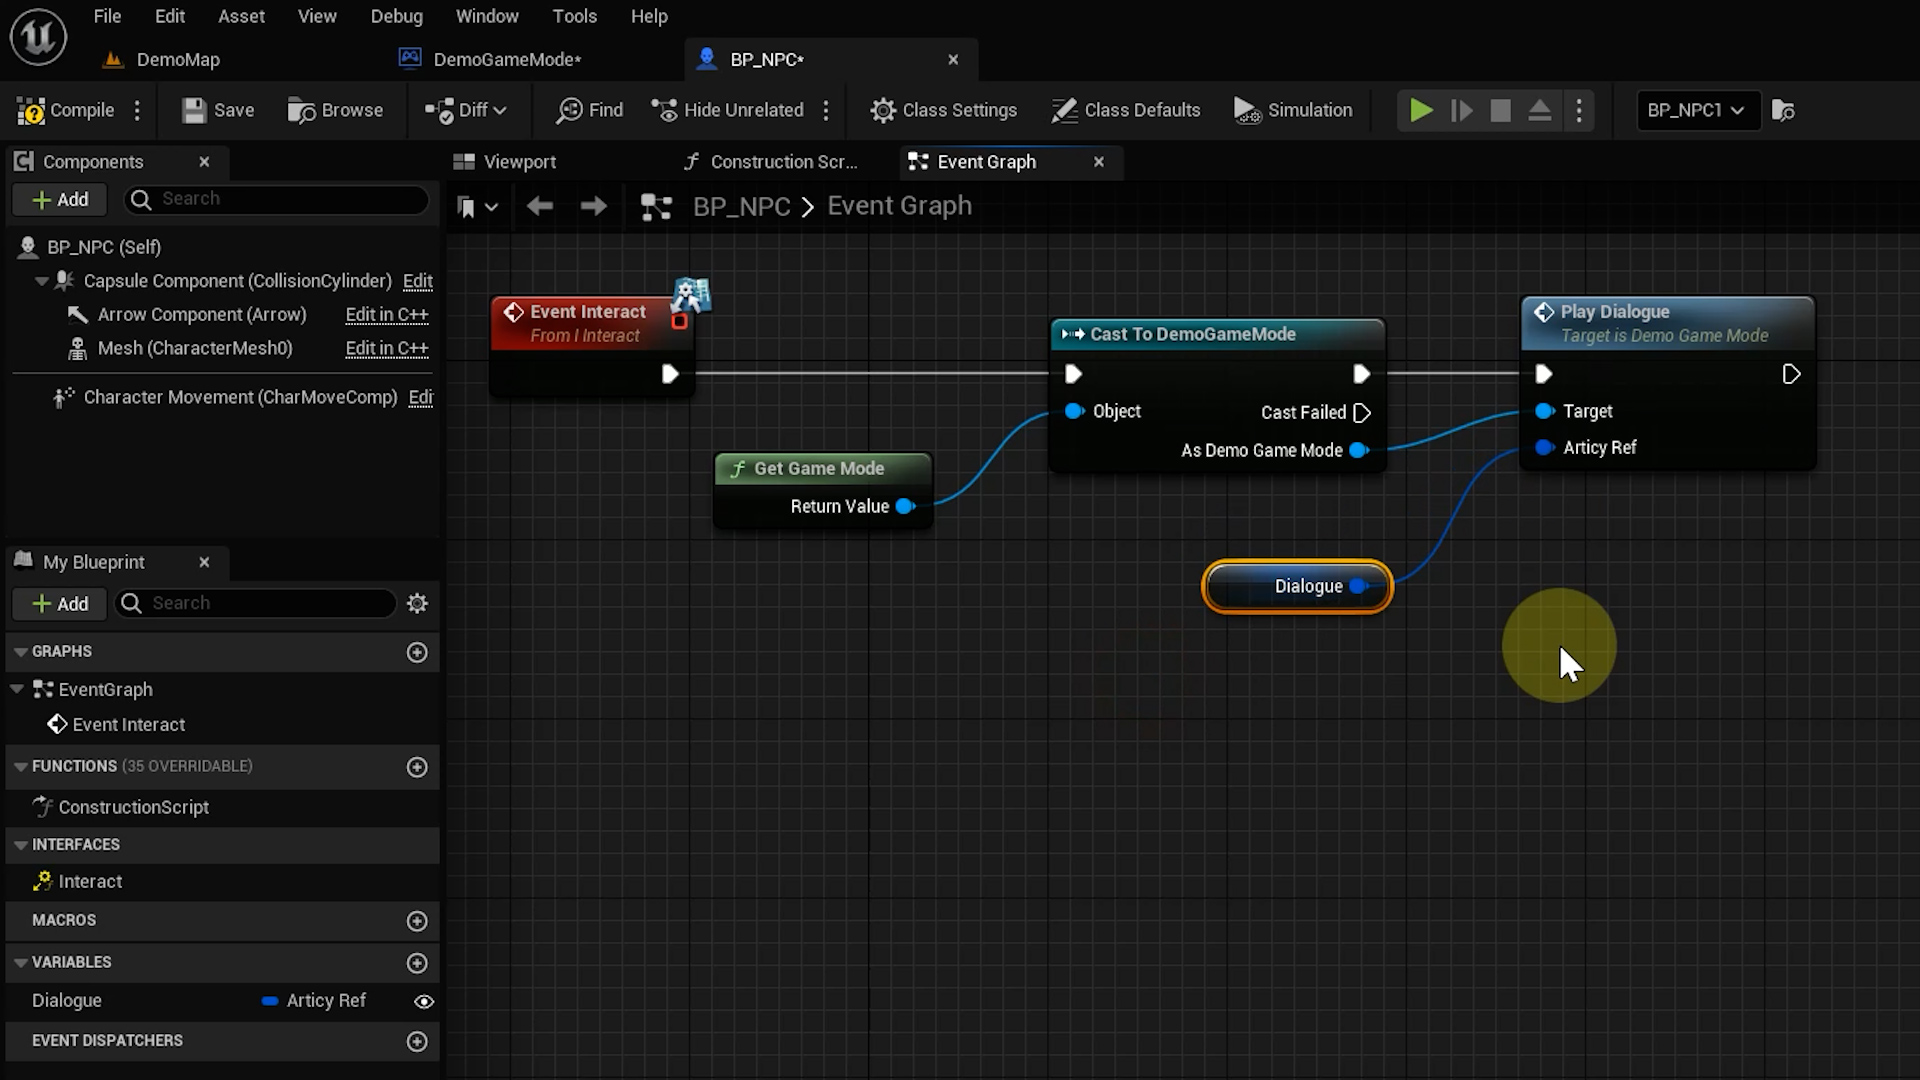
Last but not least, in the NPC blueprint, we need to pass the Articy Reference on the NPC, that means its specific dialogue, to the Play Dialogue call in the Interact event.
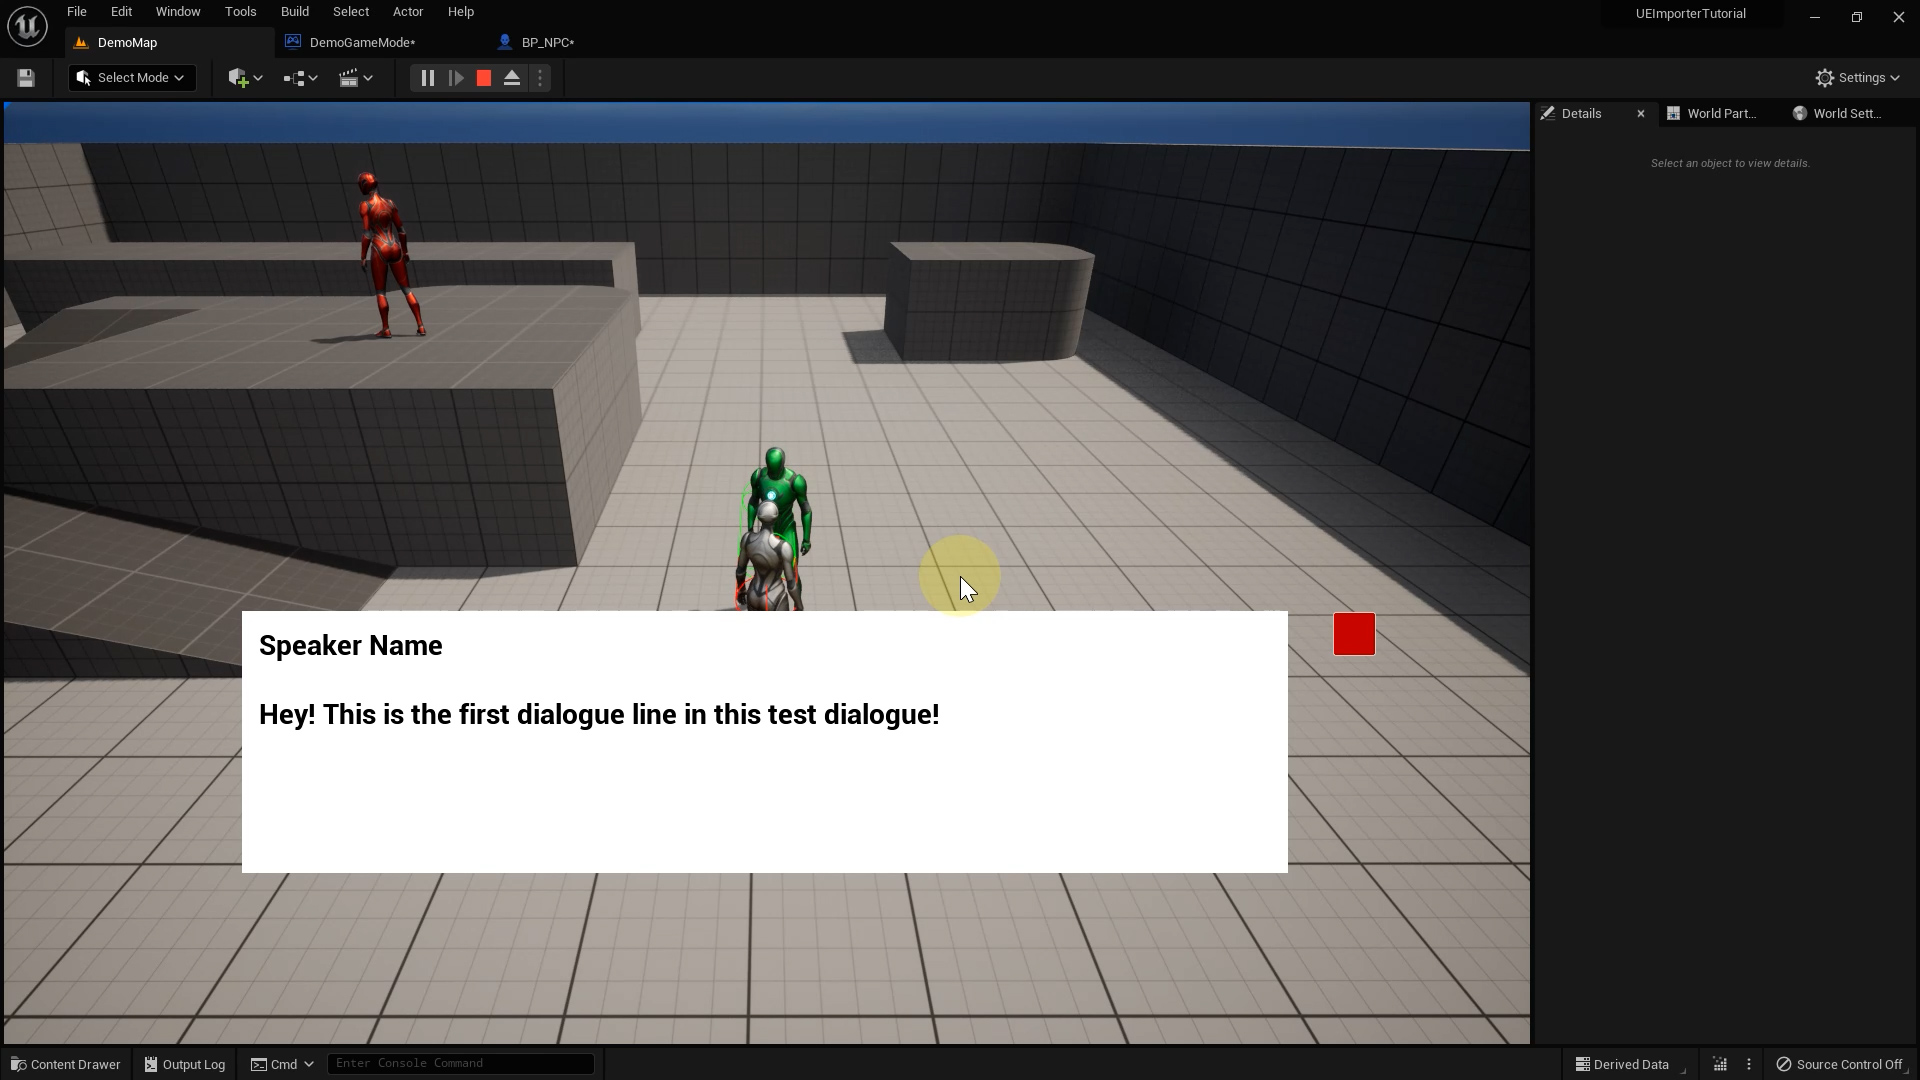
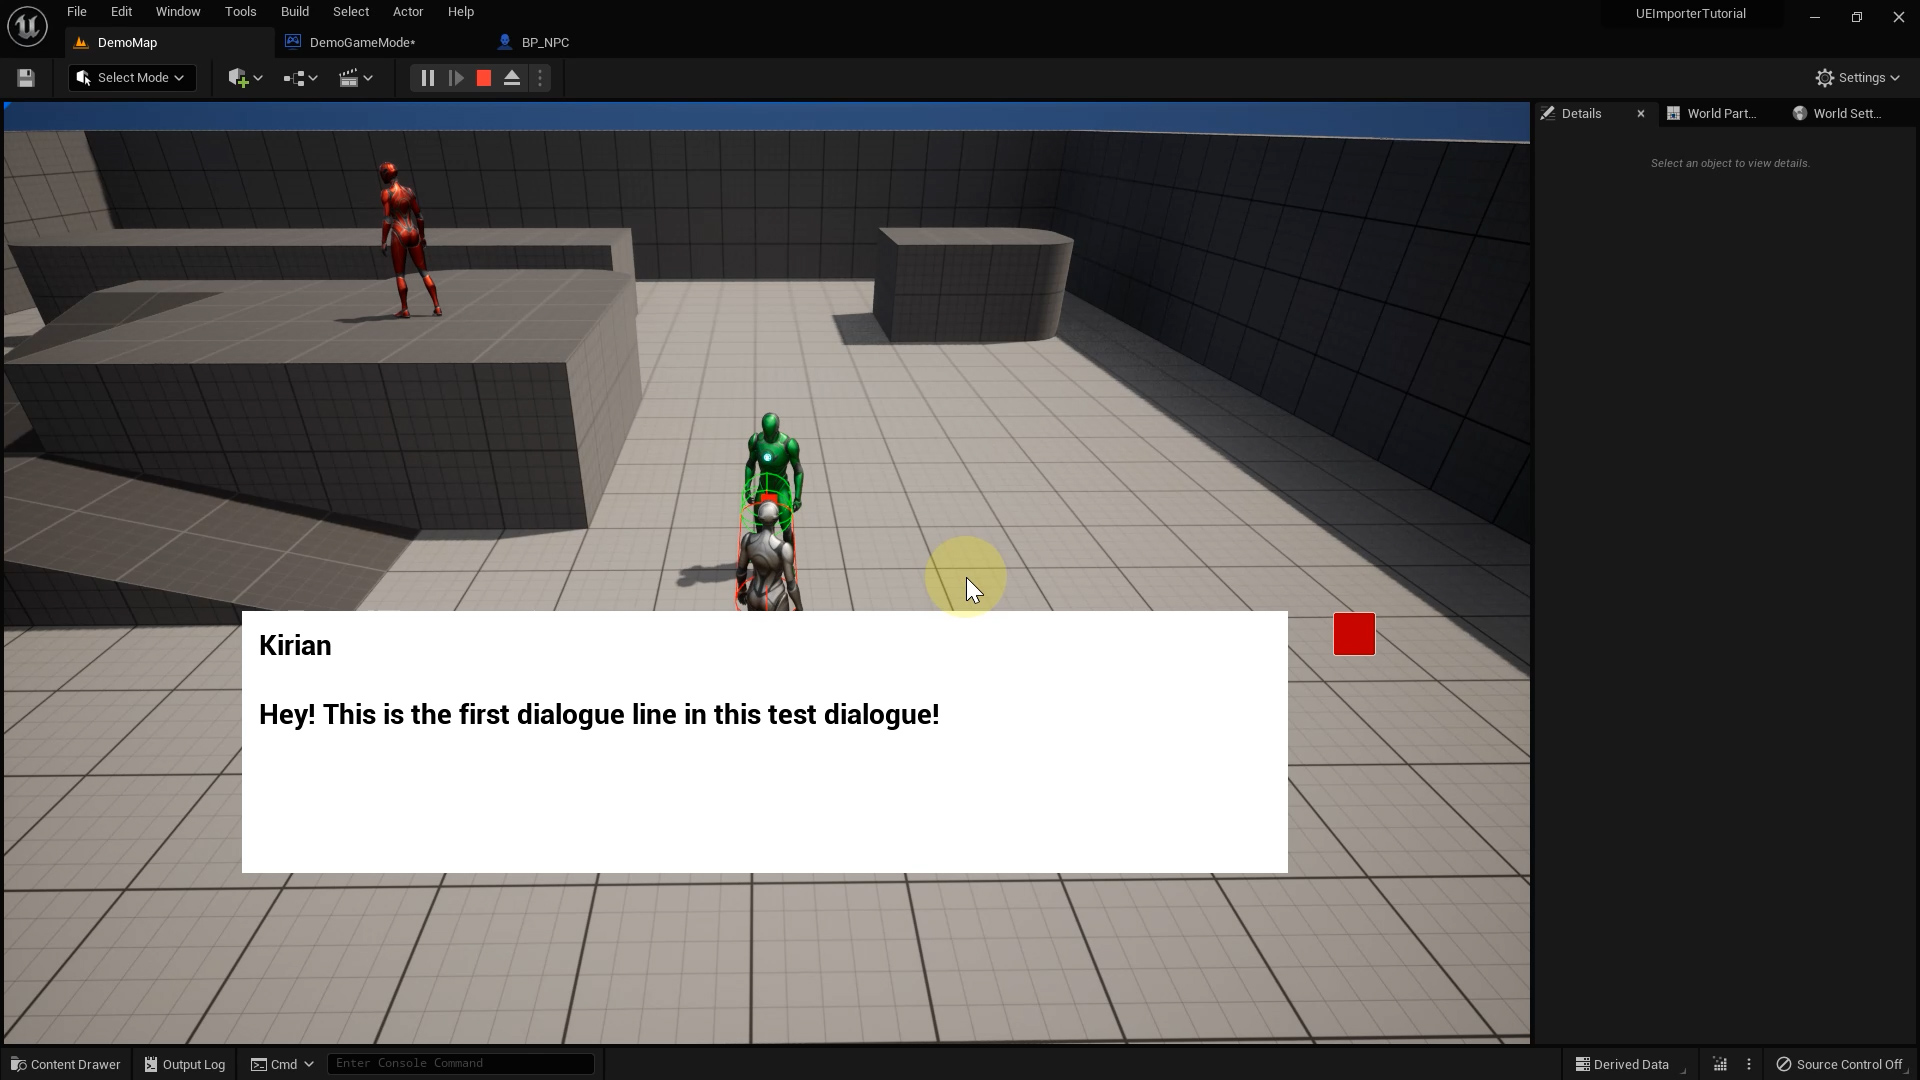
If we now play the level, we can interact with NPC 1 and see the first line of the linear test dialogue displayed in the dialogue UI.
To complete our goals for this lesson we still need to find a way to display the speaker name together with the first dialogue line. Where do you think this needs to be implemented?
It will be a second step in the On Player Paused event in the Demo Game Mode blueprint. First, we grabbed the text content of the node we paused on, now we will take a very similar approach to access the speaker information as well.
We add a Sequence node after the switch for the Dialogue Fragment path. This is just for formatting, to visually keep the different actions apart. Getting the text is step 0, getting the speaker will be step 1. Again we need to start with a cast. Analogical to earlier this time we want to access the speaker data of the node so we cast to Articy Object With Speaker. Then we Get Speaker and use the result to get its Display name. This we then can set as Text again. Like before we start with Player HUD, going over Dialogue Widget, but this time conclude with Speaker Name as the target. And same as before, we add an Is Valid to prevent errors in case the player HUD does not already exist.
When playing we now see the first line of dialogue plus the name of the speaker displayed in the dialogue UI. Great work!
Recap lesson 2
In this lesson we began setting up the dialogue system we are going to use in this Unreal project. We started by printing a line of text to the console log, and continued from there to now being able to display the first dialogue line plus the speaker name in the custom dialogue UI after interacting with an NPC.
Up next in lesson 3
In the next lesson, we will add a button to be able to traverse through the entire Linear test dialogue.
See you there!
Don’t have articy:draft X yet? Get the free version now!
Get articy:draft X FREE
*No Payment information required