Hello and welcome to lesson 4 of the articy:draft Importer for Unreal tutorial series.
Recap lesson 3
In lesson 3 we updated the dialogue system and can now traverse through linear dialogues and end them.
This lesson
In this lesson we will continue to work on the dialogue system so it can handle branching dialogue as well.
Starting with branching dialogue
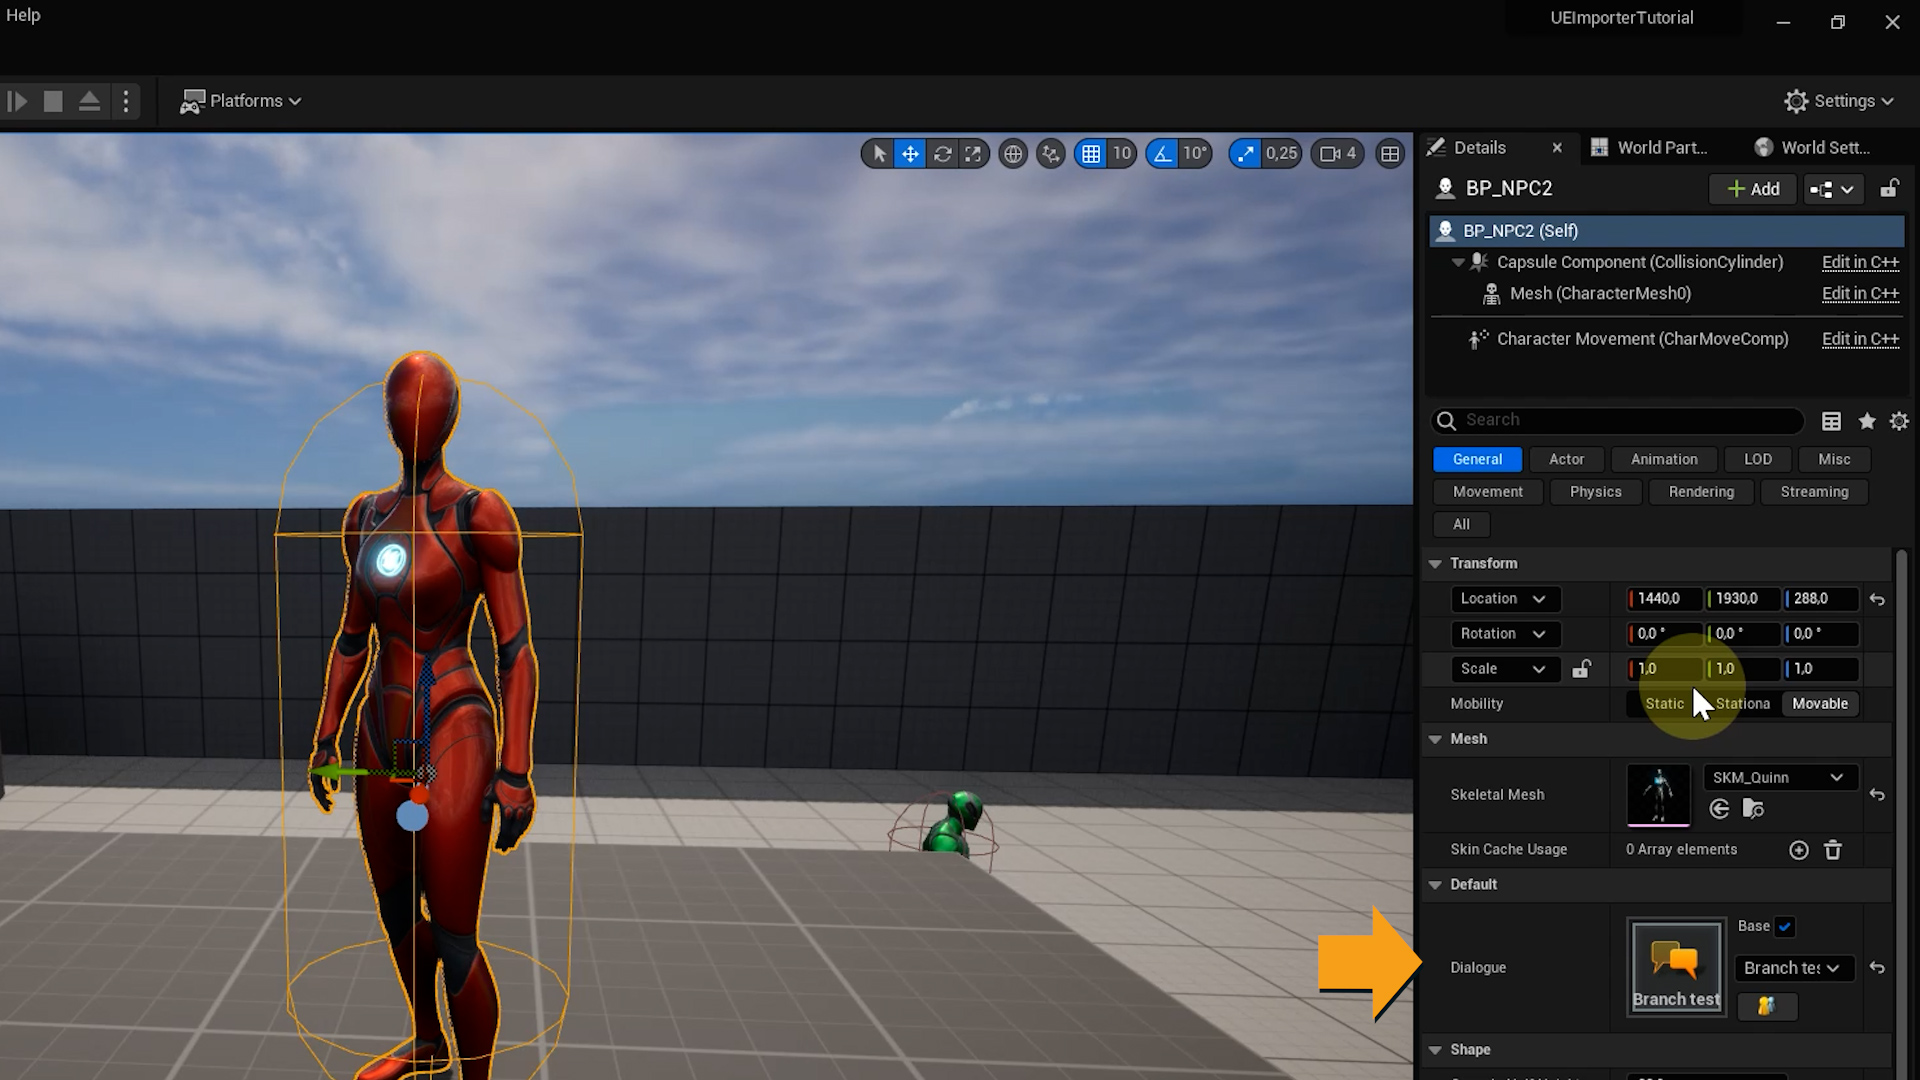
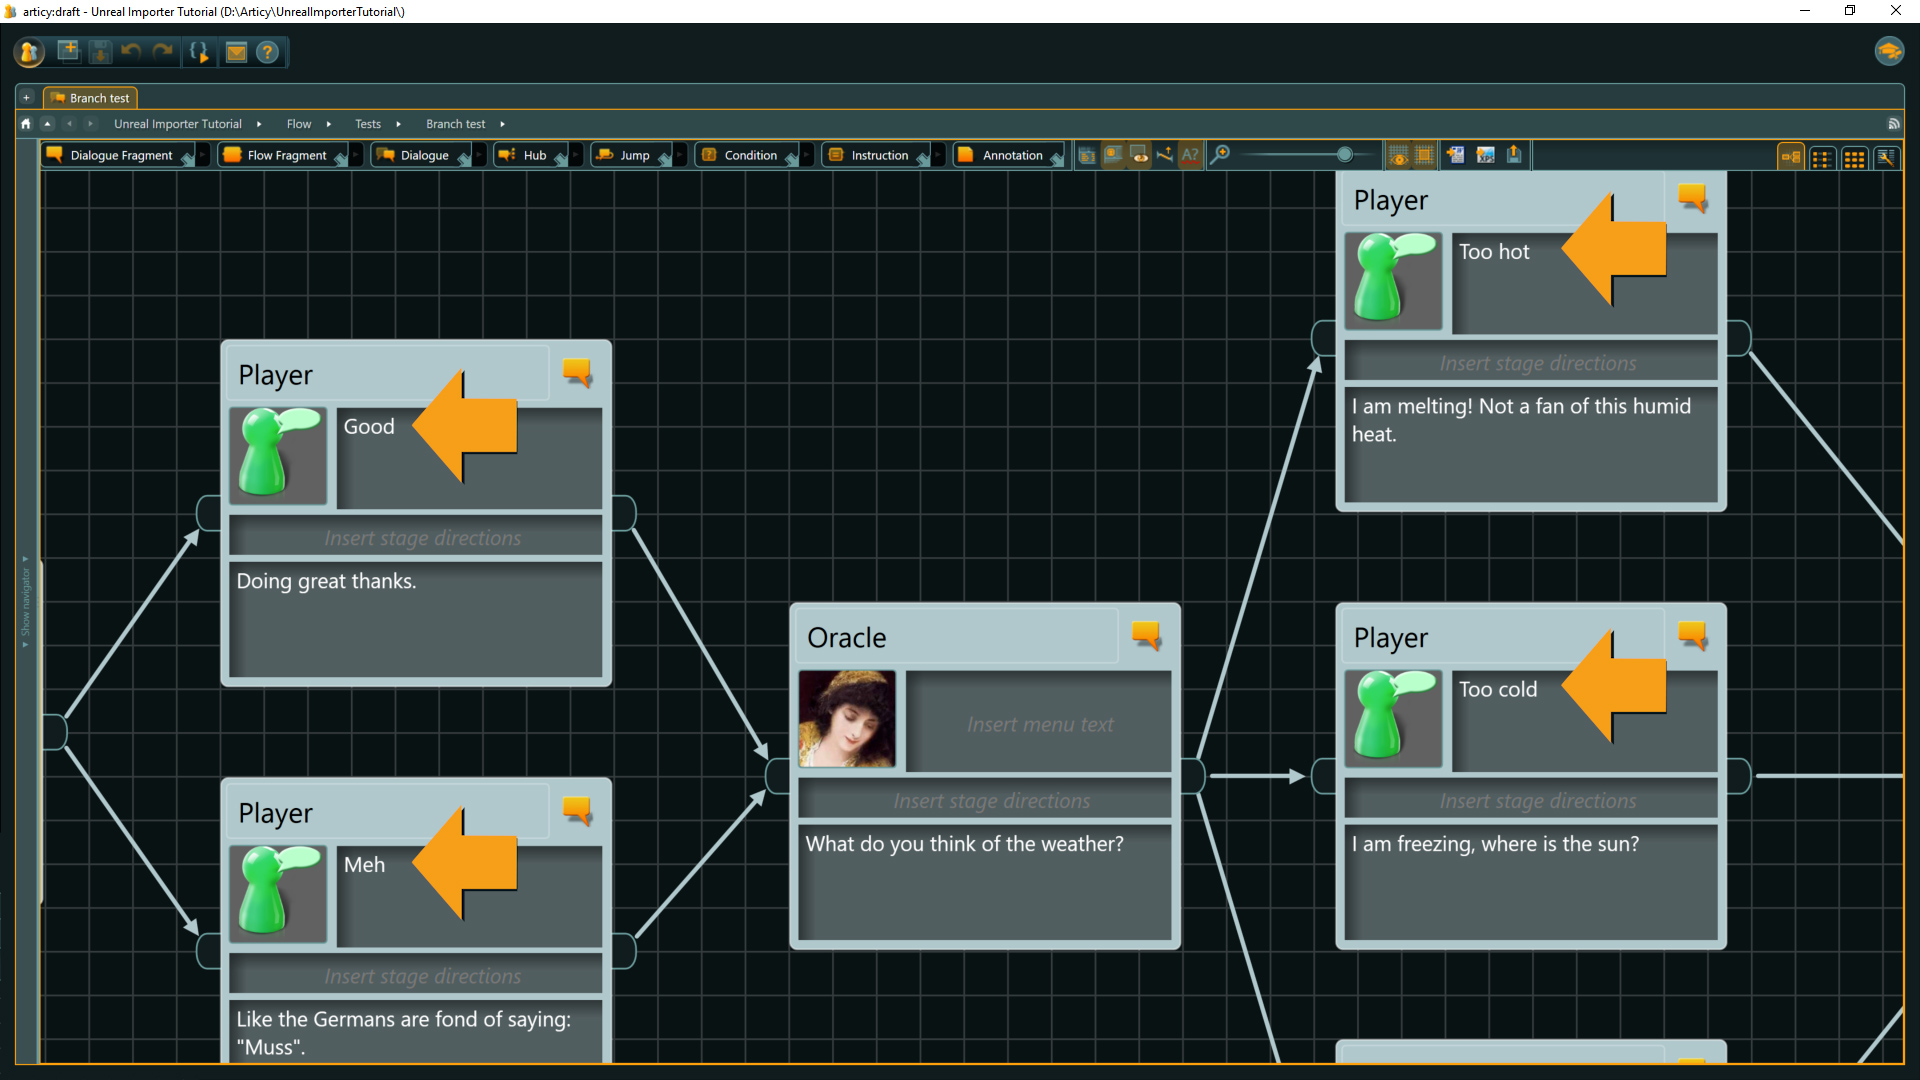
We start by adding the branch test dialogue as an Articy Reference to NPC2.
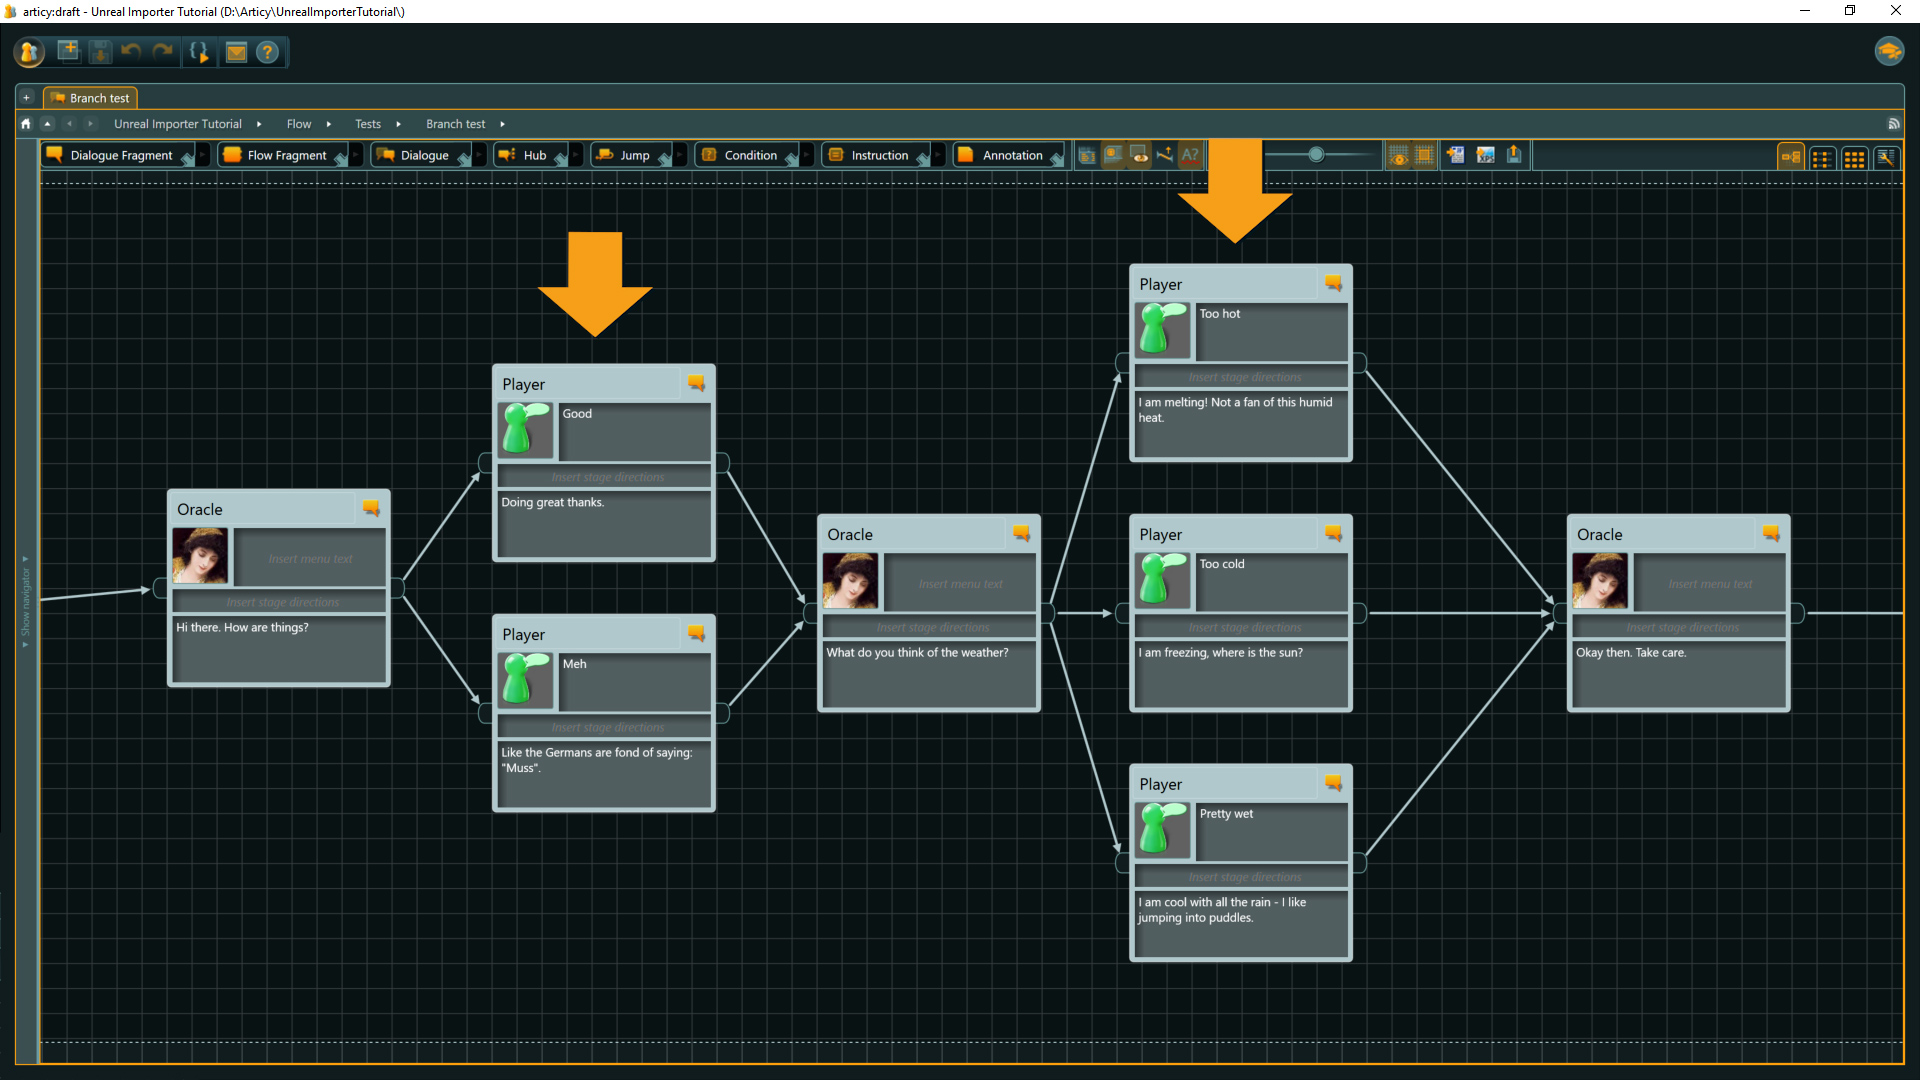
When we look at the dialogue in articy, we can see that we have a choice point with two and another with three options.
Let’s just play the level in Unreal, interact with NPC 2 and see what happens with the system we have at the moment. We actually get the corresponding number of buttons displayed at the choice points. Although at the moment it doesn’t matter which choice we select, we always see the first option displayed on screen. And of course the buttons do not have any custom text, which makes it quite hard to make an informed choice in the first place.

Setting up custom button text
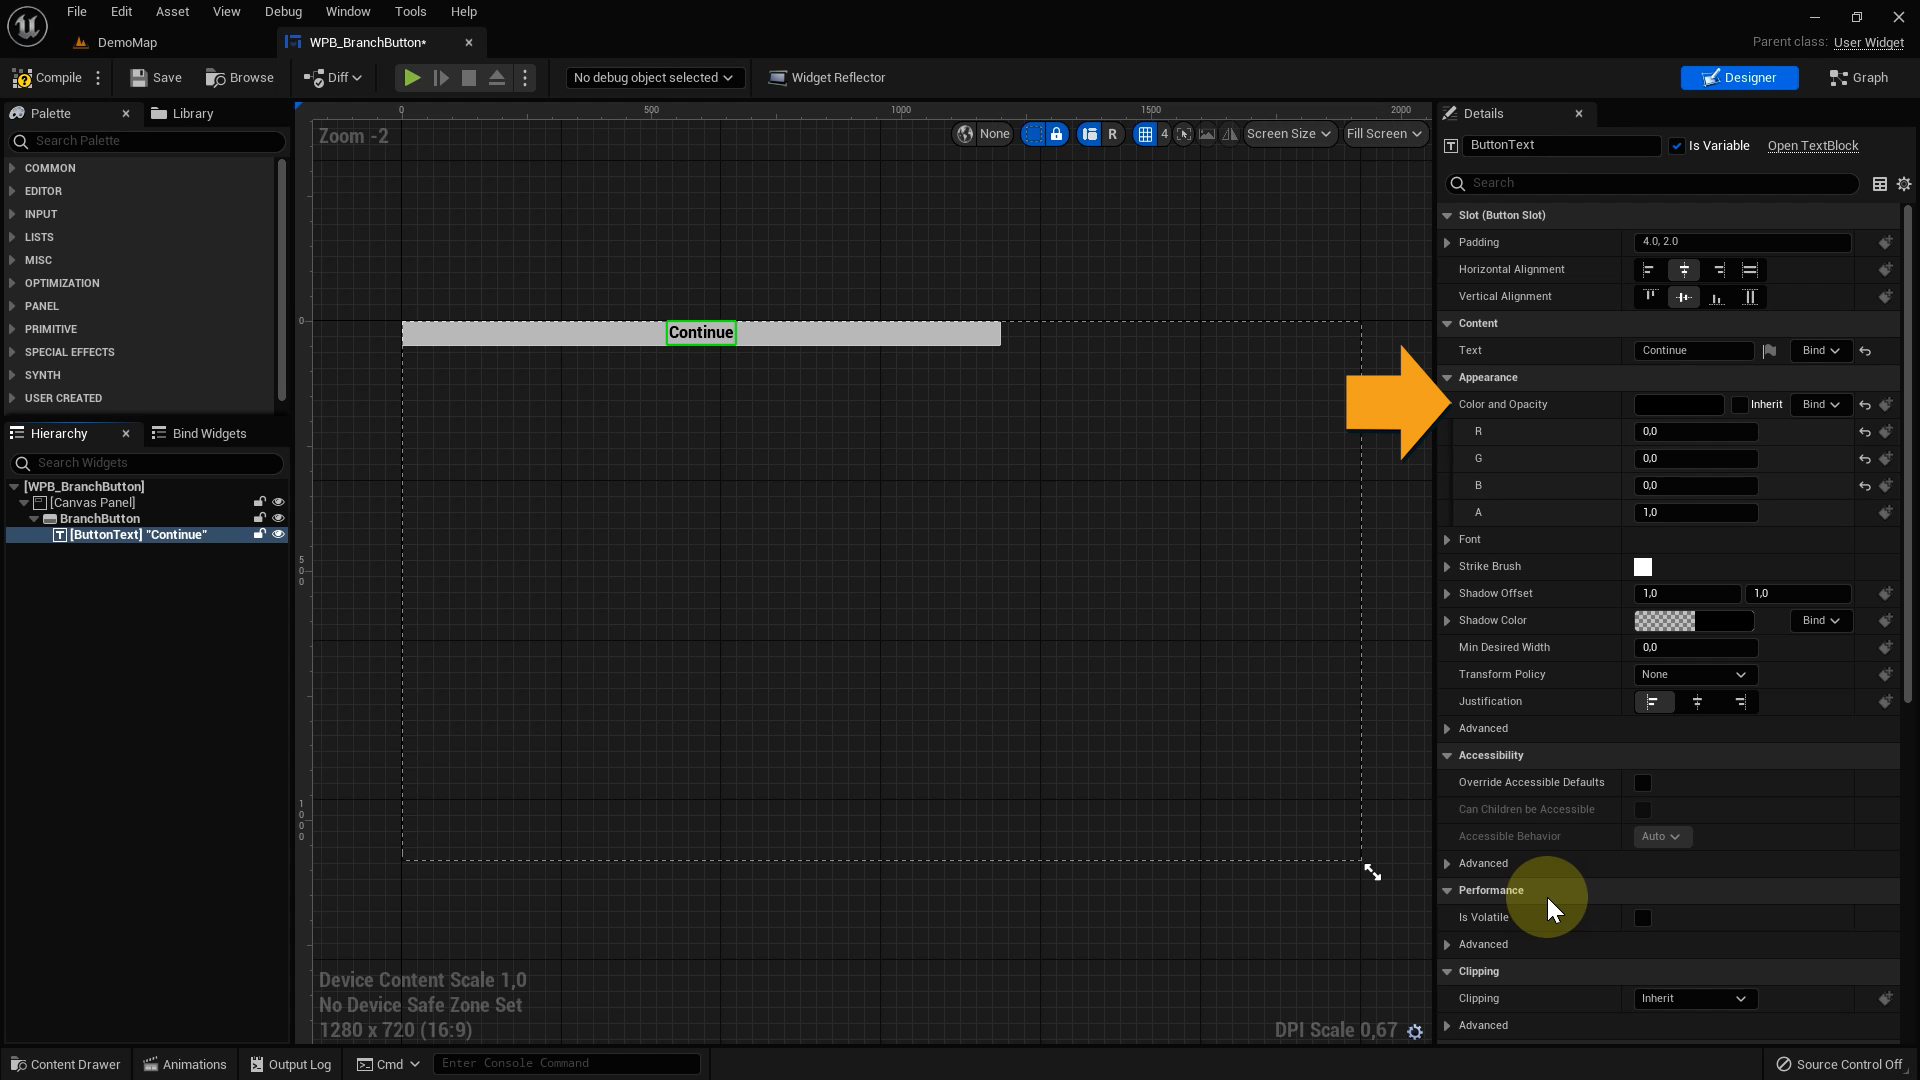
We will start with custom button text. For that we need to go into the Branch Button blueprint.
But first, a small adjustment I forgot when creating the button. I will change the button text to black to make it fit with the text color in the dialogue box.
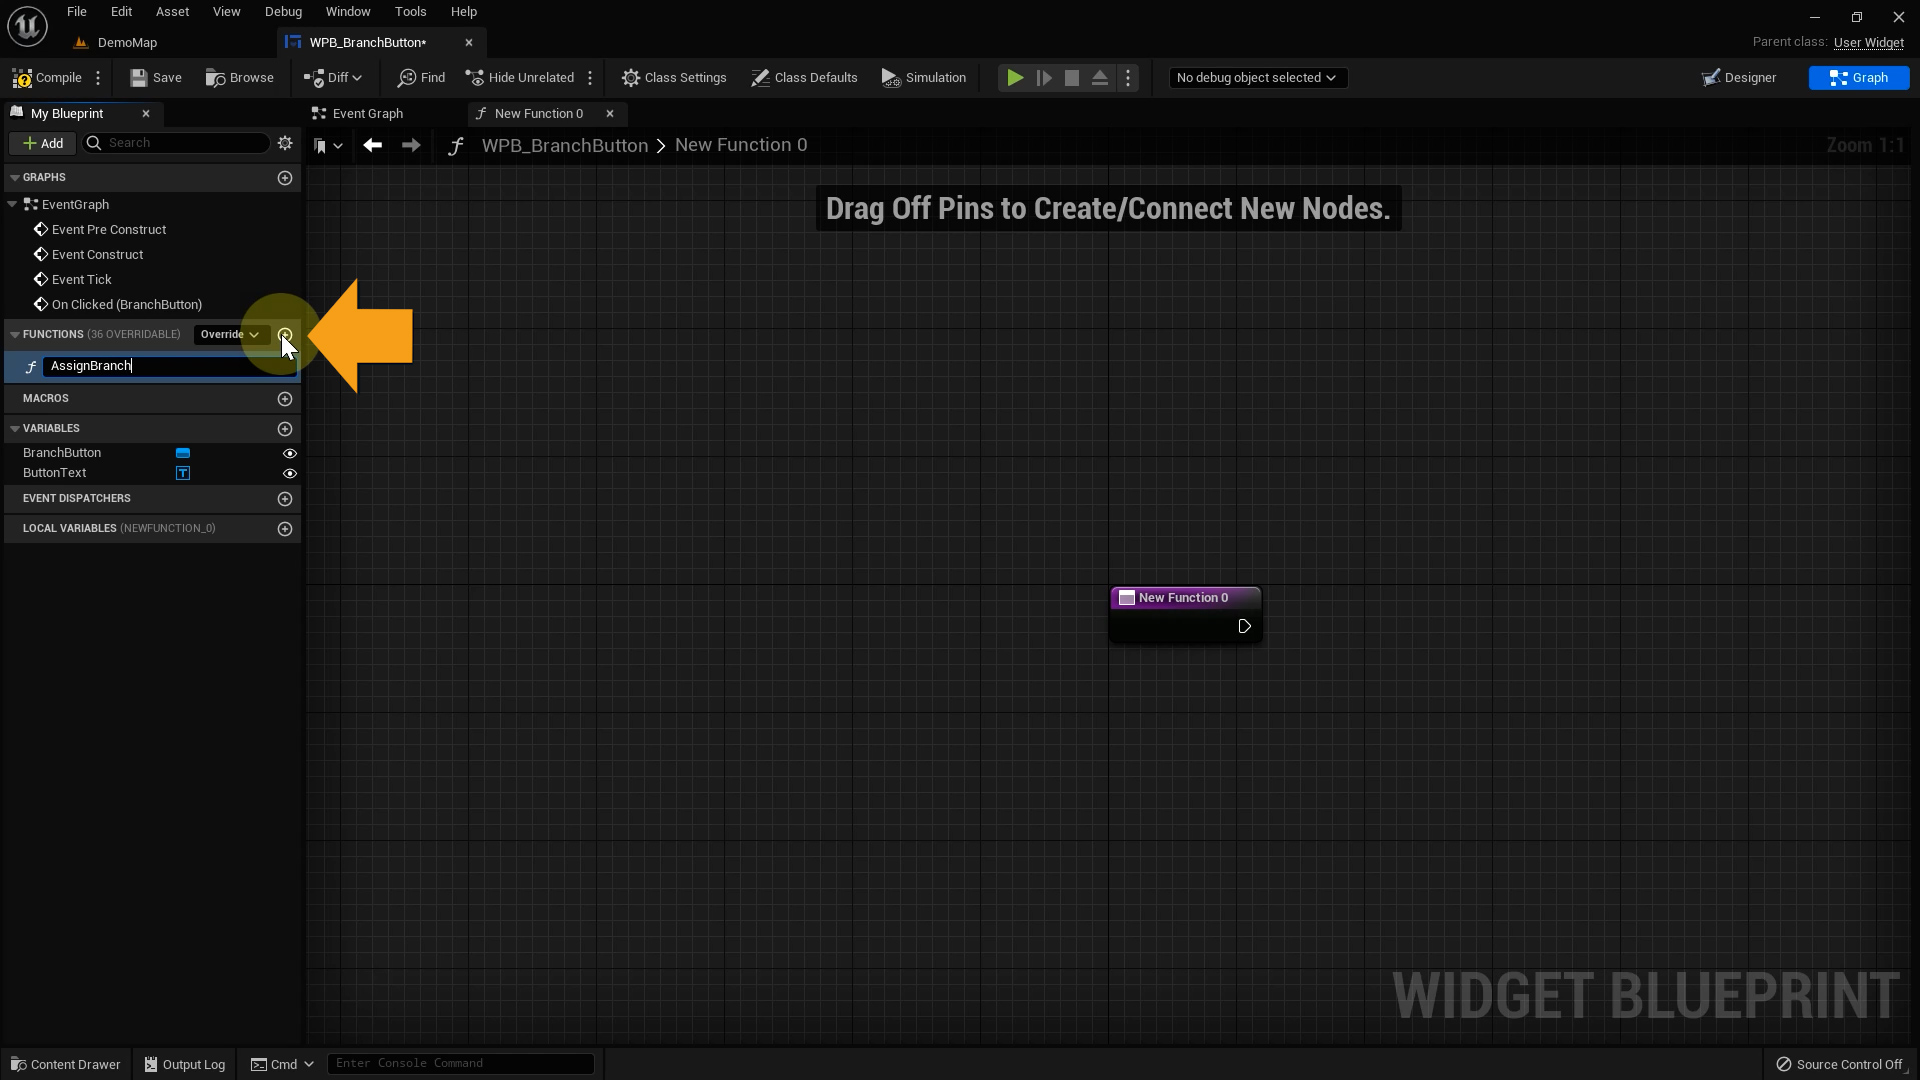
Now we switch to the graph and create an Assign Branch function.
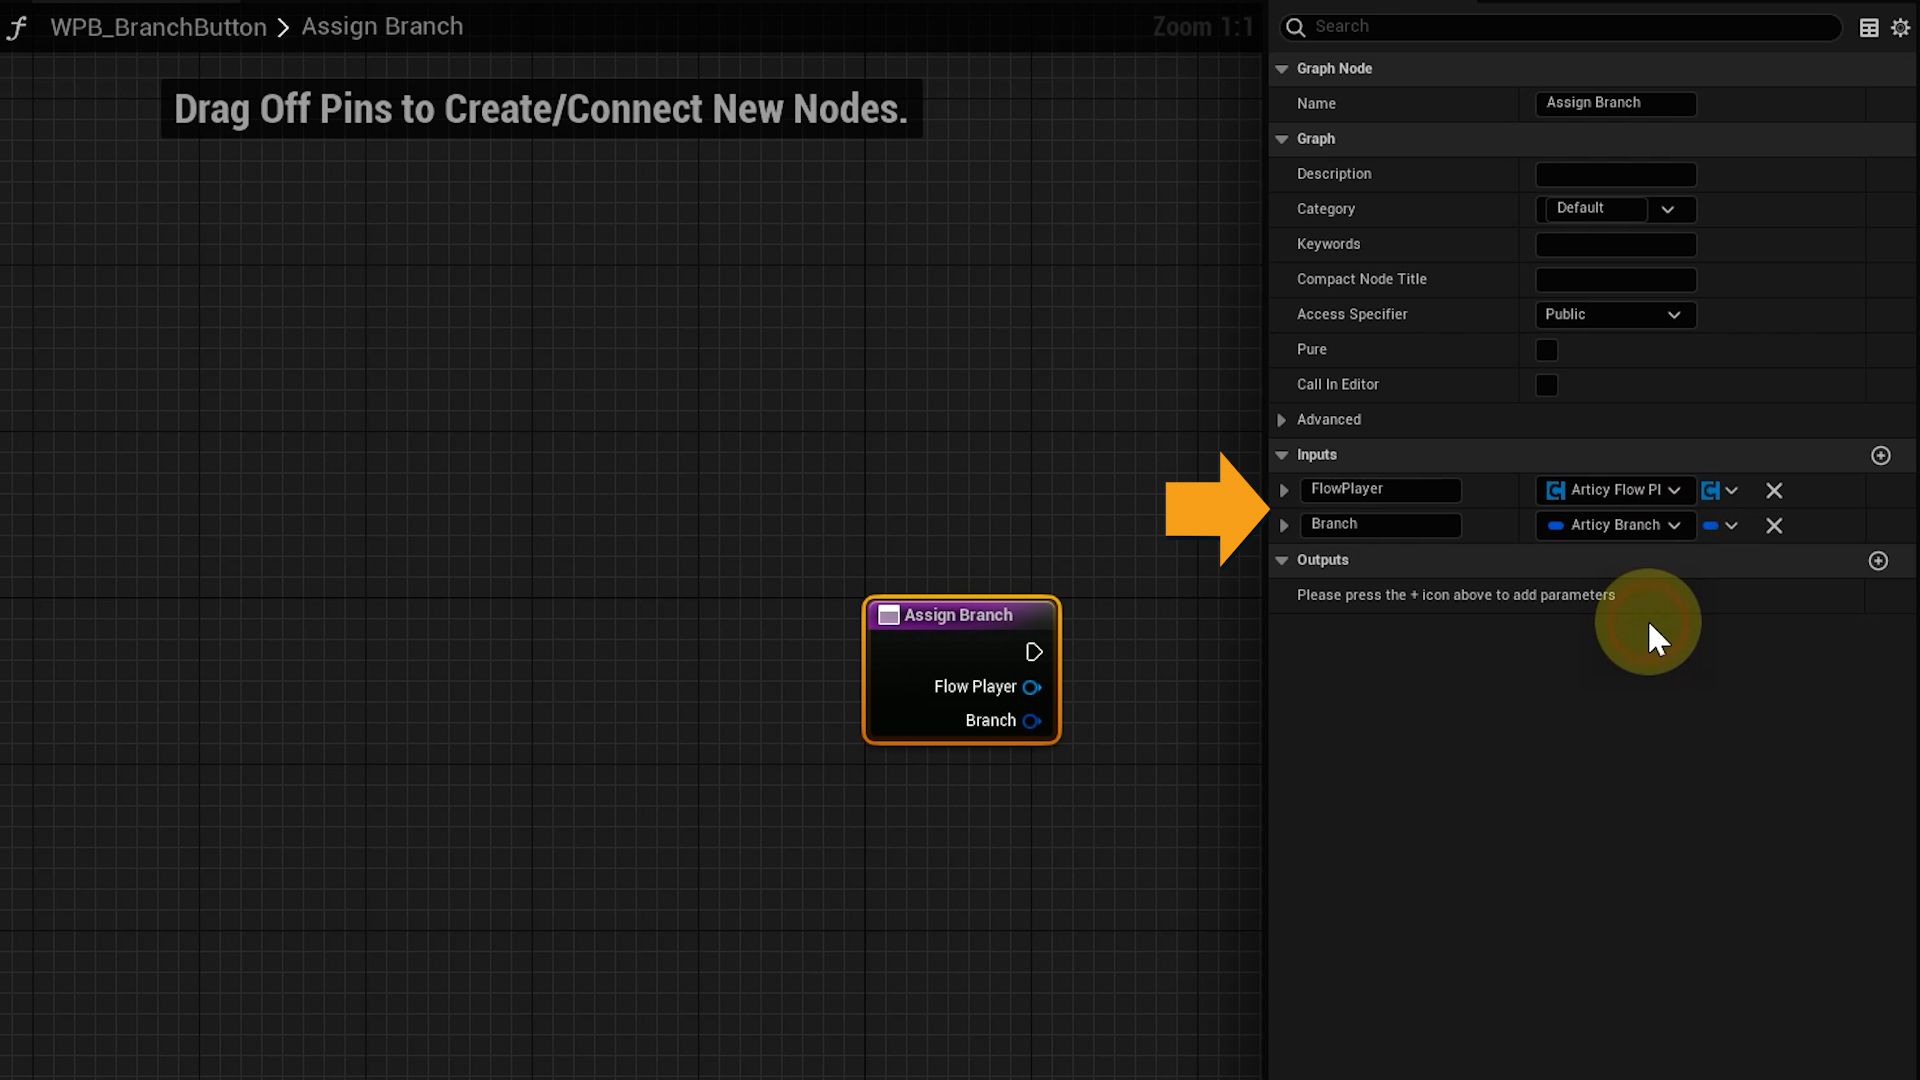
Then we add two inputs to this function: Flow Player of type Articy Flow Player and Branch of type Articy Branch.
We call this function in the Demo Game Mode blueprint in On Branches Updated, right after creation of the Branch Button. The target comes from the Create Branch Button Widget node, the reference to the Flow Player we can drag in from our components, and Branch comes from the Array element of the For Each loop.

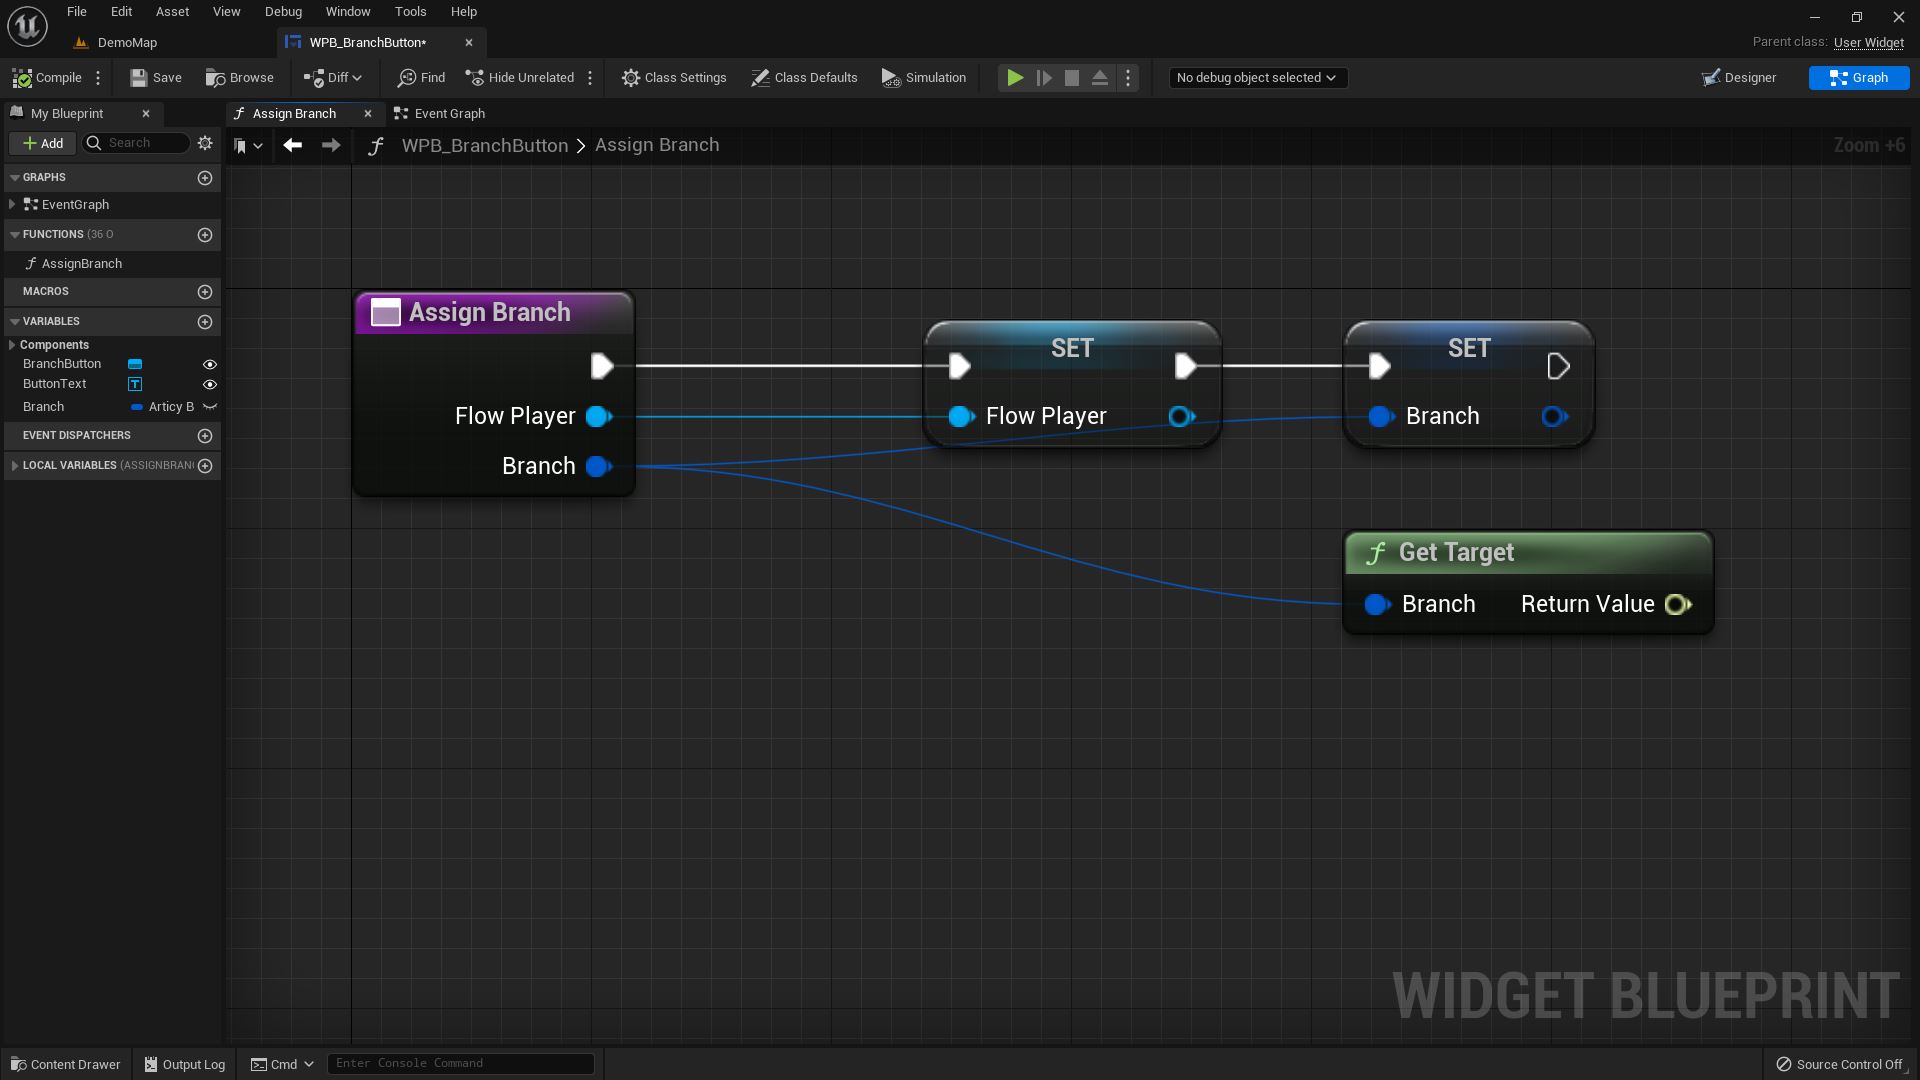
Back to the Assign Branch function. Here we promote both parameters to variables and store them for later use. We also get a target from Branch.
In the articy project we use menu text at player choice points. This menu text I want to display as the button text, so it does not display the entire line on the button and again after the click. Where there is no menu text, I just want to display three dots or an arrow, as this is basically just a continue talking branch. This of course is a personal choice, you might want to go another route in your project.
In the Assign Branch function, we cast from the target to an Articy Object With Menu Text, get its menu text and promote it to a local variable by right-clicking the return value. I’ll call this variable Preview Text.
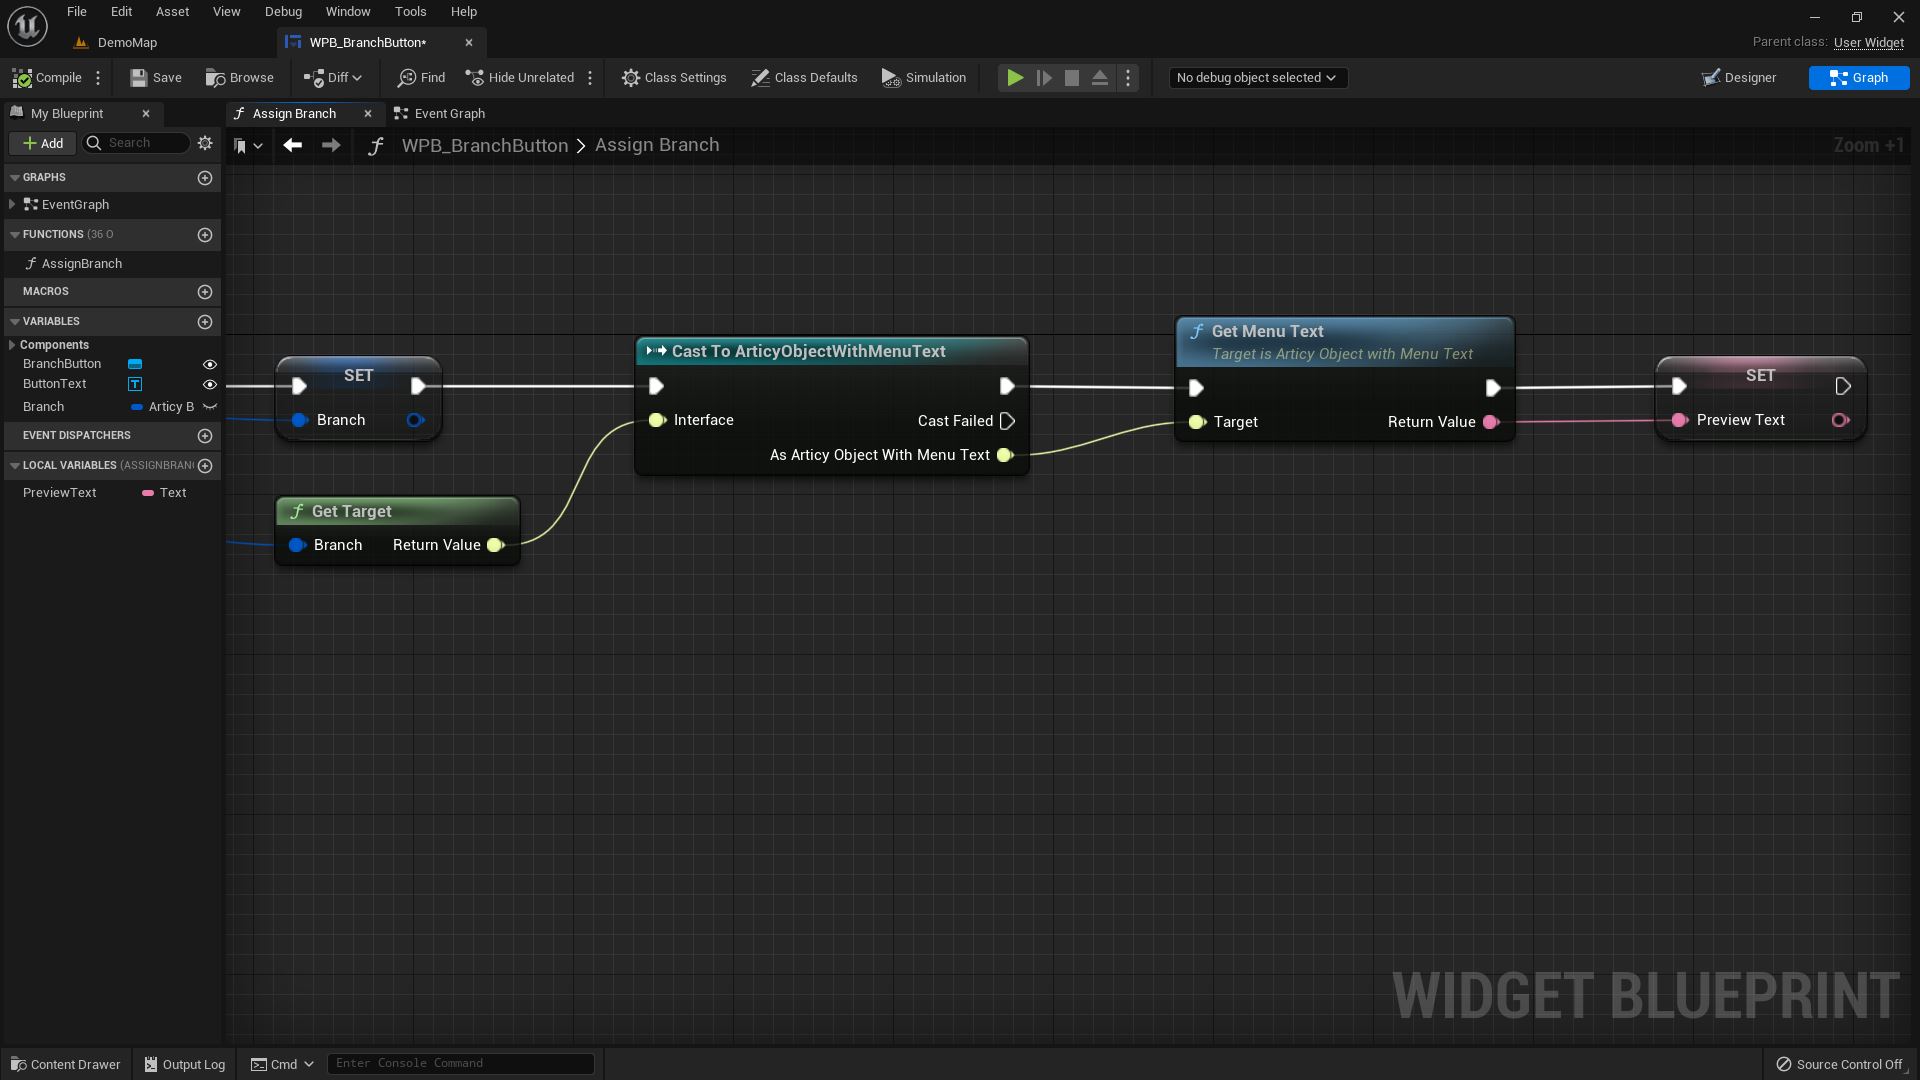
Next we check if the text is empty, which will happen unless we are at a player choice point where menu text is used. The result we use as the condition in a Branch. If it evaluates to true, meaning there is no menu text, we set the value of the Preview Text variable to the value we want to display for the continue talking situations. Last but not least we use Set Text to assign the Preview Text to the Button Text. The branch’s false option goes directly to Set Text, as we don’t want to make further changes to the Preview Text variable, but use the value we set earlier with the menu text.

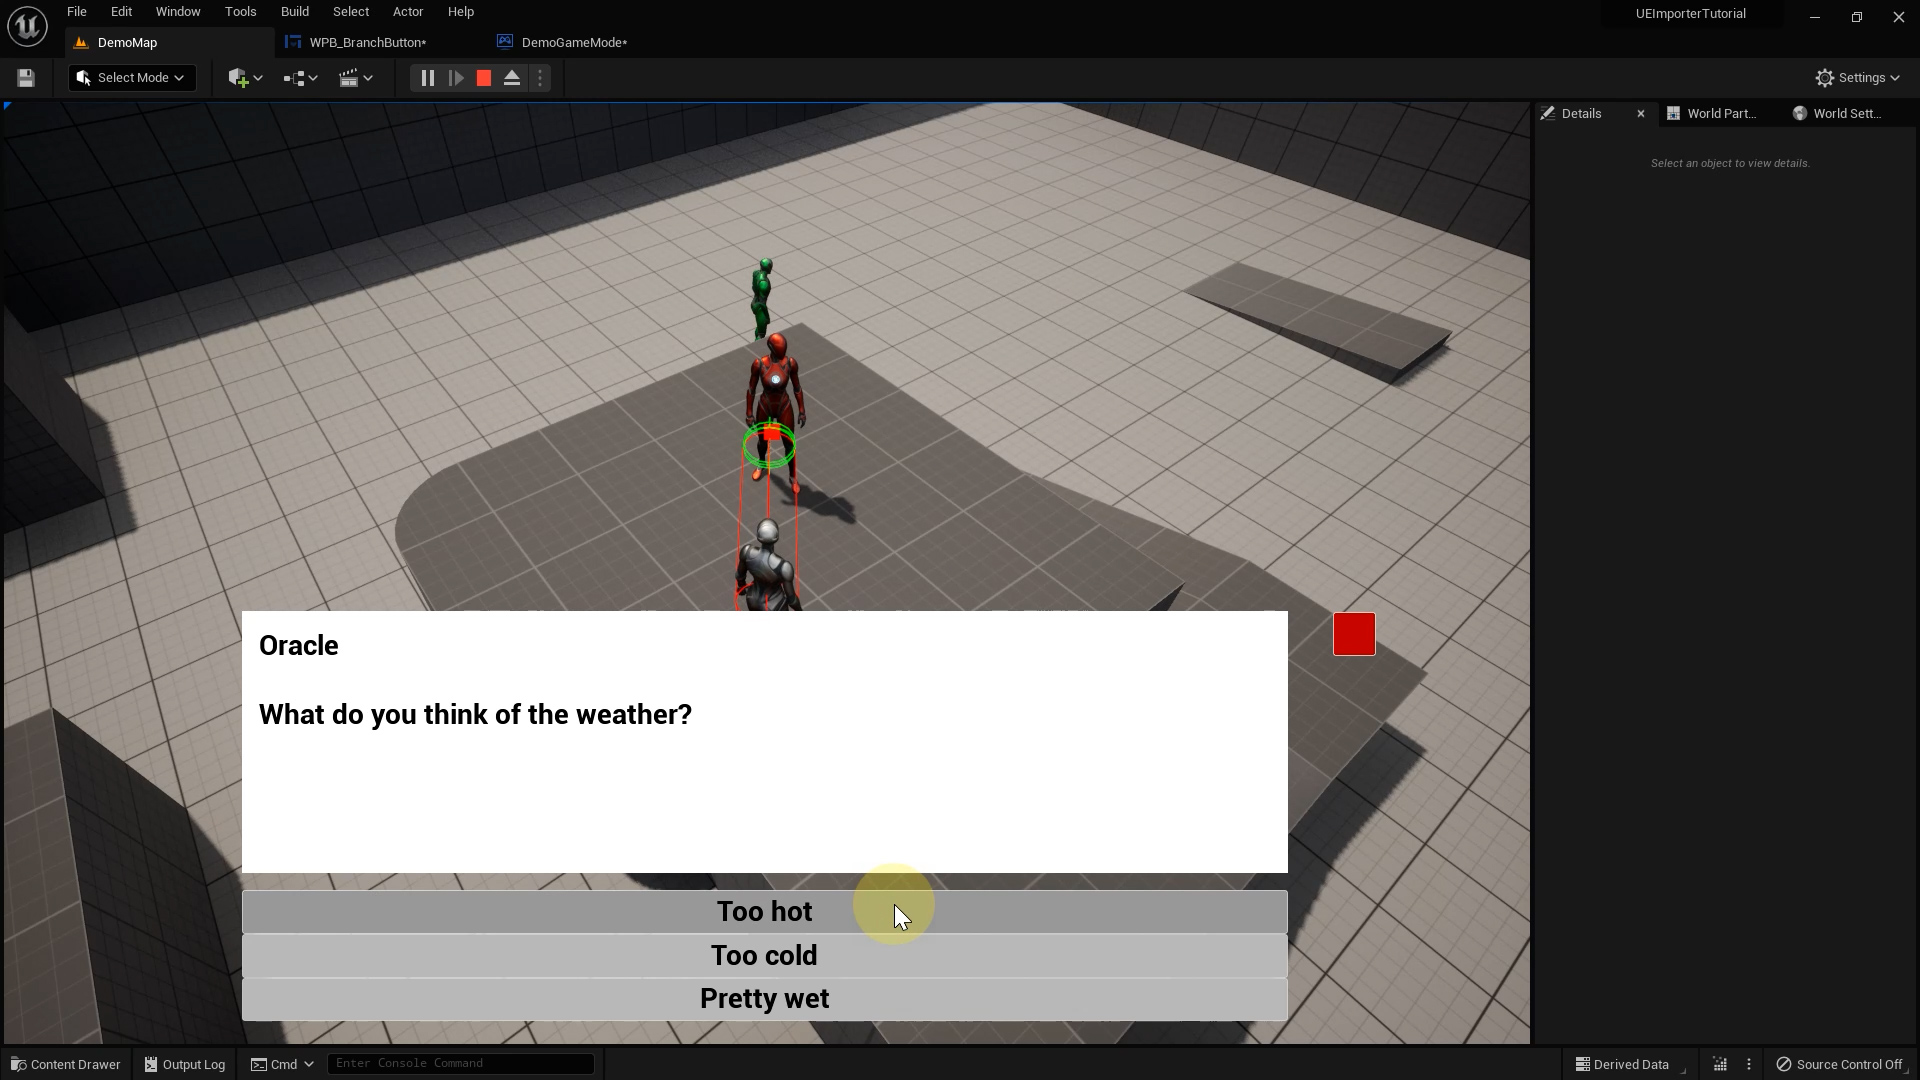
If we play now, we see menu text used as button text, which now really lets us dive into the story and make informed decisions at the player choice points.
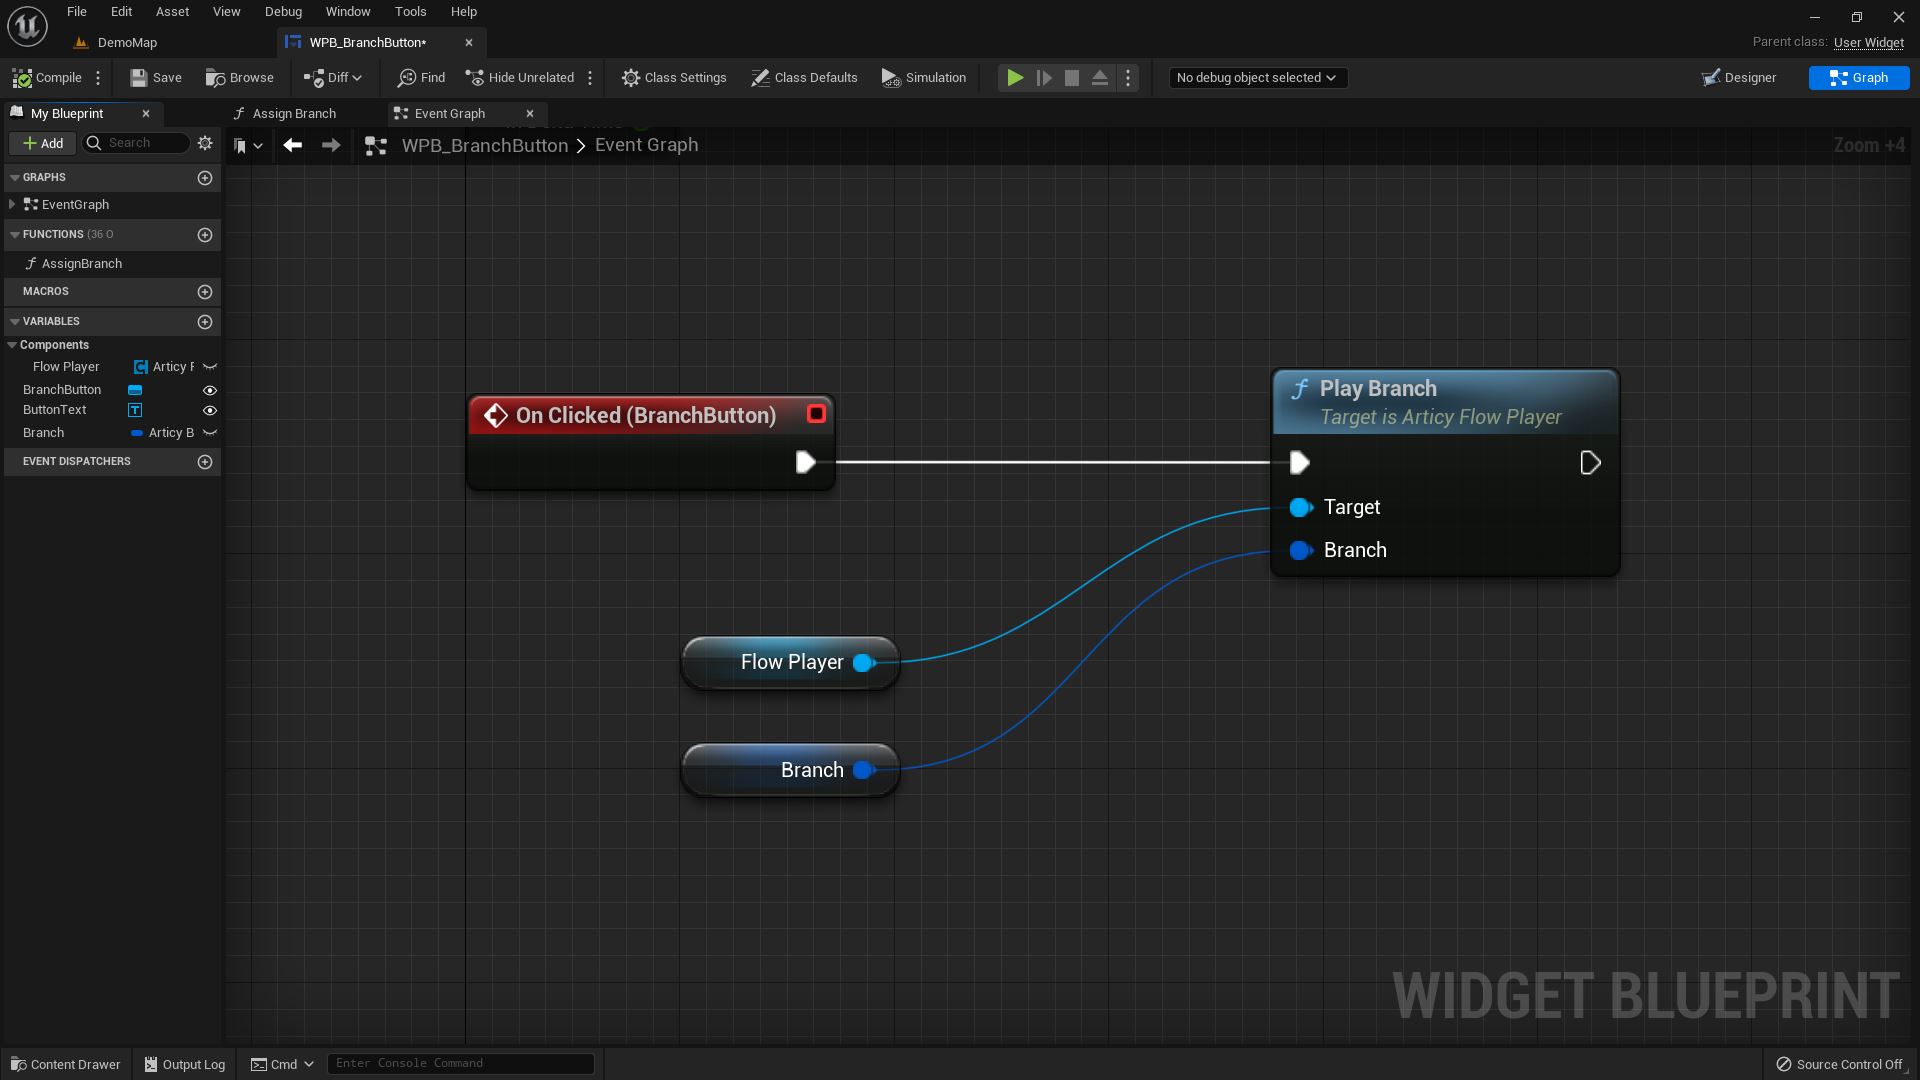
Just one small, but still important, issue – regardless of what choice we click the first branch gets auto-selected all the time. But this will be fixed with one little change in the On Clicked event of the Branch Button.
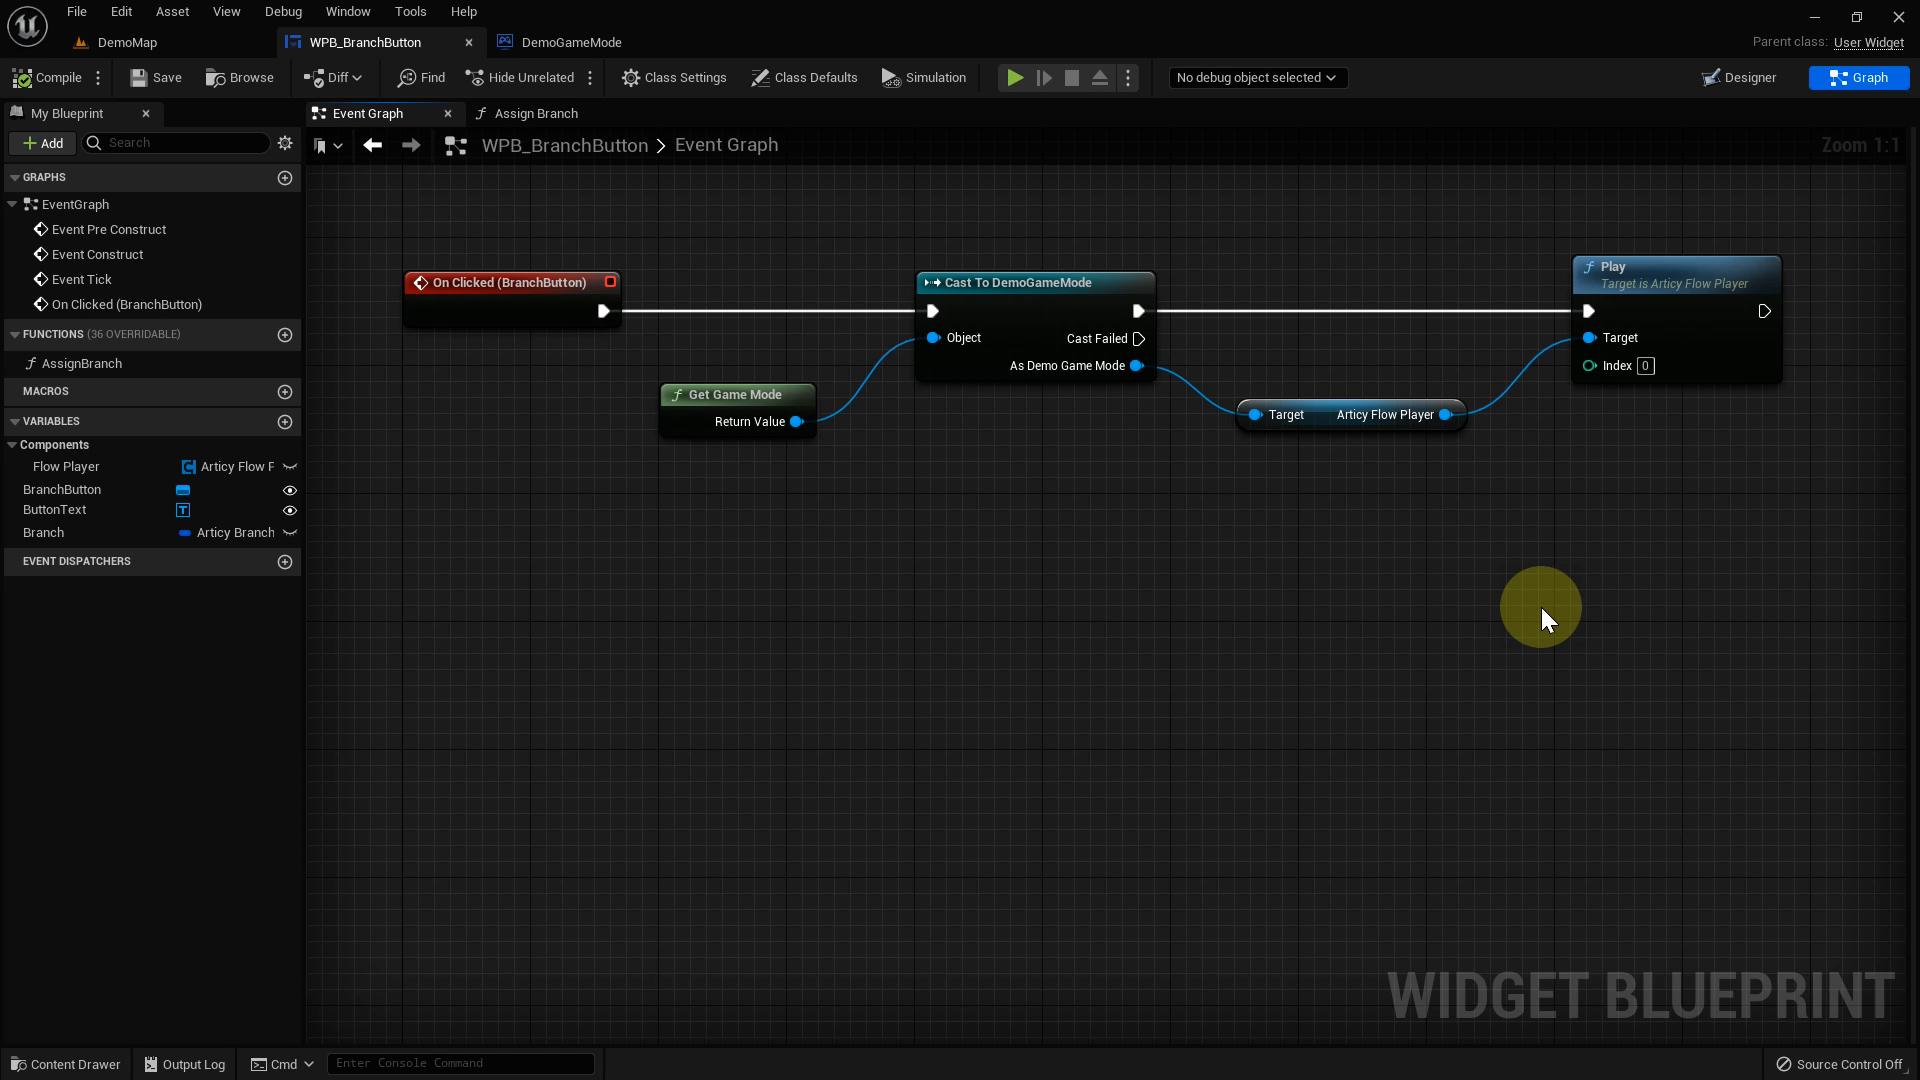
Currently it is just set to Play, which always picks the first branch by default. We need to change this to Play Branch, with Branch for the Branch input. And because we stored the Flow Player into a variable in the Assign Branch function, we can get rid off the whole casting here and just use the Flow Player reference.
Both linear and branching dialogue are displayed flawlessly in our custom dialogue UI. And with that we have arrived at the end of this lesson.
Recap lesson 4
We adapted our dialogue system to handle branching dialogue. For player choice points we use articy’s menu text to give the player an idea in which direction the reply goes without already giving the entire dialogue line away.
Up next in lesson 5
The next lesson will bring this tutorial series to a conclusion. We will see what needs to be done to display more complex dialogues and make an improvement to the NPC interaction.
See you there!
Don’t have articy:draft X yet? Get the free version now!
Get articy:draft X FREE
*No Payment information required
Follow us on Twitter, Facebook and LinkedIn to keep yourself up to date and informed. To exchange ideas and interact with other articy:draft users, join our communities on reddit and discord.