Hello and welcome to Lesson 6 of the articy:draft First Steps tutorial series.
Review:
Lesson 5 was all about the Flow. We saw how the visual depiction of the flow is ideal for creating interactive content, we learned about nesting, the anatomy of dialogue and flow fragment nodes, and created the top-level structure for our game story.
This Lesson:
In this lesson we will create our first real dialogue. For this, we will take a look at a new kind of flow element, the Dialogue Fragment, and learn how to compose an interactive dialogue.
Creating first dialogue in articy:draft
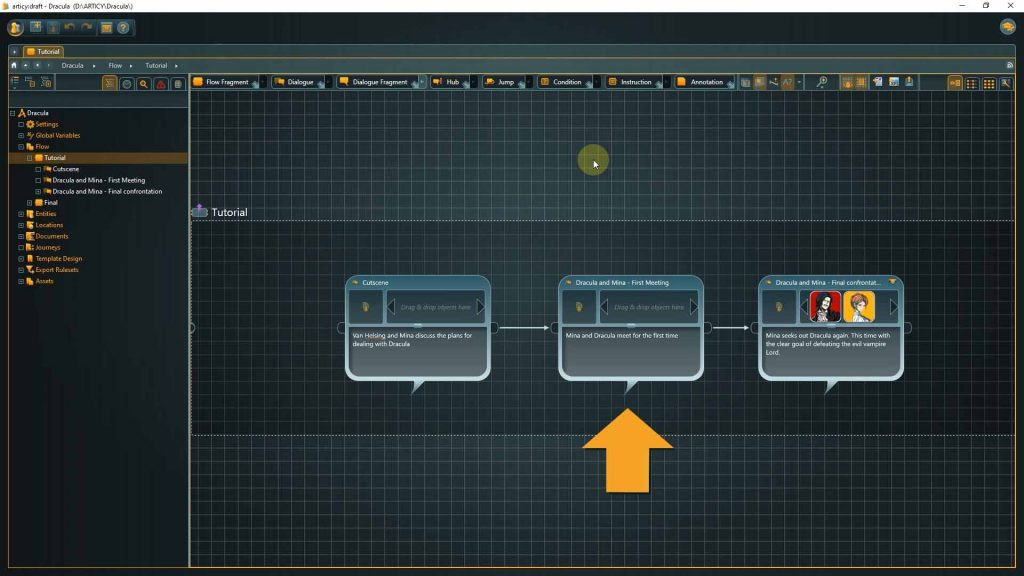
1. Open the Dracula project and go to the Flow. There we submerge into the Tutorial node. Do you still remember the hotkey? Correct, it’s Return.
We are back at the overall structure for our story. Today we will start creating content, we will write the dialogue for the first coming together of Dracula and Mina.
2. Submerge into the second node of the structure now, this is where the dialogue will take place.
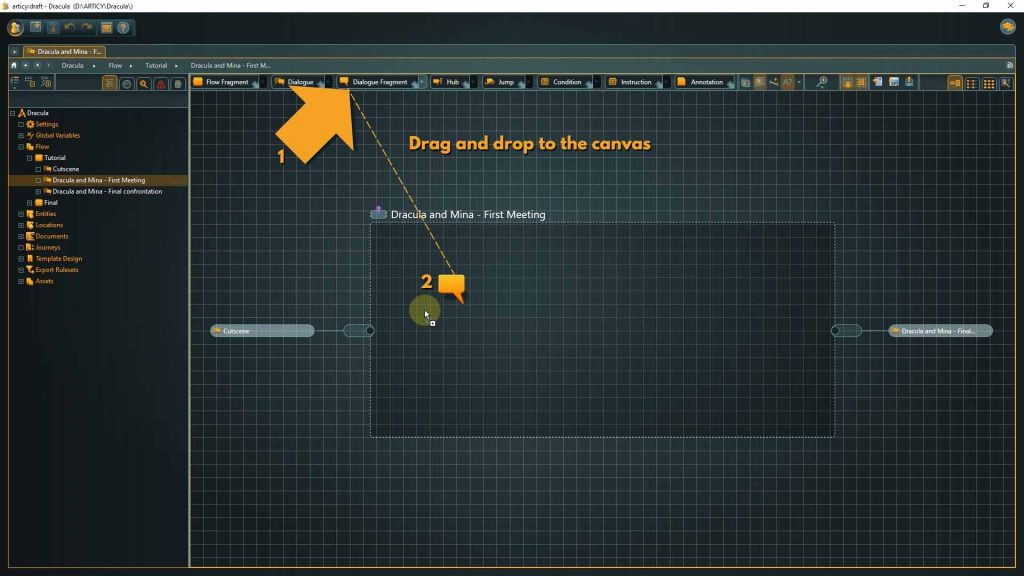
We are greeted by an empty canvas on this layer, only the dashed outline of the parent node is visible. But it will not stay this way for long. We looked at Flow Fragments and Dialogue nodes as containers for inner content in our last lesson. Now we want to write actual lines of dialogue and for this we will use a node called Dialogue Fragment.
3. Drag a Dialogue Fragment from the toolbar onto the canvas.
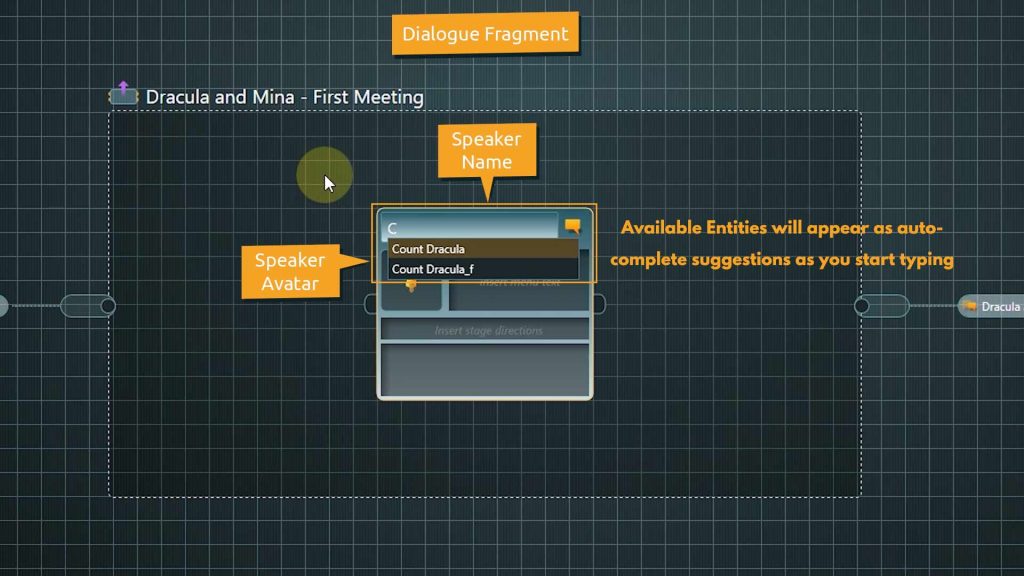
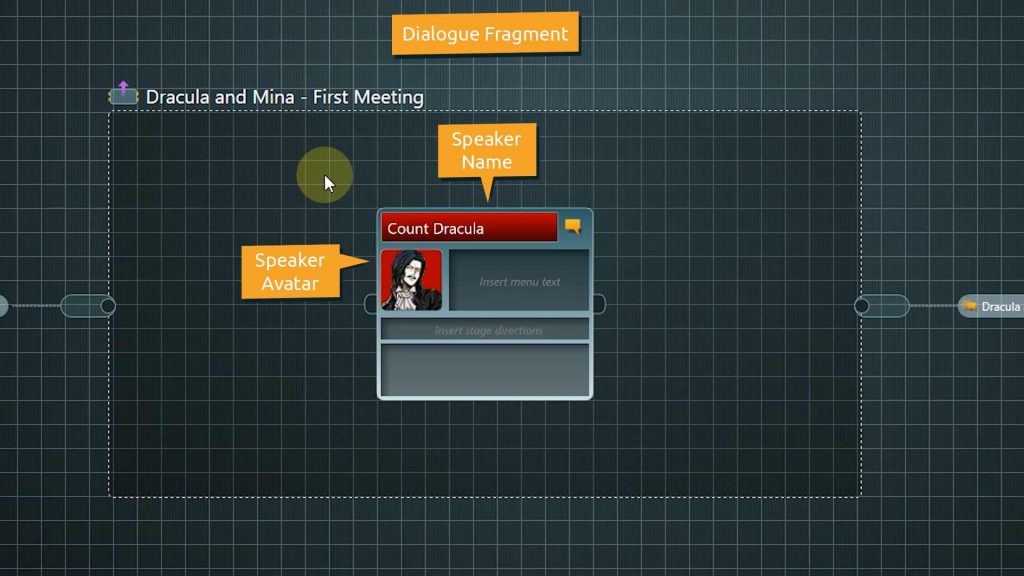
You can see right away that it looks different from the nodes we’ve seen before. A good part of the node is dedicated to the speaker, with their name and avatar image displayed prominently.
Speakers for your planned dialogue should already exist as Entities, this is why creating our Mina character was the first thing we did in articy.
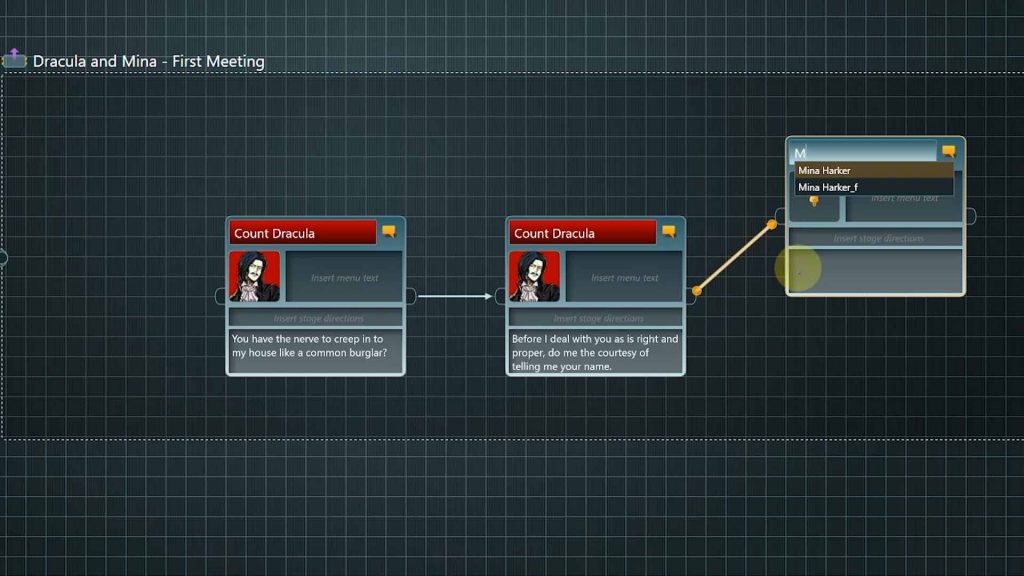
If we start typing a name in the Speaker field existing Entities will be displayed and we can auto complete the name by pressing Tab or Return.
Name, Avatar image, and Entity color will be automatically taken over from the Entity’s data.
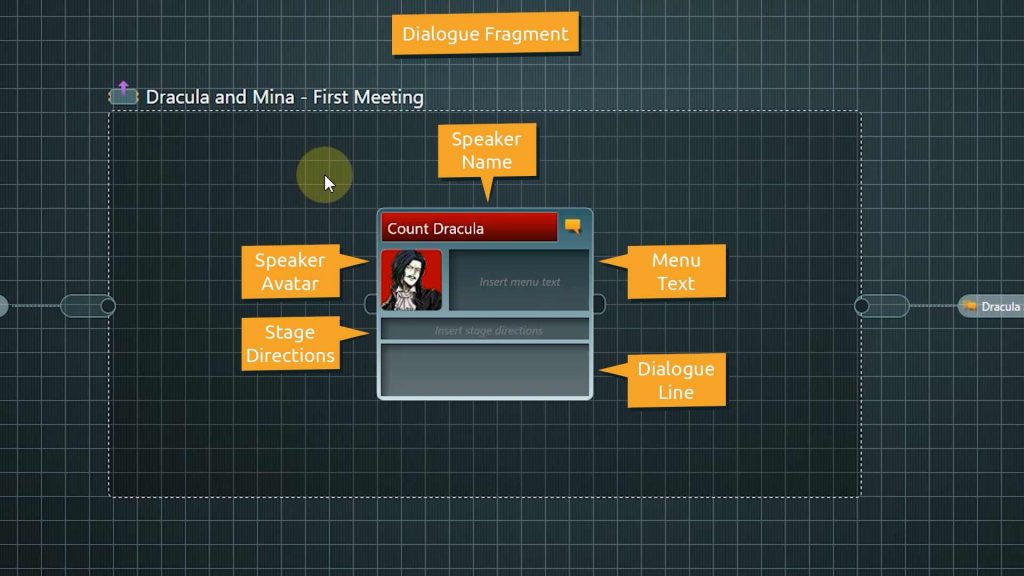
Dialogue Fragment components:
There are three text fields in a Dialogue Fragmen: menu text, stage directions and the field for the actual dialogue line.
The menu text can be used to display a shortened line of text in the game’s UI.
Stage directions can be included for example for voice over purposes or motion capture.
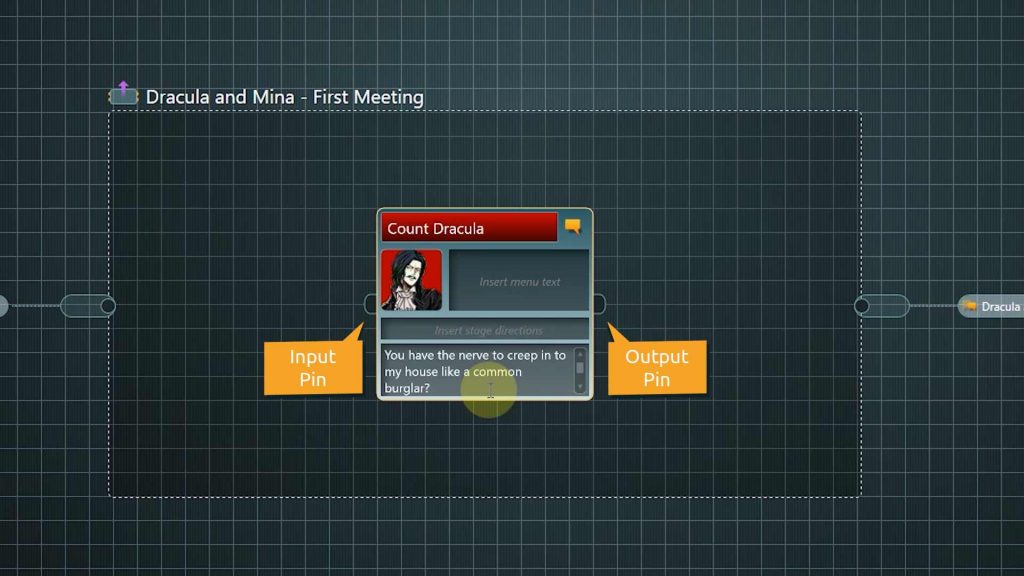
In the last text field we enter the dialogue line that Dracula is supposed to say.
And of course dialogue fragments have in and output pins as well.
👉 Dialogue Fragments are not containers, they cannot hold inner content, but you are free to put as much text in a dialogue fragment as you like
⭐ Our tip: It’s good practice to divide the text up into multiple dialogue fragments containing chunks of text that can be displayed on one screen in the text area of the game.
We have a lot of text here, let’s move part of it to a second node. To create this second node you can drag a dialogue fragment from the toolbar and enter the name like we learned before, but there is an easier and much more intuitive way to create new nodes in a dialogue flow:
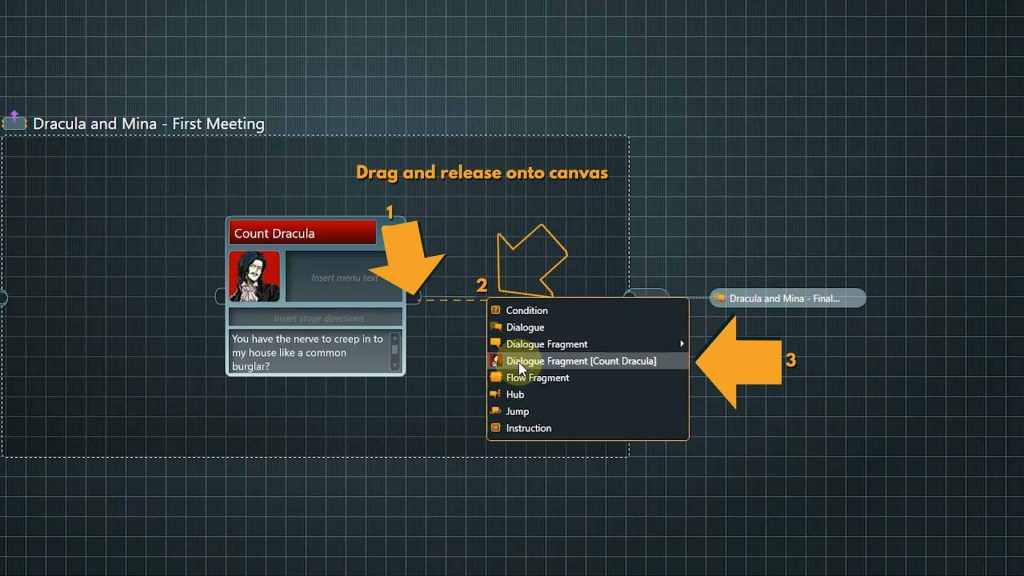
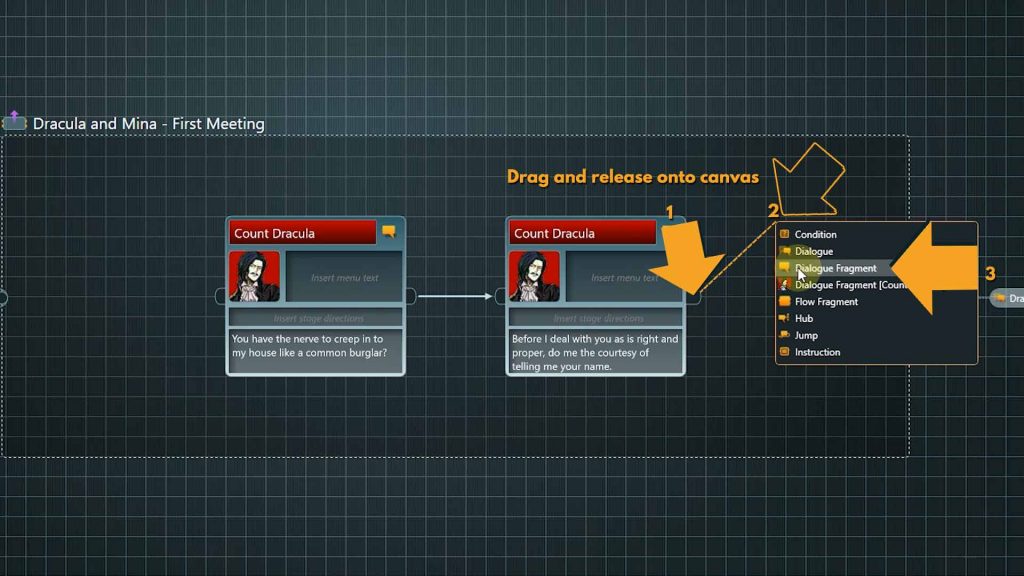
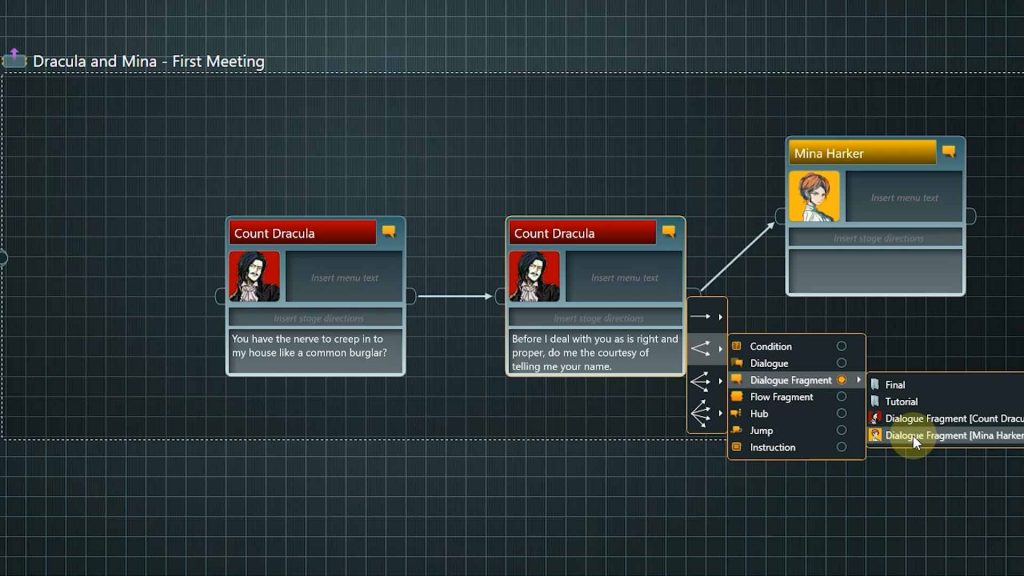
4. Drag out a connection from the output pin of the first dialogue fragment. When releasing the mouse button a context menu appears with options for creating new nodes, including dialogue fragments and even dialogue fragments with filled out speaker information.
At the moment it’s just Dracula who can be selected, but that’s simply because he has been the only speaker in this dialogue so far. If we select the option Dialogue Fragment – Dracula, we get a node where we can immediately enter our text.
5. Now Mina is supposed to speak. As she has not appeared in this dialogue, we need to repeat the action and this time drag out a generic dialogue fragment from the last node’s output pin.
6. Select Mina as the Speaker by starting to type the name and then selecting the first option. She appears twice, because like all content one version – here the one with the underscore f – is from the Final part of the project.
We do not want this dialogue just to be a back and forth between the two characters that the player follows passively, we want to add choices. So we present multiple options to continue the dialogue and the player has to pick one of those. This is where game stories differ from linear media like movies or books: Interactivity and the possibility to have the story develop in different directions. It is one of the great advantages that video games have.
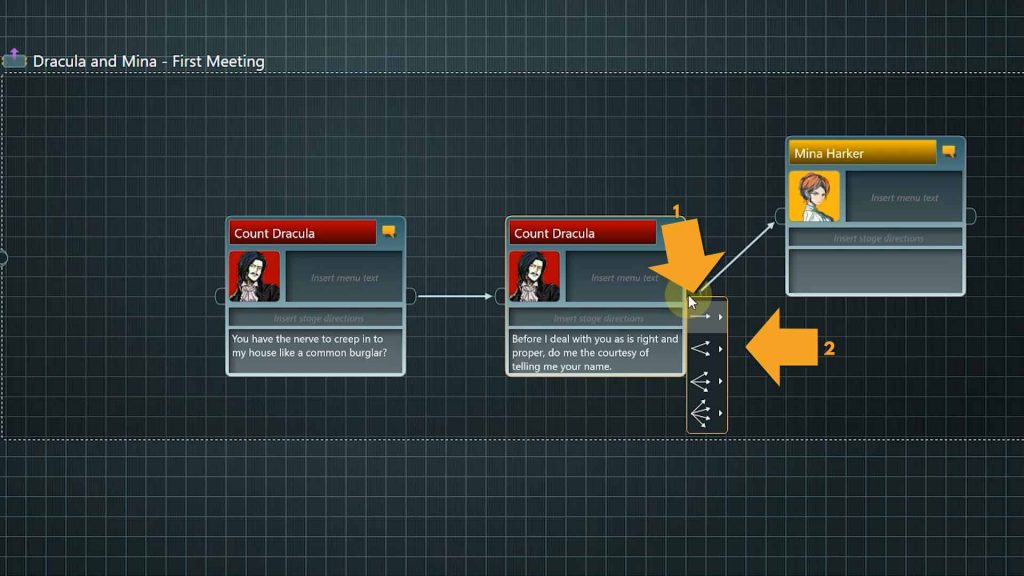
I’d like to give the player three options to choose from here. We could create the nodes one after the other, like before, but there is an even easier way to create multiple nodes simultaneously:
7. Click the output pin of the last node. Now we can decide how many new nodes connected to this one we want to create:choose two
8. From here, go through the context menu to select Mina as the speaker.
As this is a point where a decision has to be made, we are using the menu text to be able to display a shortened version of the dialogue line to the player within the game.
The actual line will be played after the selection of one option. Because this shortened version of the line is only displayed at choice points for the player, it is totally fine to leave the menu text empty for all nodes with an NPC as the speaker and even for all player dialogue not tied to a choice.
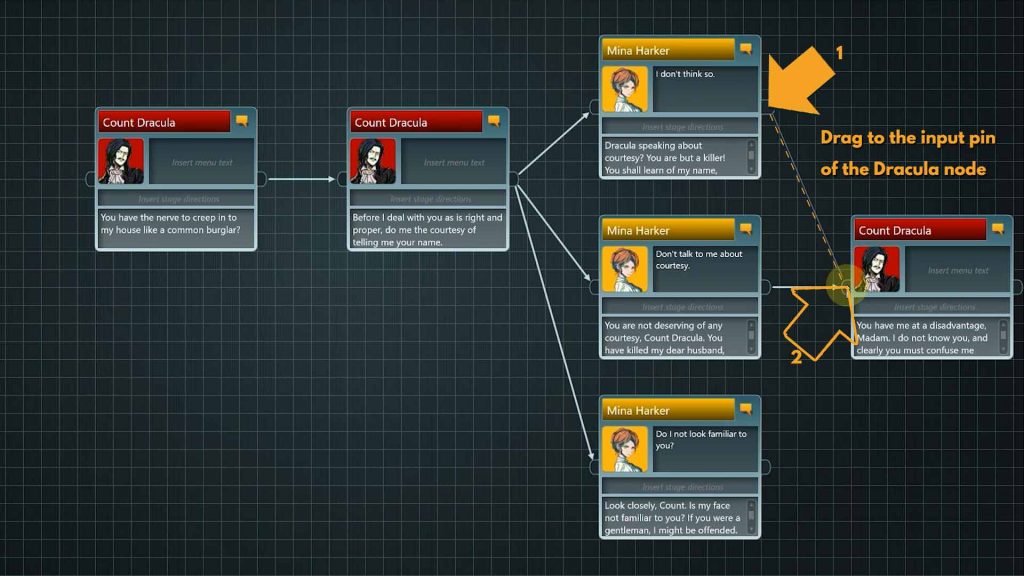
To manage the number of story branches, we now use a trick often used in games – the fake choice. Instead of continuing with three unique branches, we only use two and have the third option lead back to one of them.
9. After creating the next node for Dracula, drag a connection from the output pin of the topmost choice node to the input pin of this Dracula node. With the choice options we “branched out”, now we “merge” these two branches into one.
The order in which you create new nodes is totally up to you and depends on your preferred writing style. Some people like to finish one branch of dialogue to the end and then go to the next, others prefer to finish a node in branch one and then do a node in branch two, others like to mix and match depending on the type of content they are currently working on.
10. At this point we merge the branches again, as we are getting close to the end of our first dialogue. We will finish with a challenge from Mina to Dracula for now.
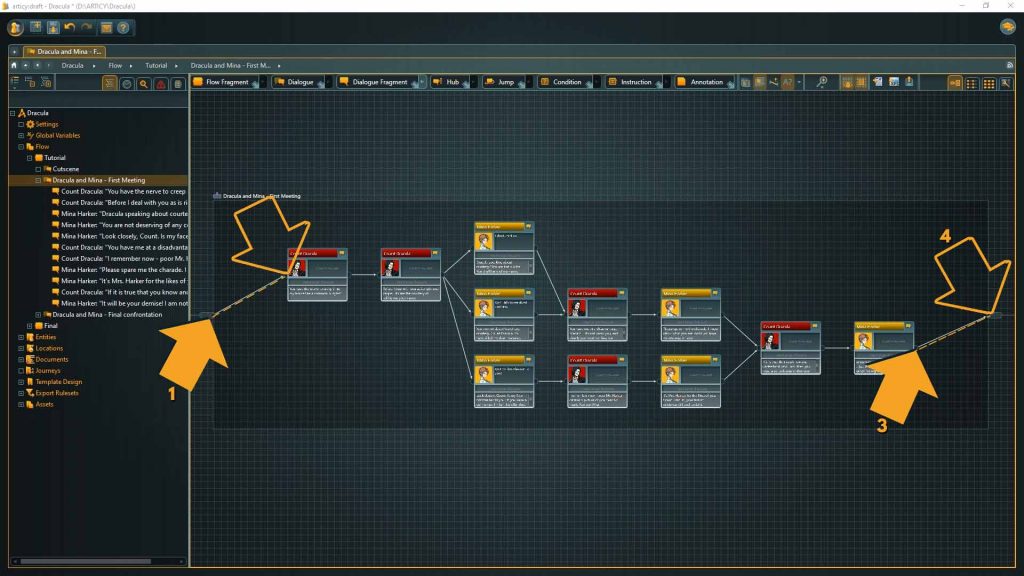
There is only one thing missing: we need to connect the first and last node of our dialogue with the corresponding pins of the parent node. This is an important step as we don’t want to create any dead ends in our flow later.
That’s a very nice first dialogue – branching, merging, choices, all there – well done!
Before we finish this lesson, let me show you some ways you can use to organize your flow further:
The first one is annotations.
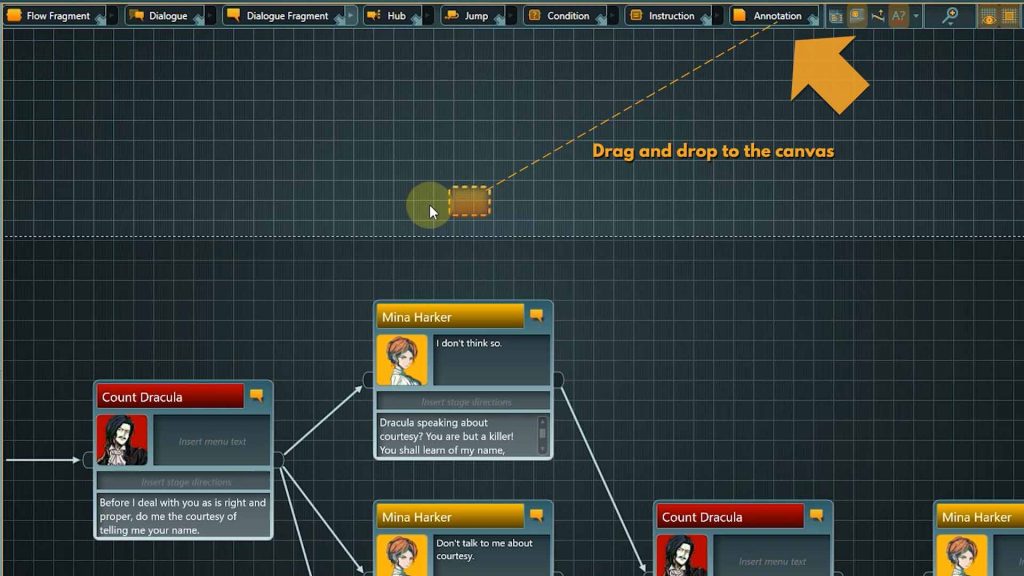
11. Let’s leave a note as a reminder that this is a player choice. To do that, drag an annotation from the toolbar onto the canvas.
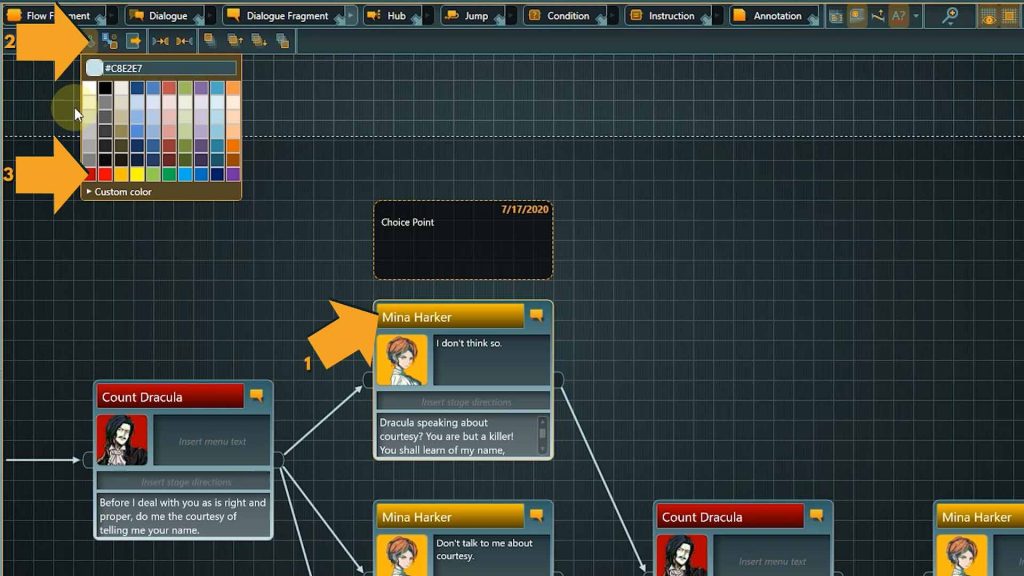
12. We can also manually assign different colors to single nodes if you want to make them stand out. Click the node you want to change and select the bucket icon from the tool bar.
Now it’s really obvious that this node is in some way different from the rest – it is our fake choice option.
This has been a very productive lesson!
Recap:
We learned about different ways to create dialogue fragments and wrote our first interactive dialogue including a player choice.
Up next:
In the next Lesson we will go through this dialogue from the viewpoint of a player in the presentation mode. Thank you for joining us, and join us again in our next tutorial.
Useful Links:
Don’t have articy:draft X yet? Get the free version now!
Get articy:draft X FREE
*No Payment information required
Follow us on Twitter, Facebook and LinkedIn to keep yourself up to date and informed. To exchange ideas and interact with other articy:draft users, join our communities on reddit and discord.

