Hello and welcome to Lesson 7 of the articy:draft First Steps tutorial series.
Review:
In Lesson 6 we learned about different ways to create dialogue fragments and wrote our first interactive dialogue including a player choice.

This Lesson:
In today’s lesson we will go through this dialogue from the viewpoint of a player with articy’s presentation mode.
Presentation Mode Overview
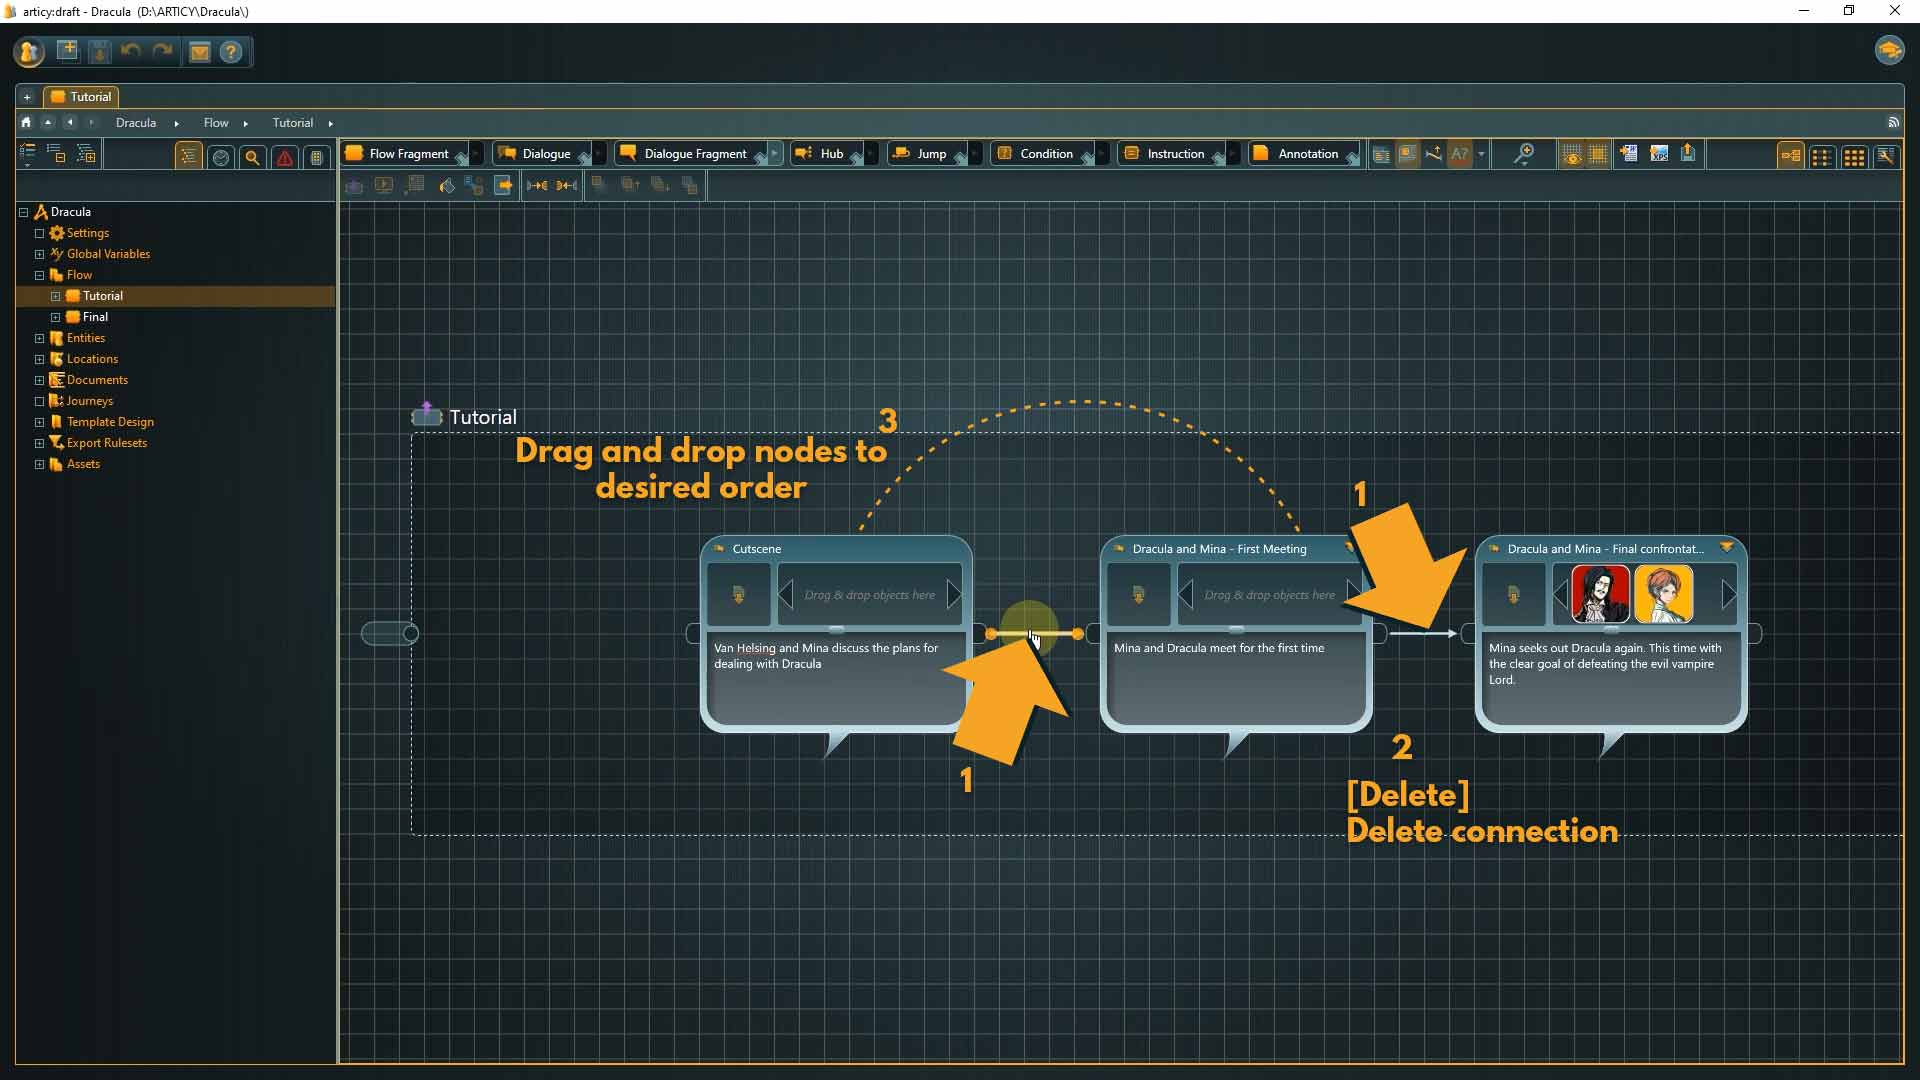
We start inside the Tutorial folder in the Flow, with our overall story structure. I thought about it for some time and decided that it might be better to have the cutscene as an element between the two dialogues instead of the very beginning. As we have used nesting for our structure it is very easy to make adjustments at this level.
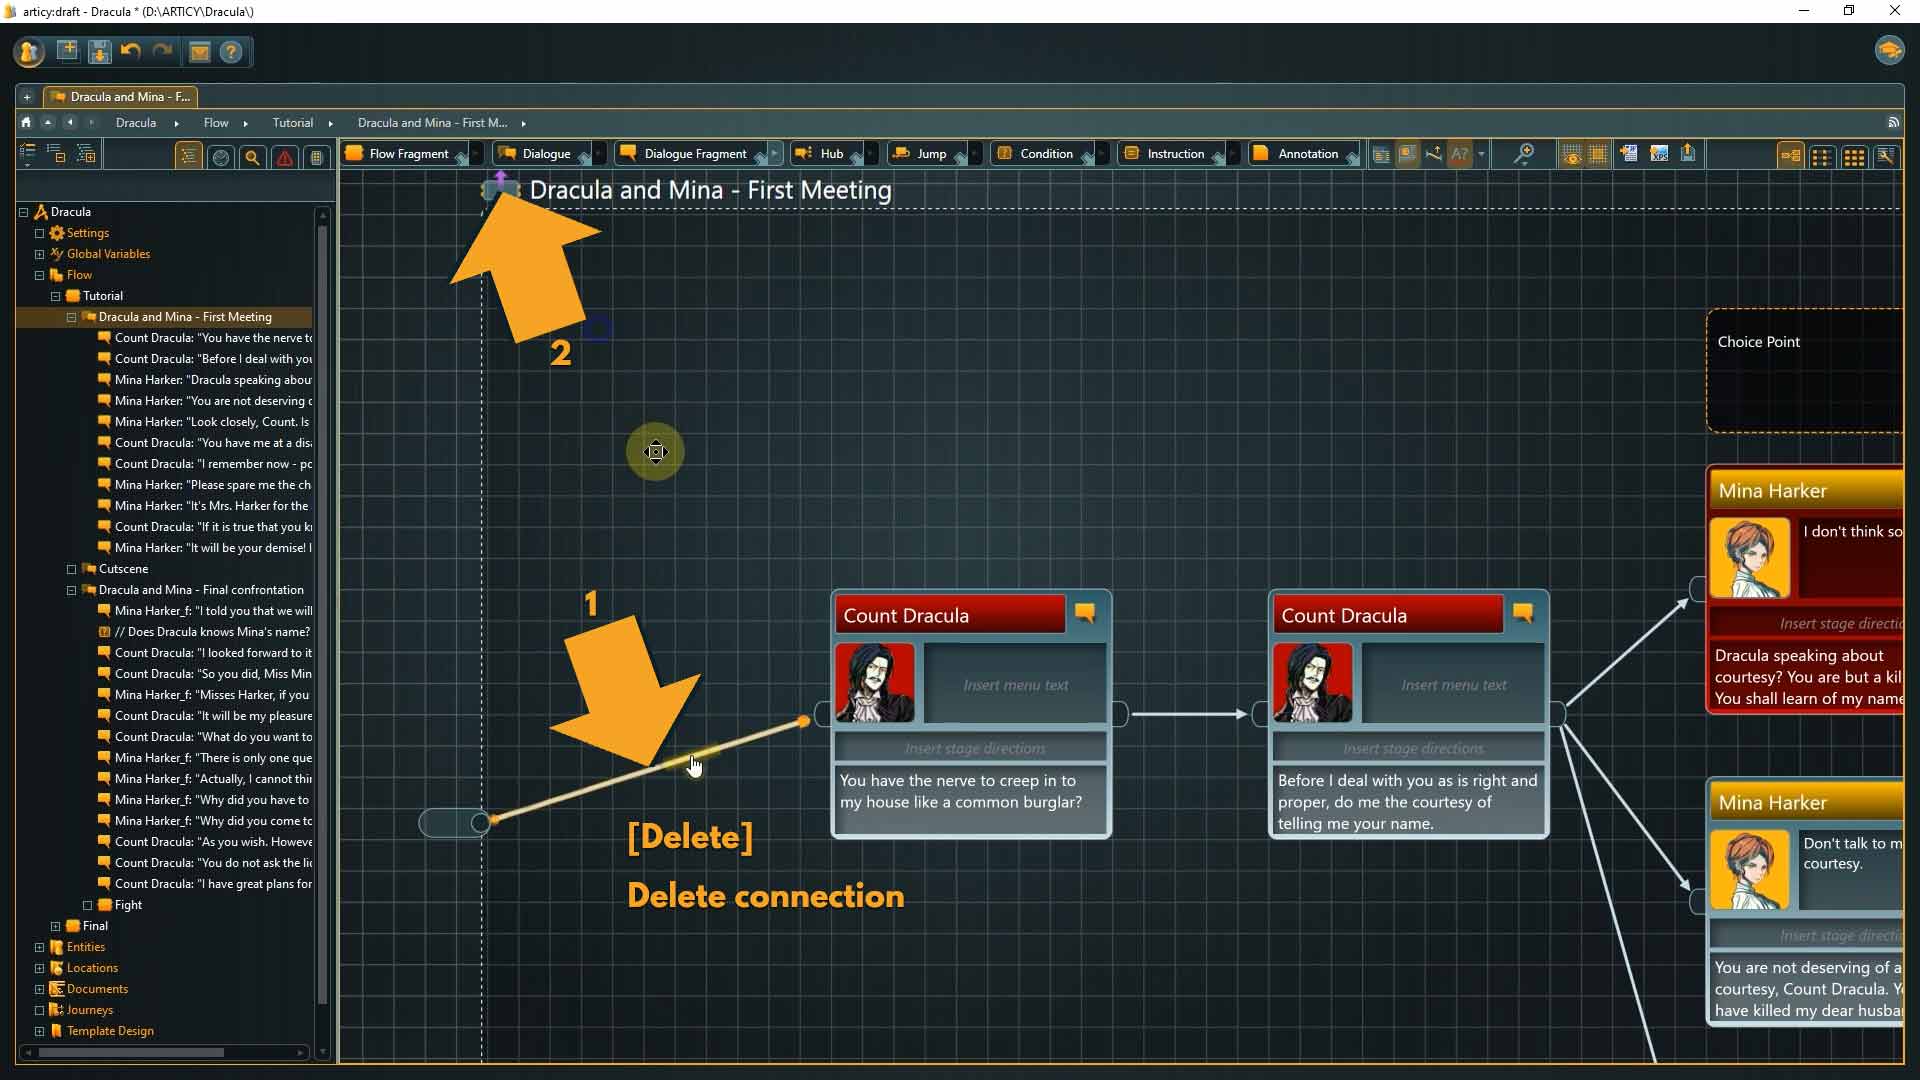
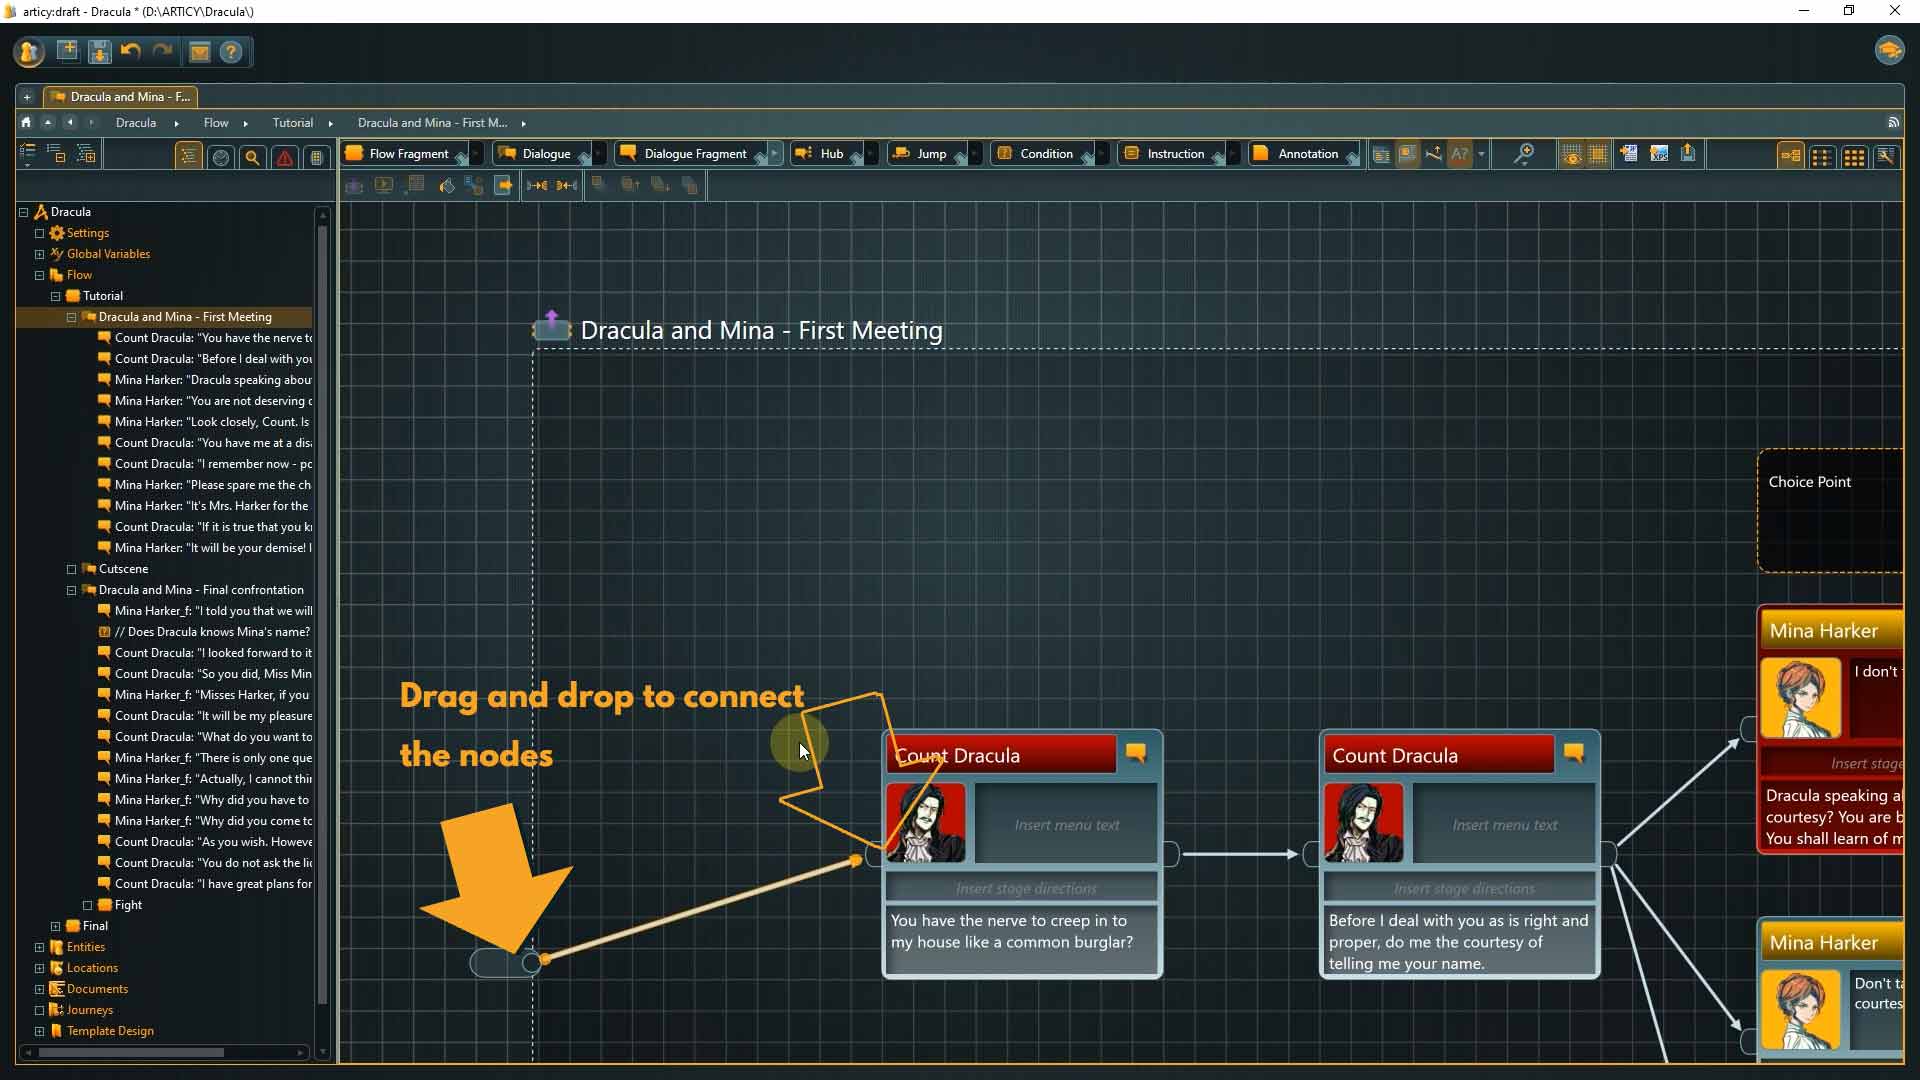
1. Remove the connections by selecting them and pressing the Delete key, then grab and drag the elements into the desired order.
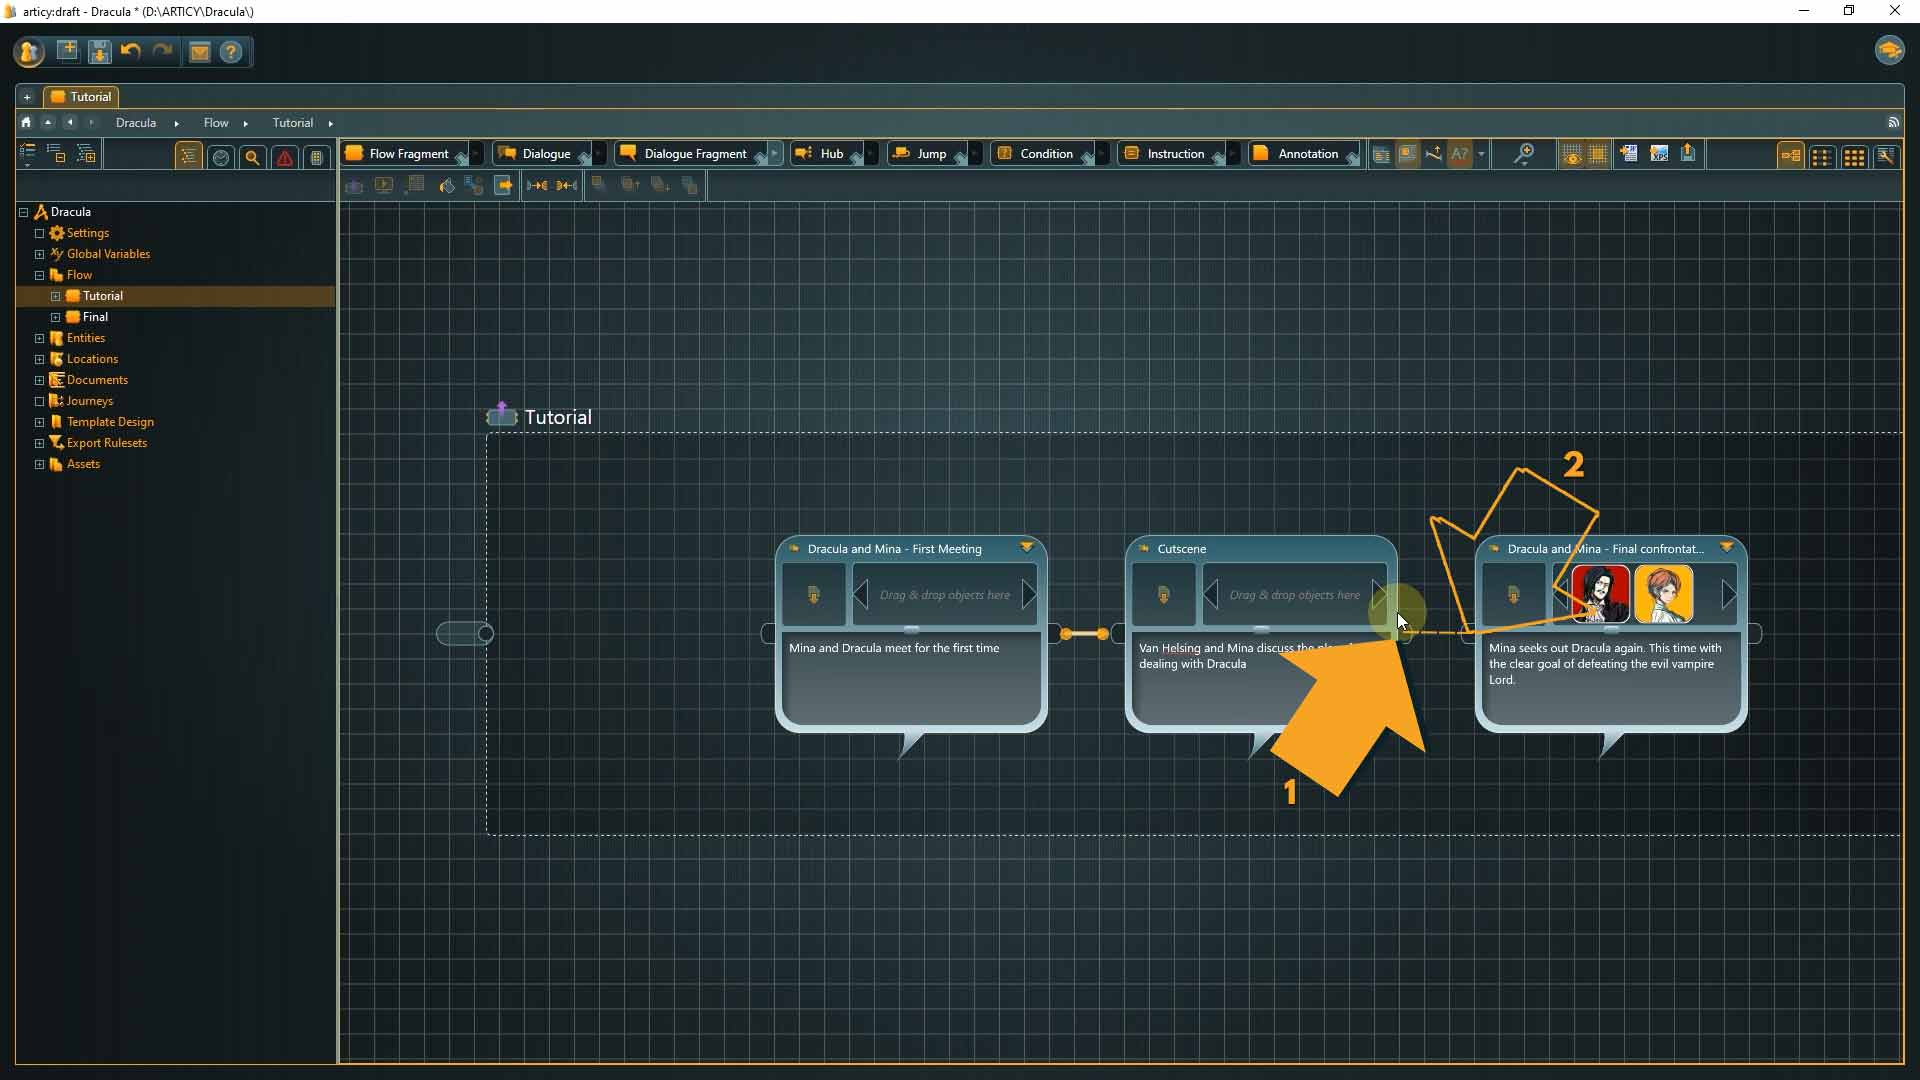
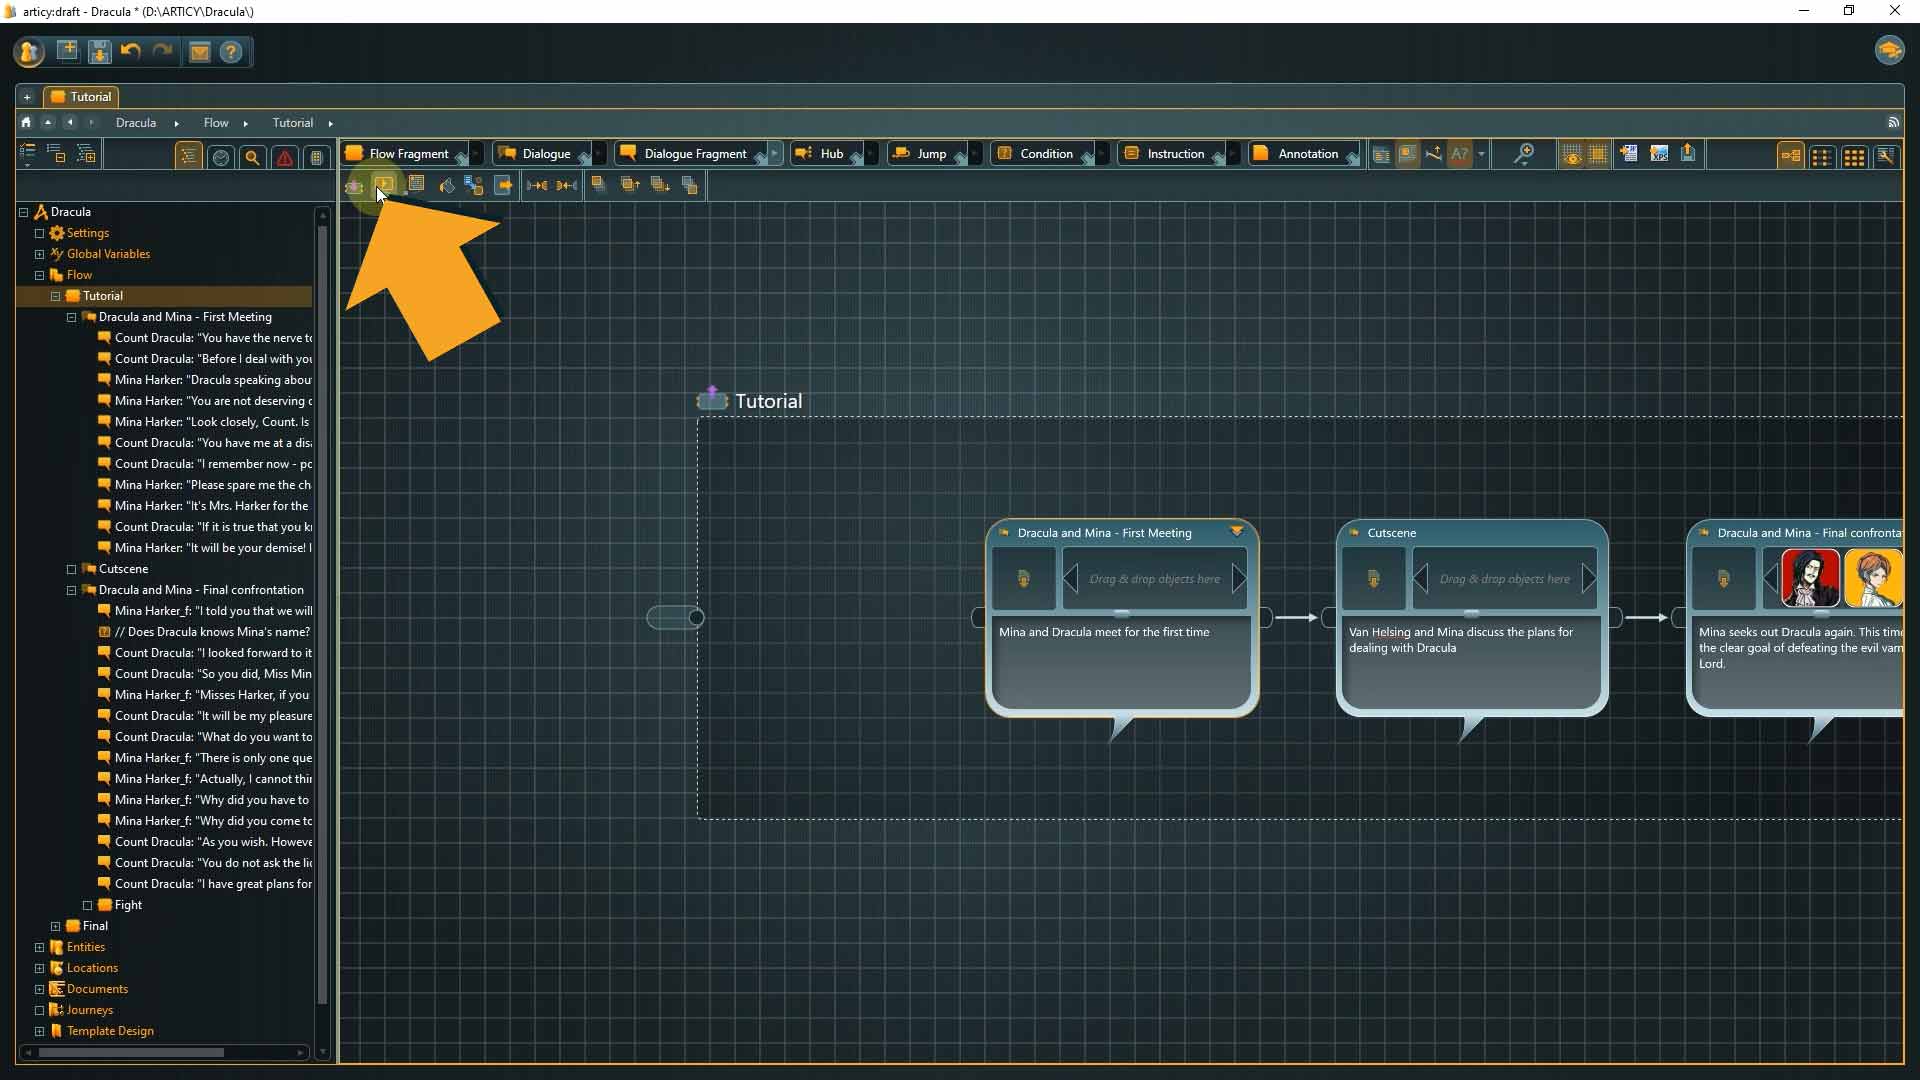
2. All that’s left to do is to reconnect the elements and that’s it. We do not have to worry about the inner content, it moves automatically with the parent nodes.
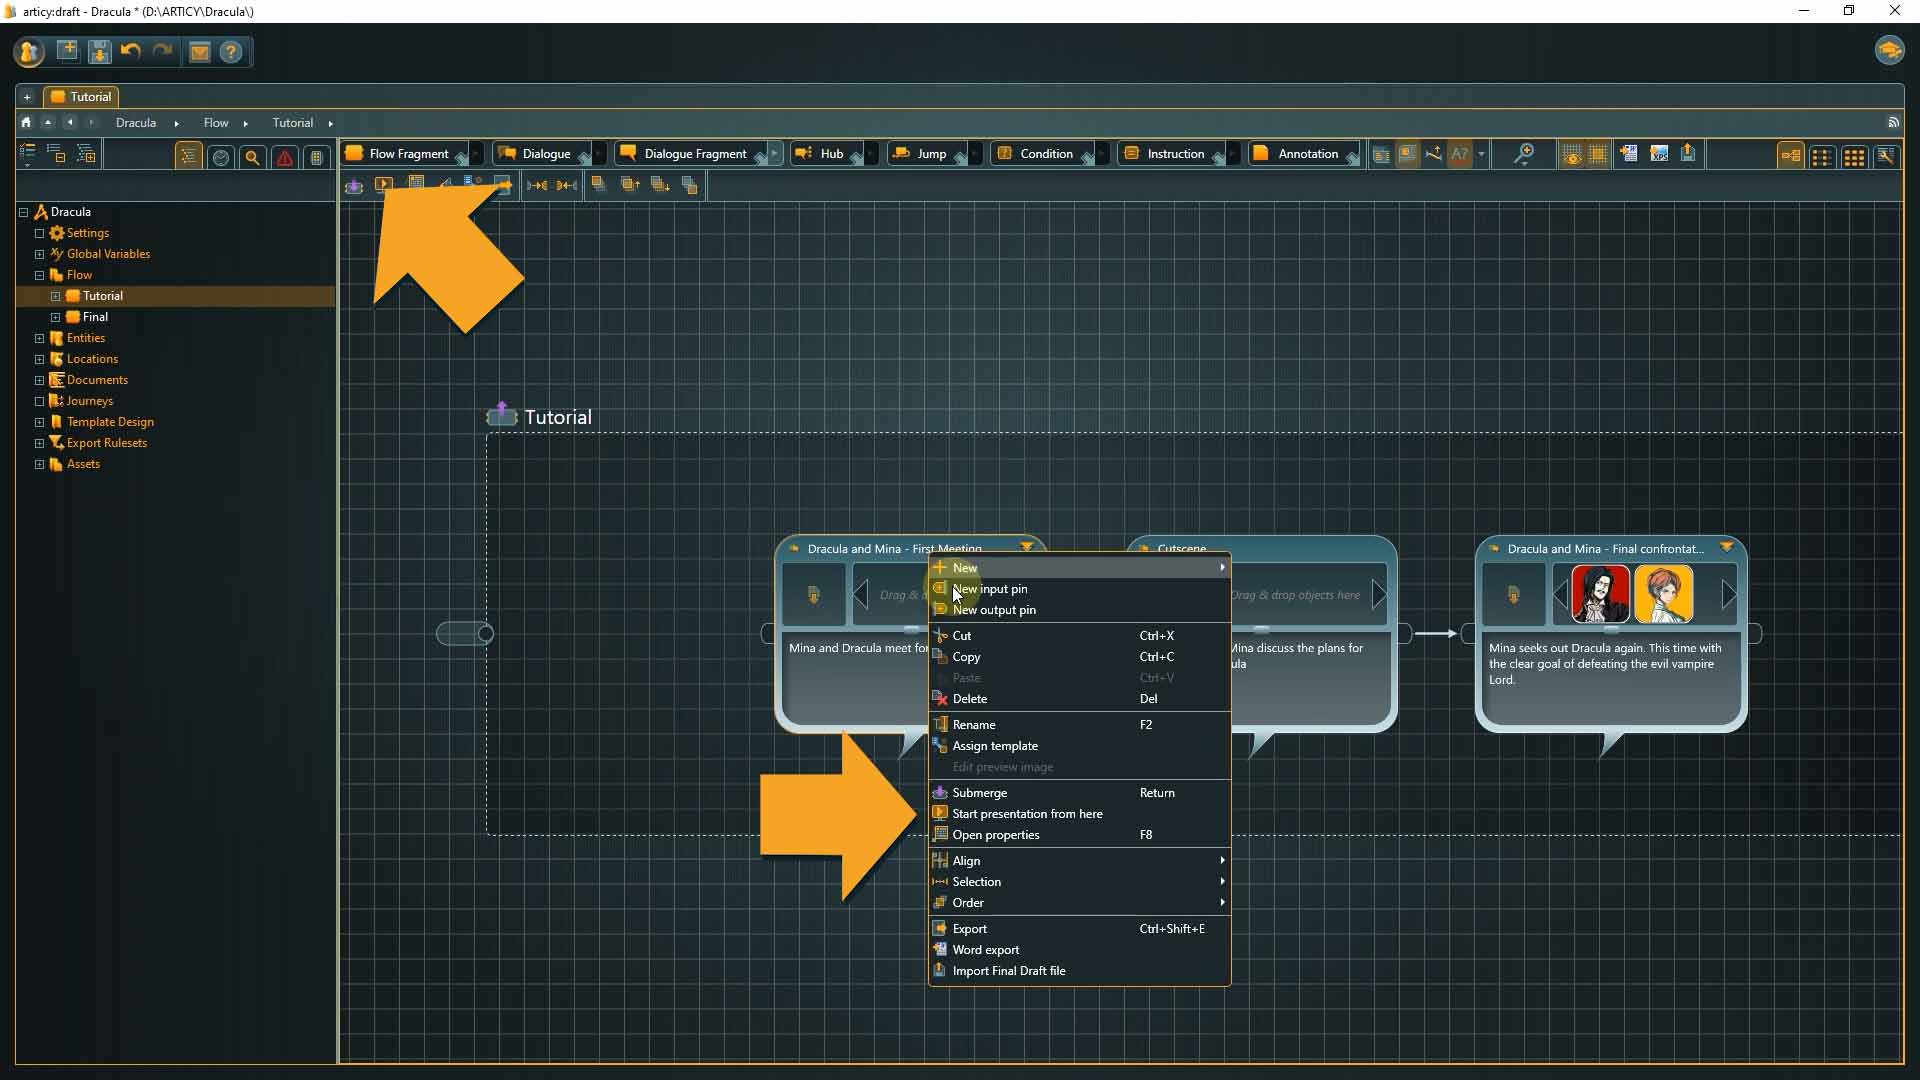
3. Select the first dialogue node and either use the “Start Presentation” button in the toolbar or the right click context menu to begin.
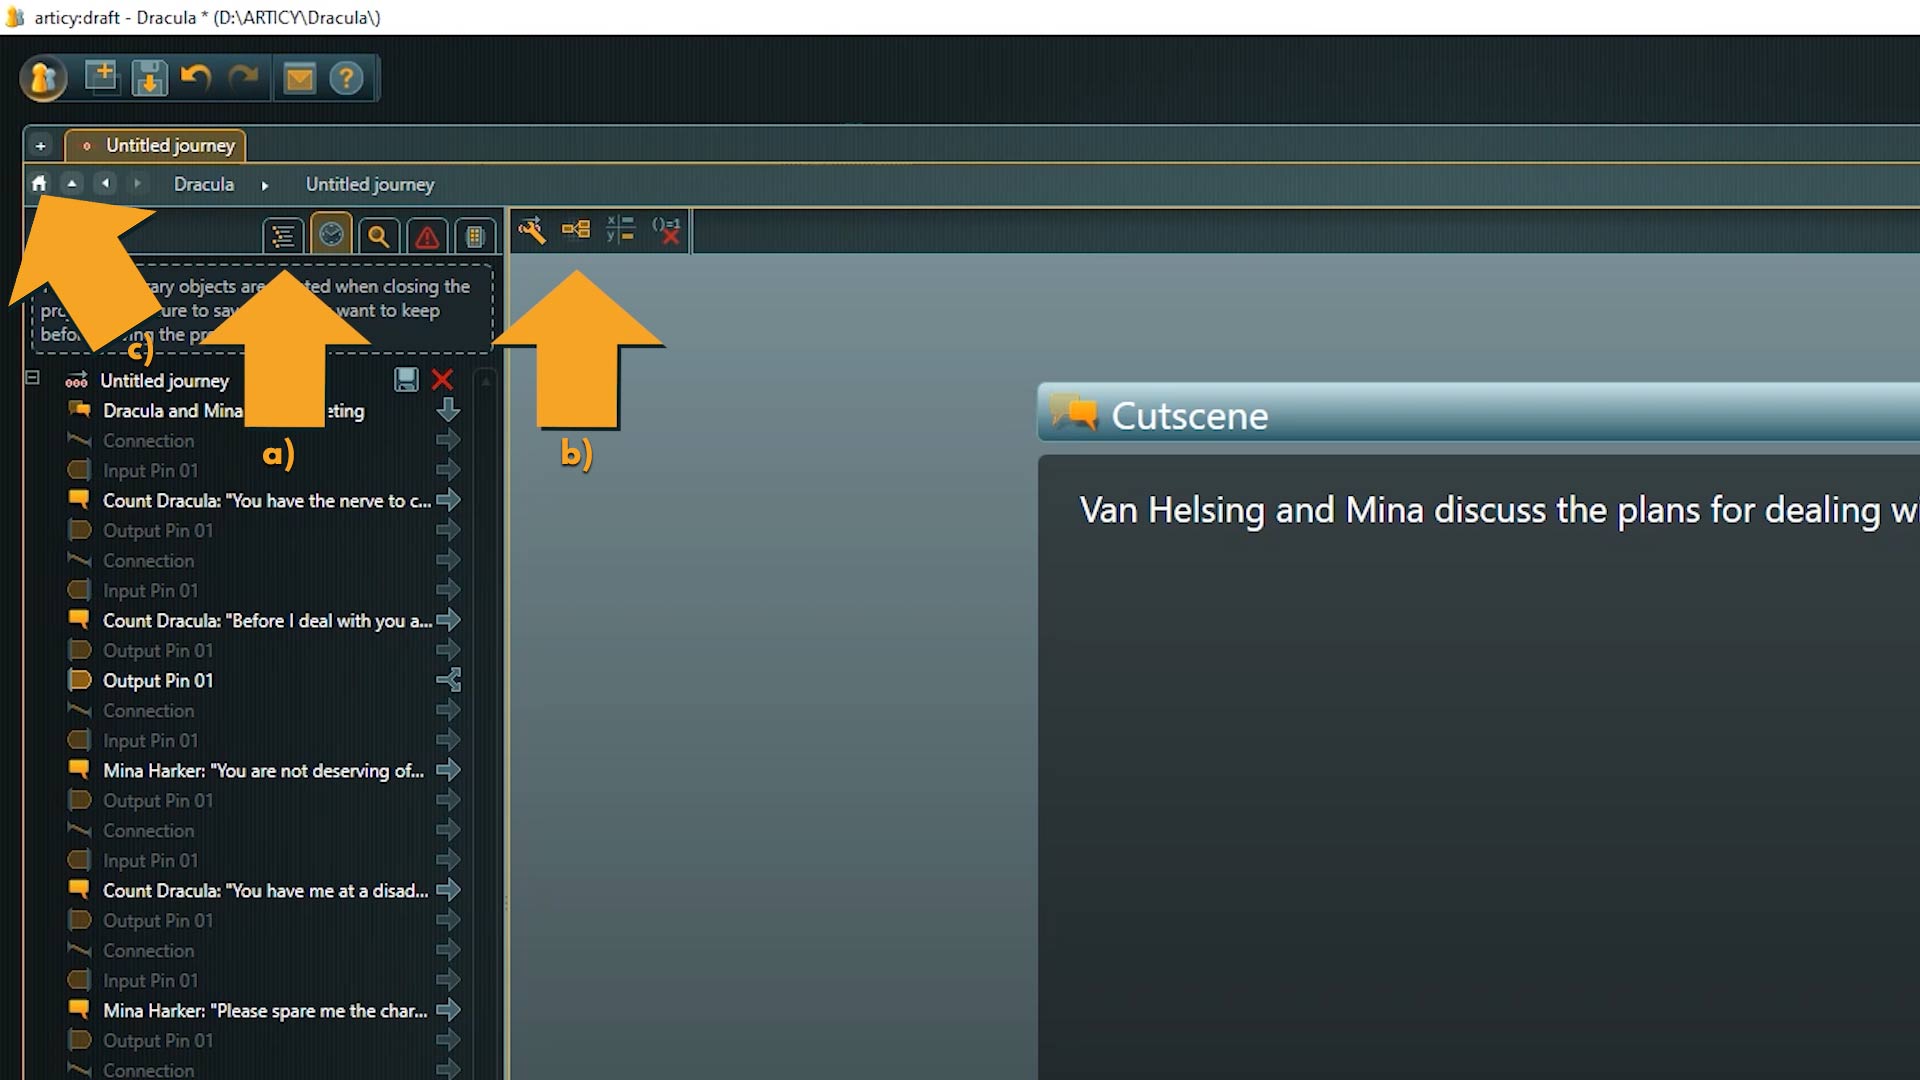
This screen looks a lot different than what we have seen so far, so we will go through it step by step:
In the presentation mode each node, or branching point is displayed as a) a slide in a Powerpoint-like presentation.
On the left side b) the steps we take during the presentation are listed. You can use this to quickly jump back to a specific step, if you for example like to select a different option at a branching point.
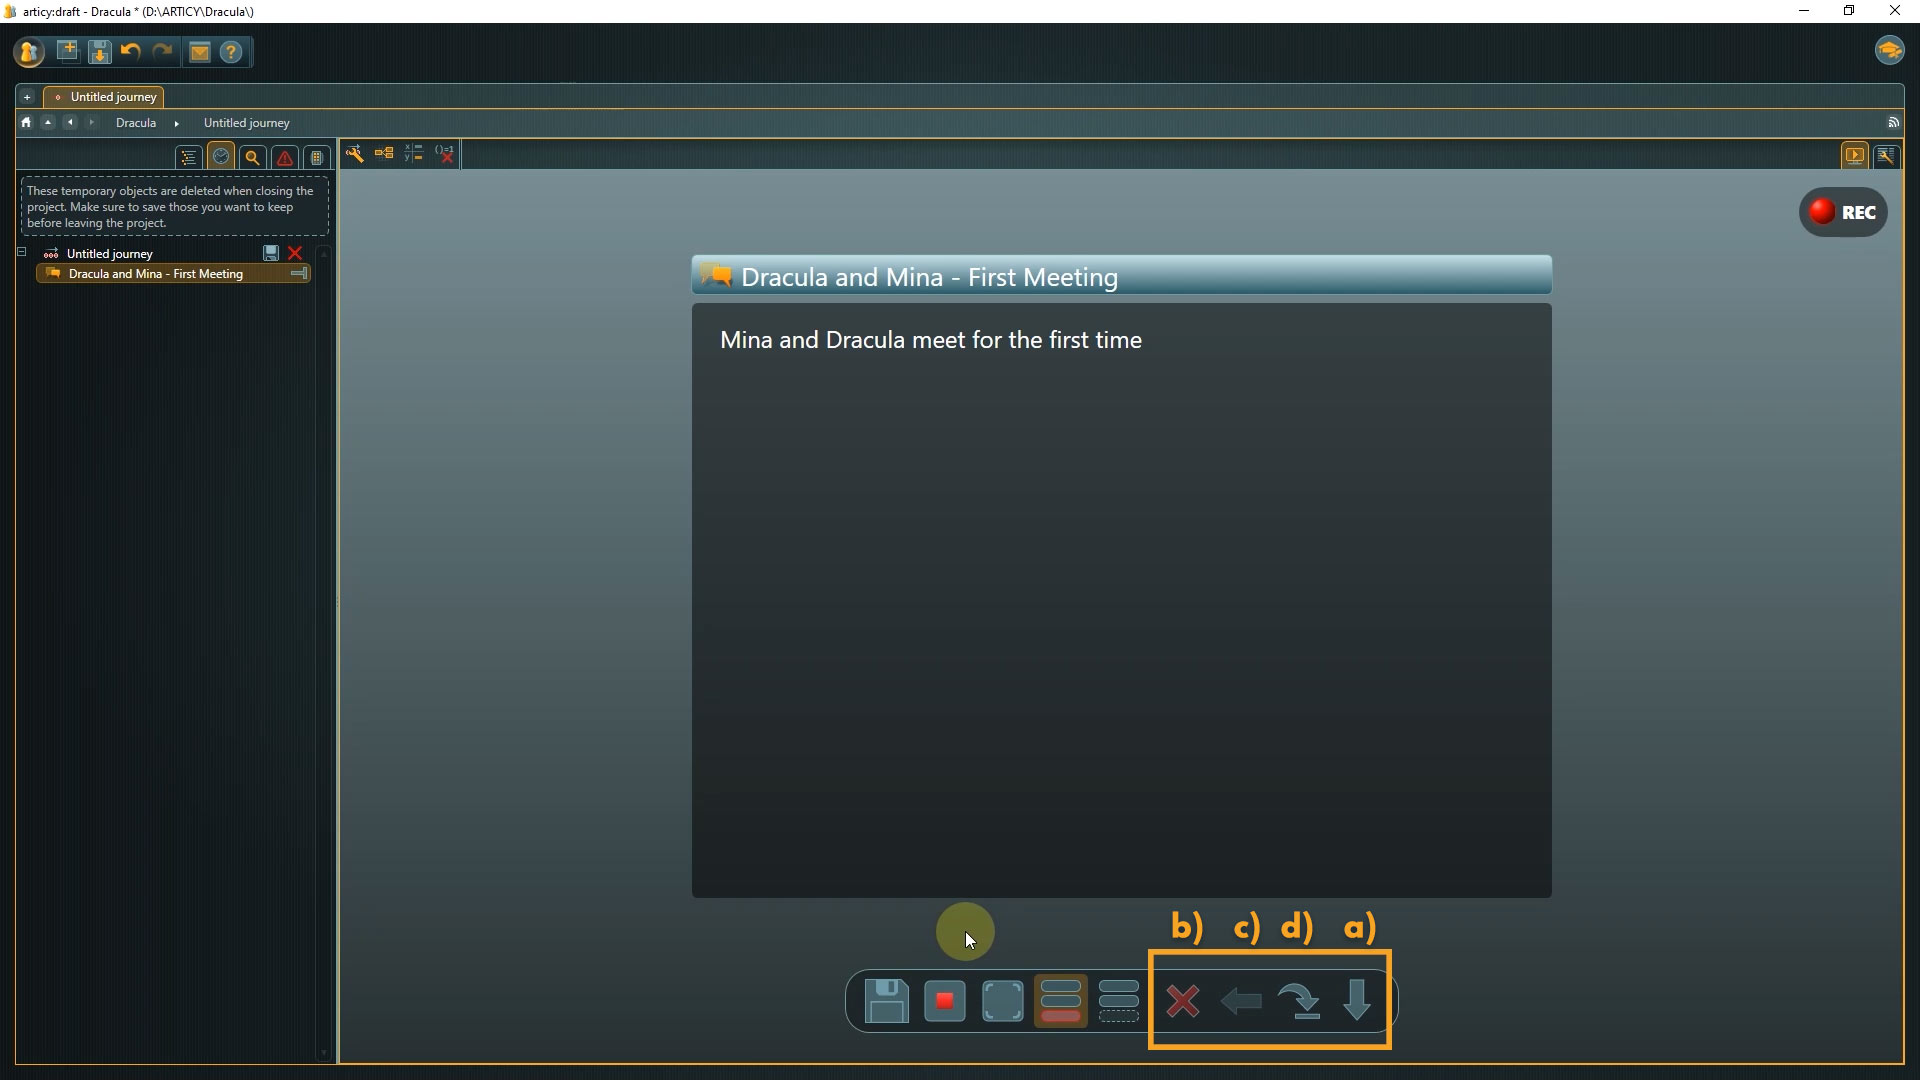
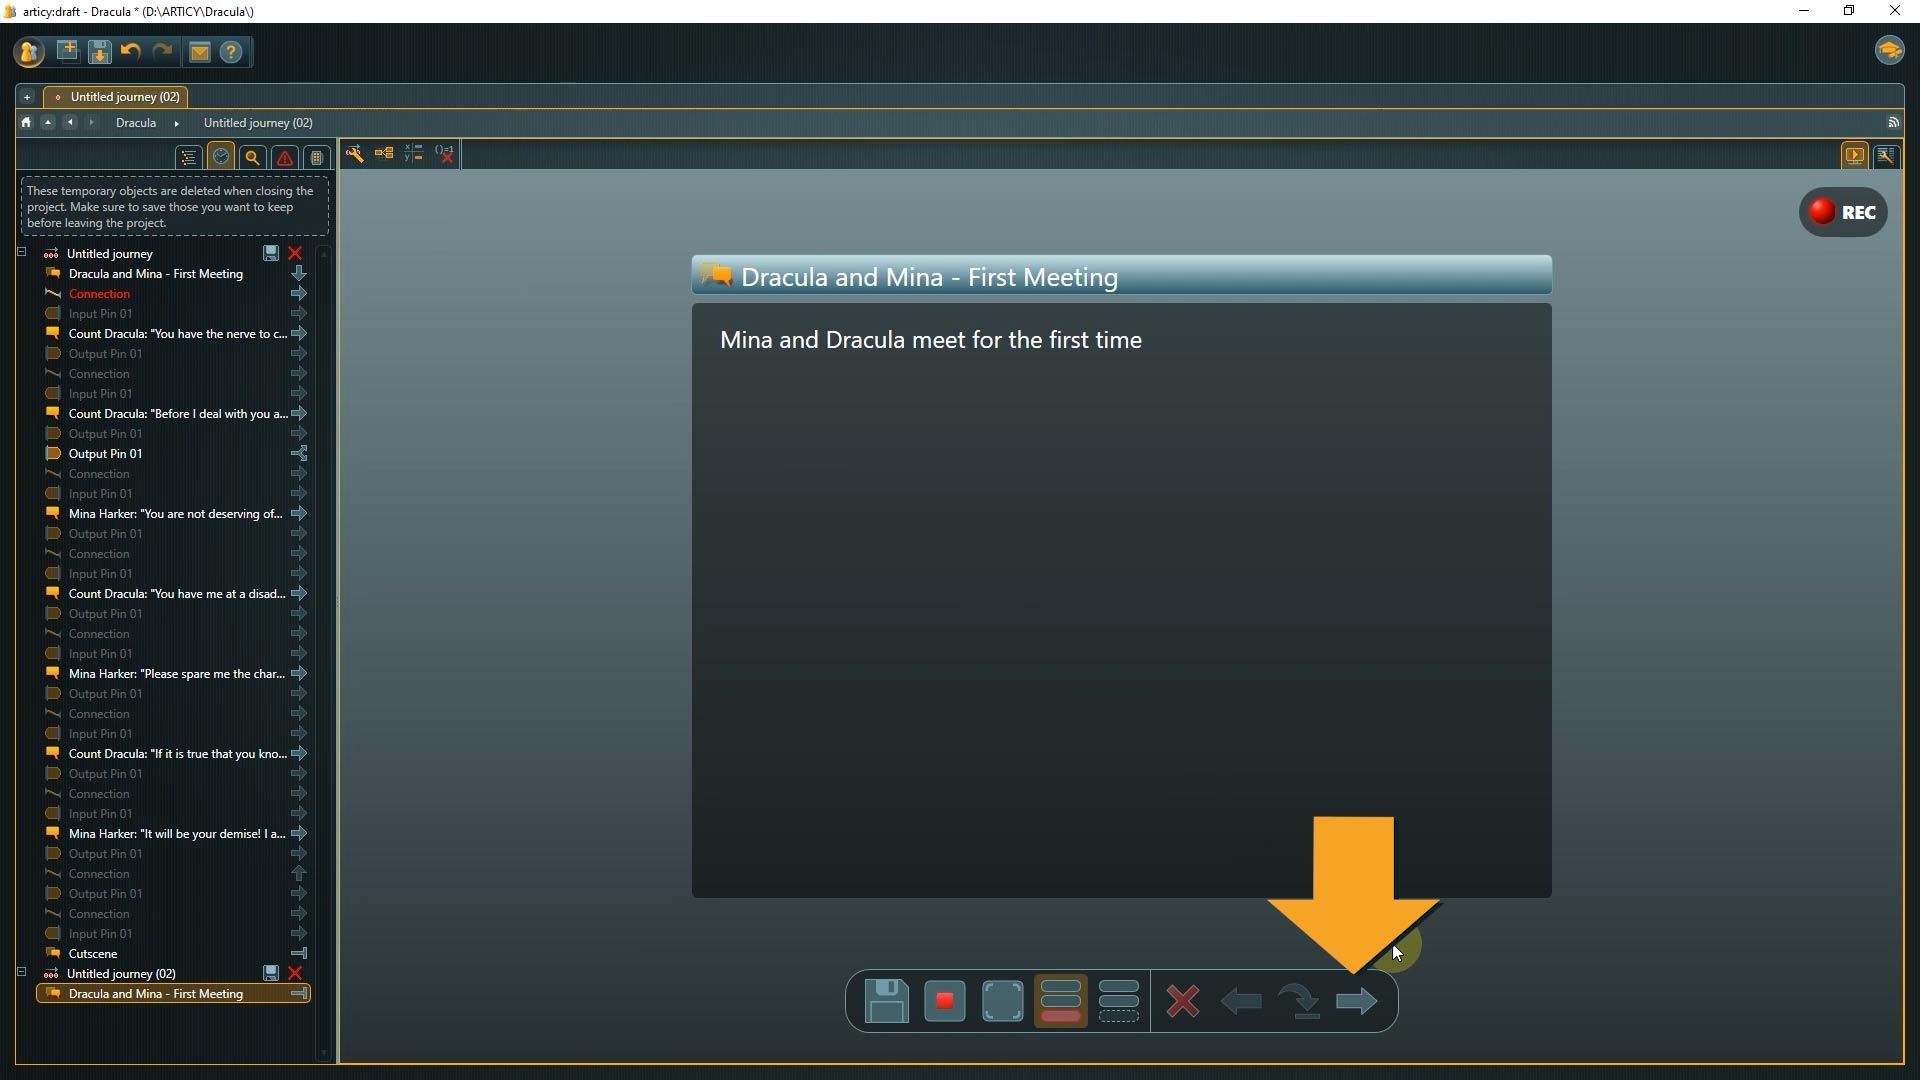
At the bottom of the content area we find c) the navigation panel.

Per default a presentation starts in record mode. This is the mode where we also use the presentation mode most of the times as it gives us the option to go through the story and make choices.

If you stop the recording you switch to view mode, where you only can play through a previously recorded journey.

A journey in articy terms is one path taken through the story flow. You can also save these journeys. This can make sense if you want to show a very specific path to someone, or have it as a reminder for yourself, because you noticed something you want to come back to at a later stage.

The option to change between Analysis and Player mode will become useful later on.
In the analysis mode false options are marked and scripting expressions are visualized.

In player mode false options are hidden, you see only what a player would see.

For this play-through it doesn’t matter which option you choose, as we have not yet included any scripting, both variants will look the same. We will come back to this at a later stage, to take a look at how these options change the presentation.
The right side of the panel holds the navigational elements. The most used one will be a) the Next button on the rightmost side, which shows an arrow that is either pointing downward when we are at container level, or towards the right side when at dialogue fragment level. The other navigational elements are used far less frequently and come into play if you want to b) delete parts of the journey, c) go back, or d) skip elements.
That covers the basics. Now we can dive right in – figuratively and literally – as the first thing we need to do is to submerge into the dialogue node we started our presentation in.
Presentation Mode Playthrough
1. Submerge by clicking the Next button.
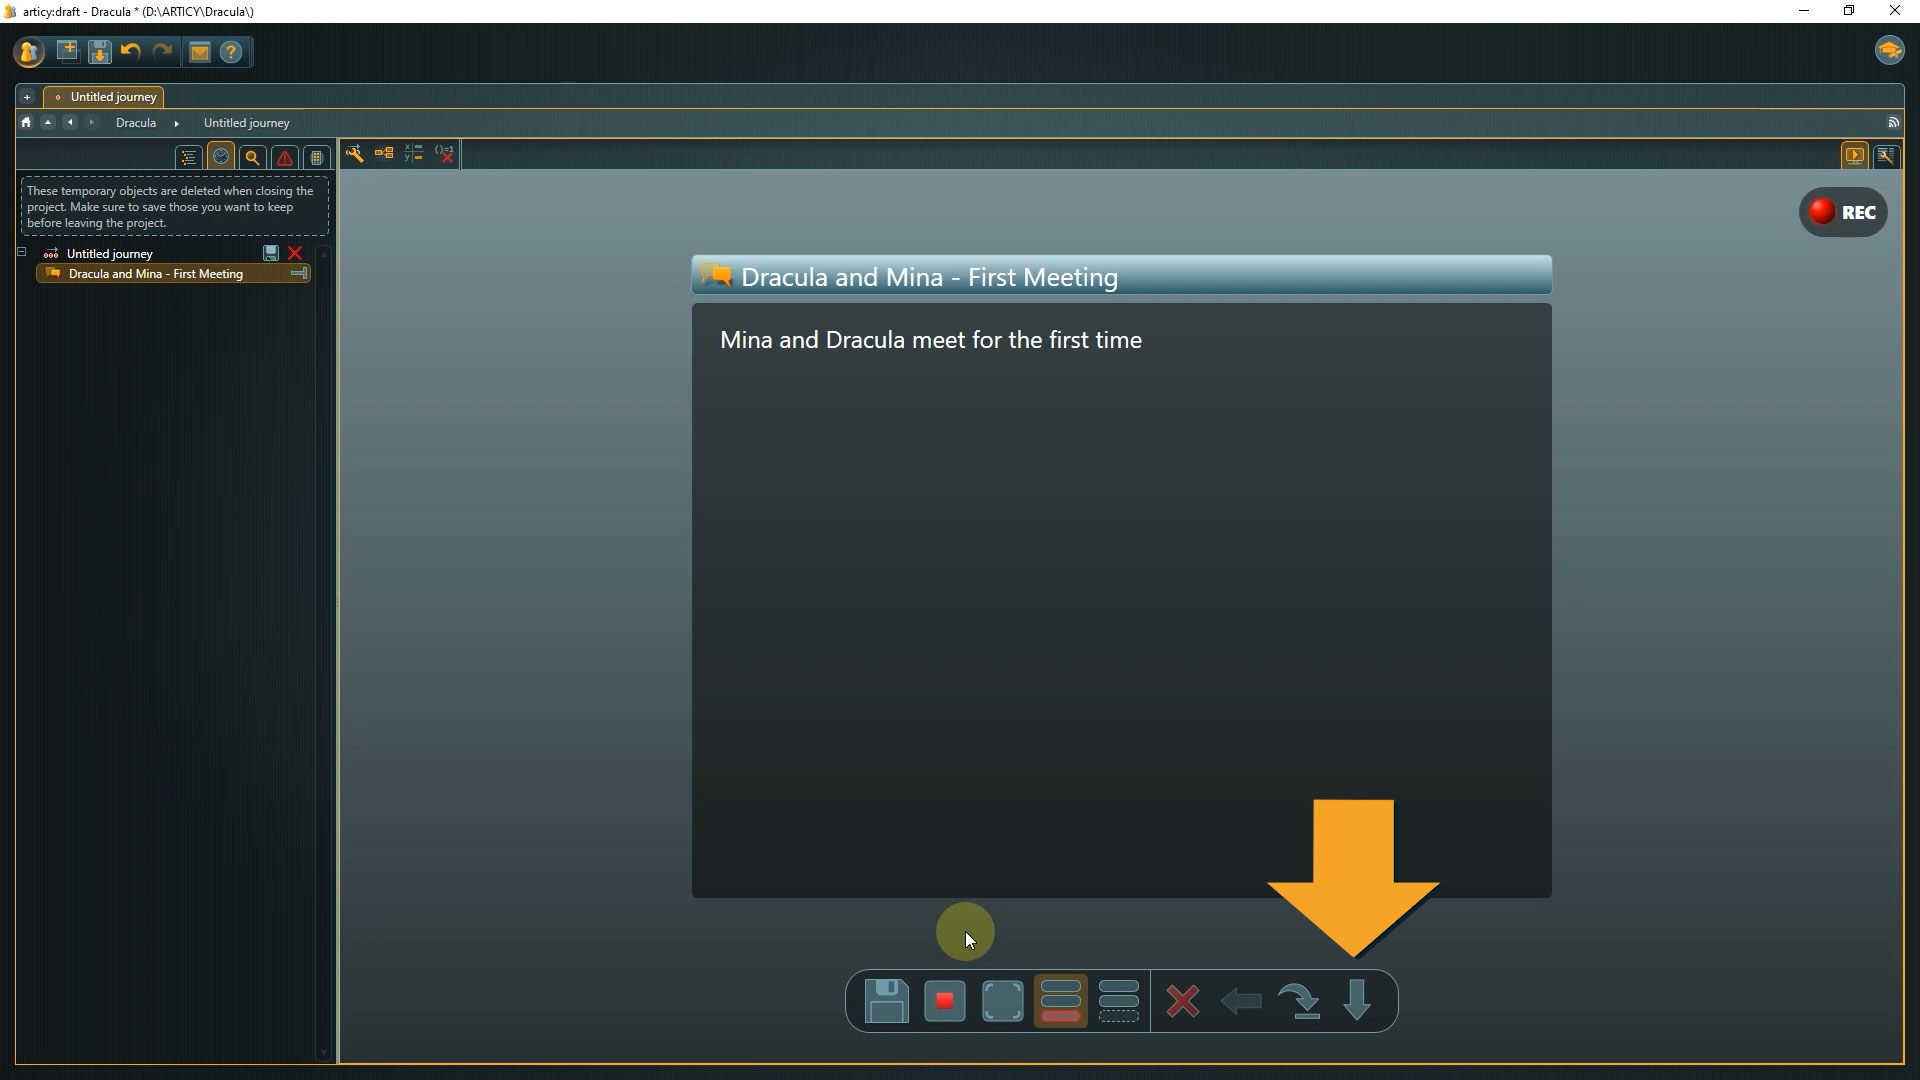
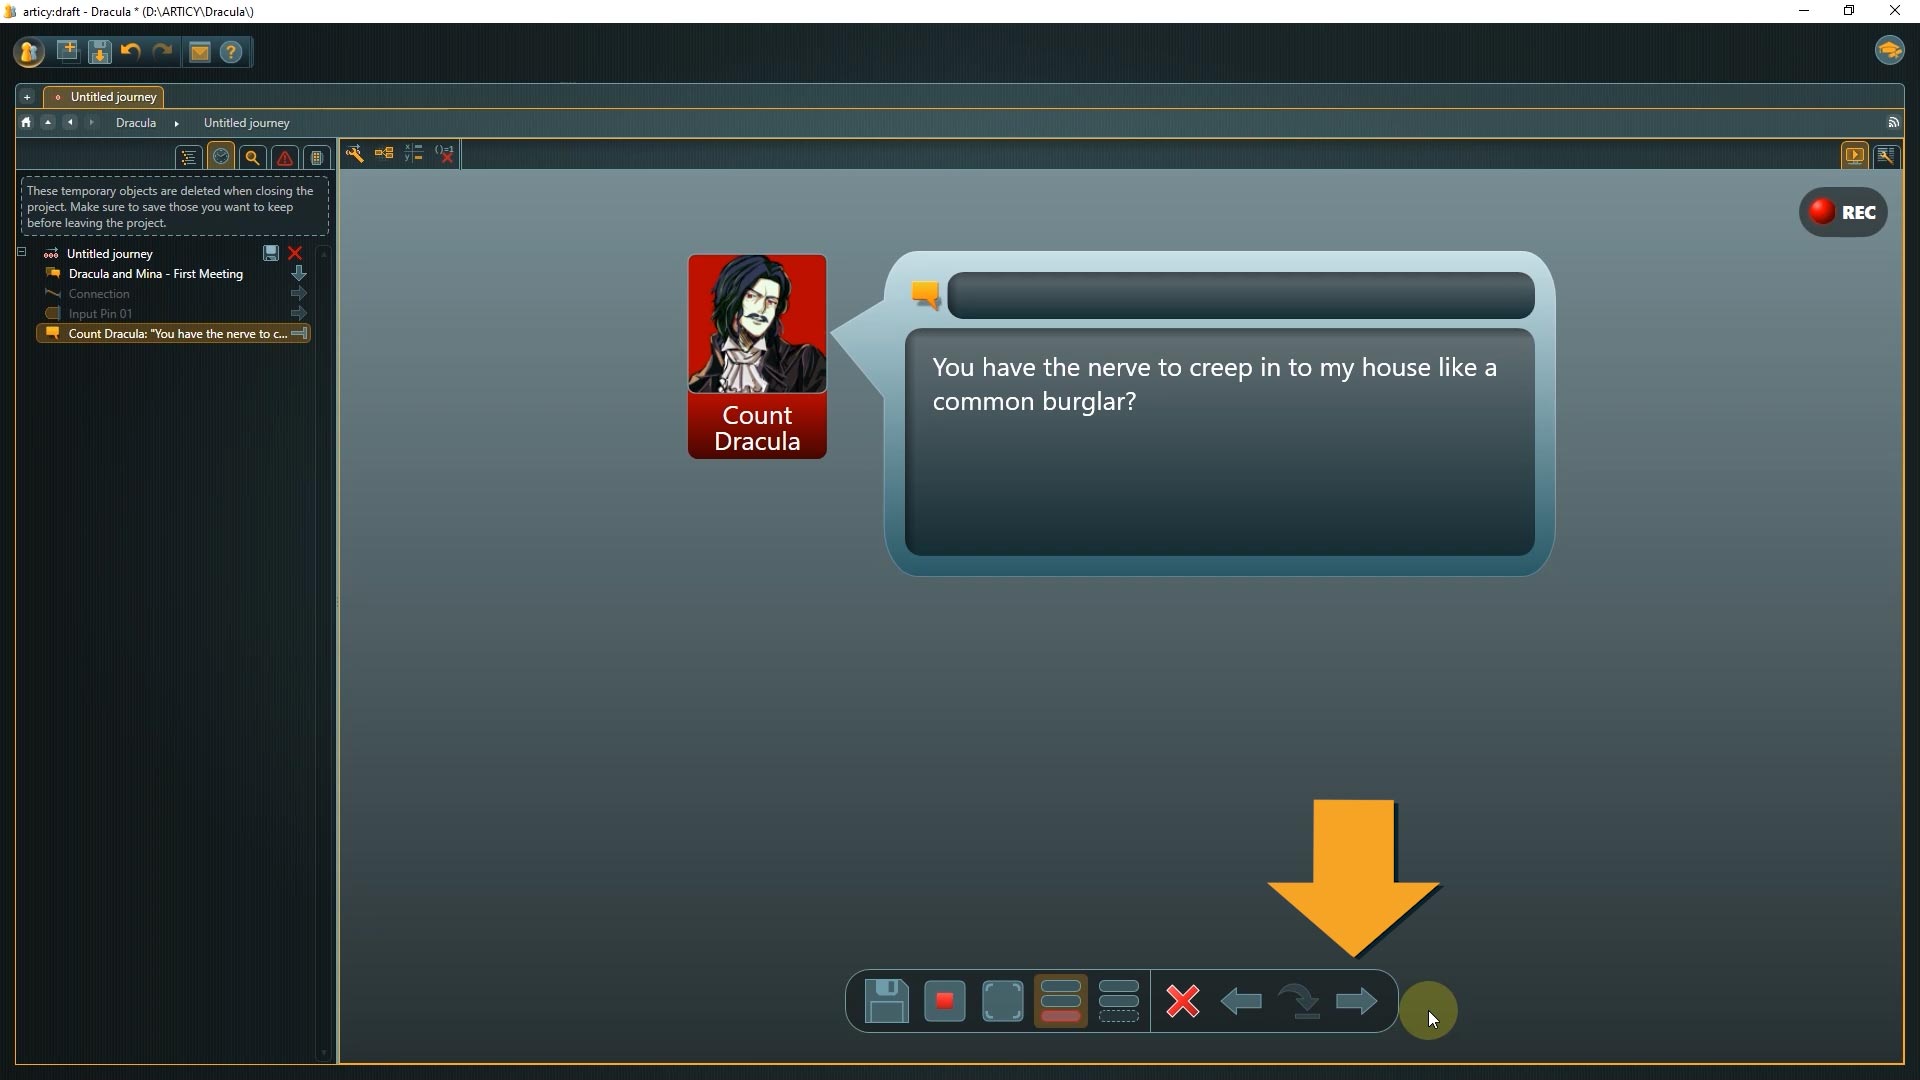
Now Dracula’s first dialogue line is displayed. The navigation arrow changed from pointing downward to right, as we are now moving along a sequence on one level.
2. Click to continue the presentation.
This is the choice we built into the dialogue. If menu text was used – as we did – then it is displayed as the options’ text. You can see that the continue element in the navigation bar is grayed out now, we have to click the arrow symbol of one of the options.

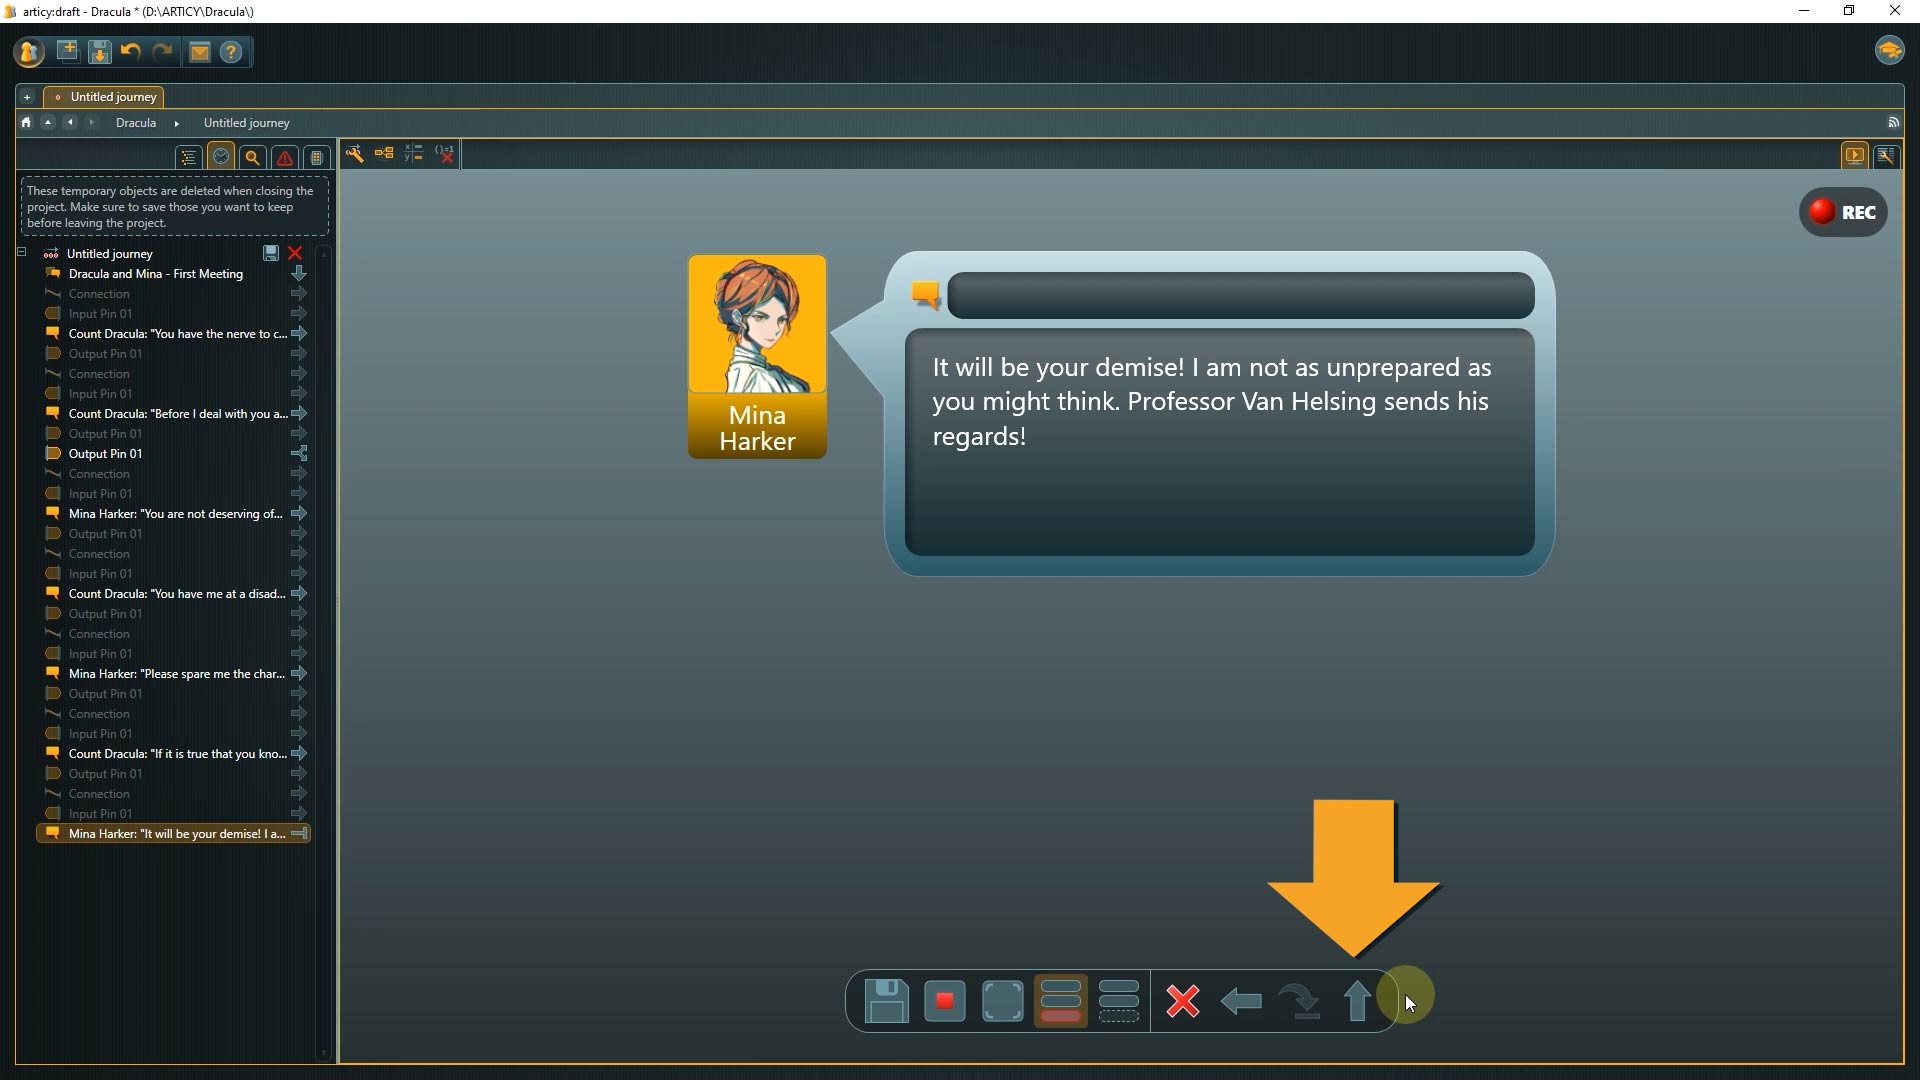
3. Click through the rest of the dialogue. The merging points we have in the story are not marked in the presentation as they happen automatically without any input necessary from the player.
Below is the dialogue’s last node and you can see that the navigation arrow changed again, it now points up. This means we have arrived at the end of the inner content of this node, if we continue we emerge from this node and go to the next connected node one level higher.
4. We are now in the cutscene node. Time to end our play through. We can leave the simulation by either clicking a) the Project or b) the Show in Flow editor button in the toolbar. Of course you can also go back to the jumpstart page via the c) home button.
👉 When we look at our structure again, we can see that all nodes are connected. This is why we seamlessly could go from one node to the next in the simulation. This is important for a continuous flow.
In our last lesson I mentioned that you need to connect the first and last node in an inner content layer to the pins of the parent node. Let’s take a quick look what happens if we forget to create these connections.
1. First submerge into the dialogue node again

2. Delete the connection to the first dialogue fragment, then emerge from the node
3. Start another presentation from here.
What do you think will happen now?
The next button now points to the right side. As there is no connection to the inner content we cannot access it, our only option is to travel directly to the next node on this level, the cutscene.
👉 If you notice this kind of behavior in a presentation it usually means there’s a connection missing somewhere.
This will be all for this Lesson. Don’t forget to reconnect the dialogue fragment, before saving and quitting.
Recap:
Today we learned how to use the presentation mode as an easy way to review the project within articy.

Up next:
In our next Lesson, we will take a look at how we can control interactivity by other means than player input. For this we will create a variable and update our dialogue with a simple condition.
Thank you for joining us, and join us again in our next tutorial.
Useful Links:
Don’t have articy:draft X yet? Get the free version now!
Get articy:draft X FREE
*No Payment information required
Follow us on Twitter, Facebook and LinkedIn to keep yourself up to date and informed. To exchange ideas and interact with other articy:draft users, join our communities on reddit and discord.