Hello and welcome to Lesson 12 of the articy:draft First Steps tutorial series.
Review:
In our previous lesson we created our first item, by building an entity template from scratch, setting up a new variable set to monitor Mina’s inventory, and bringing all together in form of the Stake entity.

This Lesson:
In this Lesson we will take a look at articy’s export options. We will go through the list of available exports, and then see how we can export our Flow directly to Word.
One of articy’s strengths is the fact that you have absolute control over your data. You always have access to your content and are able to continue using it in your pipeline thanks to the flexible export options.
Working with Exports
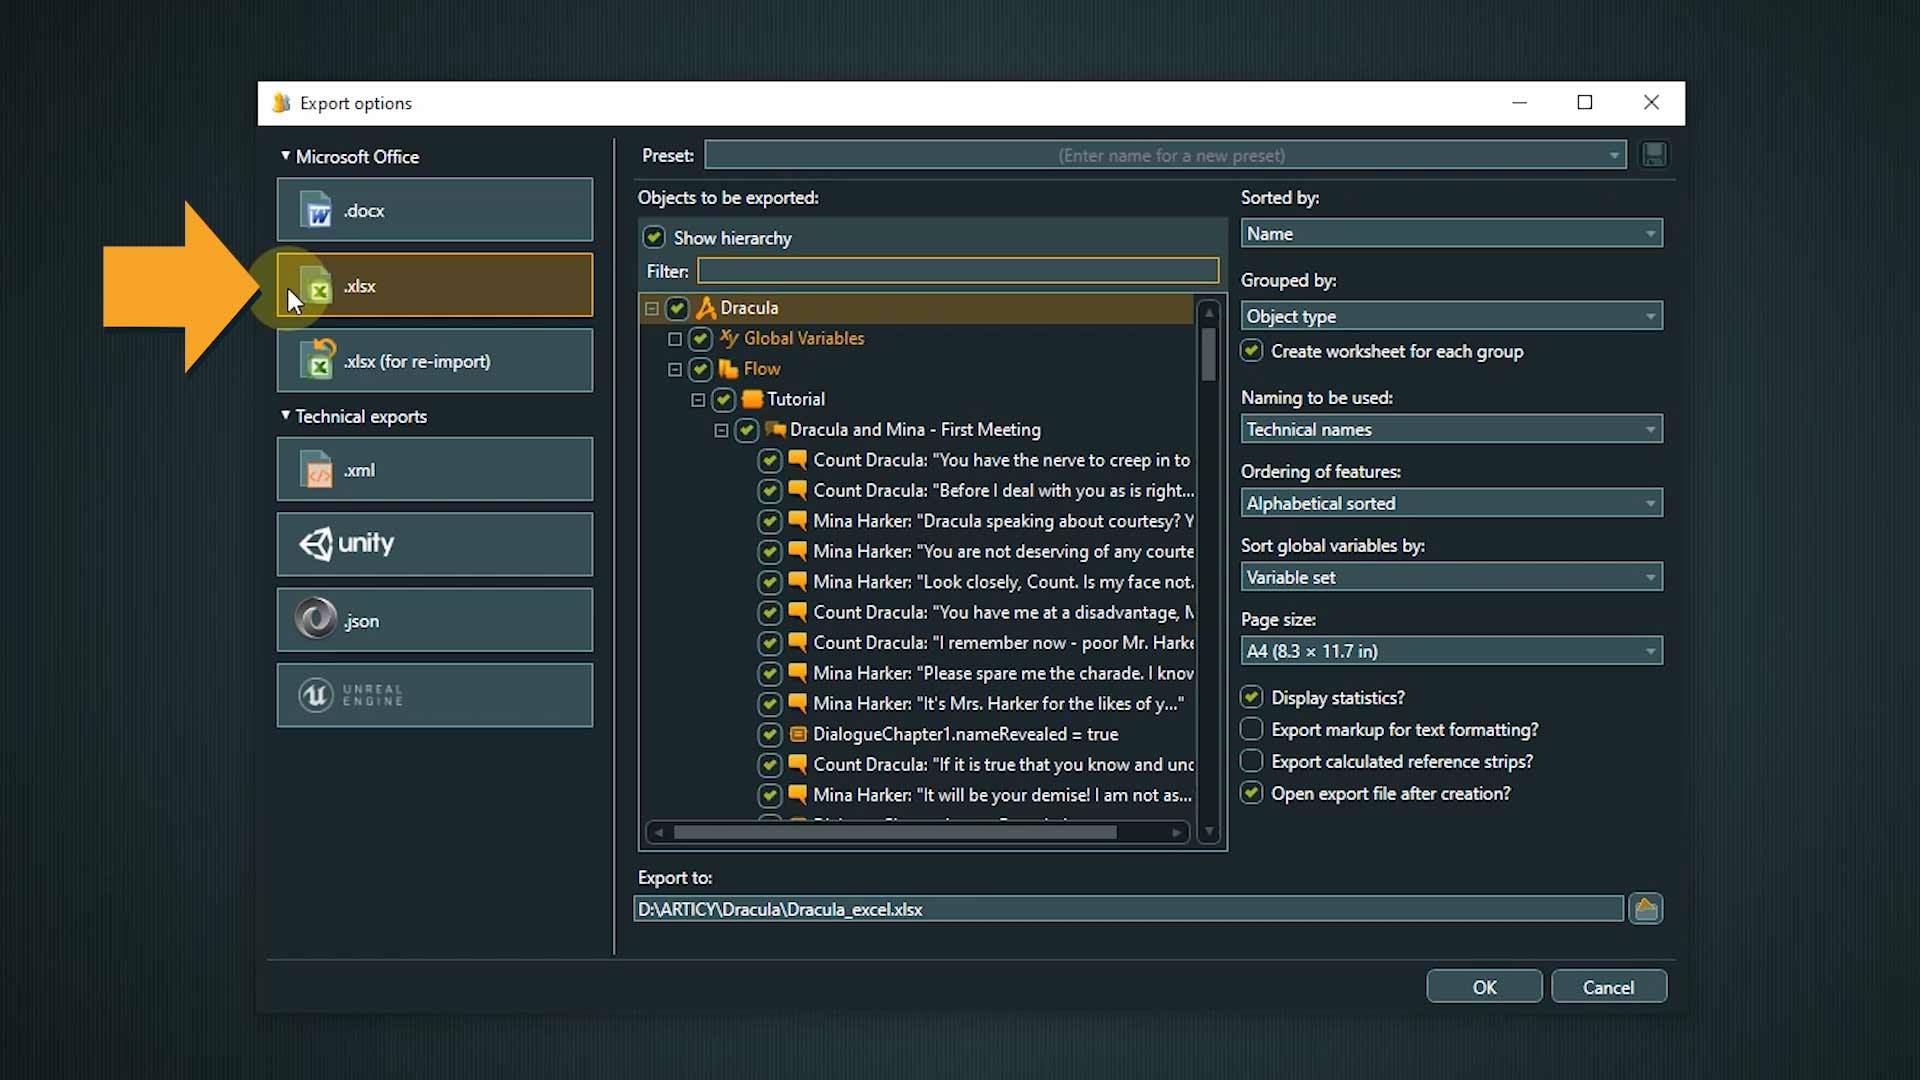
Most export options are accessible through the main menu or the hotkey “Control + Shift + E”. This opens the Export window.
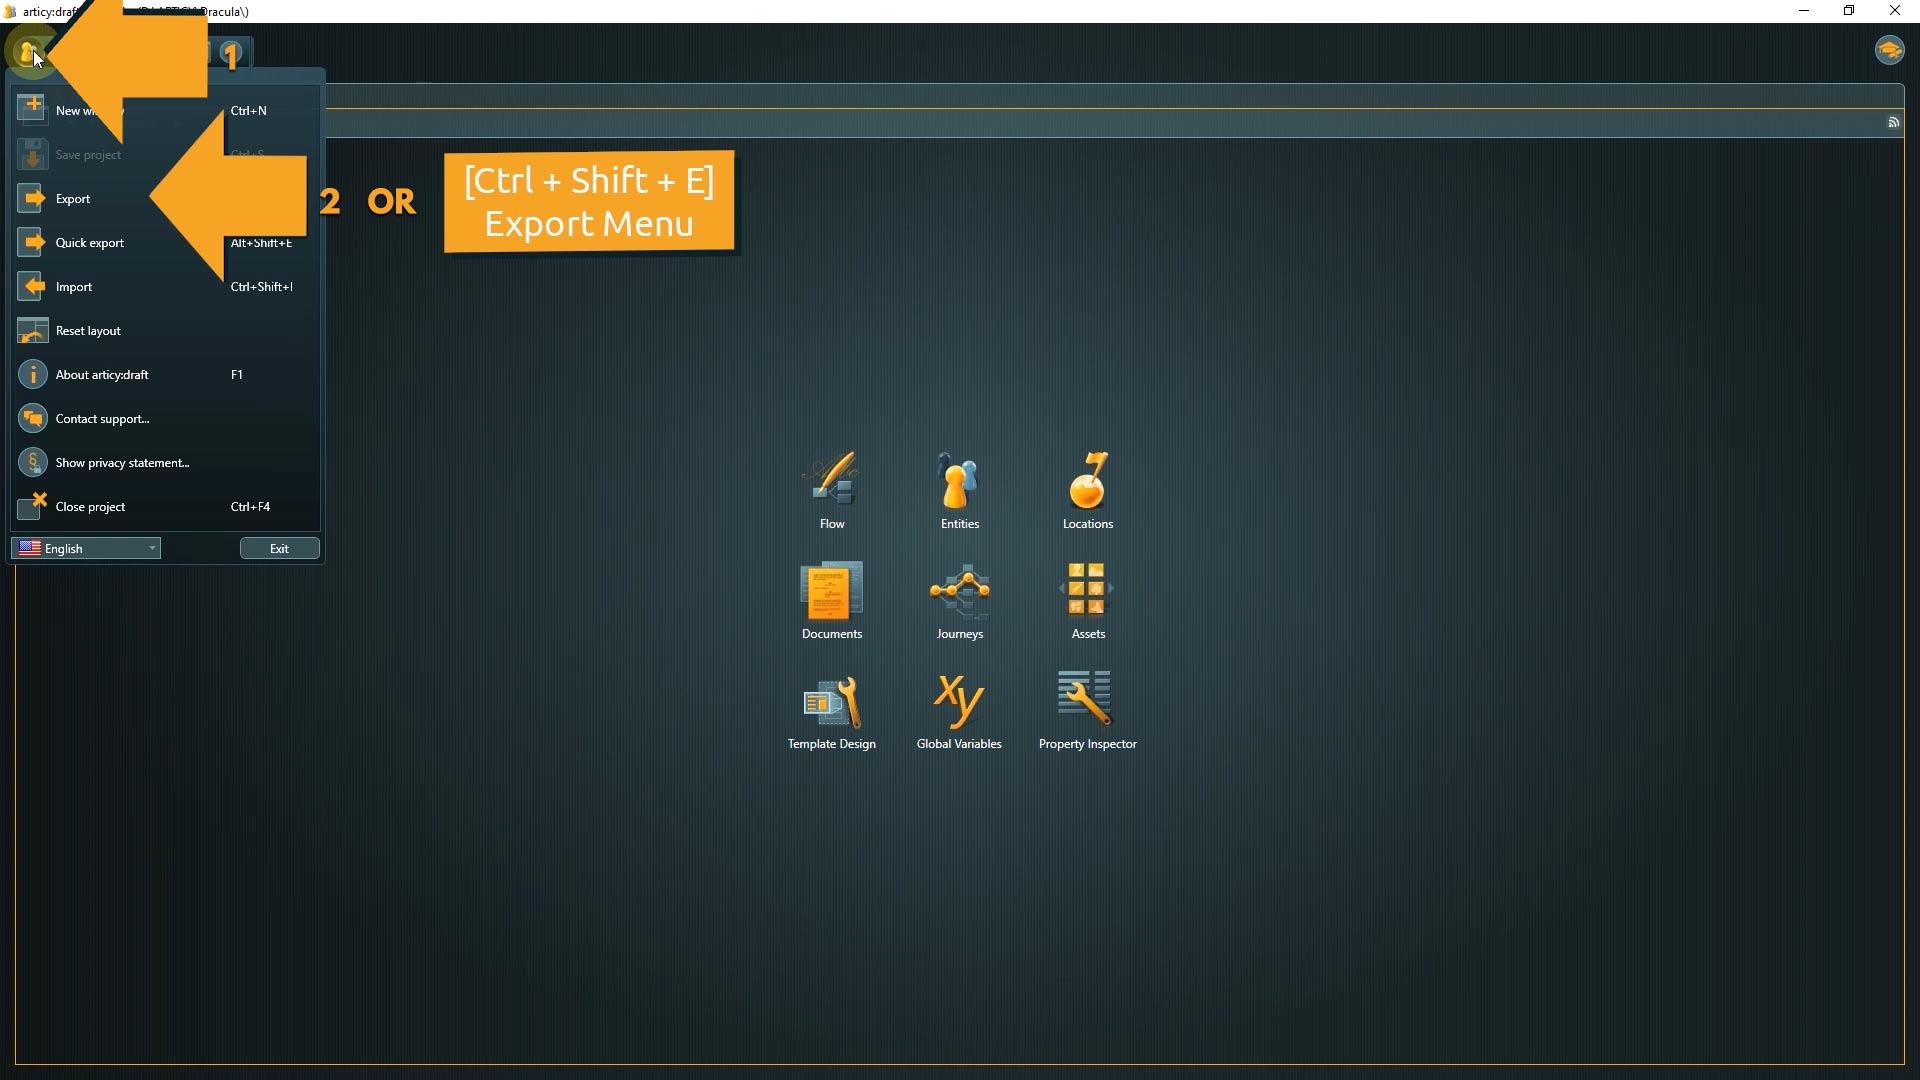
On the left side you find the list of options, divided into Microsoft Office exports and Technical exports.
The right side contains the export parameters which can differ between the options.
Export to Word
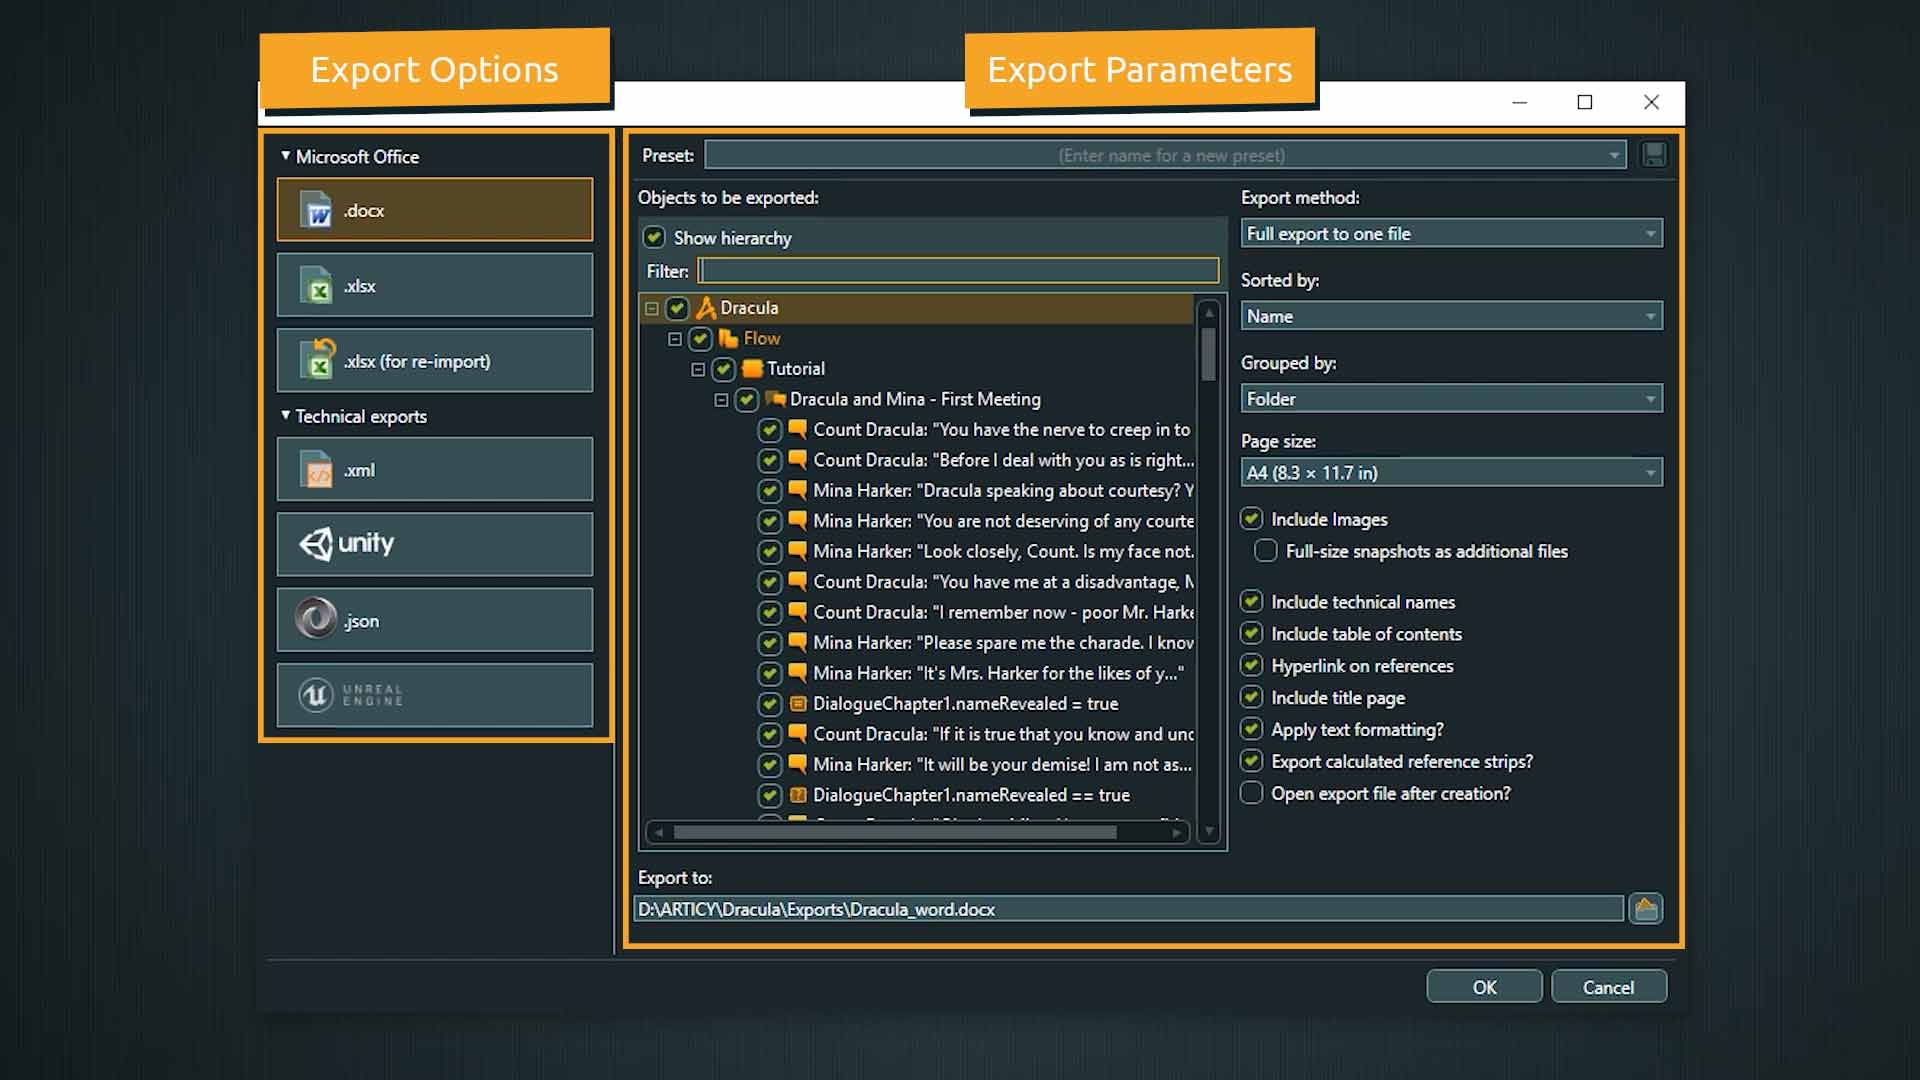
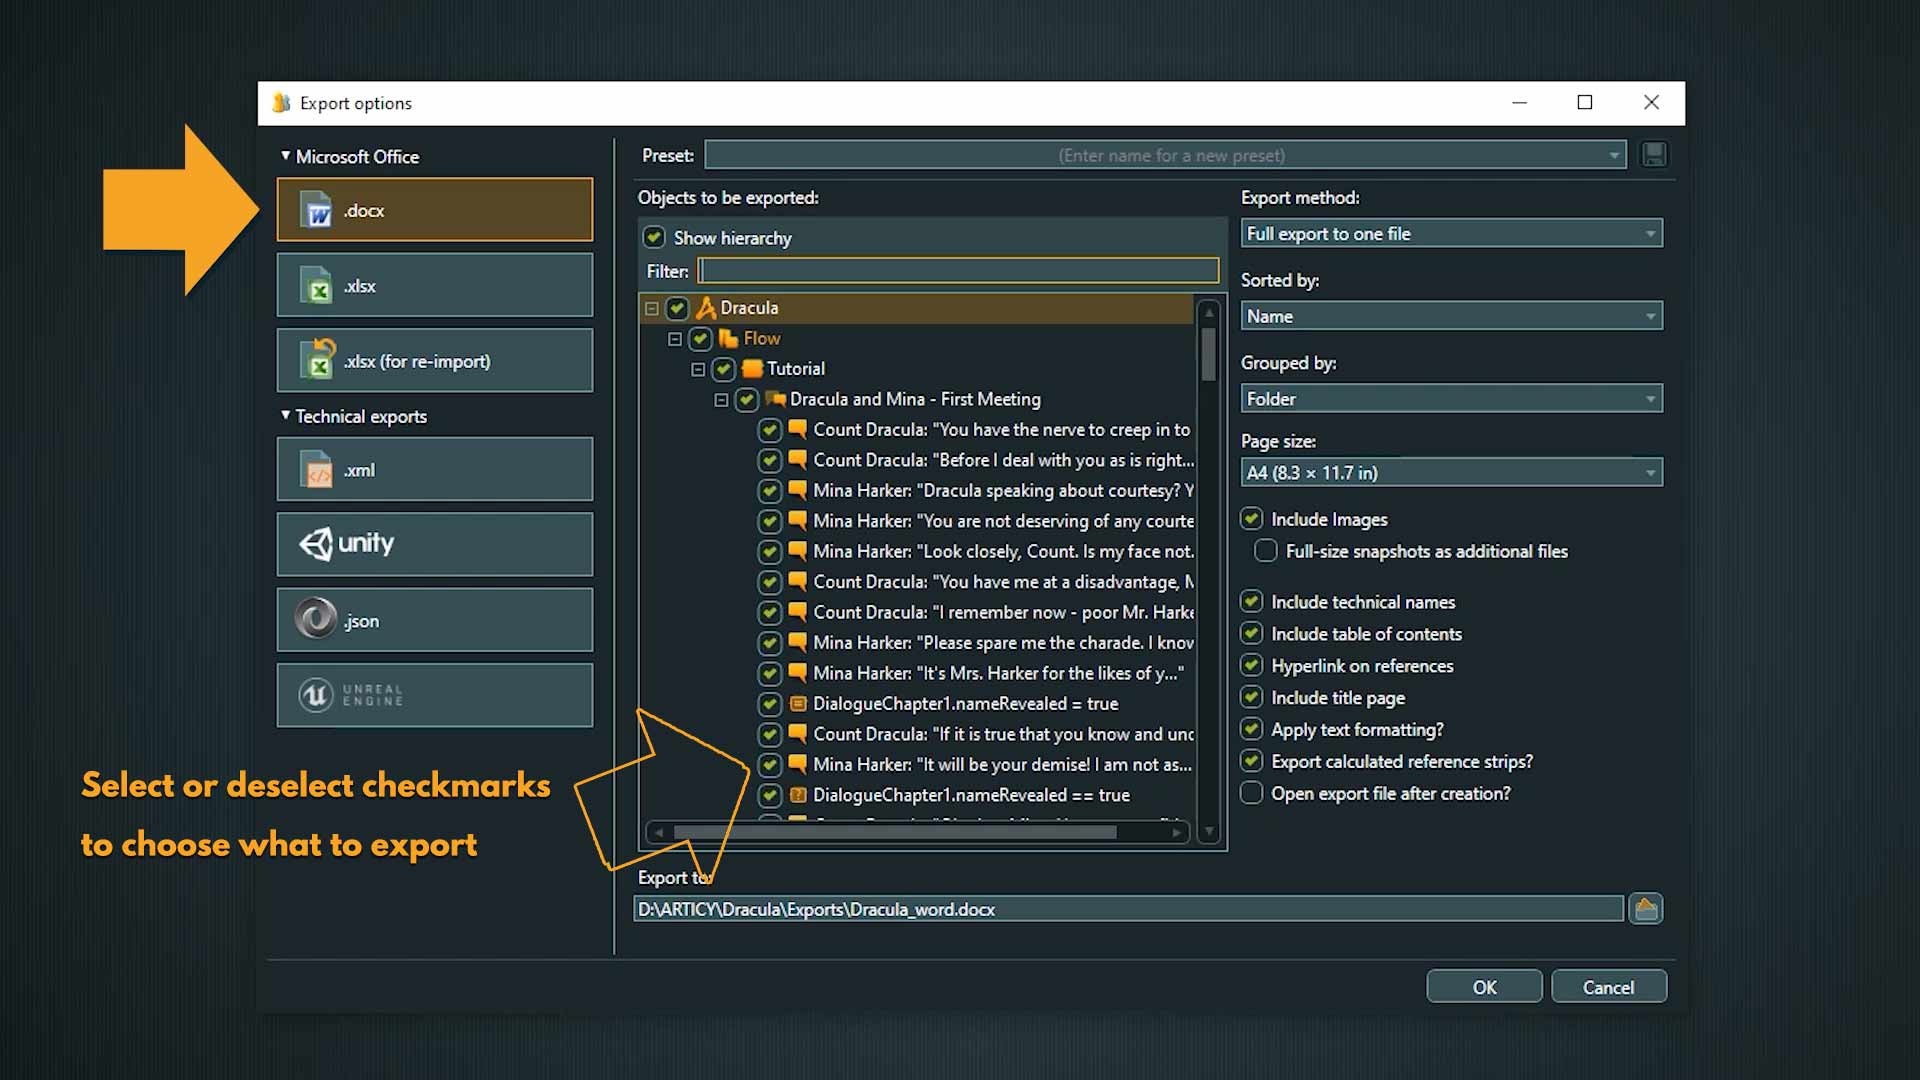
The first option is the export to Word. We can choose if we want to export the entire project, or just selected objects. To do that, just select or deselect check marks for the different areas.
On the right side we have the option to export to one file, have one file per object, or create a list. Below that are a multitude of ways to sort and order the export further. At the bottom you can specify the location for the exported document or documents.
⭐ Our tip: Exporting parts of the project like for example character sheets work well with the Word export, for the story flow other export options are more suitable.

Export to Excel
Next is the export to Excel. The parameters are very similar to the Word export. We can select the objects we want to export and have multiple ways to sort, group, and order the export.
If you want to get an overview of your project’s word count the Excel export is an easy way to get this information.

Excel export for Re-import
The next option is the “Excel export for re-import”.

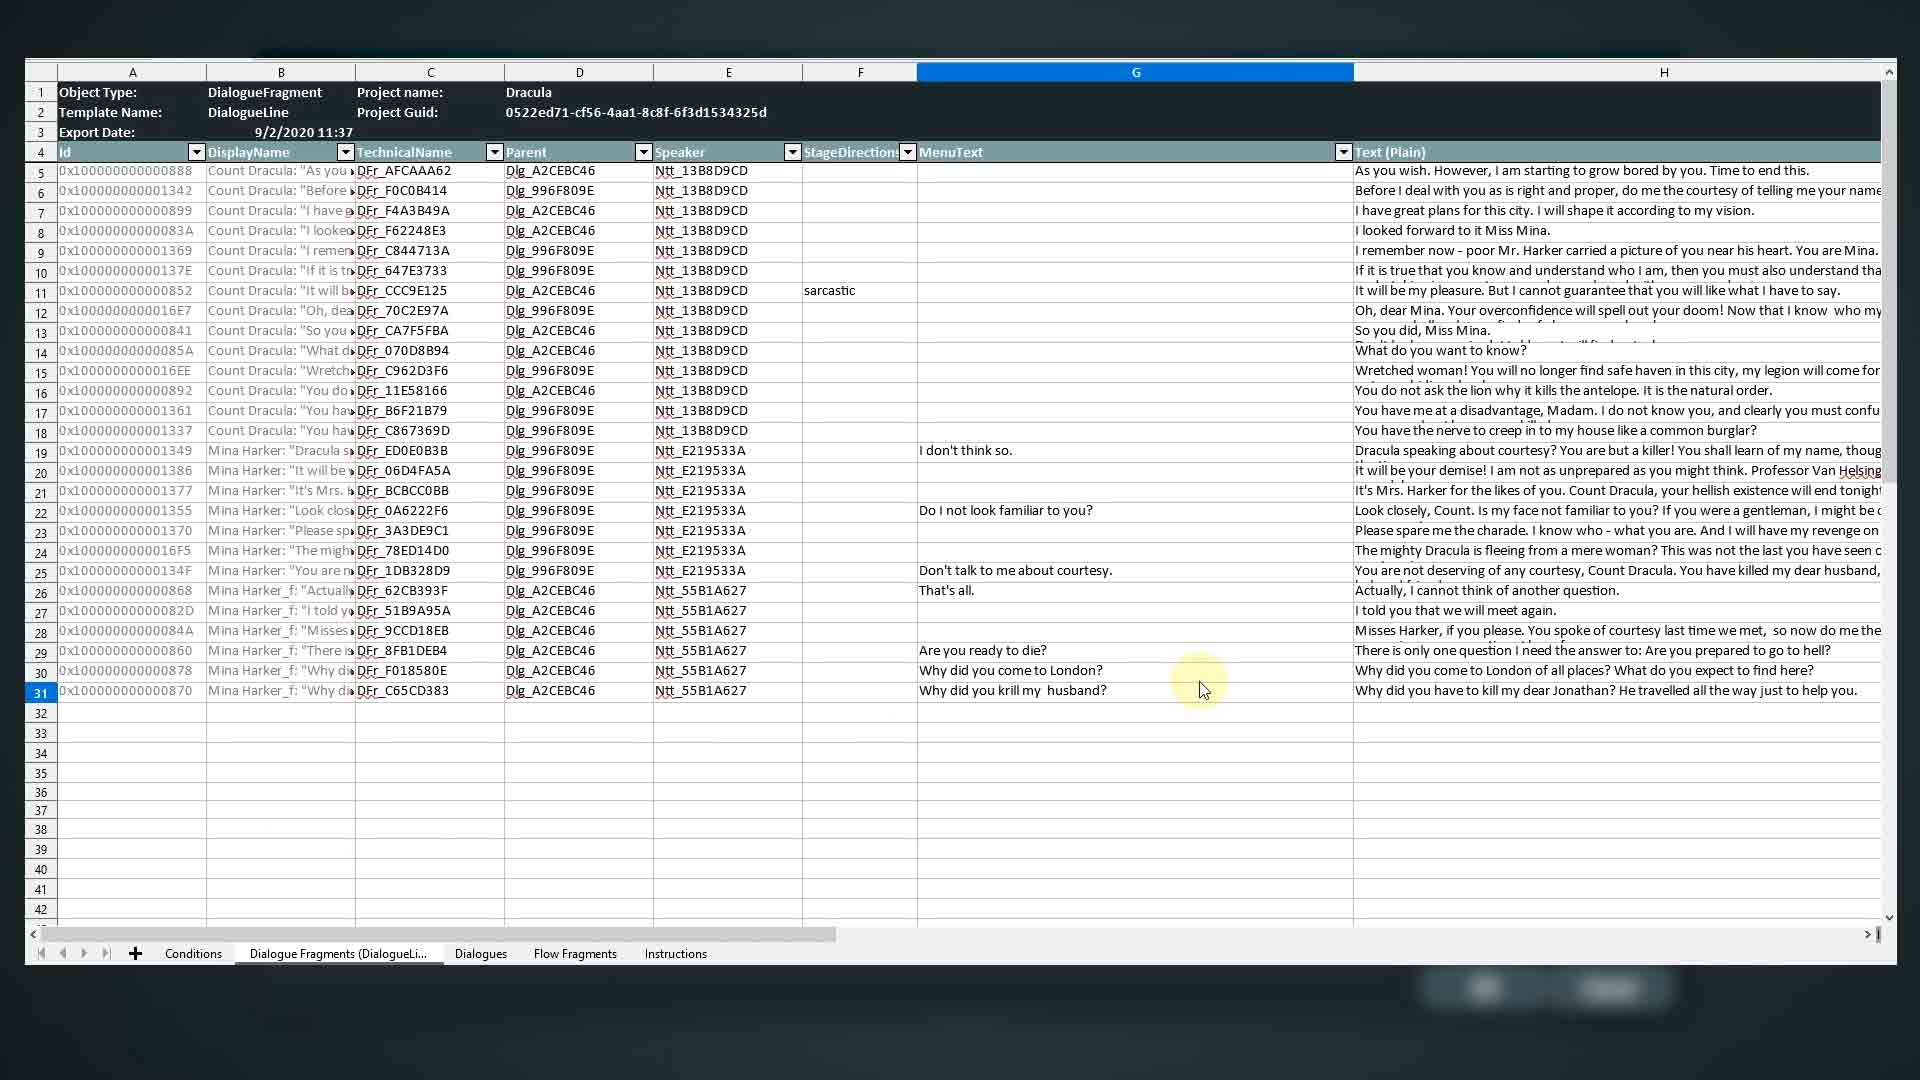
This is a special format of an Excel export that allows a re-import of data into articy. This export is often used for proof-reading and localization.
In the a) objects tab of the parameters you can choose what parts of the project you want to export.
In the b) Properties tab you can select which properties should be displayed as columns in the excel sheet. If, for example, you want to forward the export to be proof-read, you can remove all properties not vital for this task to produce a cleaner file.
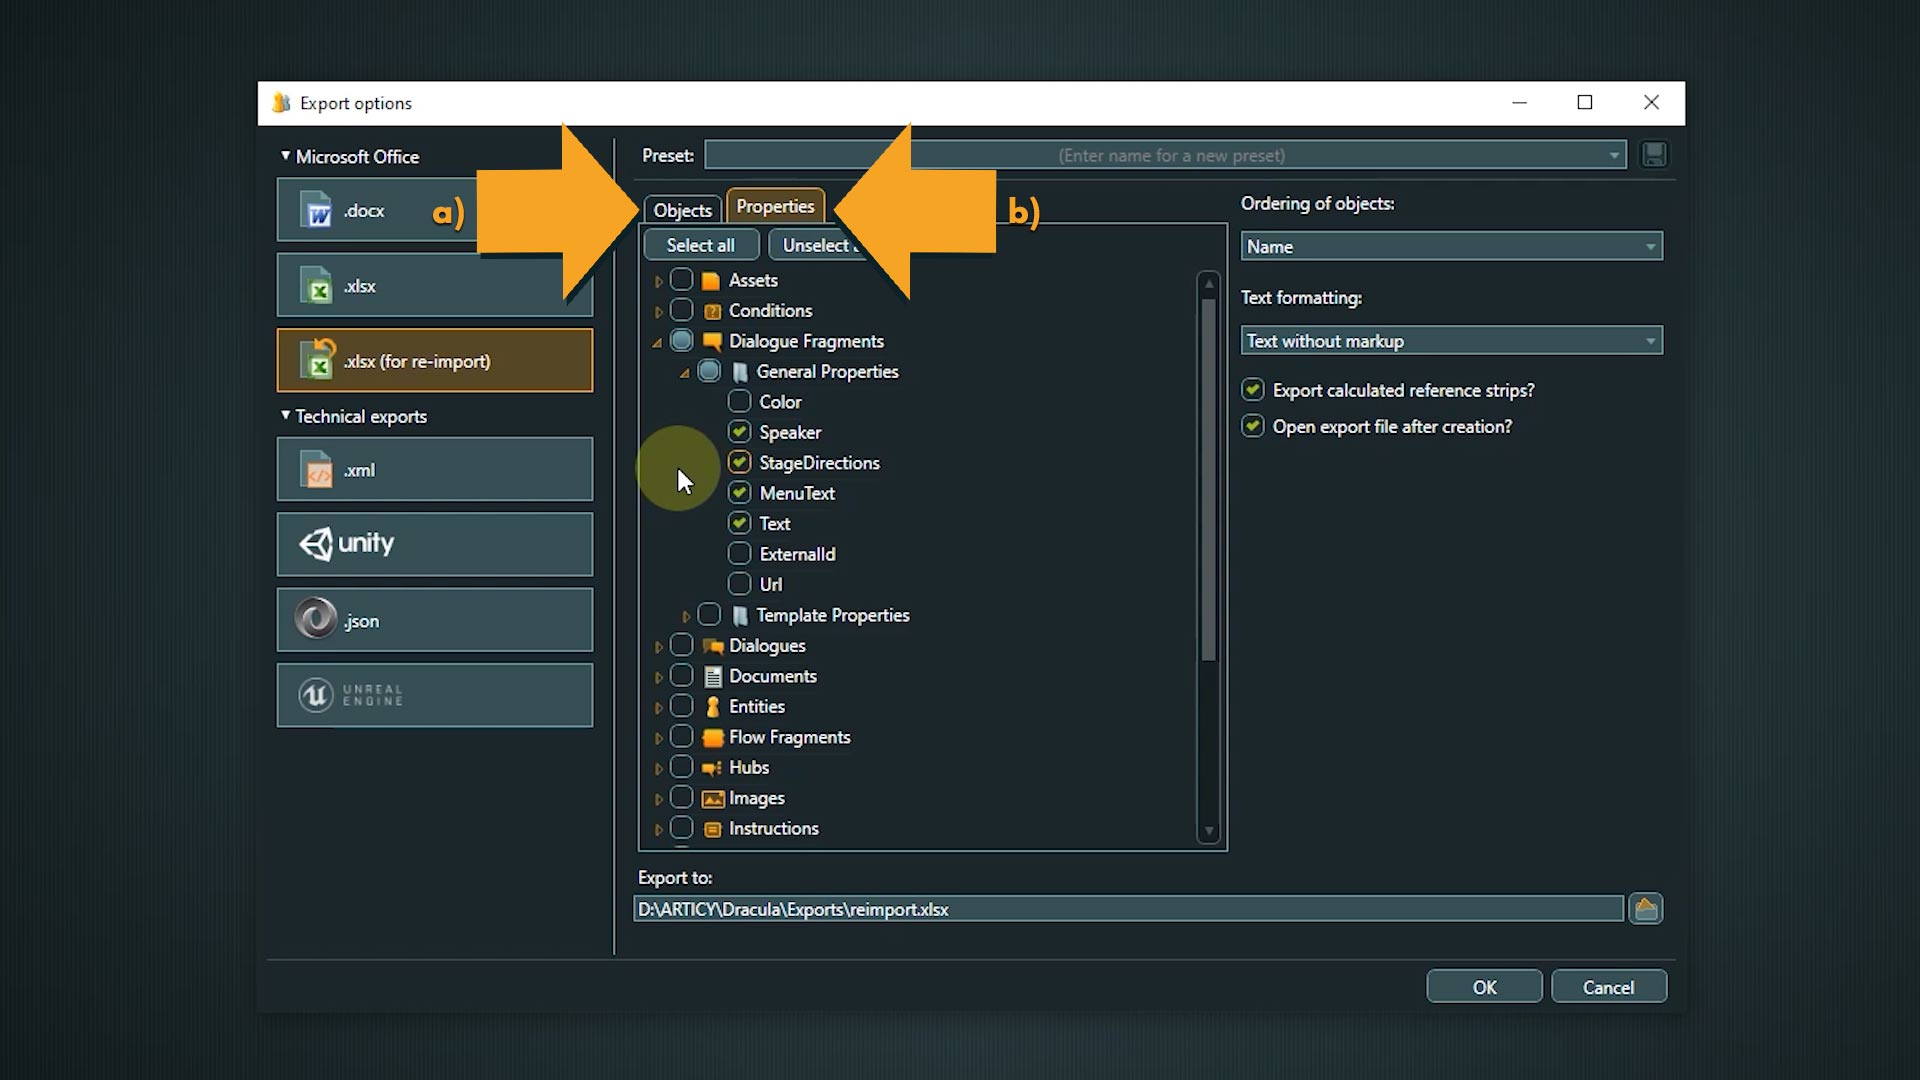
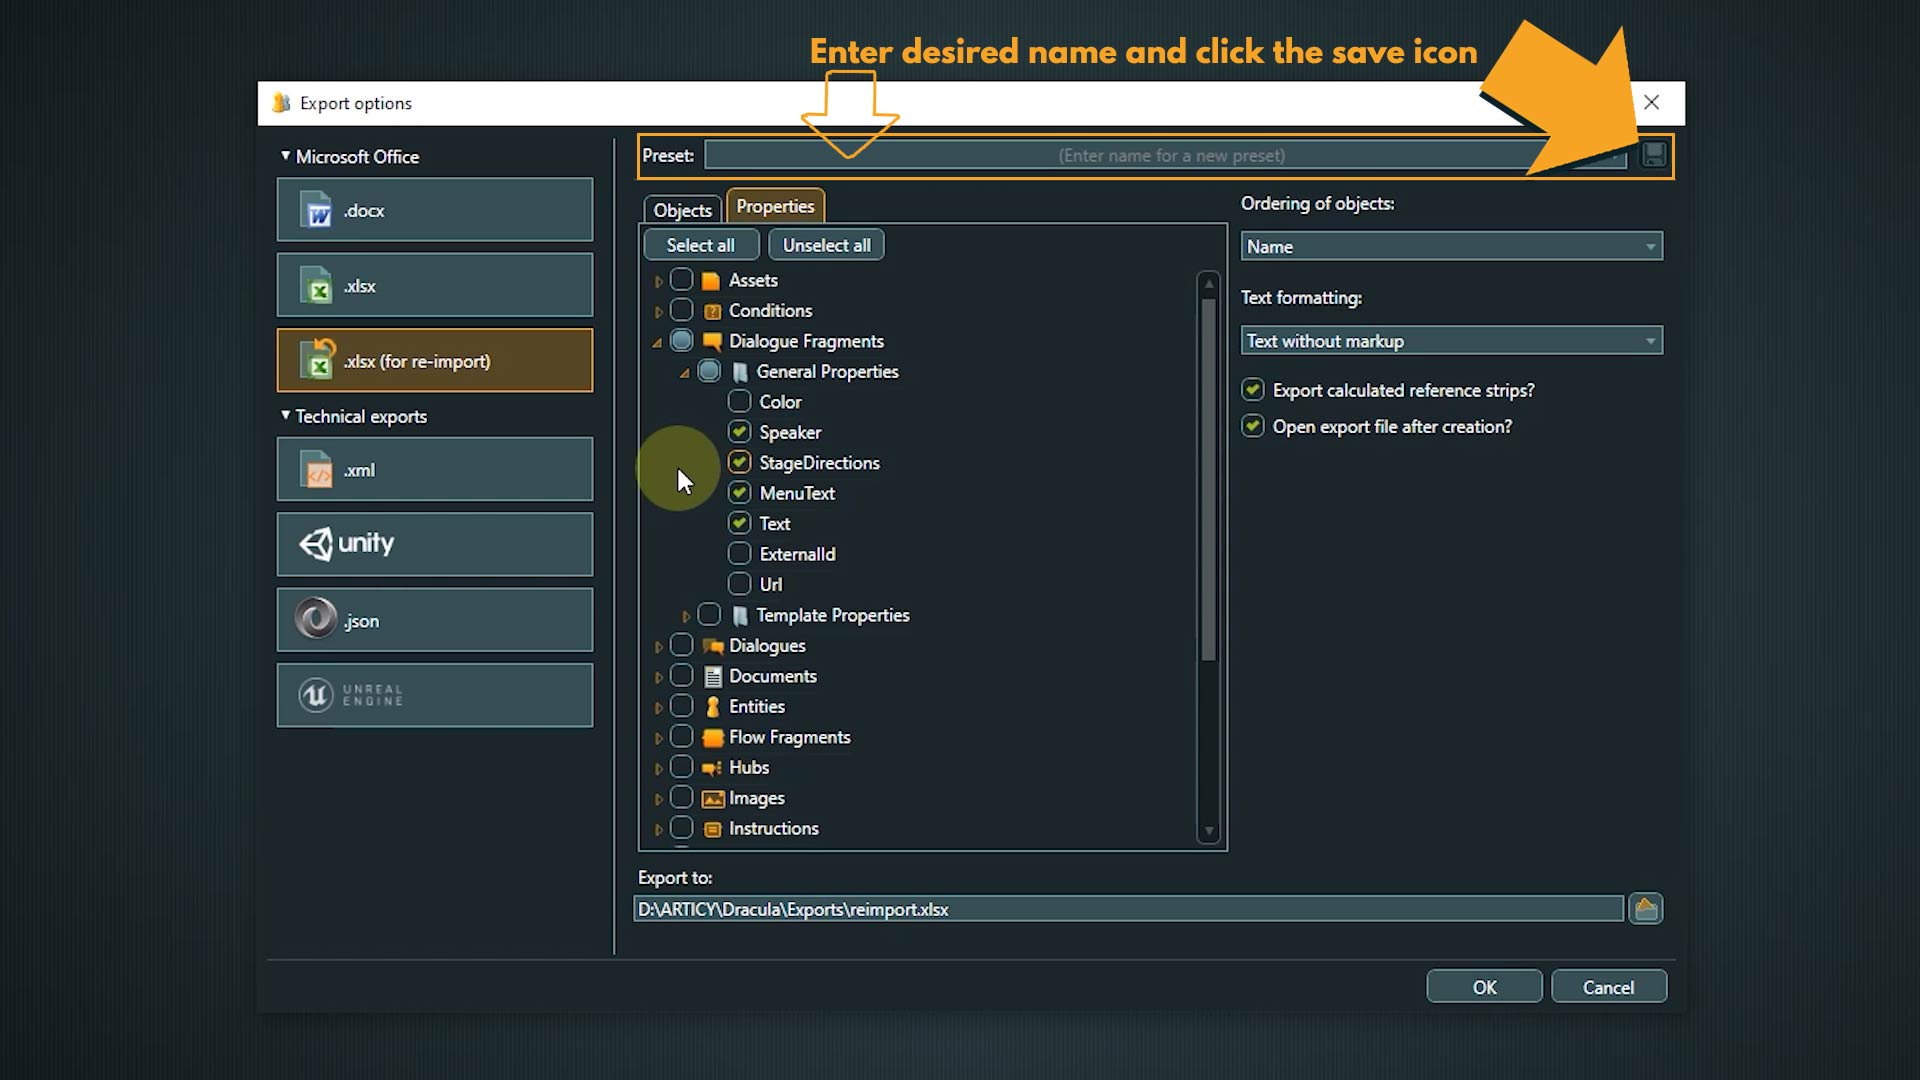
You can also save presets for exports you do on a regular basis. Presets for this export method store the selection of properties as well as all settings for the options on the right.
The selection of objects is not stored in the preset.
To re-import such an excel file:
1. Select Import from the main menu or use the hotkey “Control + Shift + I”.
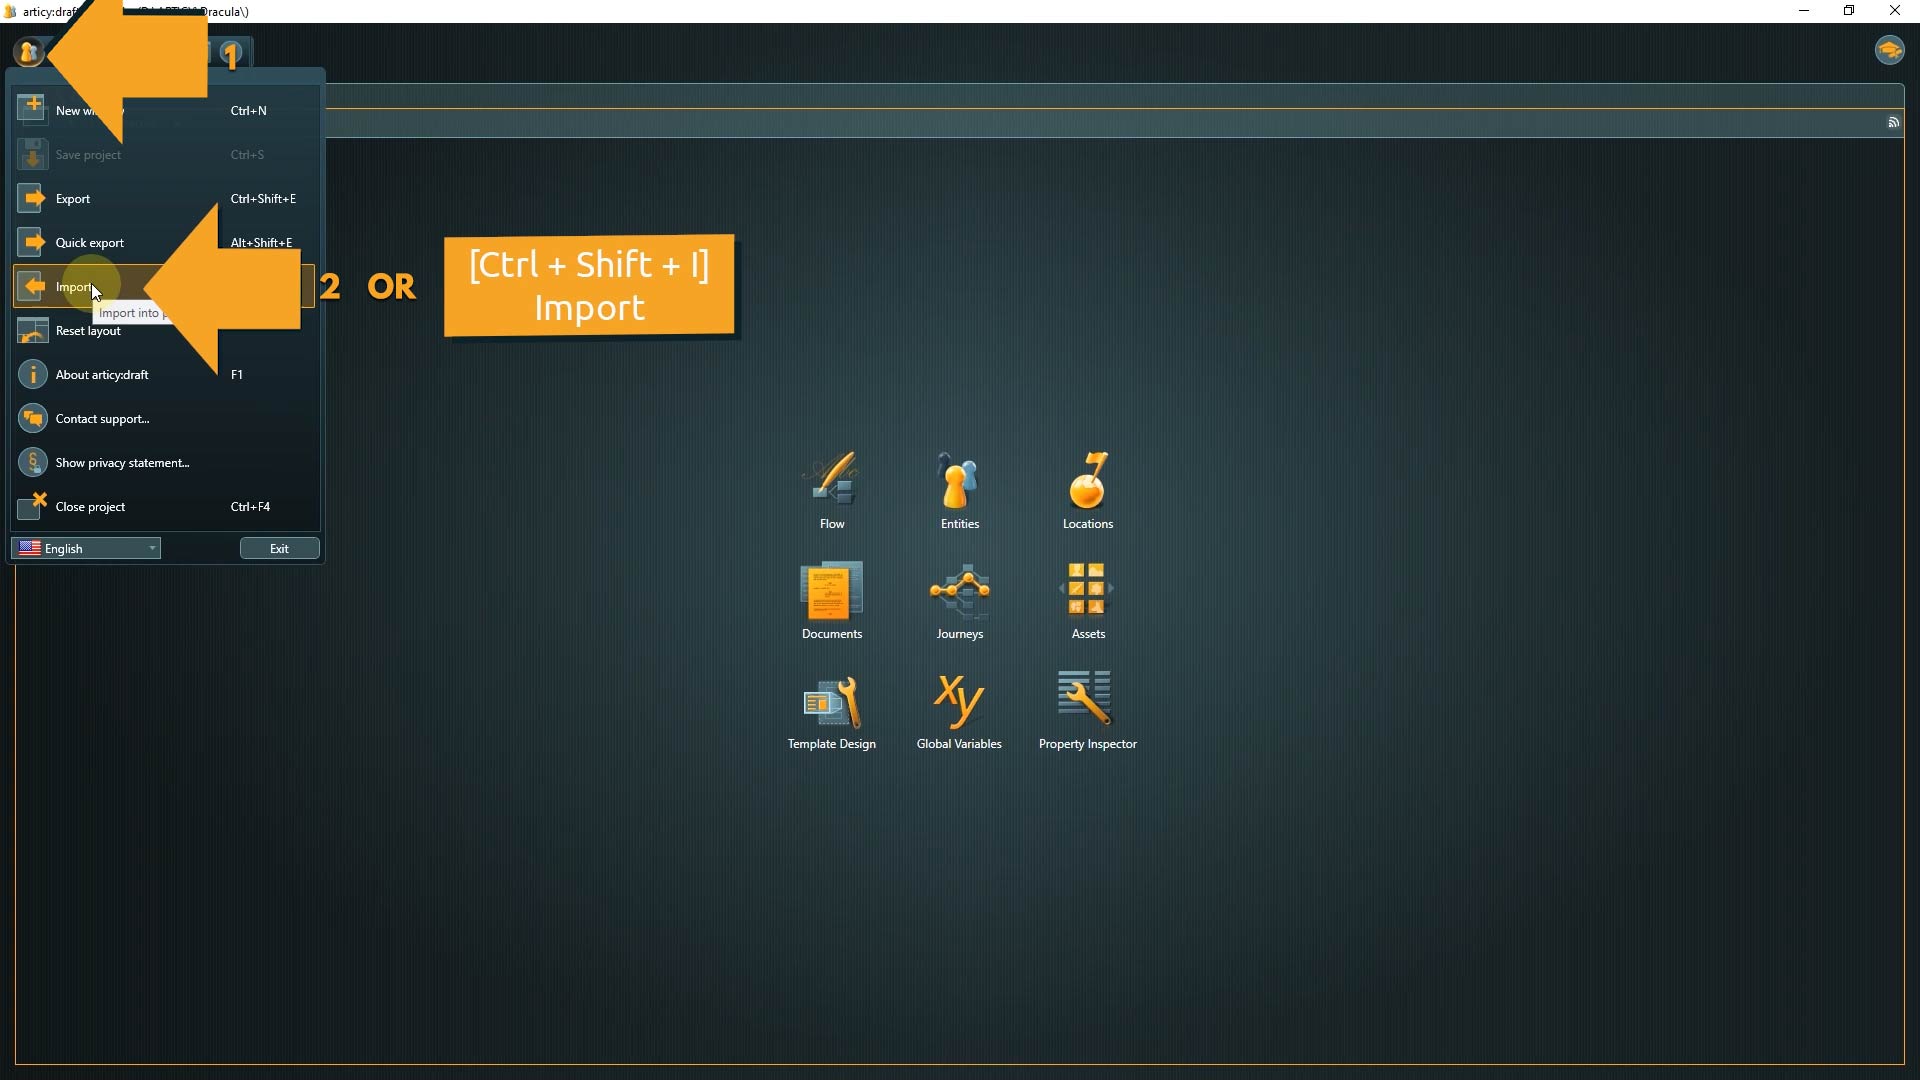
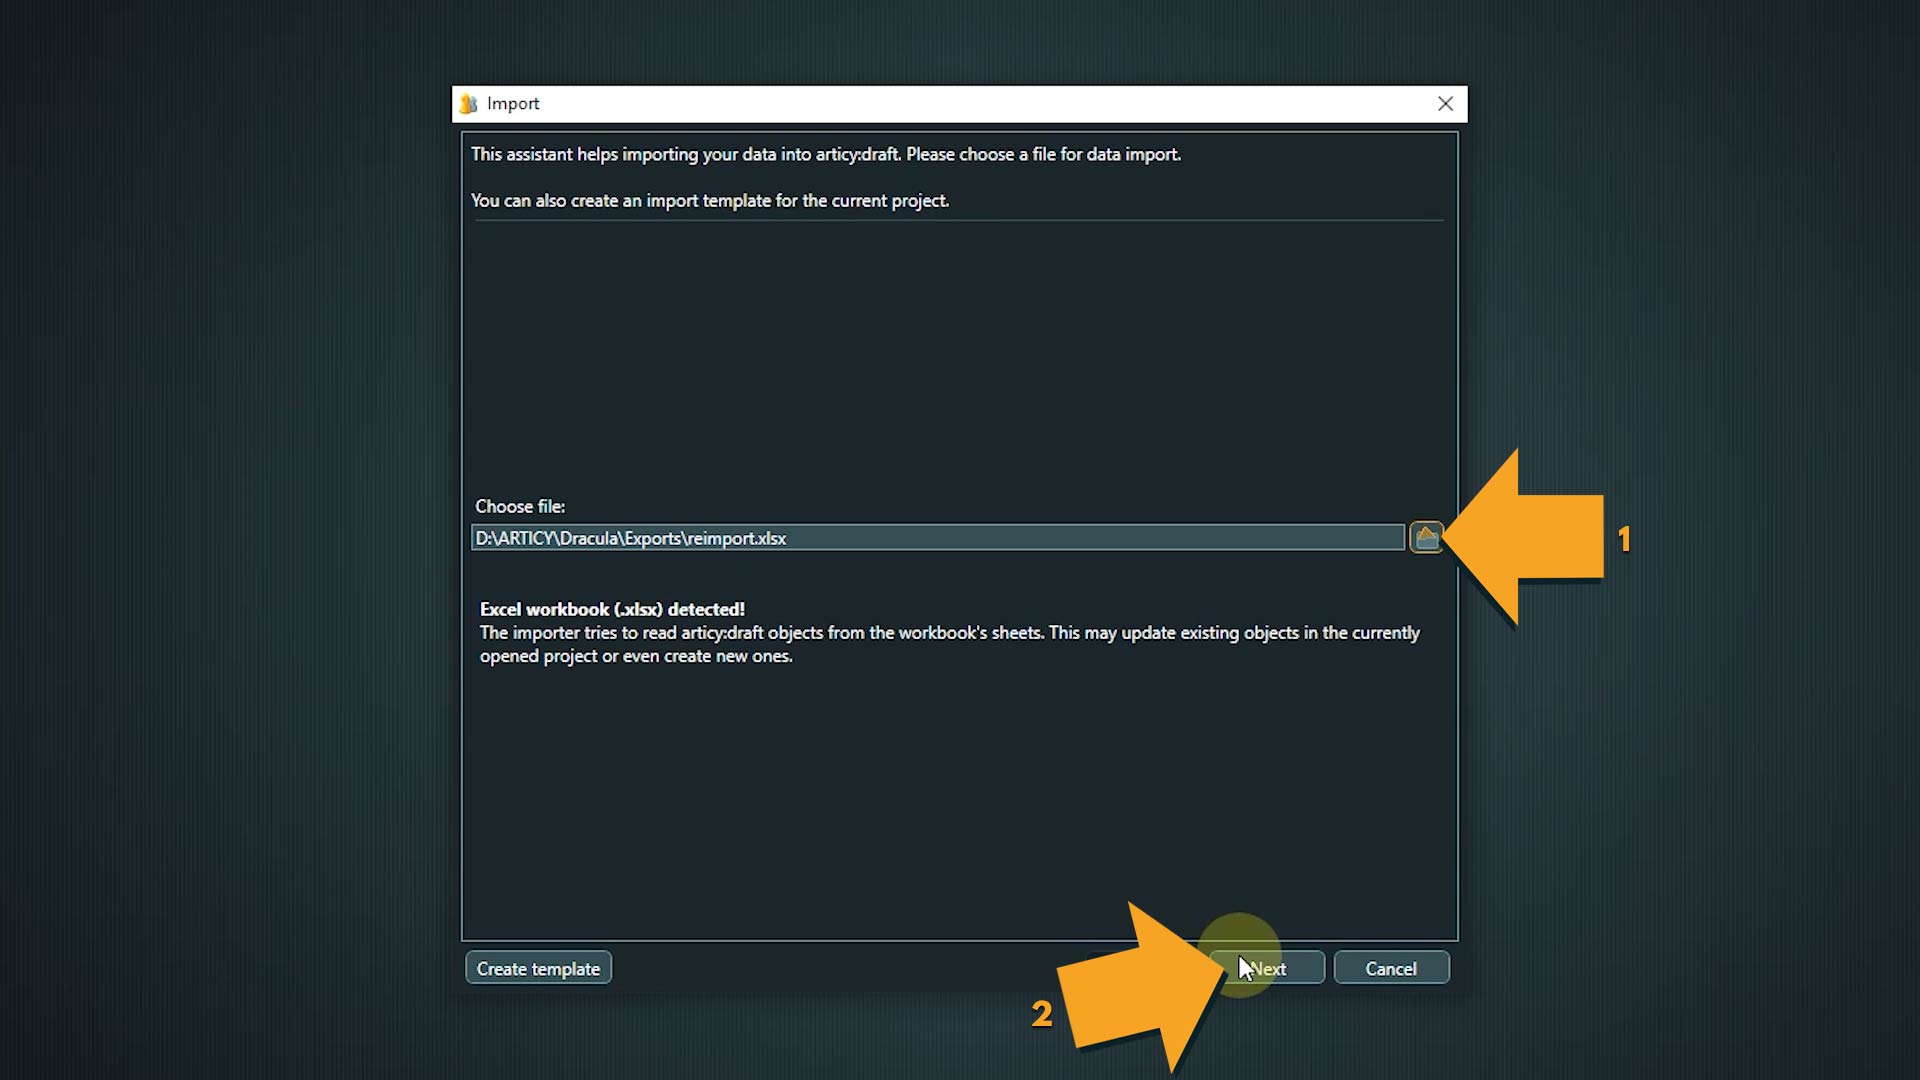
2. Select the file you want to import.
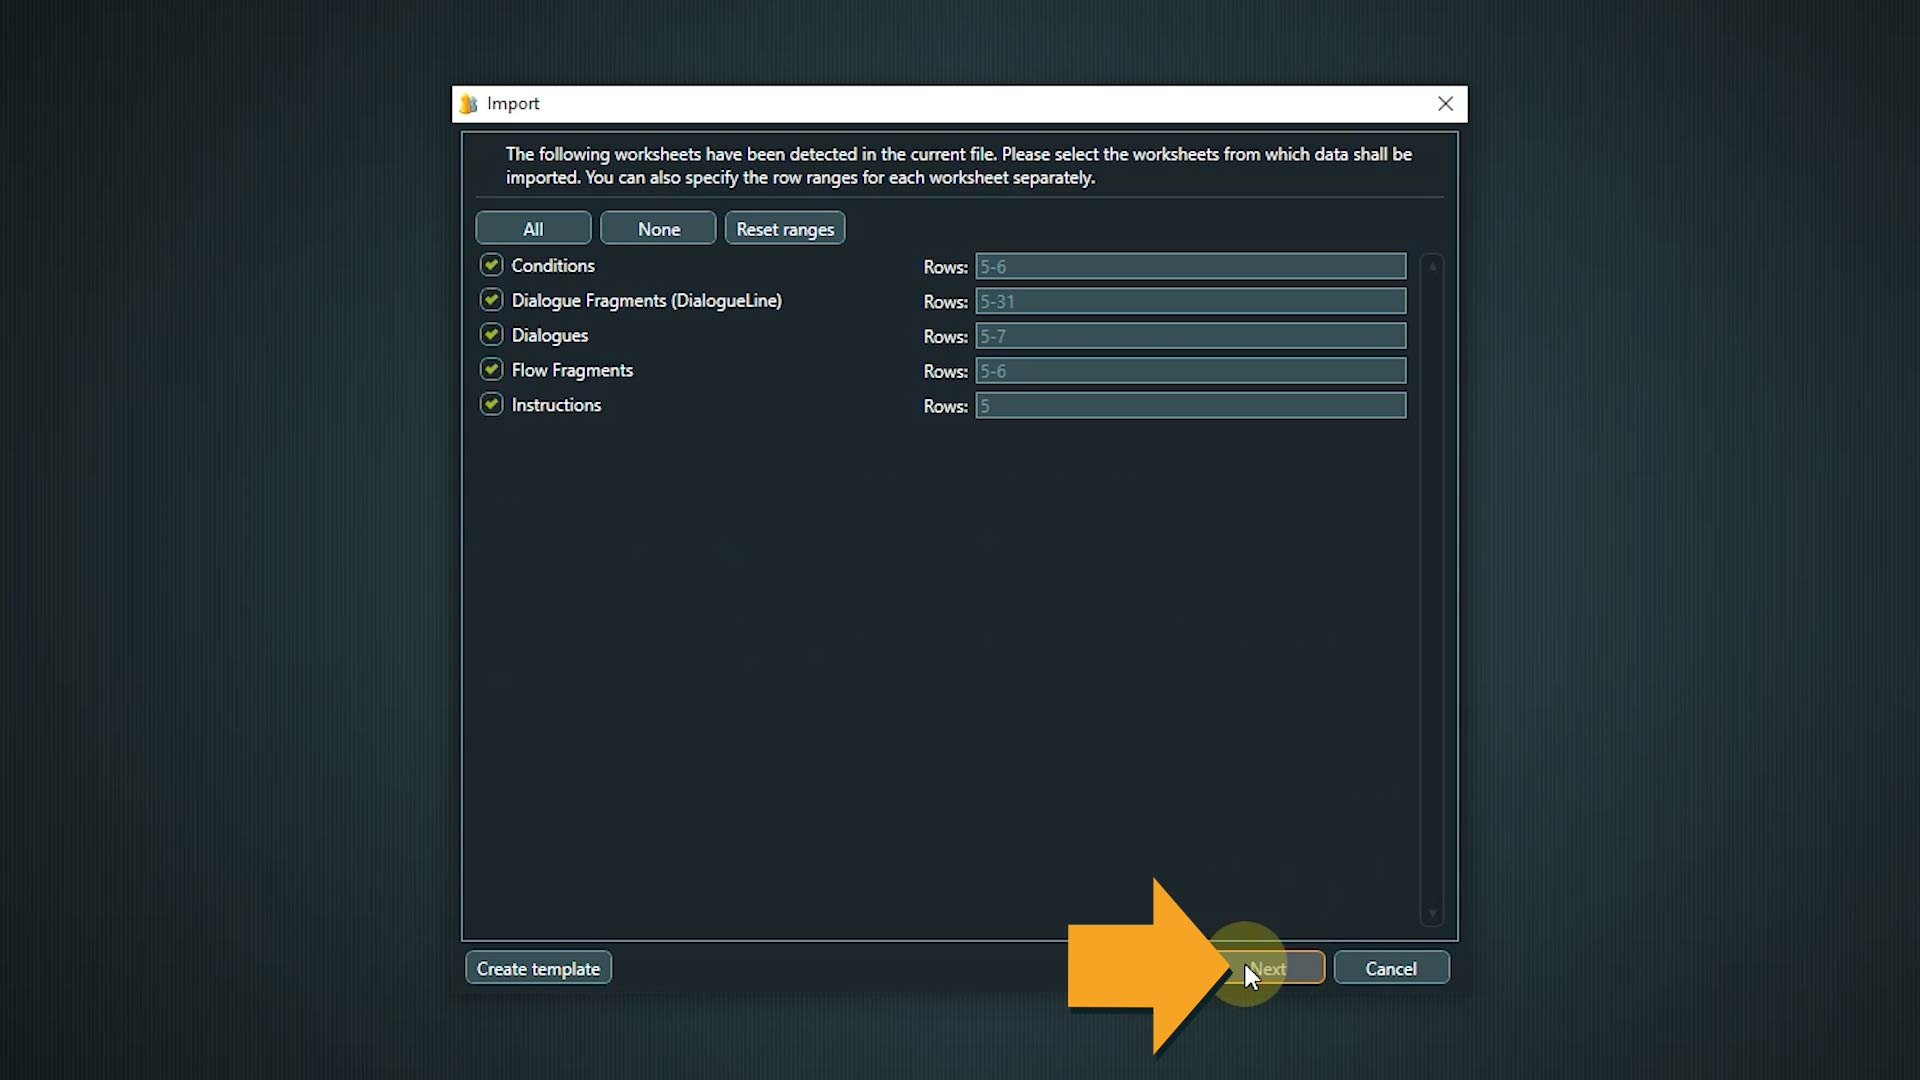
3. Next you can define which worksheets will be imported.
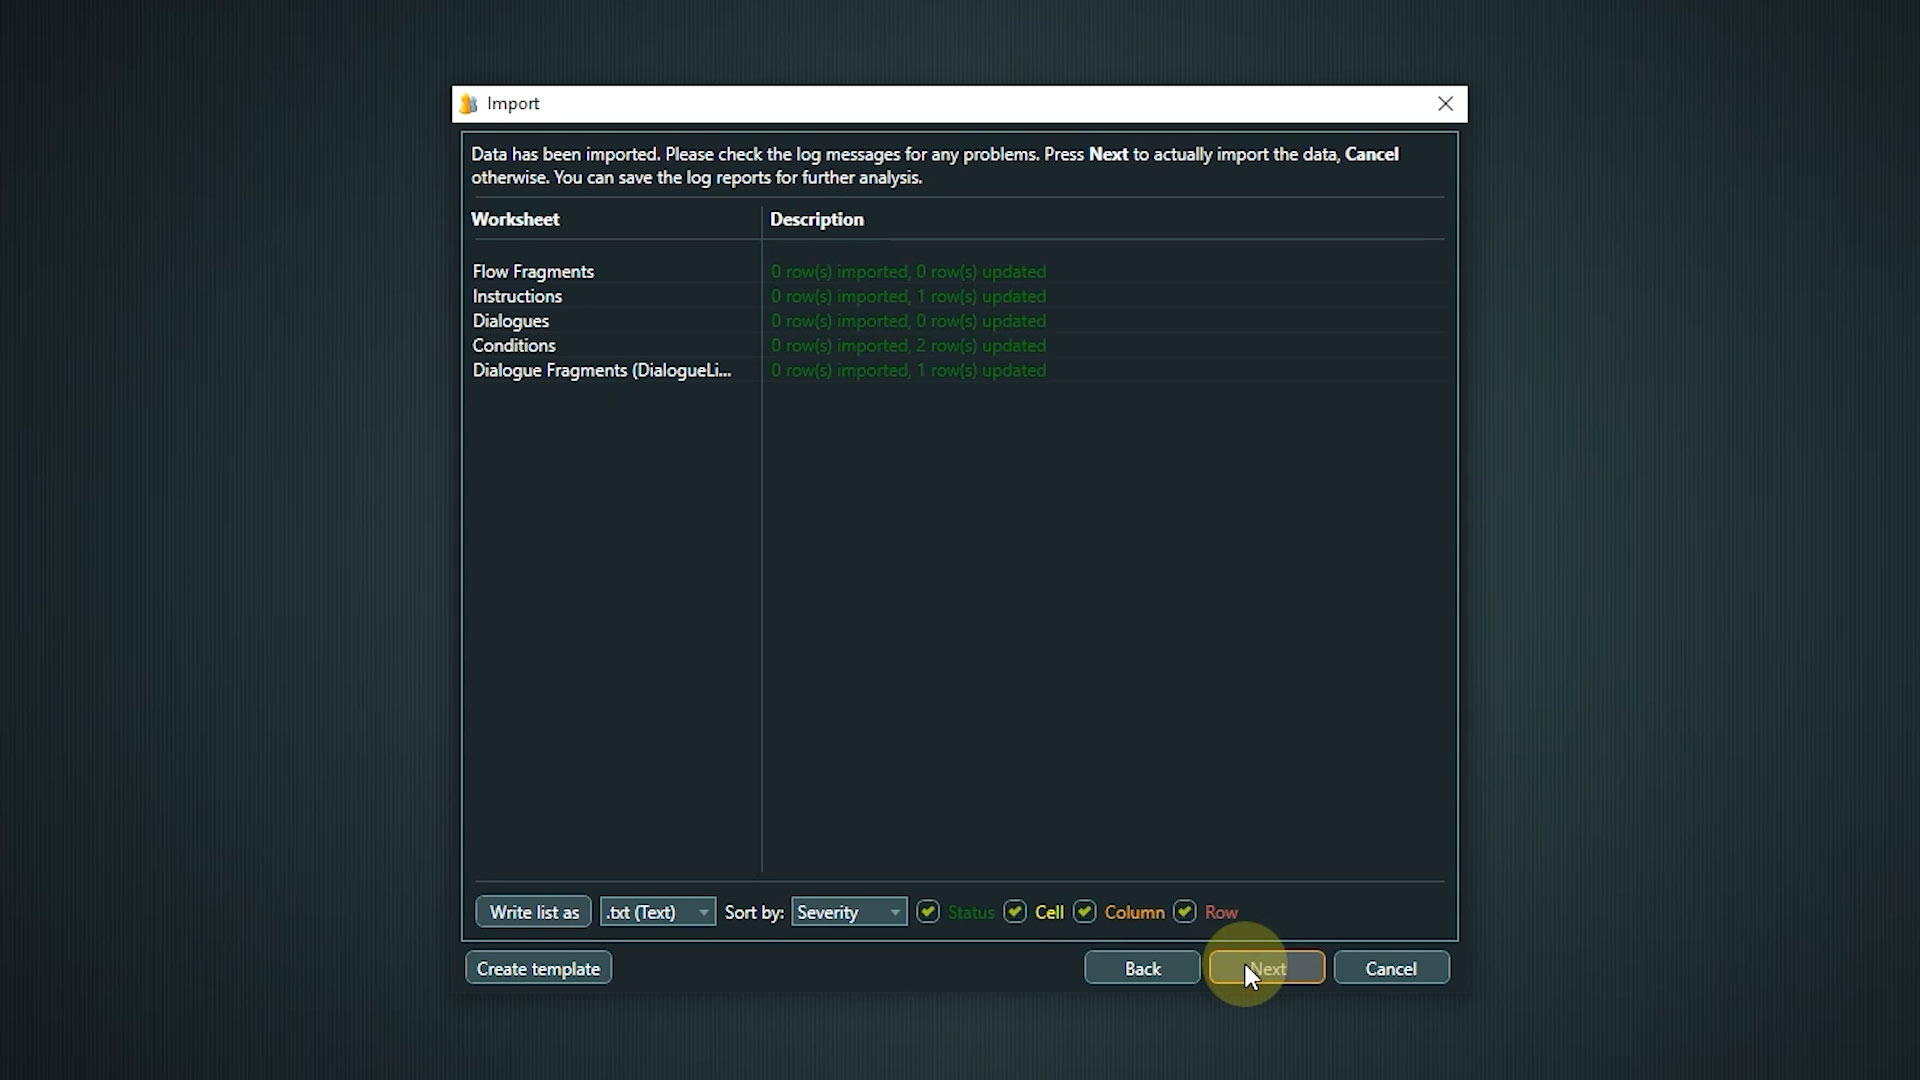
4. Then we see an overview of the number of imports and updates. If we now click next the import will be completed, with cancel no changes will be made to the project.
Technical Exports
Next are the technical exports. These mainly come into play if you want to import your articy data directly into a game engine.

Articy features fully fledged exports to Unity and Unreal, or you can use XML or JSON to have a flexible export you can adapt to your tool chain and workflow.
You can find more information about exports in general and documentation about the articy 3 Unity, articy X Unity, articy 3 Unreal, and articy X Unreal exports on our website.
But that is not all! There is another place where two additional exports are hiding – the Flow.
Flow Exports
In the toolbar we find a) Flow to Word and b) XPS export.

It makes sense that these exports are found here, as they do not affect the entire project, but are focused on the part which is active right now.
XPS Export
The XPS format is a vector graphic format and allows you to zoom in and out of the image without losing quality. The XPS export is available in the Flow view and in the Location Editor.
When exporting you have the option to create the image with its current background or more printer friendly with a white background.
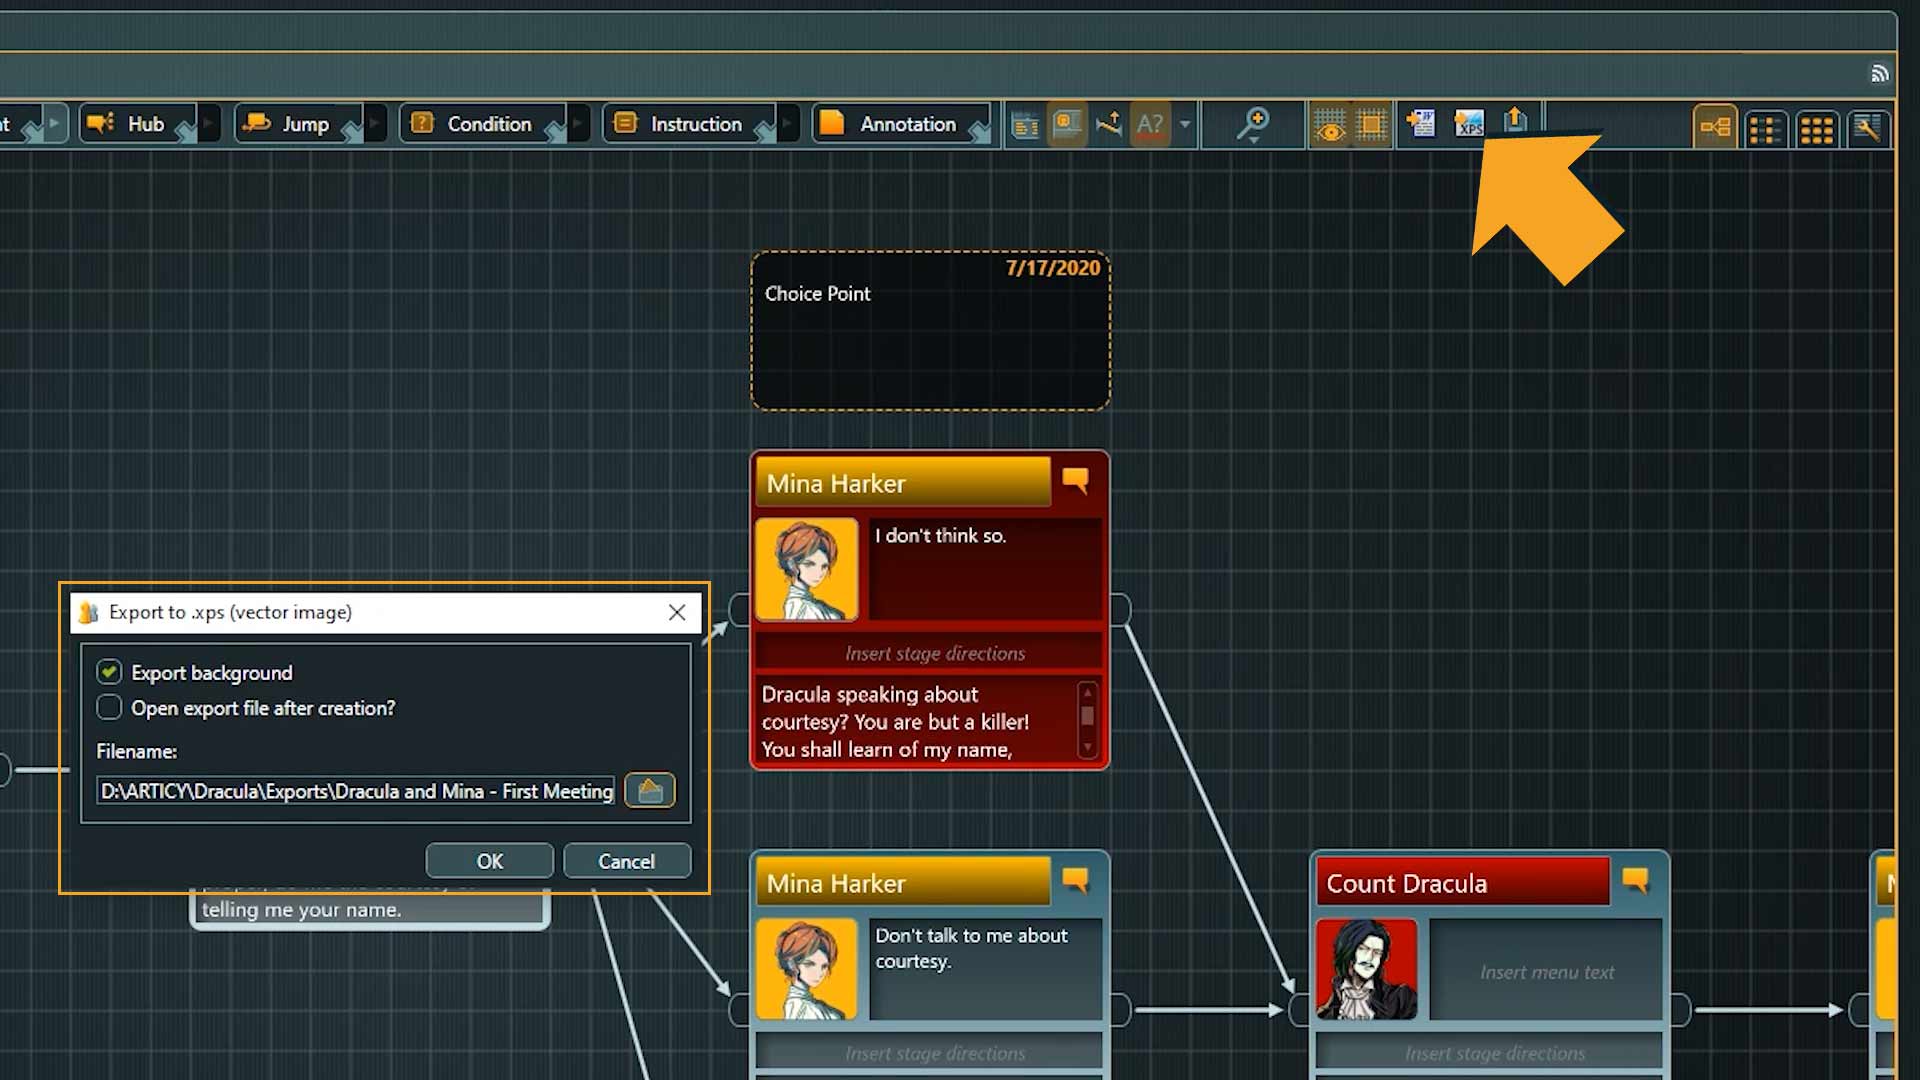
👉 The export contains the entire flow layer you are on, not just the section currently displayed on screen.

Flow to word
The “Flow to Word” export creates a word document, but this is where the similarities to the Word export we have seen earlier already end. As mentioned earlier, the Word export is designed to create a structured view of the project – or selected project parts – in document form; the “Flow to Word” export depicts the exported Flow in a screenplay-like form with focus on the text itself.
Let’s take a closer look.
Make sure you are at the dialogue level in the flow, then click the “Flow to Word export” button in the toolbar. We now see the export window, which offers a lot of customization options.
First we have the basic options, like formatting, cover page, preview images, etc. I don’t need a table of contents for our small dialogue, so I will uncheck it, the other basic options I leave checked.
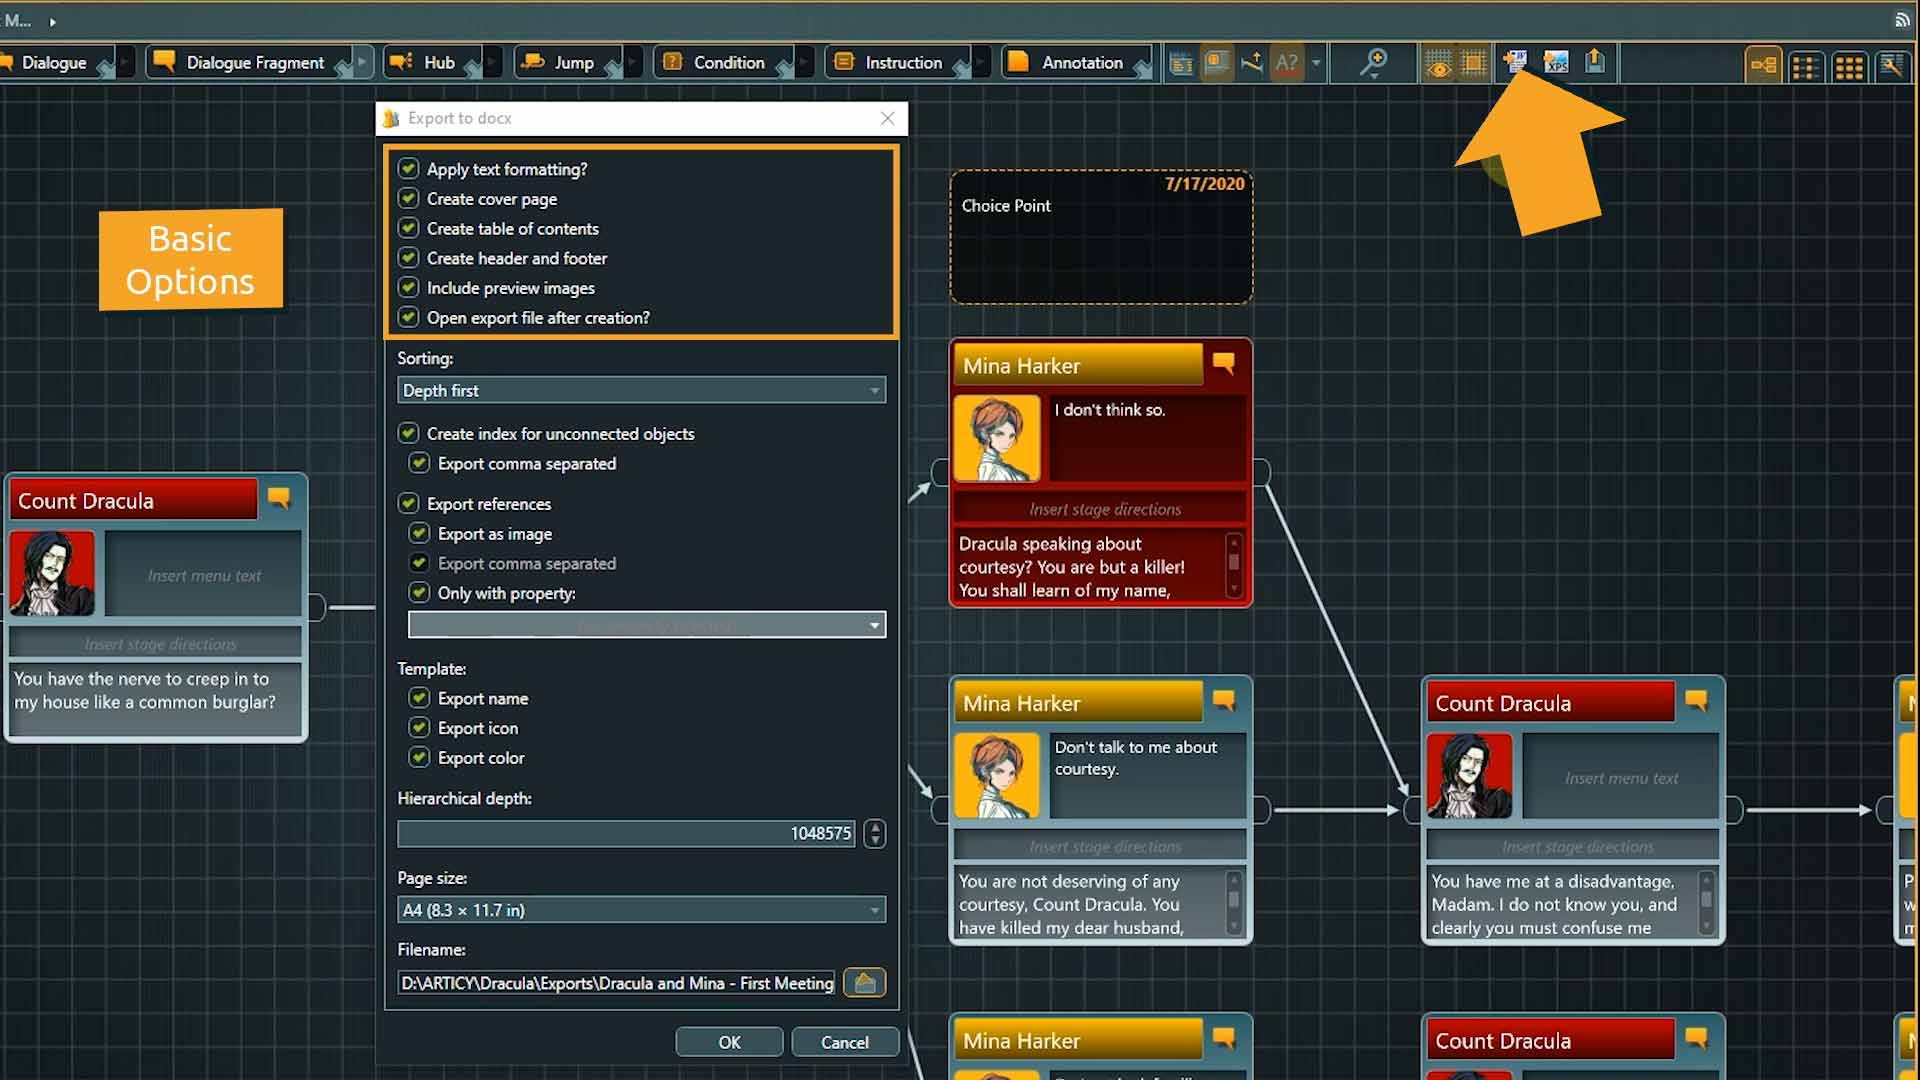
Next is the sorting option. It defines in which order the branches of the flow are added to the document. Which option fits best depends on the use case and is also a question of personal preference.
In “Depth first” the algorithm will create the longest possible branch of connected nodes, before going to the next branch.

The “Breadth first” option always lists all options of a branching point before following a branch further.
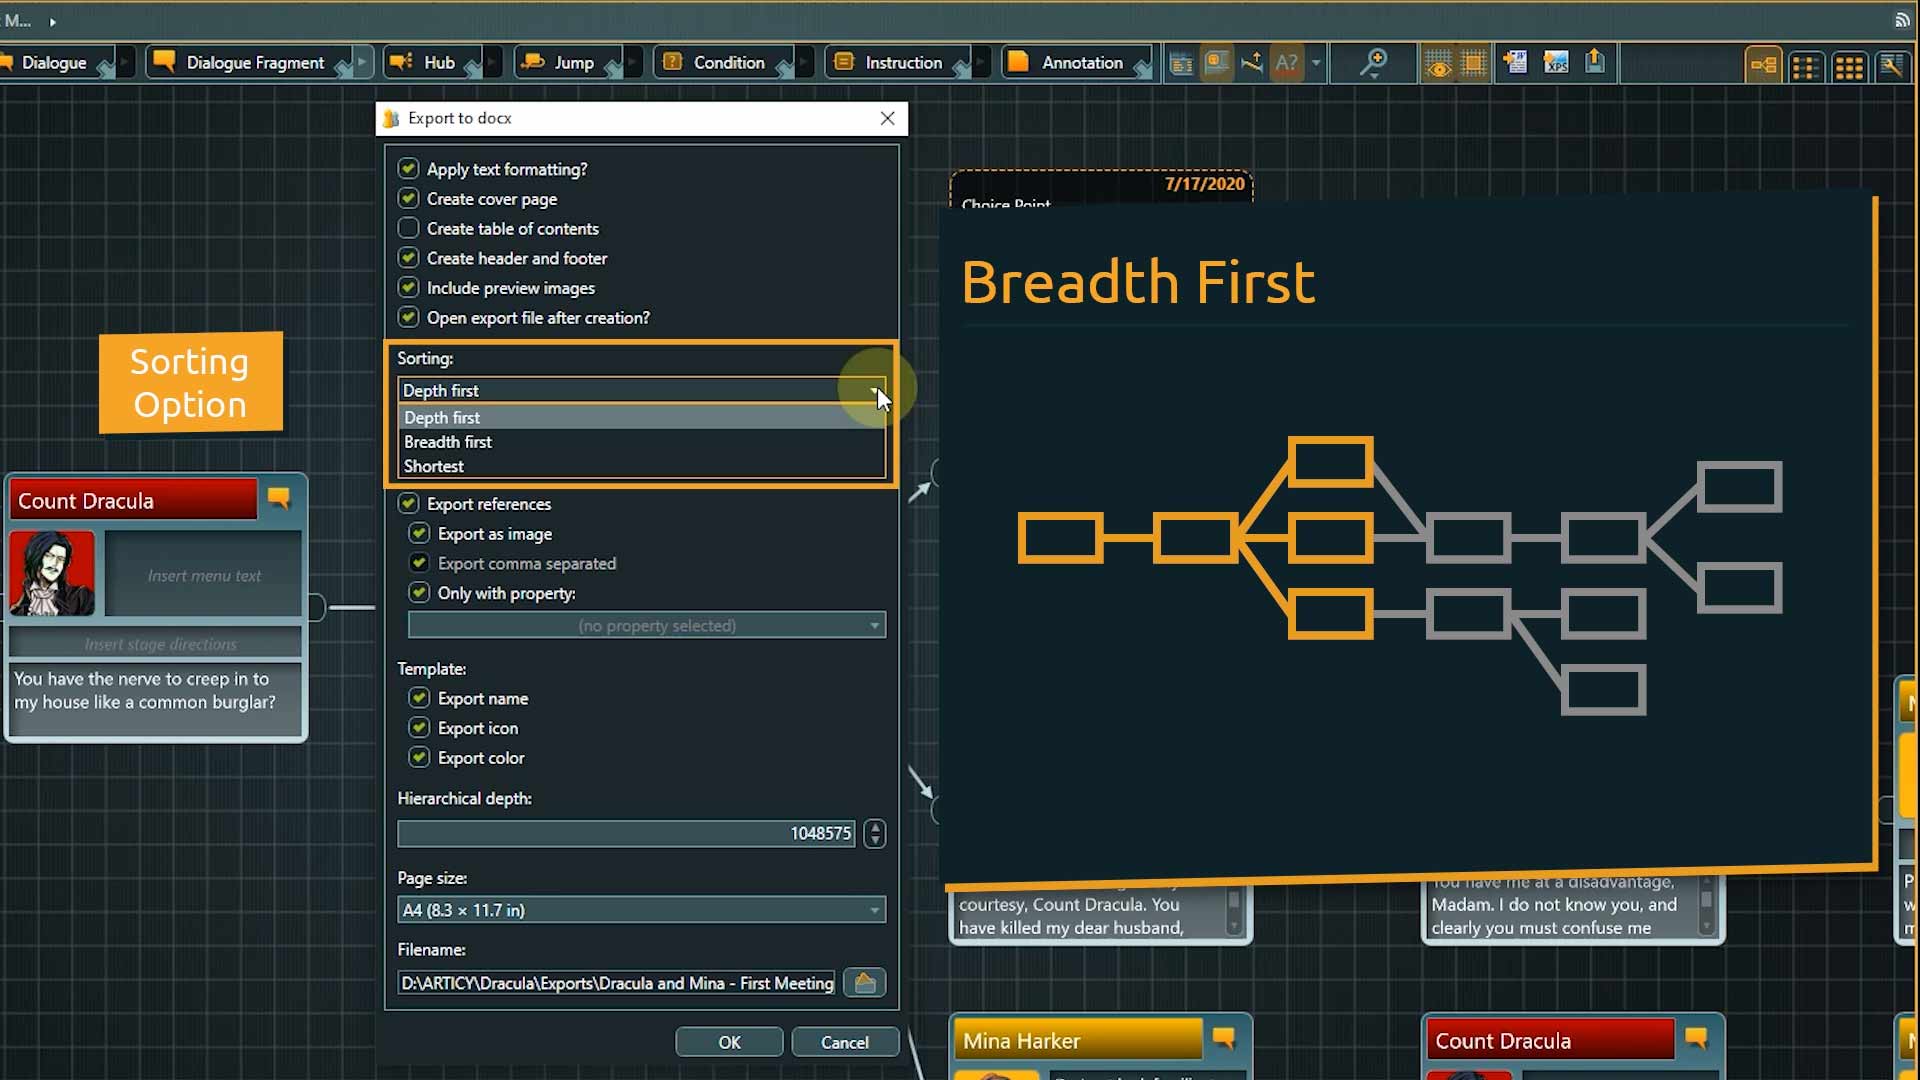
“Shortest” is a mix between breadth and depth and sorts shorter branches before longer ones.
I will go for “Depth first” for our export.
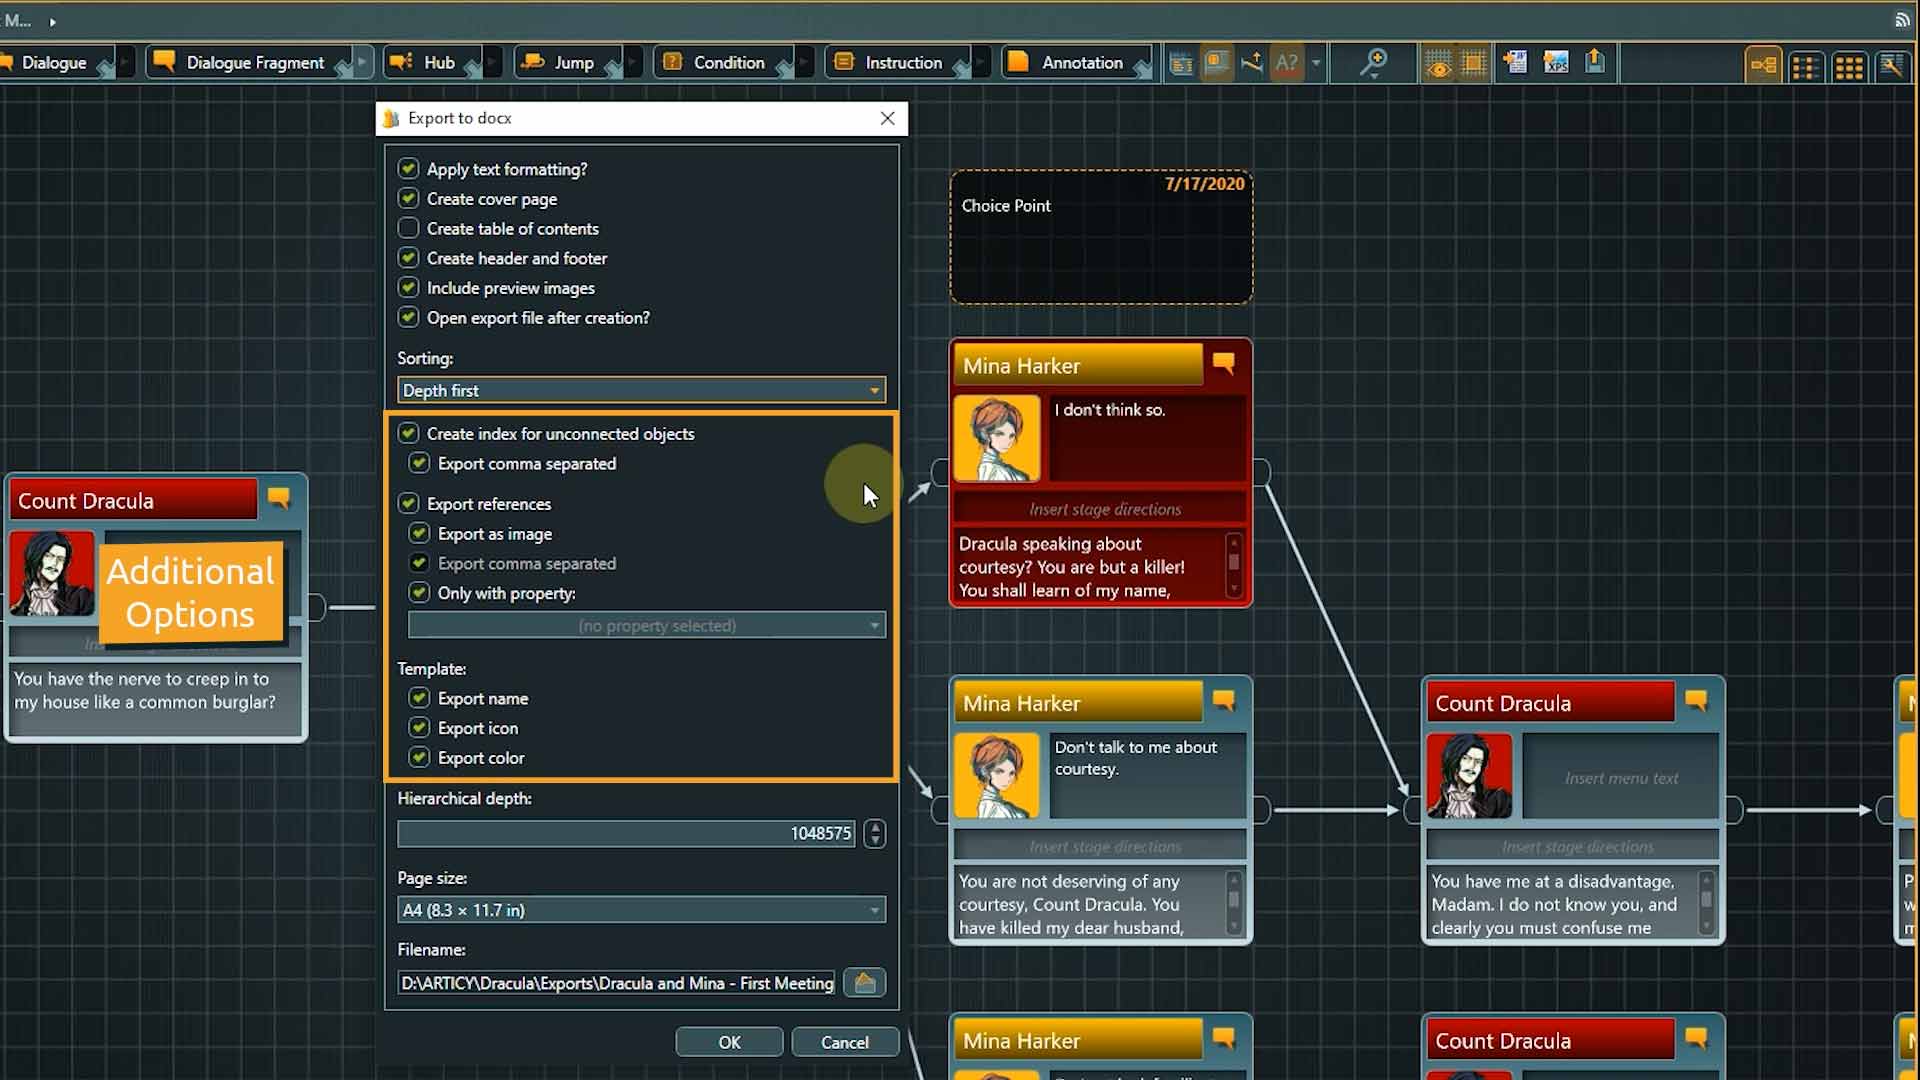
With the option “Create index for unconnected objects” we can decide if we want to list all unconnected flow nodes in the exported document. They can either be listed as one node per line or comma separated to save space.
“Export references” allows us to define if and how references of Flow Fragments and Dialogue nodes will be exported.
If “Only with property” is enabled, only references with the chosen property will be exported.
The “Template” options define if and how templates are visualized within the exported document.
The “Hierarchical depth” defines how deep the export goes. For example, if we are on the story structure level, a depth of one would just export this layer with its three elements. If we enter a higher number then the submerged layers are exported as well.
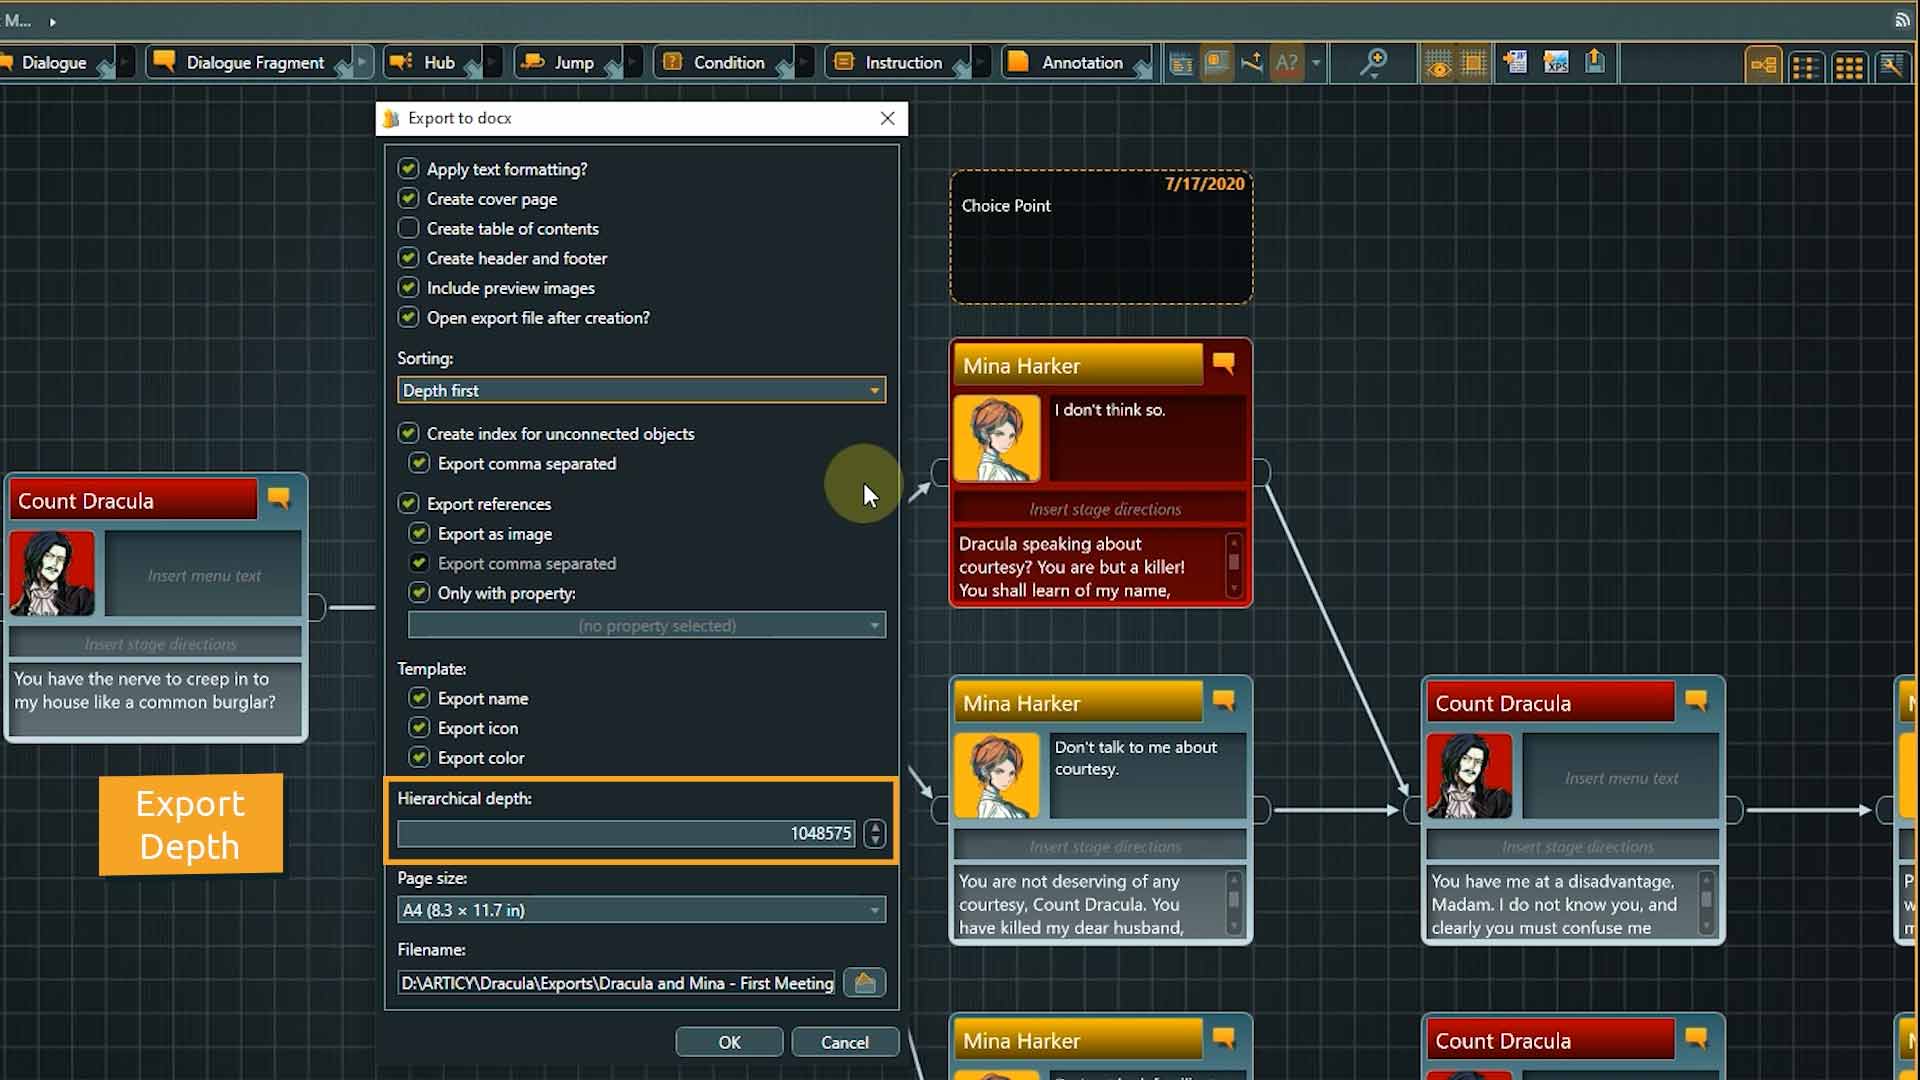
So to properly control the extent of your export keep an eye on the hierarchical depth option and the flow layer you start to export from. As we only want to export our first dialogue, we need to start the export from the dialogue layer of the flow.
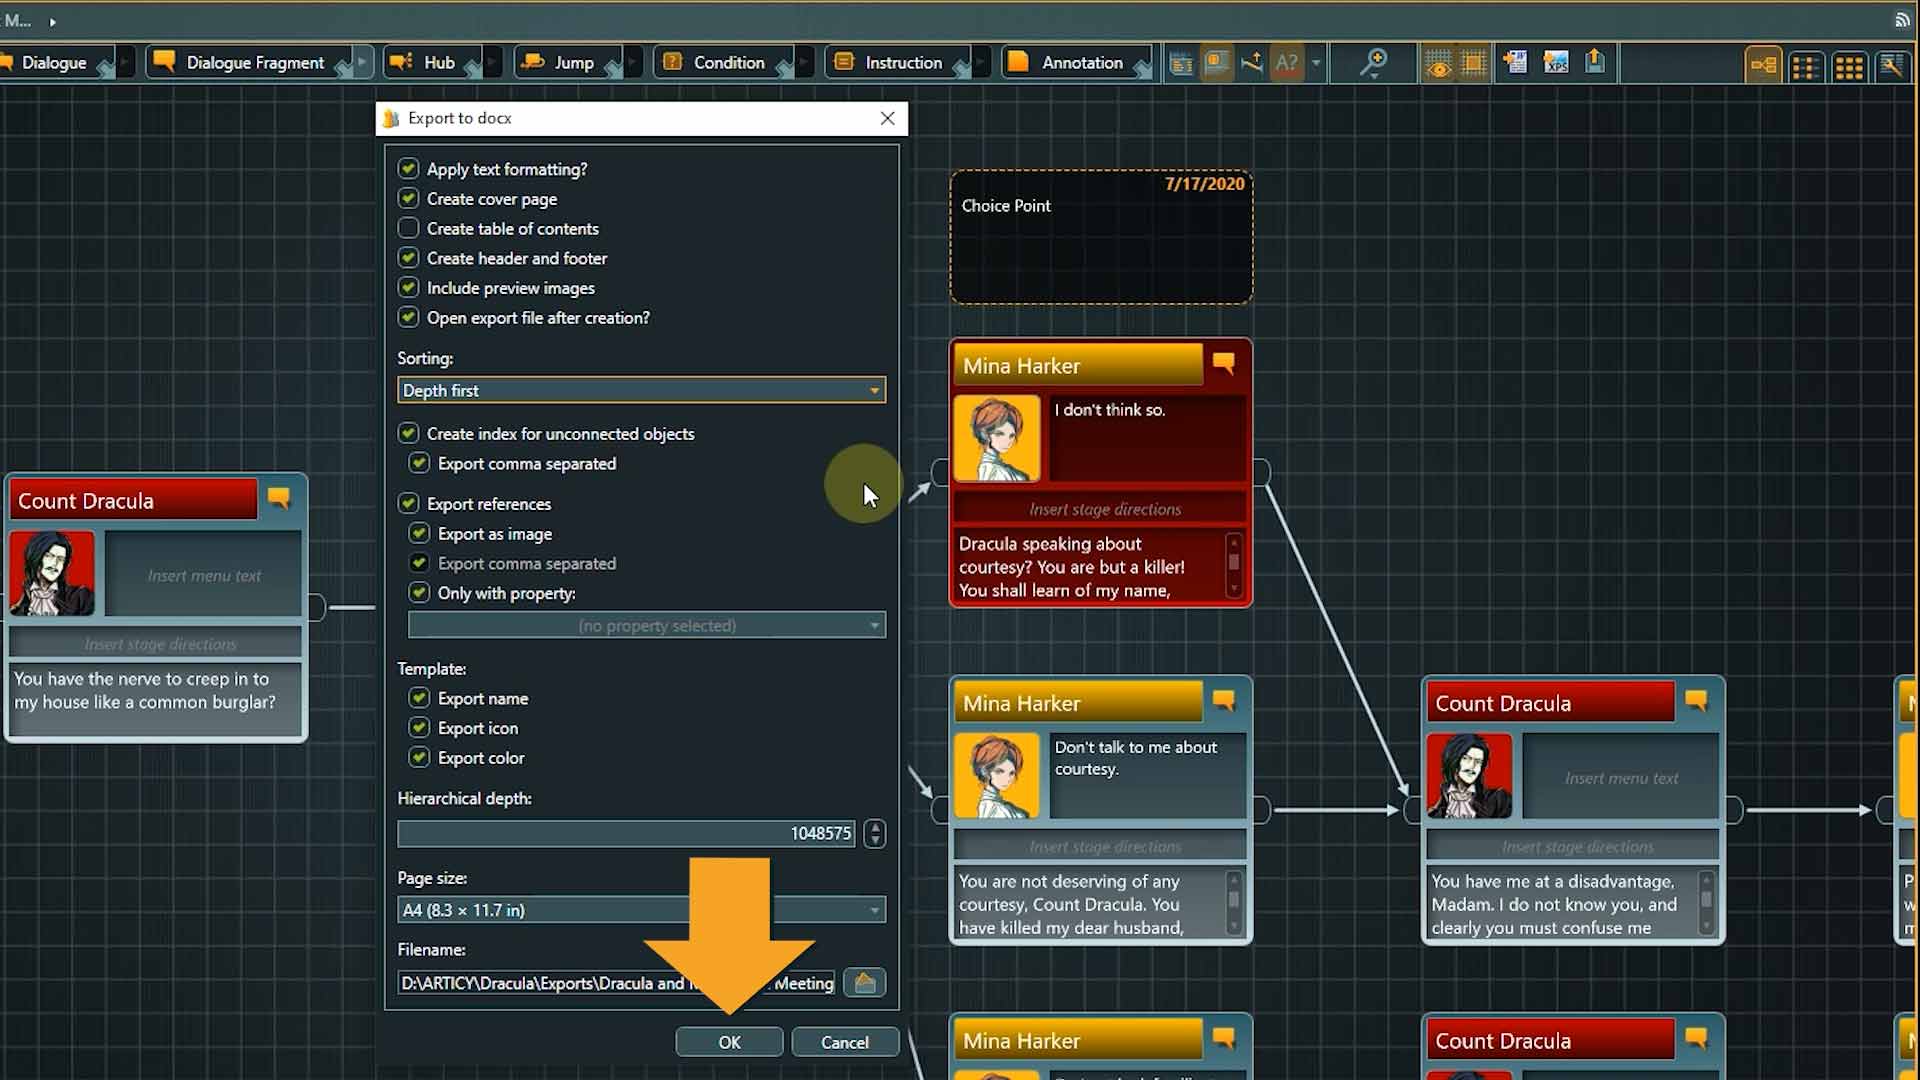
Click Okay to run the export with the selected options.
And this is the result. As we have selected “Depth first”, we can see that the conversation follows one branch until the end and then goes to the remaining branches.
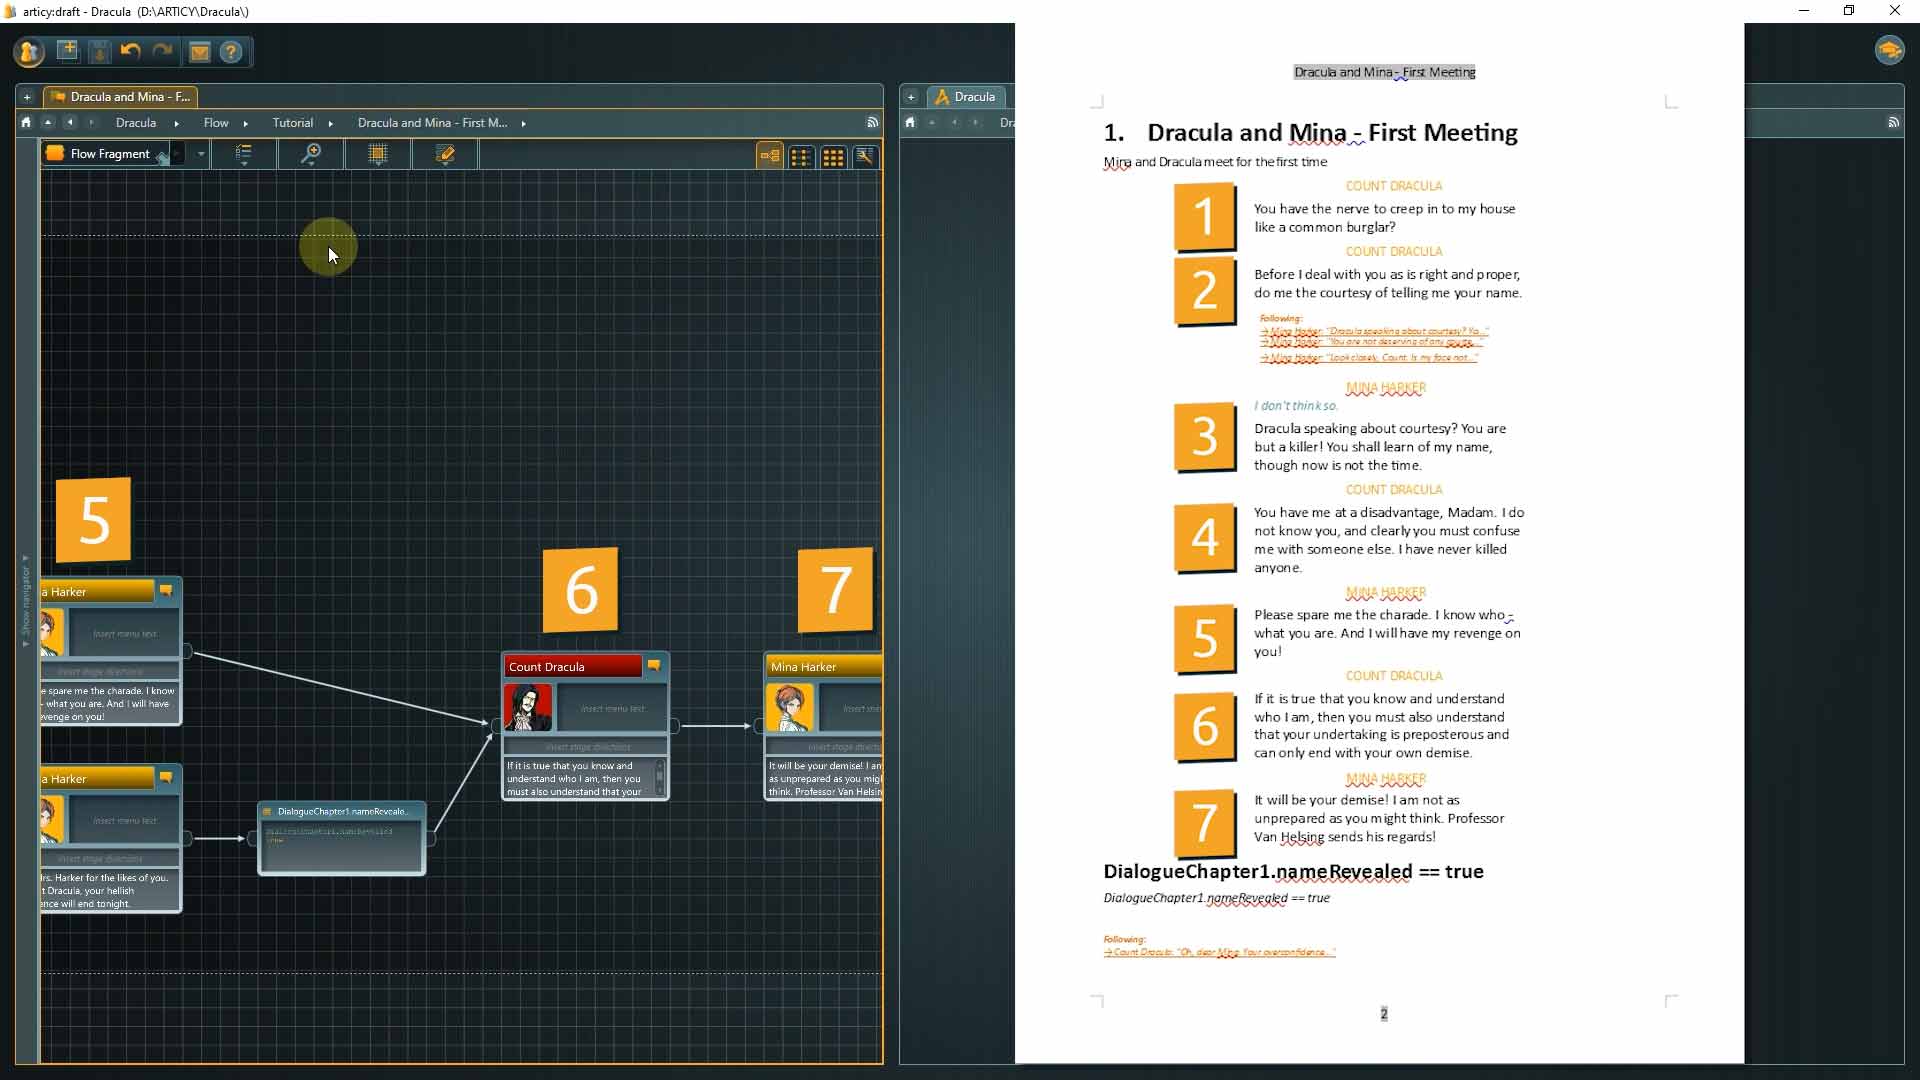
With the links you can jump to other branches within the document, which is helpful if you want to follow a specific branch, especially if the text gets longer or there is a lot of branching.
We have arrived at the end of this lesson.
Recap:
We have seen what kinds of exports are possible with articy and how to access them. Then we used the “Flow to Word” option to export our Mina – Dracula dialogue as a document.
Up Next:
In our next lesson we will visit the Document View and use it to write a linear cutscene for our project.

Thank you for joining us, and join us again in our next tutorial.
Useful Links:
Help Center – Exports
articy:draft 3 Unity Importer documentation
articy:draft X Unity Importer documentation
articy:draft 3 Unreal Importer documentation
articy:draft X Unreal Importer documentation
Don’t have articy:draft X yet? Get the free version now!
Get articy:draft X FREE
*No Payment information required
Follow us on Twitter, Facebook and LinkedIn to keep yourself up to date and informed. To exchange ideas and interact with other articy:draft users, join our communities on reddit and discord.